
bfarber
Clients
-
Joined
Everything posted by bfarber
-
In order to embed Facebook and Instagram photos, videos and posts, you will need to set up an application in Facebook's developer portal with the "Oembed" product added. Creating a Facebook App 1. Go to the Facebook for Developers site and sign in with your Facebook account. 2. If you have not already registered with Facebook for Developers, click Register Now and follow the instructions to register 3. when prompted, enter your community name as the name for your first app. If you have previously registered, click Add a New App Click to create a new app 4. Enter your community name when prompted Enter your community name here 5. You will be taken to the dashboard for the app you have just created. In the left hand column click the + symbol next to Products and then find the product named oEmbed. Click the Set Up button and confirm you understand the terms and conditions of using this product. Add the oEmbed product 6. Your application will need to be switched to Live mode before embeds will work on your community. Switch to live Set Up Invision Community Go to Settings > Basic from the left sidebar. You will see your App ID and a button to reveal the App Secret. Back in your ACP, fill in the form, using these details. App ID and Secret Next, visit your Invision Community AdminCP and navigate to System > Settings > Posting. On the General tab scroll down to find the Embeds section and populate the details. Configure Invision Community with the details you previously copied Save the form, and that's all you need to do. You should now be able to embed appropriate Facebook and Instagram content on your community. * Note that certain posts, images and videos may have privacy settings specified that prevent Facebook from returning embed HTML for these specific pieces of content. Users may make posts or images "Private" for instance, which prevents them from being embeddable. These URLs will not embed on your community. as Facebook does not return details for these URLs.
-
 The support tool has served us well for many years. You can identify, at a glance, potential issues with your community both presently and down the road, right from the comfort of your AdminCP, and you can often resolve those issues with just a few clicks. But what if we could do better? What if we could make this useful administrative area of the software even more useful? The next version of Invision Community introduces a new "Health Dashboard" which replaces the previous support tool and helps you get a better overview of potential issues within your community while retaining all of the functionality you've come to know and rely on to resolve issues with your community. When you launch the new health dashboard, the first thing you will notice is that the previous "Wizard" process is now gone, in favor of a single page giving you access to everything you might want or need. Central to the page are blocks that identify specific areas of your community, server, and configuration which could be problematic now or in the future. Invision Community will check for available updates, modified source files, server software configuration issues, whether your server is running required and/or recommended versions of important software and more. Additional checks and recommendations have been added to this page, to help identify other adjustments that could benefit or prevent harm to your community. Issues are color coded and classified as informational, recommended, or critical and a summary is provided at the top of the page with an easy "check again" button which will do so without taking you away from the screen. If we become aware of an issue, we can quickly notify communities through a bulletin which will be displayed in the "Known Issues" block on this page. These bulletins can also trigger AdminCP notifications, however they will continue to show on the Health Dashboard so long as they are relevant, even when the AdminCP notification is dismissed. A graph showing system, error and email error log activity has been added to the page to help you identify spikes in logged issues. Commonly, if an issue begins to surface on your community there will be an increase in these types of error logs, so the graph here is intended to allow you to identify an increase in these logs, allowing you to investigate and react quicker. The right-hand sidebar surfaces common tools you may need to access. The first block allows you to see our most recently featured guides, as well as search our documentation. While this functionality was available in the existing support tool, we found that it was rarely used because people more often visited the tool to allow the software to check for common issues, and the ability to search the documentation required a separate work flow through the support wizard. With the block always available (and searches performed "live" via AJAX), we expect users will find the ability to search our documentation from the AdminCP much more useful now. Next up, the Tools and Diagnostics block gives you access to common tools you may need to use. You can quickly clear your system caches, as well as access phpinfo, the SQL toolbox (for self-hosted clients only), and disable all third party customizations. The process and behavior for disabling customizations is very similar to the existing process within the support tool, with the list of customizations disabled opening in a modal window and the ability to re-enable all customizations, or selectively re-enable individual customizations, still available. Disabling customizations is still simple Finally, the ability to submit a support ticket is still available right from this screen. Upon clicking the button to submit a support ticket, you will be presented with a form inside a modal dialog that behaves very similarly to the existing form with one minor but useful addition: if there are any patches not yet installed on the community, you will be alerted to this right on the form before submitting your ticket. Think of this as one last reminder that your issue may already be solved by installing any available patches before reaching out to us for official technical support. Submitting a support ticket is still just a few clicks away We believe the improved workflow and user experience will help administrators and support technicians alike more quickly identify any issues that need addressing on the community.
 -
 For a long time, Invision Community has supported a Question and Answer mode within the Forums application which allows a reply to be flagged as the "best answer" to the question posed. With the release of 4.5, we also introduced a way to allow topics to be marked as "solved" which introduces similar functionality without transforming the look and feel or other behavior of the forum itself. Based on the popularity of this new addition in 4.5, we have made some further improvements to solved topics and answered questions in our next release. Notification to topic/question starter While notifications were available to the poster who answered a question or solved a topic with the release of 4.5, this release also adds notifications for the topic or question starter so that they can be made aware that an answer is available to their question. Topic and question starters now get notifications for solutions AdminCP Statistics Solved topics and answered questions provide for measurable statistics that can help you determine the health and direction of your community, particularly for support communities. To that end, we have introduced two new content statistic blocks that can help you measure how well areas of the community that support answers and solutions are faring. New AdminCP statistics You can now quickly see the percentage of topics/questions that have been solved (relative to the total number posted in areas that support solutions), as well as the average time it has taken for a solution to be marked on a topic or question (relative to the time the topic or question was initially posted). These statistic blocks support time period filter, time period comparisons, and node filtering to narrow down the statistical data for your specific needs. User profile enhancements User profiles now show the number of solutions the user has posted, and also allows you to view all of those solutions, in a manner very similar to reputation. Prolific problem solvers will now be called out boldly Answers can be quickly found on user profiles These improvements should help reward the most helpful users on your community by giving them more prestige and helping other users find their answers quicker. Collectively, we hope that these changes make the question and answer and topic solution features in the Forums application more useful for your community members, and the administrators behind the community.
 -
 Installing Invision Community for the first time is a fun and exciting process. After all, you're about to launch a new community that is going to thrive and attract members from all over, and you want to make sure you set it up just right to facilitate a painless experience for your visitors. If you're new to Invision Community, however, it can be a little daunting when you think about "ok what now?" immediately after installing the software. Though experience, and researching the analytical data Invision Community installations voluntarily share with us, we identified many common settings that most communities change, and it is easy to see why. In an effort to make Invision Community more approachable to new administrators, we have devised an intuitive "new installation" onboarding process that will help you configure the community just right, and quickly. Upon first logging in to Invision Community after installing the software, administrators are presented with a welcome screen. Welcome to your new Invision Community! You can obviously skip this step by clicking away to another page if you wish, and you won't be bothered again. If you click the "Skip this step" link on the page, you will be sent an email with a link to return to the page in the future should you wish to do so. Continuing into the helpful wizard, you will be presented with a screen like so A helpful guided wizard You'll note that there's an explanation as to why you may wish to configure these settings, as well as guidance for where to find the same options later should you wish. Upon clicking next, you'll see the previous step marked as completed. You can even skip around steps by clicking and expanding on them should you wish to do so. Each step is explained in detail If you reached this page but decide that you have to do something else first, there is a "Remind me later" option at the bottom of the page. Clicking it will allow you to resume whatever else you need to do first, but will helpfully bring you back to this onboarding step at a later time to finish your quick setup. Finally, once you submit the form you will be presented with a confirmation page containing links to several other areas that you may wish to visit to get started. Things like setting up forums and setting up groups are common tasks, so we've consolidated links to those areas on one helpful screen as part of the new quick setup. Confirmation that you're doing great so far! This change is but one small way that we strive to ensure our software is easy to understand and easy to use. The next time you set up a new community, we hope these adjustments make the process smoother for you, allowing you to get the backend work done quickly so you can focus on the real goal - growing your new community.
 -
 Statistics can help you manage and monitor the direction of your community, giving you valuable insight into how your visitors are interacting with your site and what areas of your community deserve the most of your attention. With the popularity of Clubs in Invision Community, we determined that some statistics aimed at helping administrators review how this feature is being received by their end users was warranted. Club activity statistics overview When accessing the "Club Activity" statistics page in the AdminCP, you will be able to quickly see at a glance which club types are the most popular, see which clubs are gaining the most traction with new signups, and see trends in club creations over time. With the signups chart, you can further filter by one or more specific clubs, and save these filter preferences as new tabs on the chart. See activity across all clubs The "All Club Activity" tab on this page shows you which types of content (topics, images, files, etc.) are most popular across all clubs as an aggregate. If you find that Calendar or Downloads is especially popular throughout clubs then you may wish to promote these features further. Conversely if you find that a certain type of content is not being leveraged, you may wish to promote it, or retire its functionality on your community. Activity by club shows you which clubs are most active You can also view activity per-club, allowing you to identify which of your clubs are the most popular and have the most activity. As with the "Club signups" chart, you can use filters to view just the clubs you are interested in comparing, and save these filters for easy review later on. We hope you find value in these new statistics pages, and that they help you manage the Clubs feature on your site more effectively.
 -
 Every single day, your members are searching your community for answers or interesting conversations to join. Wouldn't it be great if you could learn what is being searched for to identify hot issues, commonly asked questions and discover trends? We thought so too, which is why Invision Community 4.5 comes with search statistics. For the first time, Invision Community gathers anonymized information on what your members are searching for so you can use this to highlight more relevant content and shape strategic decisions with your community's structure. Search statistics help you track searches performed on your community When a member searches, their identity is converted into a unique key that cannot be reversed to identify the member. This allows us to track a single member's search usage over many search sessions without being able to link it to a specific member account. The AdminCP now features a dashboard to review the most popular search terms as well as a raw log of recent searches along with the results they returned. We have a lot of ideas in mind for additional changes down the road with the tracking of popular search terms, but for now, we hope you like the new statistics page and find the information presented useful for your future site plans.
 -
 We want to ensure that converting from your existing community platform to ours is as seamless as possible. While we do have a migration service available where we take care of everything for you, we do also offer a DIY option. We took some time to overhaul the conversion process for those opting to convert using our free tools. Ready to convert? So you've just purchased your first copy of Invision Community, and you're ready to convert your existing site over from another software package. Great! We're glad you've made the decision to take your community to the next level! You've already checked out our Migrations page, confirmed the software you wish to convert from is supported, and you're confident in your ability to work through the process. You install the Converters package and you're ready to go. Lets get started! We have overhauled the converters to simplify the process. Beginning with 4.4, you will take the following steps to convert from another software package: Rather than choose the application you wish to convert first, you will now choose what software you are converting from, which is a much more logical start to a conversion. Next, you will supply the database details for your source database (the database you wish to convert into your new Invision Community). Then, you will see a list of all applications that can be converted for the software package you are converting from. If any applications cannot be converted (perhaps because you were not previously using the corresponding application in your source software), a message will be shown indicating there is nothing to convert. If any steps require additional configuration, you will be able to specify those details here. And finally, when you submit that form - that's it! You're done, and you can sit back and let the conversion process on its own. Each step for each application will be completed automatically, and the conversion will be finalized automatically at the end. A progress bar will be shown, along with a textual indicator that outlines exactly what is being converted. What does it look like? conversion.mp4 Here's a quick video to illustrate the new conversion process. The system even remembers where you were at and automatically picks back up where you left off. Closing your browser, losing internet connectivity, or some other unforeseen issue won't stop you dead in your tracks and force you to start all over again. We hope that these updates make it even easier to switch from another community platform.
 -
 Ever since its first release, the REST API built into the Invision Community software has proven to be a very powerful and well-received feature. We love seeing what our clients and modification authors are able to do with the level of integration afforded to them through this capability, and so it is only natural that we have looked to expand the functionality in our upcoming 4.4 release. Poll Support Beginning with 4.4, you will now be able to create and update polls for both topics and blog entries through the REST API. Of course, modification authors can use this new endpoint. Warn Reasons You will also now be able to manage warn reasons through the REST API. This includes fetching a list of reasons, as well as fetching an individual reason, creating warn reasons, updating existing warn reasons, and deleting warn reasons. Event Venues Event venues can now be listed and individual venues fetched through the REST API, and you can now add, update and delete event venues through the REST API. Member Notifications You can now retrieve a list of notifications for a specific member through the REST API, useful if you were to attempt to recreate the notifications menu on a third party website (for example). Warning Users The REST API will now expose the warnings a user has received through a new endpoint. Additionally, you can fetch individual warnings, issue new warnings, undo and/or delete issued warnings, and acknowledge warnings through the REST API. If you are building a site wrapper around your community, you can leverage this functionality to ensure that users are unable to post elsewhere on your site if they have unacknowledged warnings within the community (and also to provide them with a way to acknowledge those warnings right on your site). The REST API Reference Node permissions Beginning with 4.4, you will now be able to set the permissions for a node when adding or updating it through the REST API (for example, you can now adjust the permissions for a forum or a downloads category through the REST API). Many clients noticed that while they could create new nodes through the API, the nodes would be unusable until an administrator manually went in and specified the permissions, so this change can eliminate this extra step in many situations. Event filtering You will now also be able to filter the events you pull through the Calendar REST API endpoints by start and end date (e.g. so you can show events within a specific time frame, such as the current week), and you can now also specify to sort the events returned by the event start date or the event end date. Clubs And finally, for those who leverage clubs on their communities, we have built in full REST API support for clubs. You can list all clubs, return a specific club, create new clubs, update existing clubs, and delete clubs through the REST API. Further, you can list all members in a club, add a specific member to a specific club, remove a member from a club, fetch the content types available for use within a club (i.e. so you can determine which applications are installed and have club support on a given site), fetch the nodes (displayed as tabs/sections within a club) created within a club, and delete nodes from a club. Important behind the scenes steps, such as generating invoices for members requesting to join paid clubs, are all handled automatically for you when using the REST API. We believe these changes will help clients better integrate with our software and open up new possibilities with their websites. Would you like us to add any other endpoints? Let us know in the comments below!
 -
 Who remembers the earlier days of the internet? Back when you popped your logo at the top left of your site and you were largely done? Invision Community has continually developed to account for all the new services that have been built during our 16 years. We now have social media sharing images, favicons and more to consider. Invision Community 4.4 also adds mobile application icons, Safari mask icons and data for an application manifest. Handling of these logos and icons was a prime candidate for improvement in 4.4. Moving our current options Step one for improving our handling of these images was to move our current options out of themes and to allow them to be managed suite-wide from a single area. You can still upload a logo image per-theme (which shows in the header area), but the rest of the options have now been relocated to a new area: Customization > Appearance > Icons & Logos. Adding new options After giving favicon and share logo management its own dedicated area, we took a look at enhancing the configuration options made available through the interface without requiring theme template edits. Multiple share logos You can now upload multiple share logos. If you elect to upload more than one share logo, Facebook and similar sites will generally either show a carousel to allow you to choose which logo to use when sharing, or simply use the first image referenced. Application icons You can now upload an image to represent your website which will be used to generate the "home screen" icons for iPhones and Androids automatically. Uploading a single image will result in several different copies of the image (in different dimensions) being generated, and mobile devices will automatically choose the best option from the list as needed. Safari mask icon You can also now upload a Safari Mask icon, which is used to represent your website in certain areas on Apple computers (such as on the "touchbar" of certain keyboards). This image must be an SVG image with a transparent background, and all vectors must be 100% black. Additionally, you can specify the mask color which is used to offset your image when necessary (e.g. to represent it as "selected" or "active"). Application manifest In order for devices to support the application icons that you upload, a file known as a web manifest must be generated and delivered to the browser. This now happens automatically, using details and icons specified in the AdminCP. Certain details, however, can be configured explicitly from the Icons & Logos page: Short name This is a short name to represent your site in areas with limited screen space, such as below your application icon on a mobile phone home screen. Site name This is the name of the site. The "Website name" setting is automatically used if you do not explicitly override it when configuring the manifest. Description A short description of your site Theme color You can choose a (single) color to represent the general theme of the site. This color may be used by devices in areas such as the address bar background. Background color You can also choose a (single) color to use as the background color for your site when the application is launched from a shortcut saved to the user's device home screen. Display mode Finally, you can specify the display mode your site should launch in. For our more astute designers and developers, you may have already realized that generating the manifest file lays the groundwork for future PWA (Progressive Web App) development and support. Additionally, some Android devices will automatically prompt users to add your website to their home screen now that a manifest file is generated by the site. Oh, and for the sake of completeness, we also generate the special browserconfig.xml file that Microsoft products (including Microsoft Edge, Internet Explorer, X-Box, and Microsoft-based mobile devices) look for when pinning sites and generating live tiles. There are no additional configuration options for this file - everything is automatically generated from the aforementioned options. The end result? Your community can now better convey, automatically, certain details to the myriad of devices out there that may be accessing your site, and you now have much better control over those details. You can more easily fine-tune the "little things" that help paint a complete picture of your web presence, and the groundwork has been laid for bigger and better things in the future as standardization and adoption of PWA functionality improves. This blog is part of our series introducing new features for Invision Community 4.4.
 -
 To monetize, or not to monetize, that is the question that preoccopies our administrators! Ok, I'm no Shakespeare, but a vital question community owners are faced with at some point is: can we and should we make some money from our community? Let's first look at the "should we?" Absolutely! You don't need to frustrate your users or risk goodwill by starting monetization. Running a community comes with tangible costs in terms of paying for the monthly cloud plans or license and hosting costs. Not to mention your own time which must be factored into this decision. If the community sustained all or part of your income, could you commit more time to help it grow? Now lets look at the "can we?" Absolutely! You made a great choice by building your platform with Invision Community. We have built in monetization tools that allow you to collect micro-payments from third party systems; and we have tools for selling products and services. Advertisements An obvious choice, many sites will turn to advertisements through Google Adsense or a similar service to generate income from their community. Whether this approach will work for your community or not is dependent upon many factors. Do you generate enough traffic that you will actually earn an income from advertisements? Do enough of your audience browse your site without tools such as Adblock installed? Is your site compatible with any of the many advertisement services out there? This is worth checking to make sure. Advertisement services are a relatively easy solution for generating micro-payments. It's unlikely you'll be able to retire any time soon on advertising payments alone though. An alternative approach to using advertisements is to sell advertisement space on your own site through Commerce. This can be an especially attractive option if your site holds a captive audience in a specific niche, as advertisers will be certain their ads are targetting the niche they are aiming to target effectively. Viglink Viglink is a service that looks for commercial product references in user-generated content, and links to those products using referral links that can generate revenue. Generally speaking, there is no real harm in using such a service as the functionality is transparent for most users. Invision Community features integration with Viglink out of the box. You simply need to enter certain account information into the AdminCPand the software will handle the rest. Charging for products If you sell digital or physical products, you can leverage Invision Community to help facilitate the sale of such products through your community site. If you are an expert or leader in your field, then why not write a short e-book on your subject and put it up for sale? Low cost e-books under $10 tend to sell really well and it's a great way to generate some passive trickle income. Sale, renewals, invoicing, shipping, customer support and more are all possible through our Commerce product with powerful features that allow you to easily sell products locally and around the world. Charging for additional access The simplest way to monetize your community is to charge for VIP access. This may be for elevated permissions, such as being able to upload larger files, post more content per day and access specific features like user signatures, special badges and so on. You can also set up VIP forums that regular members do not have access to. In fact, Invision Community can be tailored towards being an e-learning platform simply by setting up a subscription in Commerce and creating a private forum only the VIP group can access. Simply post a new topic with each learning module. Topics can contain embeds from YouTube and Vimeo if you prefer to deliver training over video. Be sure to give previews of such areas if you do sell access to additional areas of the community. For example, you can allow all users to "see" that a forum exists, but show an error message to regular members who attempt to read topics in the forum, while allowing subscribers full access to those topics. This helps naturally entice users into subscribing to gain additional access by allowing them to see what they will gain access to. Charging a fee for facilitation Another possible avenue to monetize your community is by charging a fee for facilitating file sharing between your members. The Downloads application allows users to upload and even sell their files to other users on the community, while also allowing the administrator of the community to retain a percentage of all sales. If your community serves a niche that may see online sales of files in a marketplace-type setting, you can earn some money by administering such a marketplace. As you can see, there are several opportunities available with Invision Community to monetize your community. Do you use any other methods of monetizing your community?
 -
 "No man is an island" wrote John Donne. He wrote that a good 200 years before computers were invented, but it rings true for any well written framework like Invision Community. The included REST API allows developers to fetch data from Invision Community and also allows data to be added. This data can be used to power widgets on your website, or to be used within other applications you are already using in a very simple way. Several enhancements have been made to the REST API for Invision Community 4.3 that we wanted to let you know about. These changes are developer-oriented, so if you do not use the REST API with your community please feel free to skip this update. If you would like to learn more about the REST API available with Invision Community, please see our REST documentation. Search capabilities As previously noted, you can now perform searches through the REST API. You can perform searches based on keywords, tags, or both, and you can limit and filter results with parameters similar to when you perform a regular search on the site (e.g. to specific containers, returning only results over a set number of comments, or searching within clubs). Permission awareness Several REST API endpoints are now permission-aware when combined with Oauth functionality built into Invision Community 4.3. This means that many REST API endpoints can be called using a specific user's access token, and only results that the specific user would normally be able to see will be returned (and/or they will only be able to submit to areas they normally have permission to). Ability to search members While an endpoint has always been available to retrieve (and add/edit/delete) members, the ability to search for members has now been implemented. You can search by name, email address, and (one or more) group(s), and a paginated response will be returned. Private conversations You can now start a new private conversation, reply to an existing private conversation, and delete a private conversation through the REST API. Other REST API changes You can now specify member's secondary groups when adding or updating a member through the REST API. You can specify the member's registration IP address through the REST API when adding or updating a member. You can now specify other member properties not directly exposed through the REST API when adding or updating a member by setting the rawProperties input field. You can now specify other member properties to retrieve through the REST API through the otherFields request parameter. The REST API now better logs changes to member accounts (so you will be able to more easily identify how a user's name, email address, password, etc. has changed when looking at the member history). You can now retrieve all content a member is following through the REST API, as well as follow a new container/content item, and delete an existing follow. You can now validate an account through the REST API You can now specify a 'perPage' parameter for paginated responses to control how many items are returned per page. Most of these changes were directly culled from client feedback and implemented per specific requests. If there are other REST API changes you would like to see implemented please don't hesitate to leave your feedback!
 -
 "The world’s most valuable resource is no longer oil, but data", the Economist wrote recently. Invision Community software stores a lot of important data that can be leveraged to analyze and improve upon the traffic and interactions with your site. While there are some various statistics tools in the AdminCP already, we spent some time with 4.3 enhancing and improving upon our existing reporting tools, as well as adding some new analytics tools you may find useful. Chart Filters Beginning with 4.3, any dynamically-generated charts in the AdminCP that support filtering will allow you to save those filter combinations for easier access in the future. When you open the Filters menu and toggle any individual filters, the chart will no longer immediately reload until you click out of the menu, and 'All' and 'None' quick links have been added to the filters menu to allow you to quickly toggle all filters on or off. Here is the 'Sales' chart for Commerce, for example. You will see that the interface is now tabbed. Commerce's Sales chart After opening the 'Filters' menu, selecting all of my products named 'test', and saving this filter combination as a new chart, I can quickly come back to this chart in the future. Specific filter configurations allow you to run reports easily Note that each user can save their own chart filter configurations independent of other users. Top income by customer Speaking of Commerce, we have also added a new chart to the 'Income' page, allowing you to view reports of your top customers. As with other dynamic charts, you can save filter configurations here for easy future access, and you can view the results as a table to get a raw list of your top customers' purchases. Further, we have tidied up the table views for the other existing tabs on this page. Looks like brandon is my top customer Reaction statistics We have introduced several statistic pages to expose information about the Reactions/Reputation system and how your users are interacting with it. For instance, you can now view information about usage of each of the reactions set up on your site. Yes, I'm definitely confused a lot You can also see which users give and receive the most reputation (which is the sum of their reaction points, keeping in mind that negative reactions can reduce a user's total reputation score), you can see which content on your community has the most reputation (which might prompt you to promote it to the 'Our Picks' page, promote it to social media, or otherwise continue to encourage interaction with the content), and you can see which applications reactions are given in the most. This could allow you, for instance, to focus more efforts in areas of your site to drive more activity, or to foster activity in areas you did not realize were as active as they are. Some areas of the community aren't as active as they could be Additionally, when viewing user profiles on the front end you can now see a breakdown of which reactions each user has given and received when you click the "See reputation activity" link in the left hand column. Apparently I'm not so much confused, as I am confusing Tag Usage Another useful statistic introduced with 4.3 is the ability to review tag usage on your community. As with other dynamic charts, you can filter however you like and save those filter configurations for easy future access. Not all tags are equal Trend charts for topics and posts When viewing the New Topics and New Posts charts, there are now tabs for "New Topics by Forum" and "New Posts by Forum", allowing you to see which of your forums are the most active. Additionally, you will see a trend line drawn on the chart to show you the trend (e.g. whether activity is increasing or decreasing). You can also filter which forums you wish to review, so you can compare your most active forums, the forums that are most important to your site, or the forums that need the most attention/may not be relevant, for instance. Viewing new topics by forum New posts by forum, but viewing only a subset of my most important forums Other Improvements Some other miscellaneous improvements have been introduced as well, which you may be interested in: When viewing Member Activity reports, you can now filter by group. We have also added the content count column to the table so you can quickly sort by top posters if this is relevant to the report you are running. Device usage is now also tracked (mobile, desktop, etc.) and can be viewed on a new Device Usage page. Developers: Dynamic charts now support database joins
 -
 A picture says a thousand words, they say. If getting those pictures online is troublesome, some of those words might be a little choice. Gallery has been an integral part of our community suite for just about as long as T1 Tech Mark Higgins can remember (and he has many years of memories). It has seen many interfaces changes as the years have rolled by. The most recent version received a fair amount to feedback on usability. We've listened. We've re-engineered most of Gallery's key interfaces to make uploading new images to your community frictionless. Lets take a look through the major changes. Improved submission process Submitting images has to be simple or else users will give up and your gallery will be underutilized. We have spent a lot of time simplifying and speeding up the submissions process for your users. The first thing that will be noticed is that the submission process is not presented as a wizard anymore, and the choice to submit to a category or album has been significantly cleaned up and simplified. Choosing a container Here, I have chosen the category I wish to submit to, so now I am asked if I want to submit directly to the category, if I want to create a new album, or if I want to submit to an existing album. Choosing one of those last two options will load the appropriate forms to create an album or select an existing album, respectively. Afterwards, the modal expands to full screen and you will naturally select your images next, and there's a lot to talk about here. Overhauled submission interface First and foremost, the interface has changed significantly to both simplify the UI and to make actually using the interface easier. When you click on an image, the form is loaded to the right immediately without an AJAX request needed to fetch the form. In addition to quickly setting the credit and copyright information for all images at once, you can now set the tags for all images quickly and easily without having to edit each image individually. Images support drag n drop reordering in the uploader here, which means that you can drag n drop images to different positions to control their order. Many users previously would name images "Image 1", "Image 2", and so on, and then set their albums to order images by name in order to control the order the images were displayed in. This is no longer necessary now that you can manually reposition the images. The default description editor is a pared down textarea box, but you can still use the rich text editor if you wish. The ability to enable maps for geo-encoded images and to upload thumbnails for videos is still supported as well, and those options will show up when appropriate in the right hand panel. The 100 image per submission limit has also been lifted. You can now upload many more images in one go with no hard limit imposed. Upon clicking submit images, you will see the typical multiredirector to store all of your images, however you will notice that it processes much faster than it did in 4.2 and below. Better submission control Administrators can now configure categories such that can accept only images, only albums, or both. This means you can now create categories that cannot be submitted to directly, and you can create categories that albums cannot be used with. This is a feature that has been oft-requested since the release of 4.0, and we are happy to report that it will be available in our next release. Additionally, album creators (if permitted) can also now create shared albums. When you create a new album, you can now specify (under the Privacy menu) who can submit to the album, with your available options being: Only me Anyone Only the users I specify Only the groups I specify Prior to 4.3, albums have always been owned by one user and only that user could submit to them. Invision Community 4.3 will open up albums so that anyone can submit to them, dependent upon the album creator's preferences and needs. The choice is yours as to who can submit to your albums New image navigation Another major change with Gallery 4.3 is that clicking an image now launches that image in a lightbox to view it and interact with it. This lightbox is context-aware, allowing you to visit the next and previous images in the listing, whether that is a category or album listing, or the featured images or new images listings on the Gallery homepage, for example. The new image lightbox Firstly, I will note that you are seeing the image here with my mouse cursor over the image area, exposing the title, tags, and some various buttons. When you mouse away from the image those overlays fade away to highlight the image itself better. As you can see, you can navigate left and right here to view the next and previous image in this context, and you can otherwise interact with the image as you would have if you had visited the older-style image view page (including the ability to rate, review and comment). The new Gallery release will introduce a new advertisement location in the right hand column to allow you to show advertisements, even in the lightbox. If you follow a link to a full image view page, the lightbox will automatically launch when the page loads, still allowing you to interact in a familiar manner. Additionally, if you move through enough images in the lightbox to reach a new page (for example, if you click on the last image in the album listing and then click on the next image button), the listing itself behind the lightbox will update for easier usability if the user closes the lightbox. One final thing to note is that the interface has been made more mobile friendly, particularly through the introduction of swiping support. You can swipe left and right in the lightbox, and in image carousels, to see the next and previous images. Notable performance improvements As we mentioned at the beginning, we recognize there is a balance between performance, usability, and attractiveness, particularly with regards to an image Gallery. For that reason, we have made Gallery's performance a major focus in 4.3, and have implemented some changes that bring with them a noticeable performance improvement. Firstly, we have adjusted the software to only store two copies of an image (in addition to the original), instead of four. In previous versions, we stored a thumbnail, a small copy, a medium copy and a large copy of an image, all of which arbitrarily sized and designed to best meet our layout needs without showing an image too large or too small in a given space. We have simplified this vastly by storing a slightly larger "small" image, and storing a large copy. Diskspace usage is reduced dramatically as a result, and bandwidth usage is actually lowered as well since only two copies of an image need to be delivered to the browser instead of four. Next, we have implemented prefetching of the 'next' and 'previous' pages when you launch the lightbox image view. This means that when a user navigates to the next image in the lightbox, it loads immediately instead of waiting for the content to be fetched from the server. From a UX perspective, this provides a much snappier and responsive interface, making users more apt to interact with the site. We have additionally sped up the submission process as previously mentioned. The order of execution for certain events that must happen during submission has been moved around a bit, resulting in a faster experience for the end user actually submitting the images. Because we know the details matter, we have implemented other smaller improvements as well. For example, the link to rebuild images in the AdminCP previously resulted in a redirect process that rebuilt the images while you waited, but now a background task is launched so that you can continue with what you were doing while the images get rebuilt in the background. From start to finish, the Gallery UI and UX has been touched on and improved, and we hope you enjoy these improvements when you start using the new version.
 -
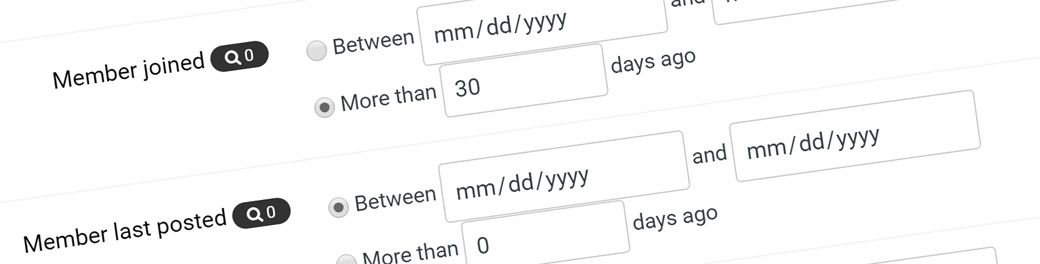 This is an entry about our IPS Community Suite 4.2 release. The ability to automatically promote users from one group to another based on set parameters has been a staple of community software for some time. Traditionally, the most common determination of promotion has been post count. Additionally, the 4.x Community Suite supports promoting members automatically based on the time elapsed since the user joined the site and based on their total reputation count. With 4.2, we have completely overhauled and enhanced the group promotion feature bringing many new options to administrators looking to promote members through different group levels. To start with, the group promotion options have been removed from the groups configuration pages into their own area. Group promotion rules overview page You will notice that rules are no longer strictly tied to a single group, and that rules can be sorted however you desire. When you create and edit rules, you can choose which groups the rule applies to, what parameters the user needs to meet in order for the rule to be activated, and then finally, which primary and secondary groups the user will be moved in to. You can also configure the rule to remove specified secondary groups, which can be useful if one rule adds a secondary group for users, and then the next rule should change them to be part of a different secondary group (i.e. add a new secondary group, but also remove the previously awarded secondary group). The system uses the same member filters available when configuring bulk mail, and we have made some updates to the member filters area (and have introduced some new filters) in this release as well. For example, you can create a rule that only applies to members who have won the daily leaderboard at least once, or members who have created a blog. Some of the group promotion filters, which are also available when sending bulk mails Any time a member account is updated for any reason (a new visit, editing the member, the member makes a new post, etc.), the software will loop through all configured rules and the last rule in the list that matches the member will be applied. This approach allows you to create promotion levels, for instance when a member reaches 100 posted content items they will be promoted to a new group, and when they reach 1000 posted content items they will be promoted to yet a different new group. Groups can be wholly excluded from any promotion rules, which is useful when you have administrator and/or moderator groups and you want to ensure that they are never moved to a different group. These groups will be disabled from selection when configuring group promotion rules, and these groups will be ignored if "any group" is selected for a promotion rule. Finally, if a user is moved to a new primary group by Commerce because they have purchased a product which moves them to a new group, they will also be excluded from group promotion rules (however, Commerce purchases that only adjust secondary groups will not exclude users from being checked by group promotion rules). Developer note: You can add your own filters for group promotion rules (and bulk mails) by adding MemberFilter extensions in 4.2, available in the Developer Center for your application.
 -
This is an entry about our IPS Community Suite 4.2 release We are happy to introduce several changes to our Gallery application to both refine the existing capabilities and to introduce new useful functionality; particularly for Albums. We have clarified how to submit images directly to a category on the first step of the upload form in Gallery. Clarification for submitting directly to a category When submitting images to the Gallery, a simple "Add more images" button has been added to the wizard. While it has always been possible to add more images by dragging and dropping them on to the upload area, or by clicking the "Choose files" button again, the addition of this button should help add some clarity for users who overlooked these capabilities. A new "Add more images" button makes adding additional images easier Applying the same details to all of the images you are submitting has been made much simpler. When you begin entering the details for the first image, you can specify a template to use for the caption name leveraging a special replacement "%n". A small help icon next to the caption field label explains how to use this capability. When you are done supplying the details, you can click "Copy details to all images" and your submission will start instantly, using all of the details supplied for the image you are editing. You can quickly set tags, an image description and a caption name template (for instance "Aquarium %n") to all images using this new capability, useful when submitting 50+ images at once. Of course, you can still supply the details for each individual image as well, if you wish. Submitting a lot of images at once has been made easier In addition to improvements for submitting images, albums have been updated to include many new features, including: Commenting Reviews Reactions Messages Featuring Hiding Locking Reporting Searching A new Gallery widget (sidebar block) to show albums anywhere throughout the Community Suite has been added as well. Album overview page Going along with these changes, we've improved how groups of images that are submitted to an album are handled in searches. If you submit multiple images to an album, you will only see the album listed in activity streams, and similarly if you follow a bunch of images in an album these are grouped as well, making activity streams more useful and easier to follow. Activity streams have been updated as well The changes to albums and image submissions will simplify your users' interaction with Gallery in 4.2, and make submitting images and new albums, and working with those albums more useful and robust.
-
This is an entry about our IPS Community Suite 4.2 release Statistics can be an important part of monitoring your site and ensuring it grows and responds to your marketing and promotion efforts effectively, and several new statistic tools have been added to the 4.2 Community Suite which we know you will be excited to learn about! A simple tool has been added that will allow you to look up and list all member accounts that have last visited the site within a specified time period. Look up members who have visited within a set time period Additionally, online user (both logged in user and guest) counts are now tracked every 15 minutes and graphed in the AdminCP for you to reference. You can view online user trends over a specified date period, view just guest counts or just member counts (or both), and view the graph in multiple different modes (such as an area chart or as a column chart). By default, the data is retained for 180 days, however you can control how often to prune this statistical data in the AdminCP. Online user trends graphed You can also view a graph of member activity on the site. Member activity is defined as any "activity" beyond simply browsing, such as submitting a new post, reacting to any content item or comment, or following any content item or node. Activity information about your member base You will also be able to define keywords that you would like to monitor and then see both a graph of usage of those keywords, as well as a table listing all usages of those keywords. You can use this to track usage of competitor names, find out if hash tags you define are trending, or learn if promotional materials are making an impact on your membership. Keyword tracking can help you closely monitor your community Along with these additions, we've cleaned up the menu and wording for the rest of the existing statistic options to make their functions more clear. We hope these additions help you better track and control your community, making the most of your time and money. Note for developers: A new chart class has been added which allows you to populate dynamic charts using callbacks, in addition to the standard methods that already exist for pulling data directly from a specified database table.
-
This entry is about our IPS Community Suite 4.2 release Improvements to our Gallery application, both in terms of new functionality and minor enhancements, are coming in 4.2. One area that was identified early on for improvement was the Gallery image view page and specifically how the lightbox feature available on this page behaved. We adjusted the buttons that overlay the main Gallery image to use icons instead of text If you click to view an alternative image size, we improved the header styling of this page as well for clarity and to allow easier downloading of the image you are viewing When viewing an image, you can open the image in a lightbox by clicking the icon at the very top far right corner. When doing so, there was previously a button at the bottom left hand corner of the lightbox if you wanted to download the image. We modernized this experience by implementing an overlay that you can click on in order to download the full size image instead. You will notice there are now left/right arrows in the lightbox view here. You can click left/right to scroll through the images in the container, just as if you clicked through the images in the photostrip immediately below the image on the main page. You can also use the left/right arrow keys on your keyboard. While this would navigate through the photostrip previously, it will now also navigate through the images in the lightbox as well. When viewing on your mobile device, the lightbox has been cleaned up allowing more image to display which is a welcome change for your mobile users. We have more changes coming to Gallery in 4.2 which we will be revealing soon but in the mean time we hope you enjoy these useful improvements.
-
This entry is about our IPS Community Suite 4.2 release IPS Community Suite comes with a default profile photo which is used when members have not set a profile photo for their account. While this model has served the software well for years, we felt it was time for an update to the software to keep pace with current internet trends. This has led to one of the latest changes you can expect to see with version 4.2: letter profile photos When upgrading you will be asked if you wish to use letter profile photos, or if you wish to stick with the generic per-theme default profile photo that is used presently. You can change your mind any time after upgrading by adjusting the setting in the AdminCP as well. AdminCP members list We have tested many languages to ensure maximum compatibility. The font used in the image is automatically selected based upon the characters to be written to the image, so sites that have more than one language will see compatibility for all of the profile photos that are created automatically. The colors are not set for each letter. You will notice in the screenshot that each "A" letter photo has a different color. They are chosen randomly when generated. Letter photos in a sidebar widget We hope that this change helps bring your communities to life with a little more style, flair, and uniqueness for each new user on your site. Developer Note The code is structured in such a manner that third party developers can further extend the feature with plugins. The methods for writing text to images are exposed through our central \IPS\Image class introducing new possibilities in your own custom code.
-
When the IPS Community Suite creates new files and folders, by default it uses the following permissions or "chmod" mask: Folders that the software will write to: 0777 Folders that the software will not write to: 0755 Files that the software may overwrite: 0666 Files that the software will not overwrite: 0644 While these permissions work in most environments, you may find that the permissions are not appropriate in your particular hosting environment. You have the ability to override these options if necessary. Warning Only your webhost can advise you as to what the most appropriate permissions are in your hosting environment. If you believe file and folder permissions are not being set appropriately, please contact your host to inquire as to the best values to use in your hosting environment. To override the default permission levels used, you must create (or modify) the constants.php file in your Community Suite root directory, and then add the following lines, adjusting the masks accordingly. /* Folders that will be written to later */ define( 'IPS_FOLDER_PERMISSION', 0777 ); /* Folders that will be created and not written to later */ define( 'FOLDER_PERMISSION_NO_WRITE', 0755 ); /* Files that will be written, and then later deleted or overwritten */ define( 'IPS_FILE_PERMISSION', 0666 ); /* Files that will be written once, and would not later be updated or deleted */ define( 'FILE_PERMISSION_NO_WRITE', 0644 ); Be advised that the values defined are in octal notation and the leading 0 is required. Additionally, these should be defined as you see above without enclosing the values in quotes.
-
We are releasing a patch for IP.Board 3.4.x and IP.Nexus 1.5.x to address two potential security issues brought to our attention. It has been brought to our attention that an open redirect exists within IP.Nexus which might allow a user to redirect other users to a remote site of their choosing through IP.Nexus. Additionally, an issue has been brought to our attention where-by sensitive user data may be exposed in certain circumstances. To apply the patch Simply download the attached zip and upload the files to your server. This single zip file includes the patch files for both IP.Board as well as IP.Nexus. patch-34x-05252016.zip If you are an IPS Community in the Cloud client running IP.Board 3.4 or above, no further action is necessary as we have already automatically patched your account. If you are using a version older than IP.Board 3.4, you should contact support to upgrade. If you install or upgrade to IP.Board 3.4.9 after the date and time of this post, no further action is necessary as we have already updated the main download zips.
-
We are releasing a patch for IP.Board 3.4.x to address a potential cross-site scripting (XSS) issue. It has been brought to our attention that specifically crafted posted content followed by specific user actions can cause a scenario where untrusted javascript can execute. A patch is being released to address this potential issue. This download also includes a patch for an email issue previously reported to us. To apply the patch Simply download the attached zip and upload the files to your forum server. This single zip file includes the patch files for both IP.Board as well as IP.Gallery. patch_2016_1_21.zip If you are an IPS Community in the Cloud client running IP.Board 3.4 or above, no further action is necessary as we have already automatically patched your account. If you are using a version older than IP.Board 3.4, you should contact support to upgrade. If you install or upgrade to IP.Board 3.4.9 after the date and time of this post, no further action is necessary as we have already updated the main download zips. We would like to thank @newbie LAC for responsibly disclosing this issue to us.
-
IP.Board 3.4.9 is now available in the client area This is a maintenance release to consolidate security updates released since 3.4.8, release additional security updates, and fix some minor bugs impacting many clients. We recommend you upgrade to ensure you have all security updates in place. You can download in the client area and upgrade as normal. We would like to thank newbie LAC for responsibly reporting a potential CSRF (cross-site request forgery) issue related to warnings resolved with the release of 3.4.9. Support Notes IPS will no longer provide upgrade services for self-hosted licenses on the 3.x series. You can do the upgrade yourself (it's very easy) but our support will only do upgrades for you to IPS Community Suite 4. If you are a IPS Cloud client we will still do the upgrades for you. IP.Board 3.4.x will reach "End of Support" status soon and we strongly encourage all clients to upgrade to the 4.x Community Suite.
-
We are releasing a patch for IP.Board 3.4.x and IP.Gallery 5.x to address a potential cross-site scripting (XSS) issue. It has been brought to our attention that specifically crafted posted content followed by specific user actions can cause a scenario where untrusted javascript can execute. A patch is being released to address this potential issue. This download also includes a patch for an email issue previously reported to us. To apply the patch Simply download the attached zip and upload the files to your forum server. This single zip file includes the patch files for both IP.Board as well as IP.Gallery. patch_12_15_15.zip If you are an IPS Community in the Cloud client running IP.Board 3.4 or above, no further action is necessary as we have already automatically patched your account. If you are using a version older than IP.Board 3.4, you should contact support to upgrade. If you install or upgrade to IP.Board 3.4.8 or IP.Gallery 5.0.5 after the date and time of this post, no further action is necessary as we have already updated the main download zips. We would like to thank @newbie LAC for responsibly disclosing this issue to us.
-
Fixes a security issue when importing statuses from Facebook, Twitter or Google Plus. Introduces support for PayPal Billing Agreements in Commerce. Introduces new REST API for developers. Changes the behaviour of media embedding in the editor so links that can be embedded no longer need to be on their own line. General bug fixes and improvements.
-
This is a maintenance release which includes some improvements to embedded content.


