
Marc
Invision Community Team
-
Joined
-
Last visited
Everything posted by Marc
-
There are scanners out there for that purpose. Anything we posted which was literally "Check for this as we have seen x" would also be an advertisement to those writing malicious code "Avoid x as we are seeing it". This is, for example, the reason we don't disclose rules relating to our spam system. Any disclosure would result in telling spammers how to avoid it. This said, however. It's simply not our responsibility to check the code of 3rd party developers. As with any developer you purchase any written code on the internet, you are purchasing on some level of trust and reputation. This actually used to be the case. What's known as a loss leader. However, there comes a point where the benefits are not outweighing the costs. This is the case here. In the case of Apple and google, you are looking at marketplaces/stores of several million items, all of which make money for those companies. They also have very very very very large budgets for these things. In our case, as already explained, the market for this has been in decline for quite a few years now. This is not to say there isn't a place for 3rd party items. However, it is to say that its not cost-effective, or an effective use of time, to host these items ourselves. Whether it be the files themselves or directories of files, these involve time from the staff here that are better put toward the main product for the benefit of all. We will decide more on this nearer the time.
-
Not at present, but thank you for the feedback of course. We anticipate there will be things people bring up once this has been released that can be improved on, as with most new features.
-
It's worth noting here, that the decision is quite simply market driven. It's not that enterprise customers only install a few add-ons. It's actually that the majority of customers of any type don't install any at all. Enterprise will actually tend to go for custom solutions from developers for their own needs.
-
We would need to look further into this for you, however the access details on file appear to be incorrect or missing. Could you please update these details by visiting your client area, selecting the relevant purchase, then clicking "Review/Update Access Information" under the "Stored Access Information" section. We look forward to further assisting you.
-
In the past we sold Invision Community with the option to choose which of the various apps you wanted. This was great for purchasing flexibility but limited our ability to provide a cohesive experience. We have streamlined our offerings by combining the entire suite into a single package. Now you can really have it all at a more affordable price. We have also increased our payment flexibility and are now offering monthly payments of rather than the 6-month renewal term. For full information on terms and changes, visit your license page in the client area and click the upgrade button. If you are on a version 4 license (Invision Community Suite), you can choose to switch to the new terms or you can just do nothing and nothing will change for you. If your license reads "Invision Community Classic" then you are already on the new terms. Upgrading your License To upgrade your license, log into your client area, and select the option to change to the new terms. This will be found at the bottom of your main client area page Changing Your Terms Clicking to change will show you the new terms for you to read through. Note, you have not accepted them at this point, so you can read through first. It will show you your own current license terms, and what your new terms would be, including the prices and dates of renewals. New Terms page Adding any applications gained Many customers will gain applications through the switch to the new community classic terms, so you then need to add this to your community suite. In order to do this, you would do the following. Download a fresh set of files from your client area. If you are unsure on how to do this, please see the following guide which will show you how to get this. https://invisioncommunity.com/4guides/welcome/install-and-upgrade-r259/ Unpack, and uploads the files. Do not delete any existing files, however please do overwrite where there are files that already exist on the server. You may find this guide helpful if you are unsure on this https://invisioncommunity.com/4guides/welcome/install-and-upgrade-r259/ Log into your admin CP, and visit "System>Site Features>Applications". From here you will see that you can install your new application, using the install button provided. For example here, we will install the gallery application, using the + icon shown. Installing an Application
-
Our infrastructure is indeed built on AWS, yes
-
Ive split this off into a new topic for you. The first thing I would ask there, is if you have tested without cloudflare being switched on?
-
Please re-read my message above. This was one person assuming 80% of 'their' plugins 'may' be 😄 With regards the other questions, its much better to wait until there is more released and the authors themselves state what can and cannot be achieved before going down that route.
-
It does need to be noted, this is very much a case where someone says "someone may have" and by the time it hits the end the believe is the person did, and admitted it. The 80% there was not from invision, and also not referring to all marketplace plugins. It was from a plugin author relating to their own plugins. It was also an assumption without yet having all the information to make the statement those 80% are not possible. (As we havent shown everything yet, and also gathering feedback on some items).
-
I'm sure there are others who have found in nice to get a glimpse 🙂 No matter which way we do this, releasing everything in a single blog would just be too much. And actually, we announced one yesterday, then release another today. These things are always a "damned if you do, damned if you don't" kind of thing. If we say nothing, some dont like it, if we say something, some wont like it. There's more to come, as mentioned.
-
Please feel free to post this within our feedback area for consideration in the future 🙂
-
This is not something that is possible at present, but we are looking into
-
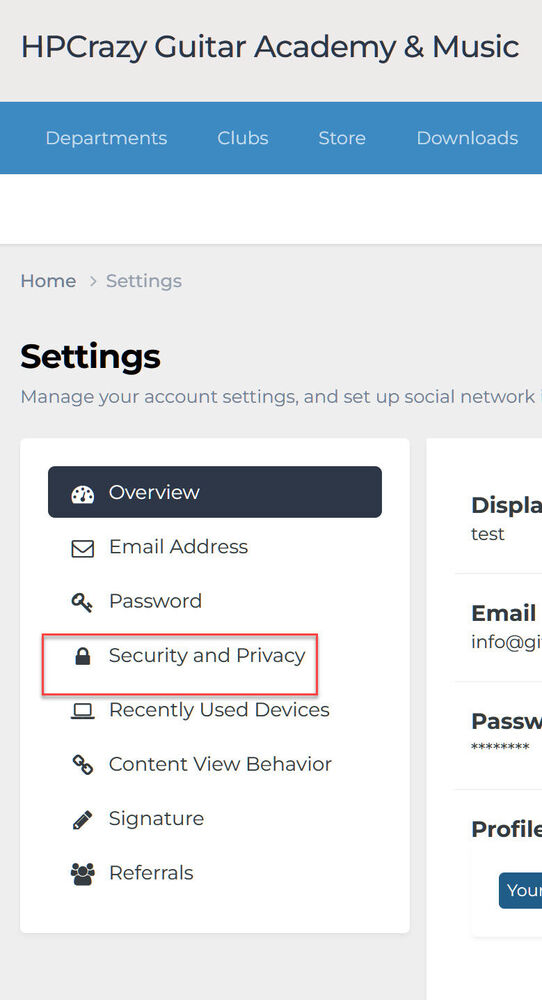
Logged in as that member, I am actually seeing the secuirty and privacy section. Have you since resolved this? If you are still having the same issue, please provide an example user Im not sure why you would have the impression that this is the primary audience, as that isnt the case. Areas of the community are intentionally locked out in every way from a banned user. They would have to use the contact form to contact if they are banned
-
Usually via the contact form
-
You can indeed. When you are in a module, click on "Moderator actions" and "Edit Module" Once in there, you will see a "Lesson Order" tab, where you can reorder with the handles shown here


-
Which items are available on which platforms is at the bottom of the original post there. For clarification, these are what is available to each client. Note, these are content item level, not page level.
-
We hope 😉 This is not a bug, no. As mentioned in the original message, this is currently available to moderation. Thank you for the feedback though. Always appreciated and I will pass that on for you.
-
No need It is
-
I believe this may well be a bug
-
Google Analytics are a way of tracking and reporting website traffic on your site. We offer the ability to integrate your google analytics 4 (GA4) directly into your site by simply entering the code given into your adminCP. Setting up google analytics In order to set up google analytics, we first need to visit the google analytics page and sign in (creating an account if needed) https://analytics.google.com/ Once signed in, you are given the following page. Click this to get started Analytics Welcome Screen Once selected, we need to enter an account name. It doesnt matter what that is, as its just for yourself. We will use IPS test here, just to get started. I have chosen the default options for the checkbox items, which I would suggest for you also, unless you know specifically what you wish to change Account Details We are next asked to create a property for our analytics. A property is an item which will hold the measurement data for your website. Choose a name, along with adjusting the timezone and currency accordingly. Property Details Add your business details as described, and click next Business Details You will then choose your business objective. I have chosen to get baseline reports in the test here, but you can choose which is most appropriate for your business Business Objectives Once you then click on create, you will be asked to read and agree to googles terms and conditions. When you have done this, you will be taken to the "Data collection" section, where you will select "Web" as the platform Data Collection Location You need to add your website URL and a stream name from here. You will see what is currently being measured, but you can add other measurement items using the settings icon, should you wish to do so Web Stream Settings You will now be given your google tag code, which we will need for setting this up on your IPS platform. Google Tag Code Adding to your IPS Platform Adding google analytics into your IPS platform is simple. All you need to do is to visit the following location and click enable on "Google Analytics" System->Integrations Enter the code you were given in the previous section, and ensure you select to enable. Then save Adding to the ACP You should now be able to see your analytics being collected and be able to view them at the following location, once it's collected some data https://analytics.google.com/
-
As mentioned, this is a value add item for creator pro and above (who, as regularly pointed out, pay more for their service). Nobody mentioned languages being a decision on whether or not to make it cloud only.
-
At present, this is a value add item for our cloud customers on Creator Pro and above. It has been stated that we may, at some point in the future, consider this on the classic platform. However there is nothing set it stone as of yet
-
There is no plan to remove them entirely as of yet, so nothing to really point you to
-
If you're here, you will want to know about our courses, and all it has to offer within the Invision platform. Courses is a lightweight learning platform, that will allow you to provide a simple learning experience for your users. Helping to deliver training, digest important information, and validation of that retained information by the use of quizzes. Creating and Settings Courses and related global settings are set up from the your AdminCP at the following location Community->Courses There are 3 submenus, which I will give a brief overview of, before we begin to create a course Courses - This is where we would create a course and view/manage any courses that have already been created. Settings - There are settings relating to views, and quizzes here, along with the ability to allow paid courses to be set up on the system Enrollments - This will allow you to quickly see who is enrolled in which courses on your system. To create a course, go to the courses section and select "Create new". On this guide, we are going to create a small course on rules for our fictional school You will notice I have selected this to be a required course. Doing this will mean members cannot complete another course, before they have completed this one. When created, you are taken back to the course list. Note from here, you can click to go to the course, and manually enroll people if you wish to do so Modules, Lessons & Quizzes Once you have created a course, you can head over to the front end of your site to add modules and lessons. You can select the view icon in the admin CP to take you straight there if needed.At the bottom of the page, you can select course manager to add and arrange modules on the course Once you have added all the modules needed, if you visit a module, you will see you can then add a lesson to that module. Lessons are as simple to add as adding a topic on the community. So you can add whatever you need to them, such as videos, images etc. You will notice that on each of the modules, you can add a quiz from the button provided Clicking on this will allow you to add either multiple choice, or true/false questions for your members to complete after taking a course Enrollment Enrolling in a course is as simple as clicking on the enroll button in the top right of the page, if your permissions allow. If you have set permissions so a user cannot enroll themselves, you can manually add them from the enrollments section Community->Courses->Enrollments
-
Live Topics is a hosted live chat and question-and-answer event that is converted into a forum topic upon completion. It combines the fun and togetherness of a live event with the permanence of a forum topic allowing you to continue the conversation long after the event has ended. This guide shows the setup and usage of Live Topics on your community. Permissions Live topics can be used by any moderator that has the relevant moderator permissions set. These can be set in the following location, on the live topic tab, by selecting the relevant option. Note, if a moderator is set to "Unrestricted" they will already have this permission Members -> Staff -> Moderators Creating Live Topics Creating a live topic is as simple as visiting your ModeratorCP and visiting the "Live Topics" section, as shown in the image below. Once you have clicked to schedule a new live topic, you can configure the following options Duration - This is the scheduled duration that attendees will see before the event. This sets expectations of time for your community. Add To Events - This option creates a new Calendar Event in your Community. This allows the live topic to be searched, viewed, and promoted like other event within your community. Live Video URL - This is the URL of a YouTube embed. You can also add this after starting the live session. Attendees - This option specifies who can attend the live topic. Leaving as "Recommended" allows any registered member to join. Staff - The staff are responsible for moderating user generated content as it comes in. The default setting will add all groups that are allowed to moderate live topics. You can adjust this default in the AdminCP using moderator permissions. Additional Hosts - Hosts have the highest level of permission in the live topic. They create questions, update the video URL, and guide the discussion. By scheduling the Live Topic, you are automatically a host but you can add more hands to help. All hosts get a reminder notification close to when the event is due to start. Require Approval for question replies/chat messages - During the live session, you may wish to control the rate of incoming content (especially questions). Chat Message creation can be locked during the live session. Hosting a Live Topic To start a live topic, you need to click into it from the ModeratorCP. Alternatively, if it was added to an Event you can click into it from there. Then just click start, it's as simple as that. Your attendees will see a waiting page with a countdown. It is worth mentioning that the live topic cannot Run without any hosts in attendance - When hosts abandon a live session, it will automatically end within a few minutes Run longer than 6 hours - The aim of Live Topics is to accompany a live event and to be short-term compared to regular forum topics. The live session will also end automatically in this case Once a live topic is started, the screen is divided into have 2 main areas: One for Main Questions and another for Chat. Any video streams you embed are shown in the top right and automatically started. Main Questions/Replies On the left, you will see Main Questions that have either been added by a member of staff or moved to the main questions area from a chat channel. There are important items to note about the main questions area Main Questions and their replies are what will be preserved when the topic is converted into a forum topic. For each question, you can also configure if the replies are "locked". A main question can be unlocked, locked to all members, or locked to non-staff. When a question is locked, new replies cannot be created. Chat Channels For each Live Topic, there is a General Chat and a Staff Chat Channel. If a member is non-staff, instead of the Channel selector tabs, they will see only "Chat". When a non-staff attendee creates a chat message, it can be marked as a "question". This lets the host know that the question was intended for others to respond to. Optionally, the host can even convert the message into a question so it's integrated into the standard topic post-conversion (moved to the Main Questions area mentioned above) Live Stream Tools Hosts can select a time in the live feed a main question was answered by selecting the time on the video, then hitting the "Use current player time" button. This will then timestamp the answer to show the location on the video. You can change the video embed at any time mid-session if required. Moderation tools Staff can hide or delete questions, chat messages and replies. The reply and chat feeds can also be set to automatically hide new items on creation, if required. Non-staff attendees can report content, the same as they would in any other area of the community. Reports for live topics show within the staff area of chat, rather than in the main reports area. This is so they can be quickly dealt with during the live session.


