


Invision Community makes it easy to customise the top-level menus on your site to suit the way you want your community to work. Whether you’re adding internal links, external URLs, or sub-menus containing other menu items, the Menu Manager lets you set everything up quickly and with minimal effort.
Menu Manager
The Menu Manager is located in the Admin CP at:
System → Site Features → Menu Manager
From here, you have control over the primary navigation menu shown across your community.
Menu Manager Main View
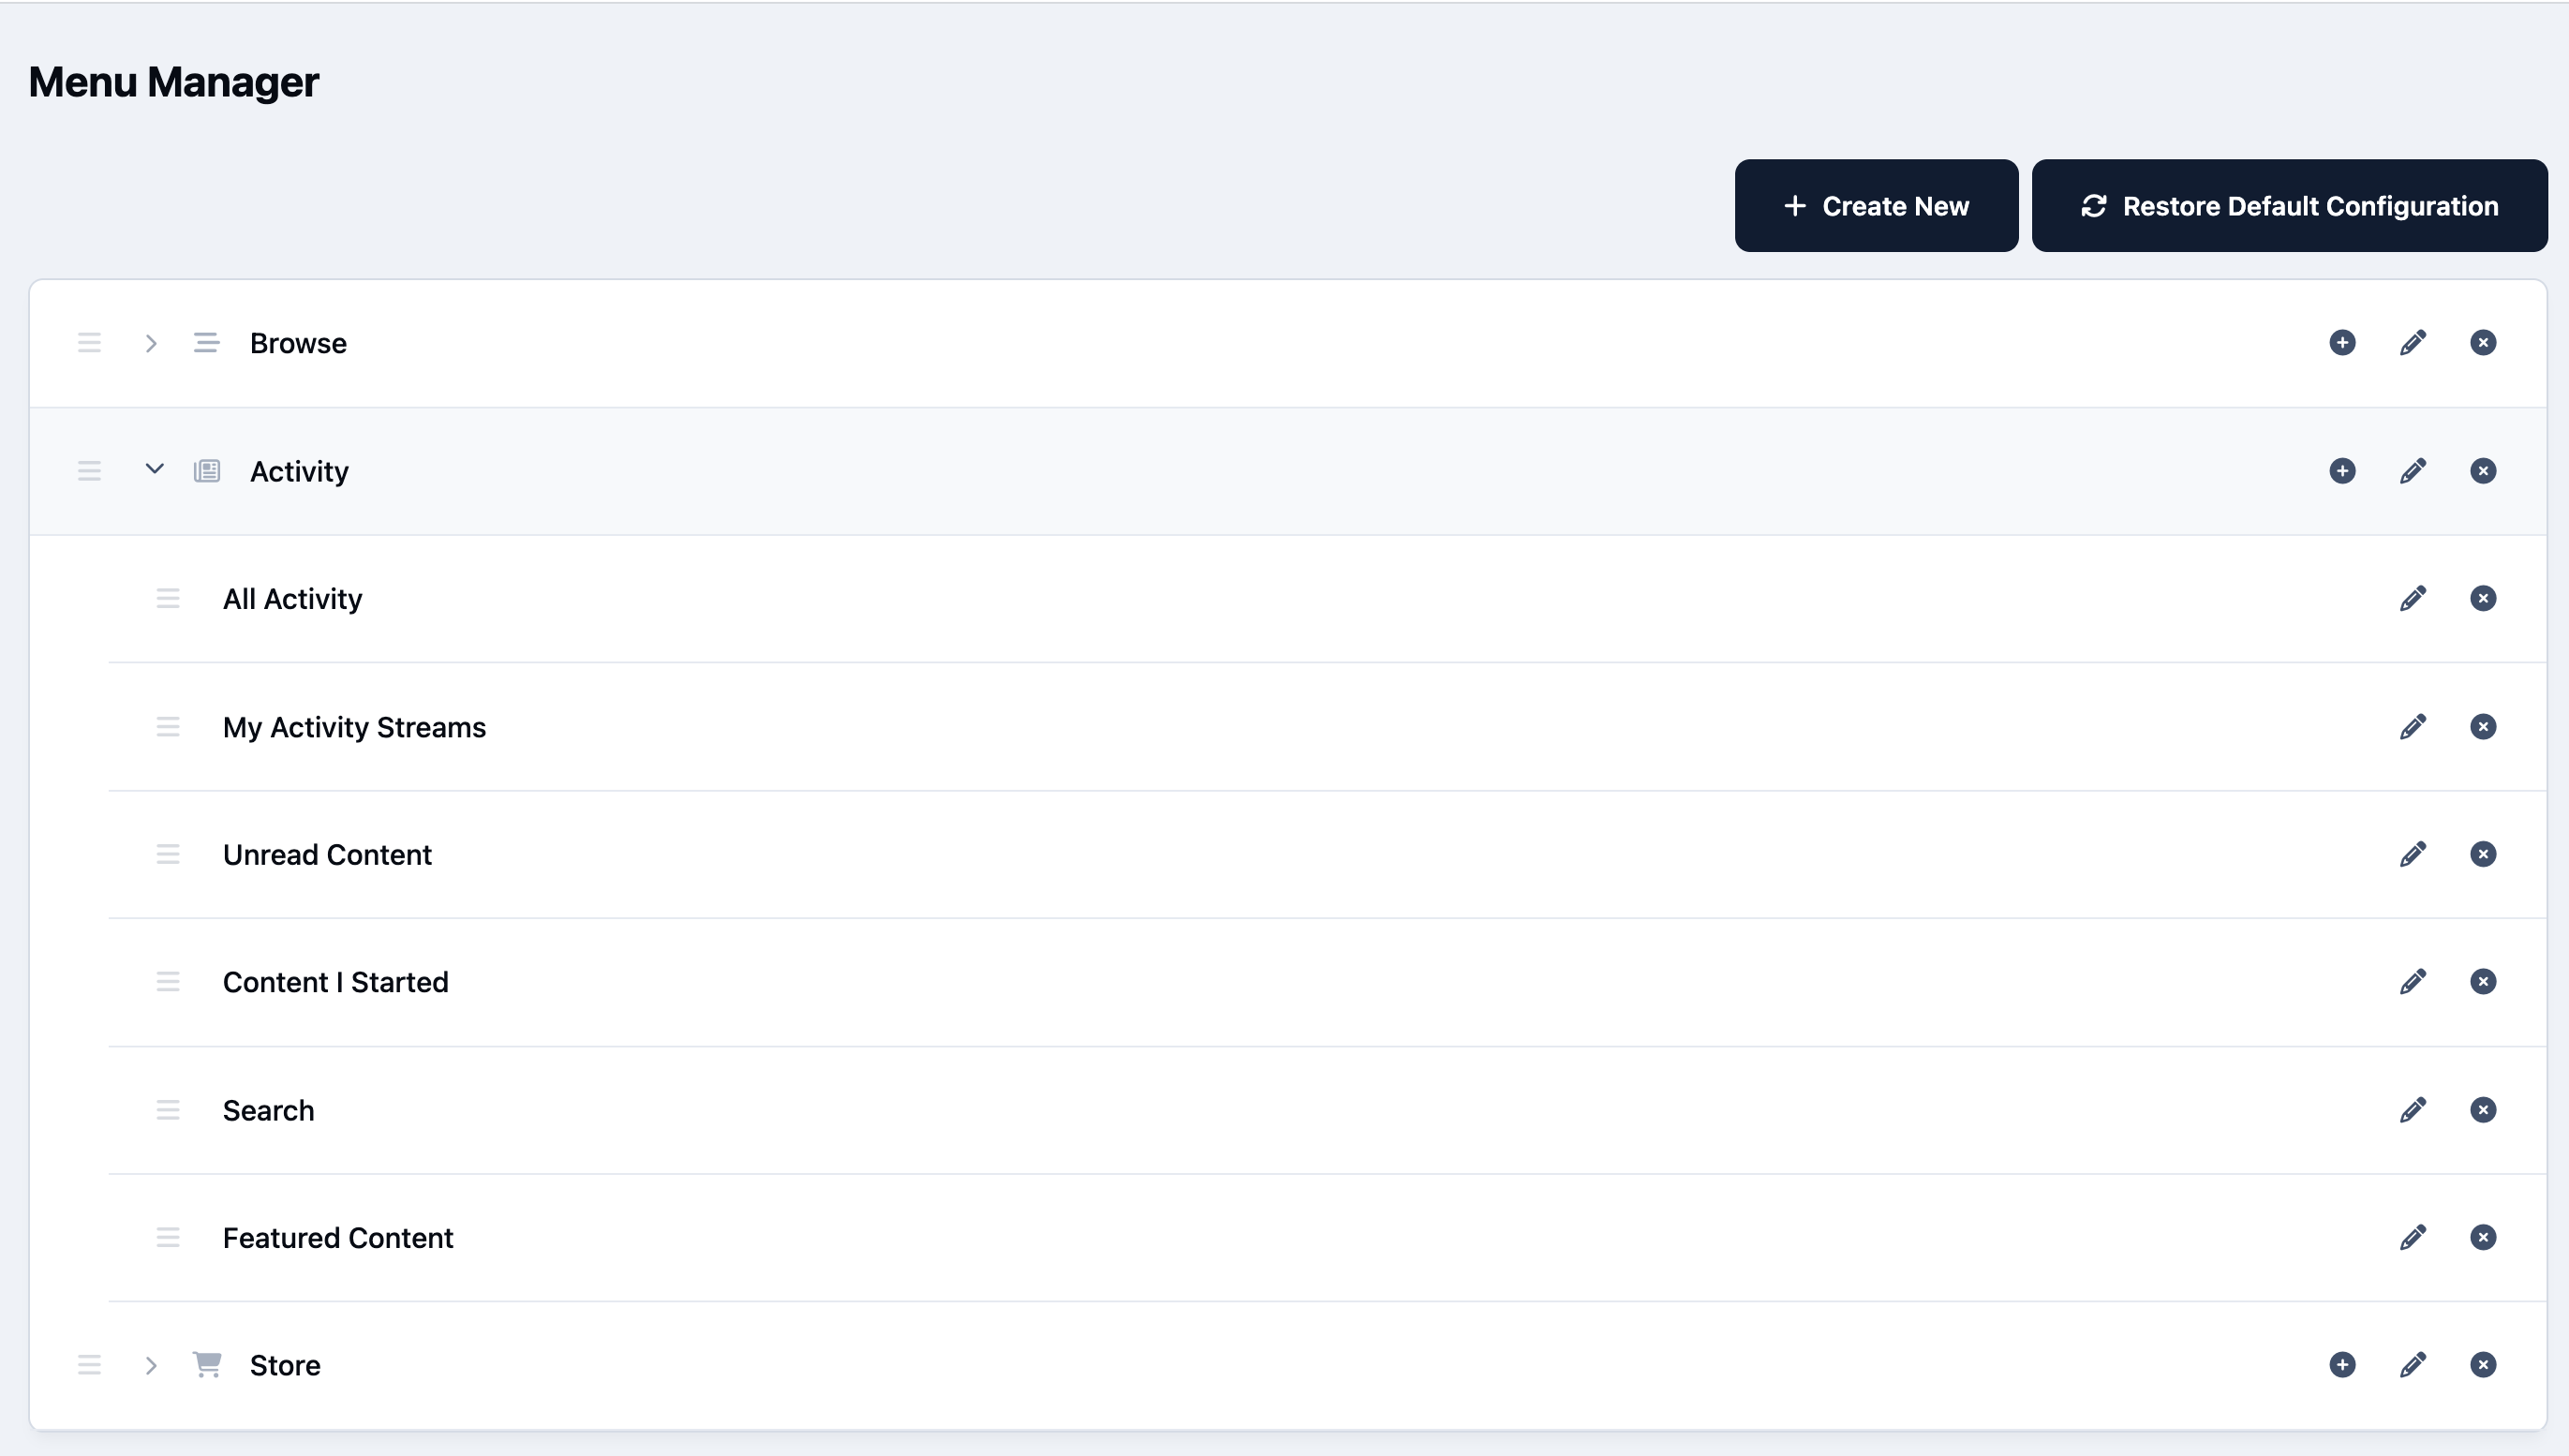
Available menu item types include:
Suite Node – links to specific applications such as forums, gallery or blogs
Activity Streams – direct access to a particular activity stream
Links to Pages and Quests - direct links to specific pages and quests created in those applications
Custom link – link to any URL you choose
Tags - Link to the tag page of a specific tag
Sub-Menu – A sub-menu which will contain one or more of the above items
Adding An Item
To add a new menu item, select the Create New button and choose a menu type. The options available will depend on which applications are installed and which menu items already exist. Some third-party applications may also add their own menu options.
As shown below, the settings available will change depending on what you select. For example, you can create a link to an external website by entering a URL, or choose the Pages application and link directly to an internal page. You can also choose on which device types the menu item will appear.
Creating a Menu Item For Downloads
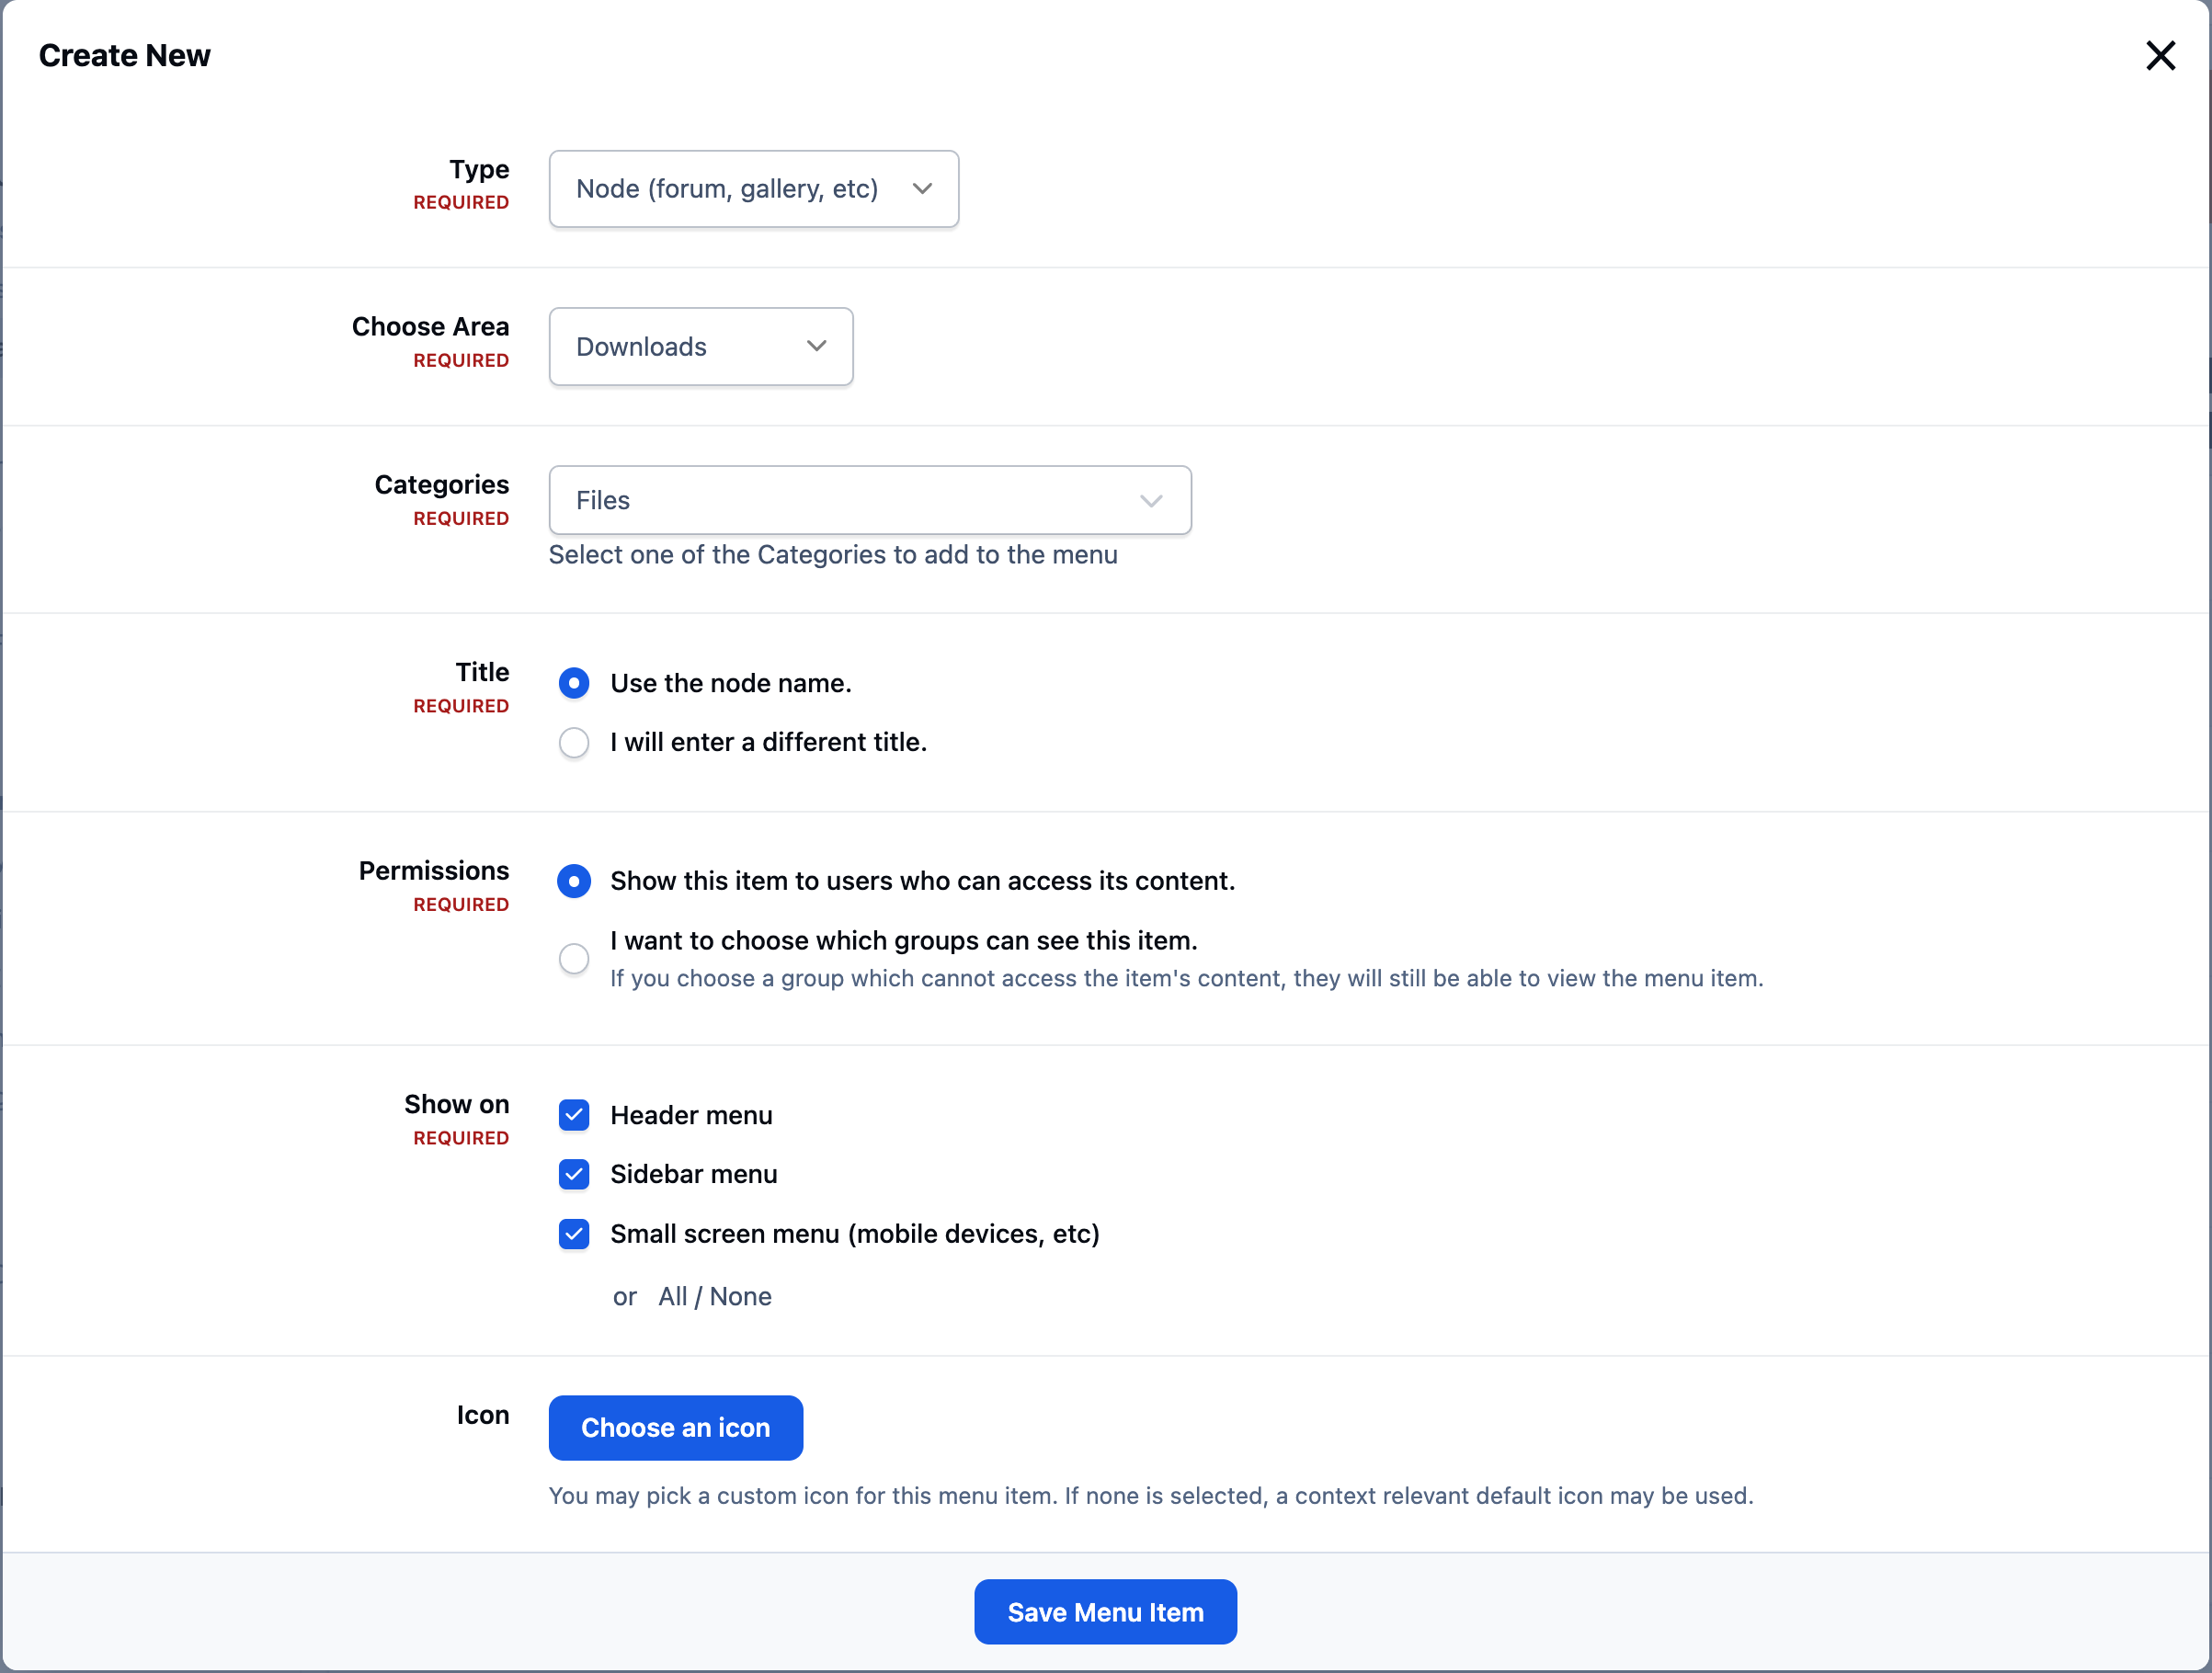
All menu items support full permission control. You can either inherit the permissions of the item being linked to, or define custom permissions by selecting which member groups are able to see the menu item.
Icons can be selected for locations where items are shown on your theme, these ares switched on from the desktop header section of your theme, in the theme editor
Reordering Items
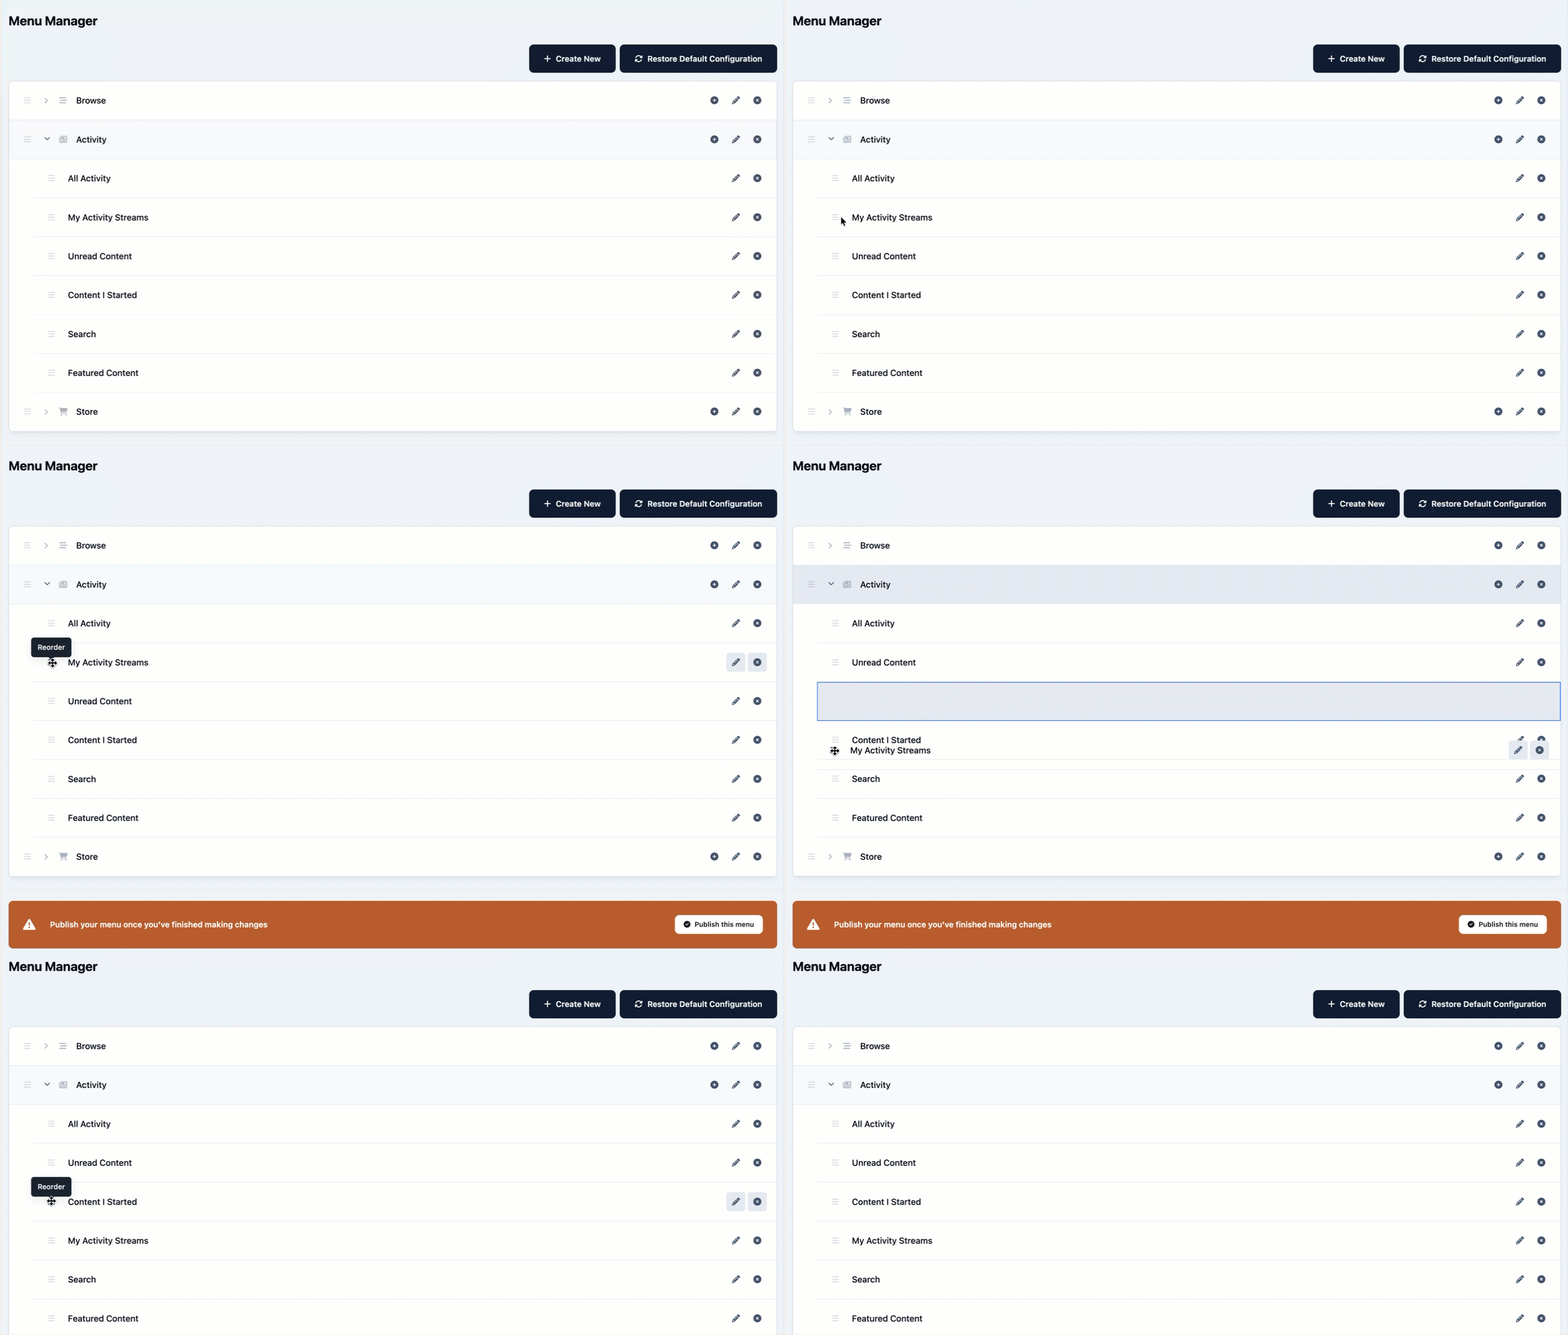
Reordering menu items is as simple as drag and drop. You can move items along the menu bar or nest them inside other items to create sub-menus.
Reordering a Menu Item
Restoring defaults
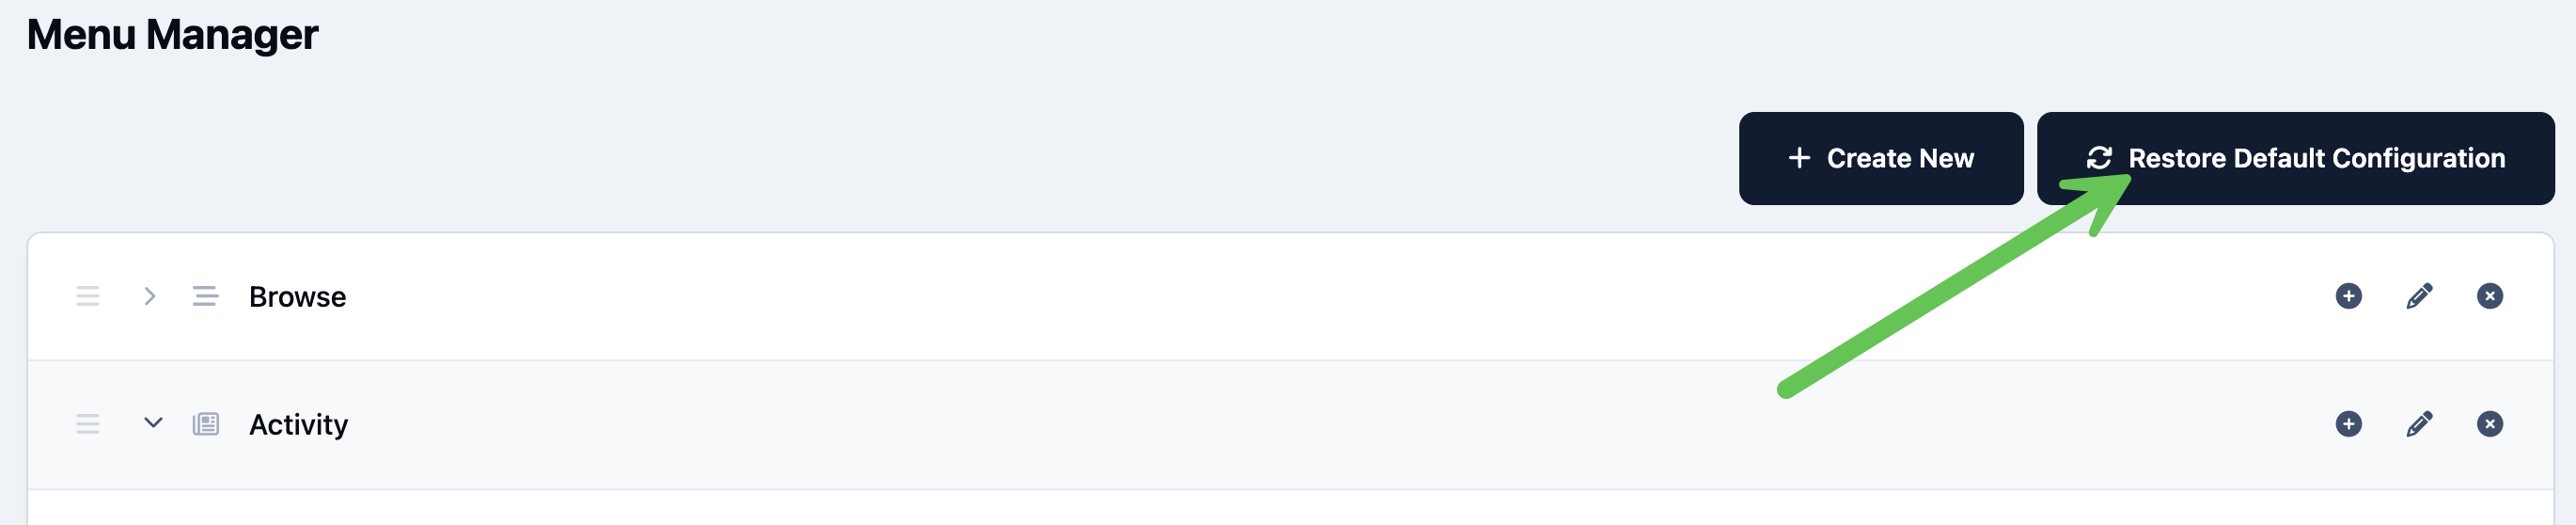
If you ever want to start again, you can restore the menu to its original configuration by selecting Restore Default Configuration in the top-right corner of the page.
Restore Default Configuration
Publishing Your Menu
Once you’re happy with your menu layout, don’t forget to publish your changes. Your updated menu will not be visible to members until it has been published.
Making Sure To Publish Our New Menu

Recommended Comments