


In addition to the payment methods covered in the previous guide, there are several other configuration options related to payments within the Commerce application.
These can all be found in the Admin CP under:
Commerce → Payments → Settings
Each tab within this section controls different aspects of how payments are processed and managed. The available tabs are explained in more detail below.
Currencies
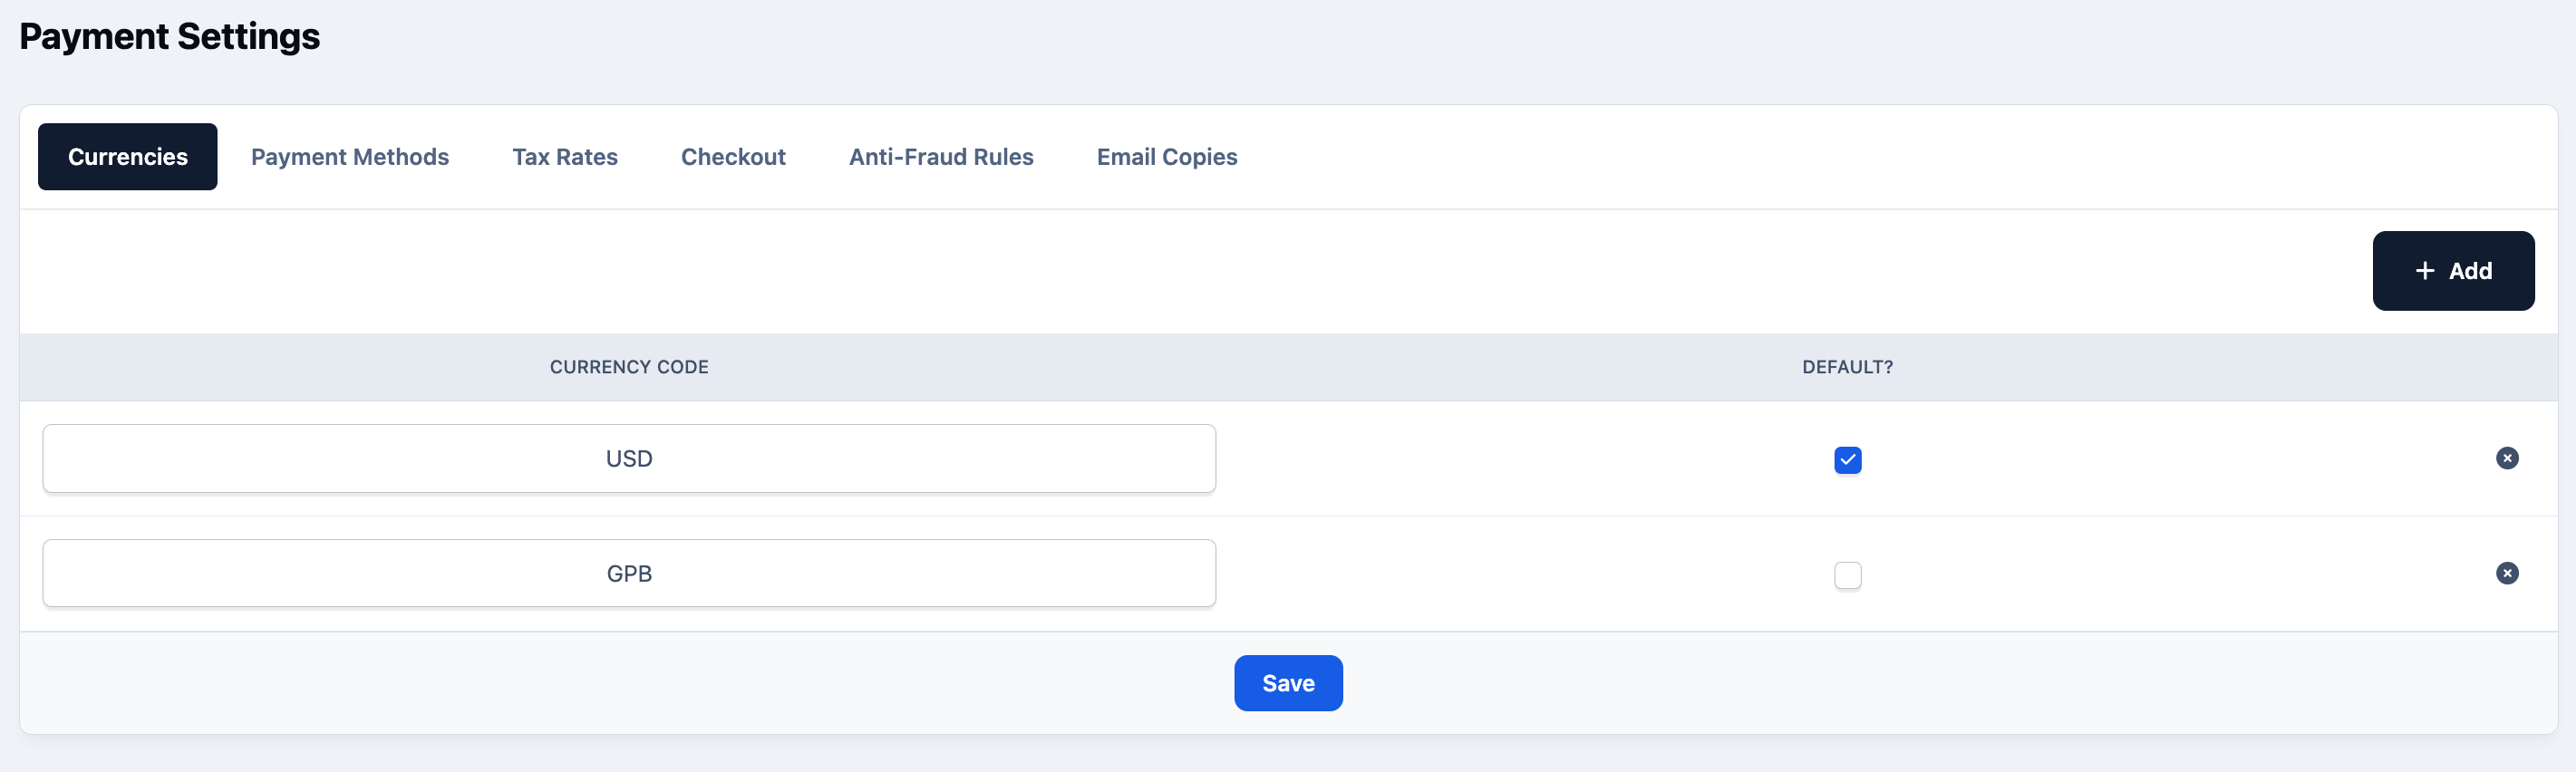
From this tab, you can configure the currencies you plan to use within the Commerce system. Adding multiple currencies allows you to set prices in more than one currency, giving customers a more localized checkout experience.
To add a new currency, click the Add button in the top-right corner, as shown in the image below, and enter the appropriate currency code from the list provided.
You can also designate one currency as the default. This is the currency that will be displayed to users by default when they browse your store.
Currencies
Tax Rates
Tax may not be everyone’s favorite topic, but it’s an important — and often legal — requirement when selling products or services.
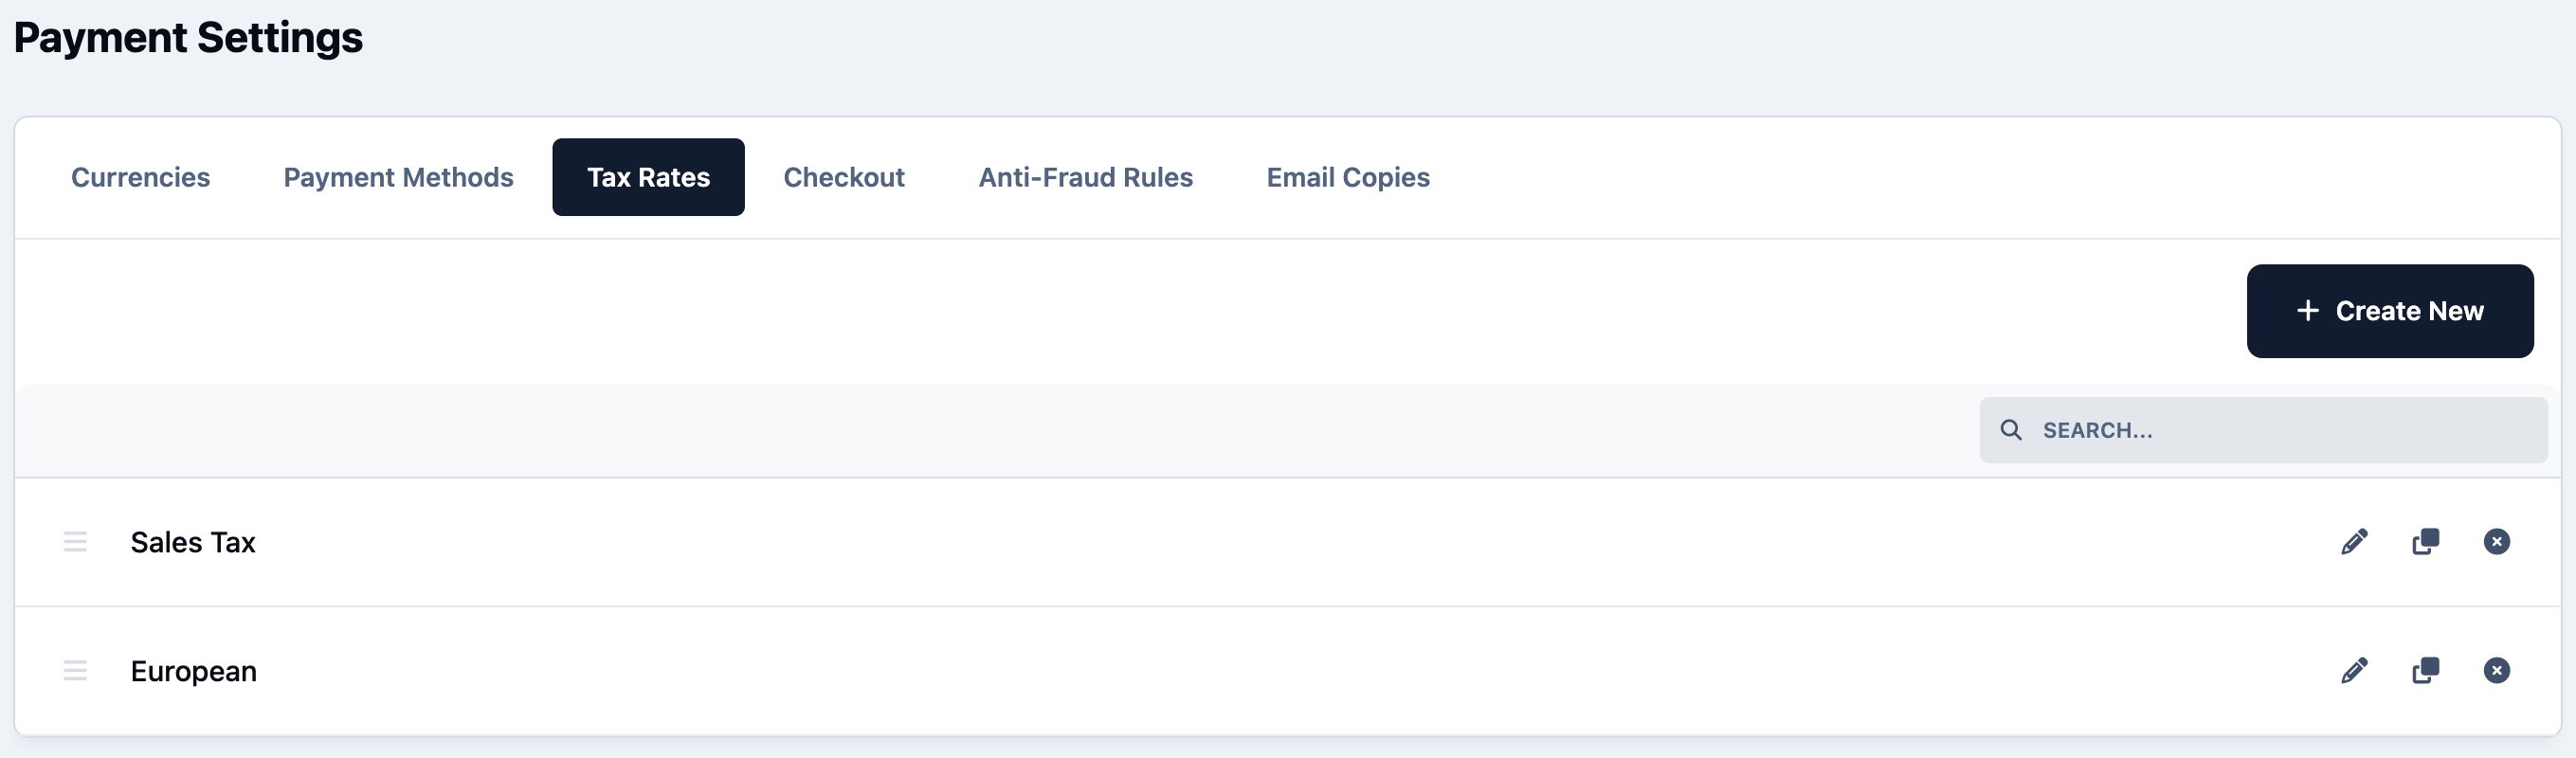
In the Tax Rates tab, you’ll see a list of all tax rates currently configured on your system. To add a new tax rate, simply click the Create New button and enter the relevant details.
Main Tax Rates List
When creating a new tax rate, you’ll be presented with two tabs to configure the relevant details.
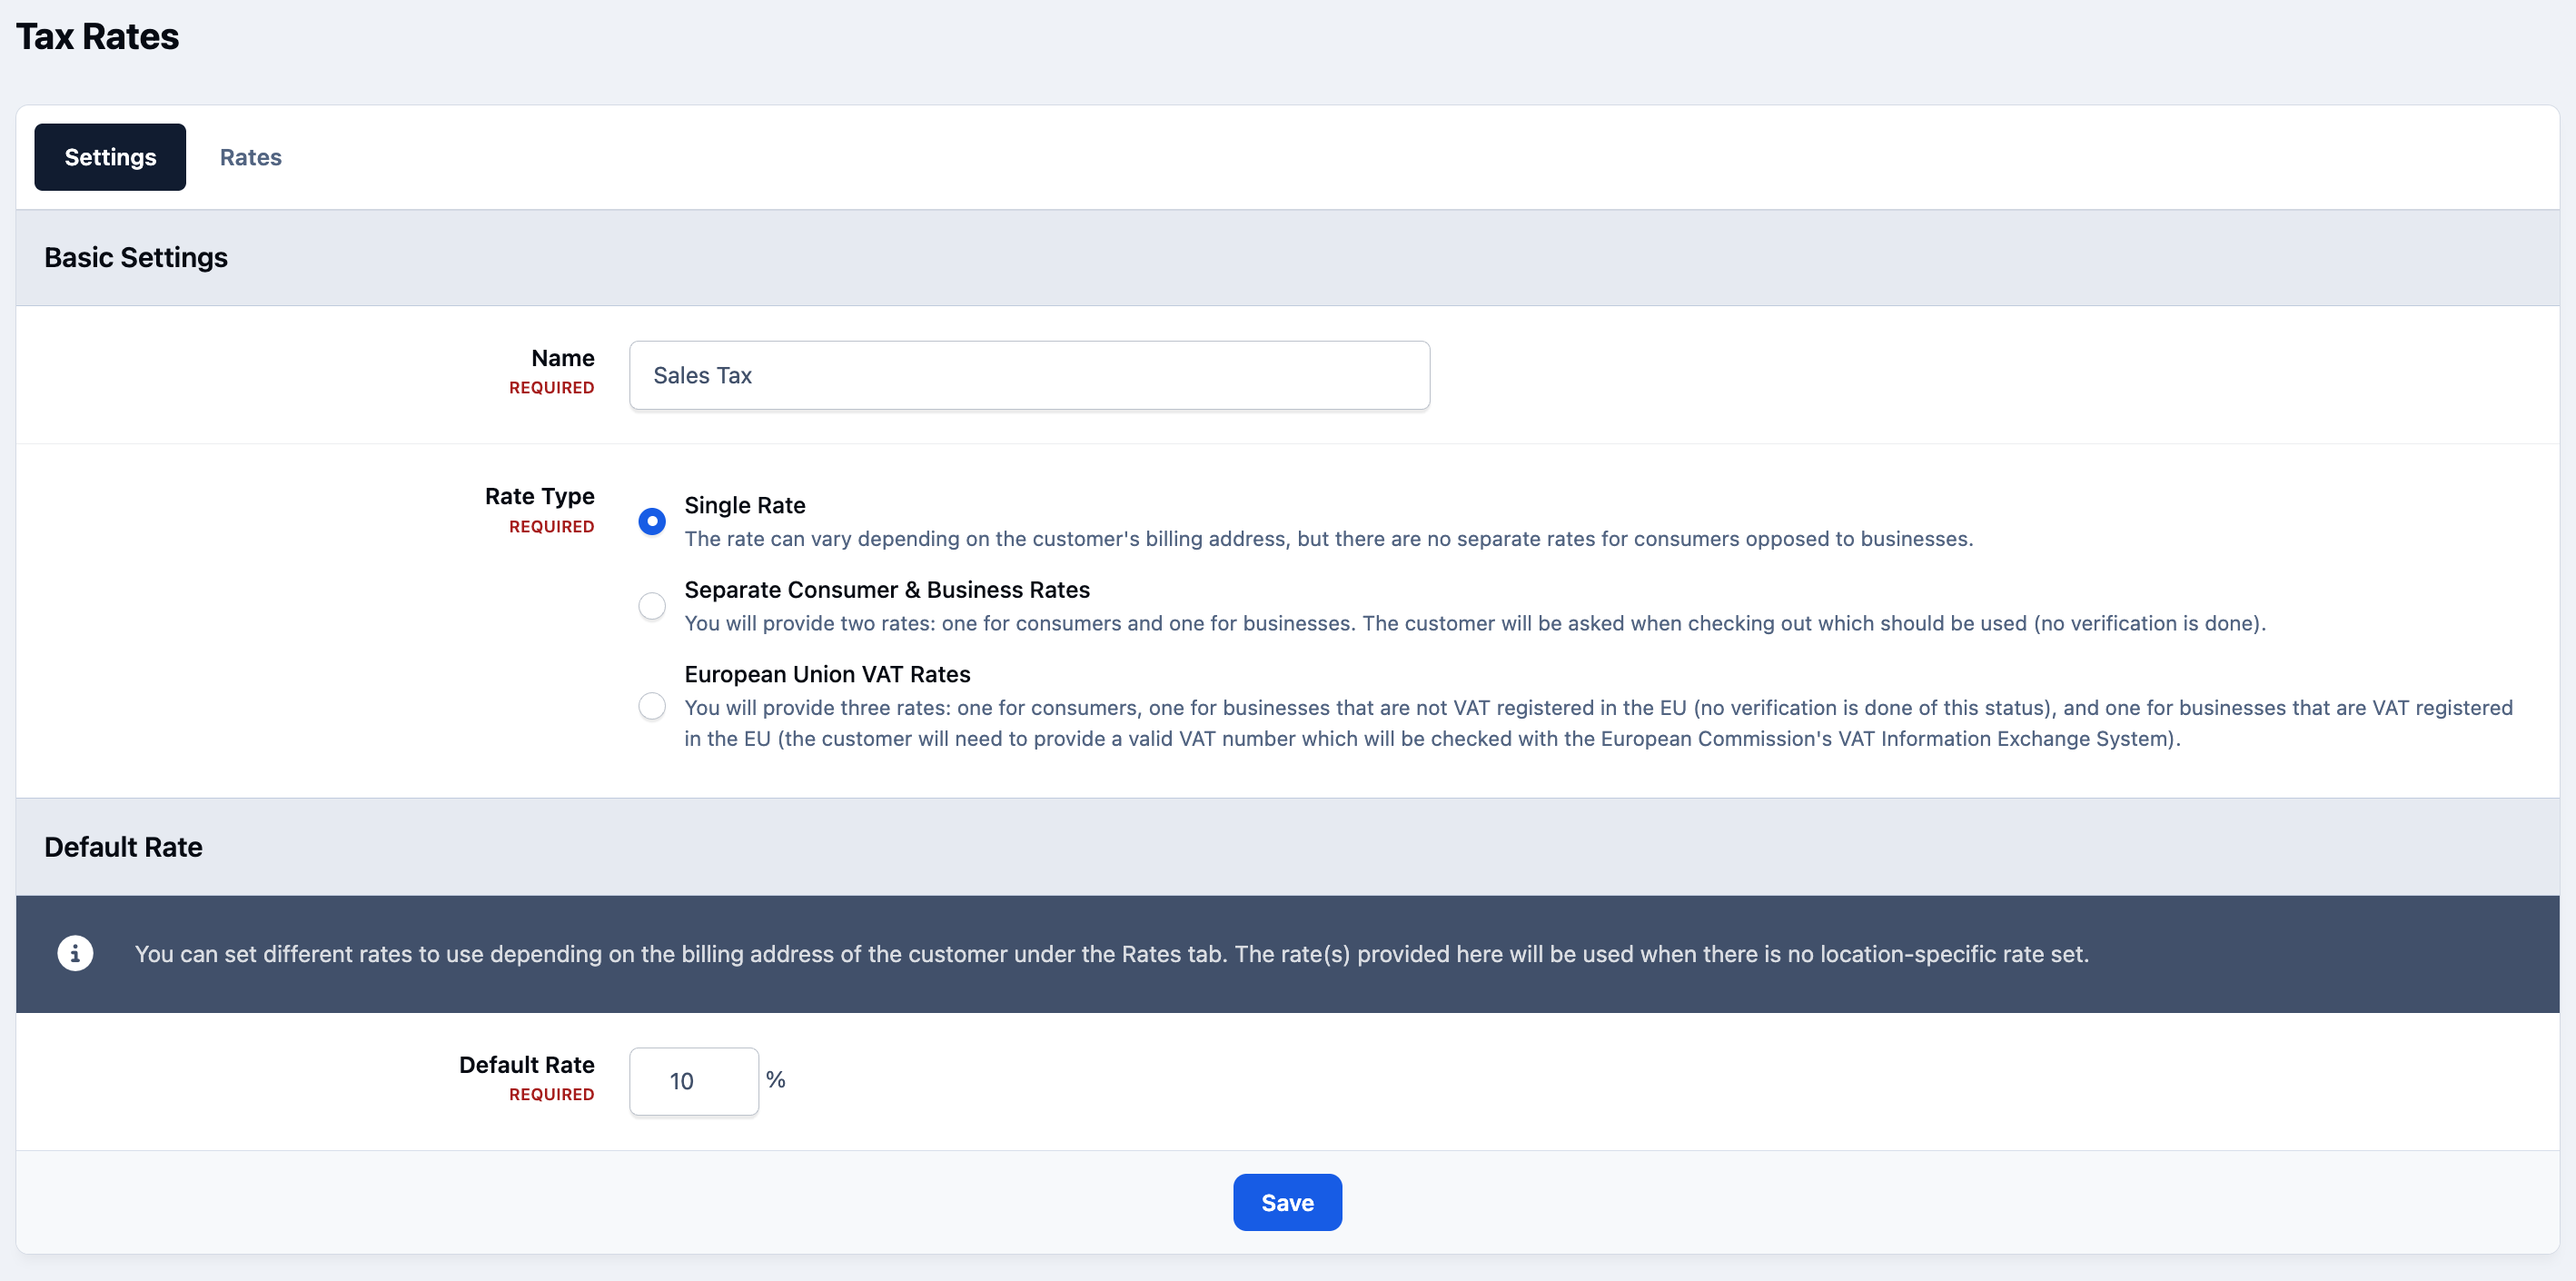
The first tab, Settings, allows you to enter a name for the tax rate and define a default percentage. This default rate will be applied if none of the location-specific rates configured in the second tab (Rates) match the customer’s location.
Creating a Simple Tax Rate
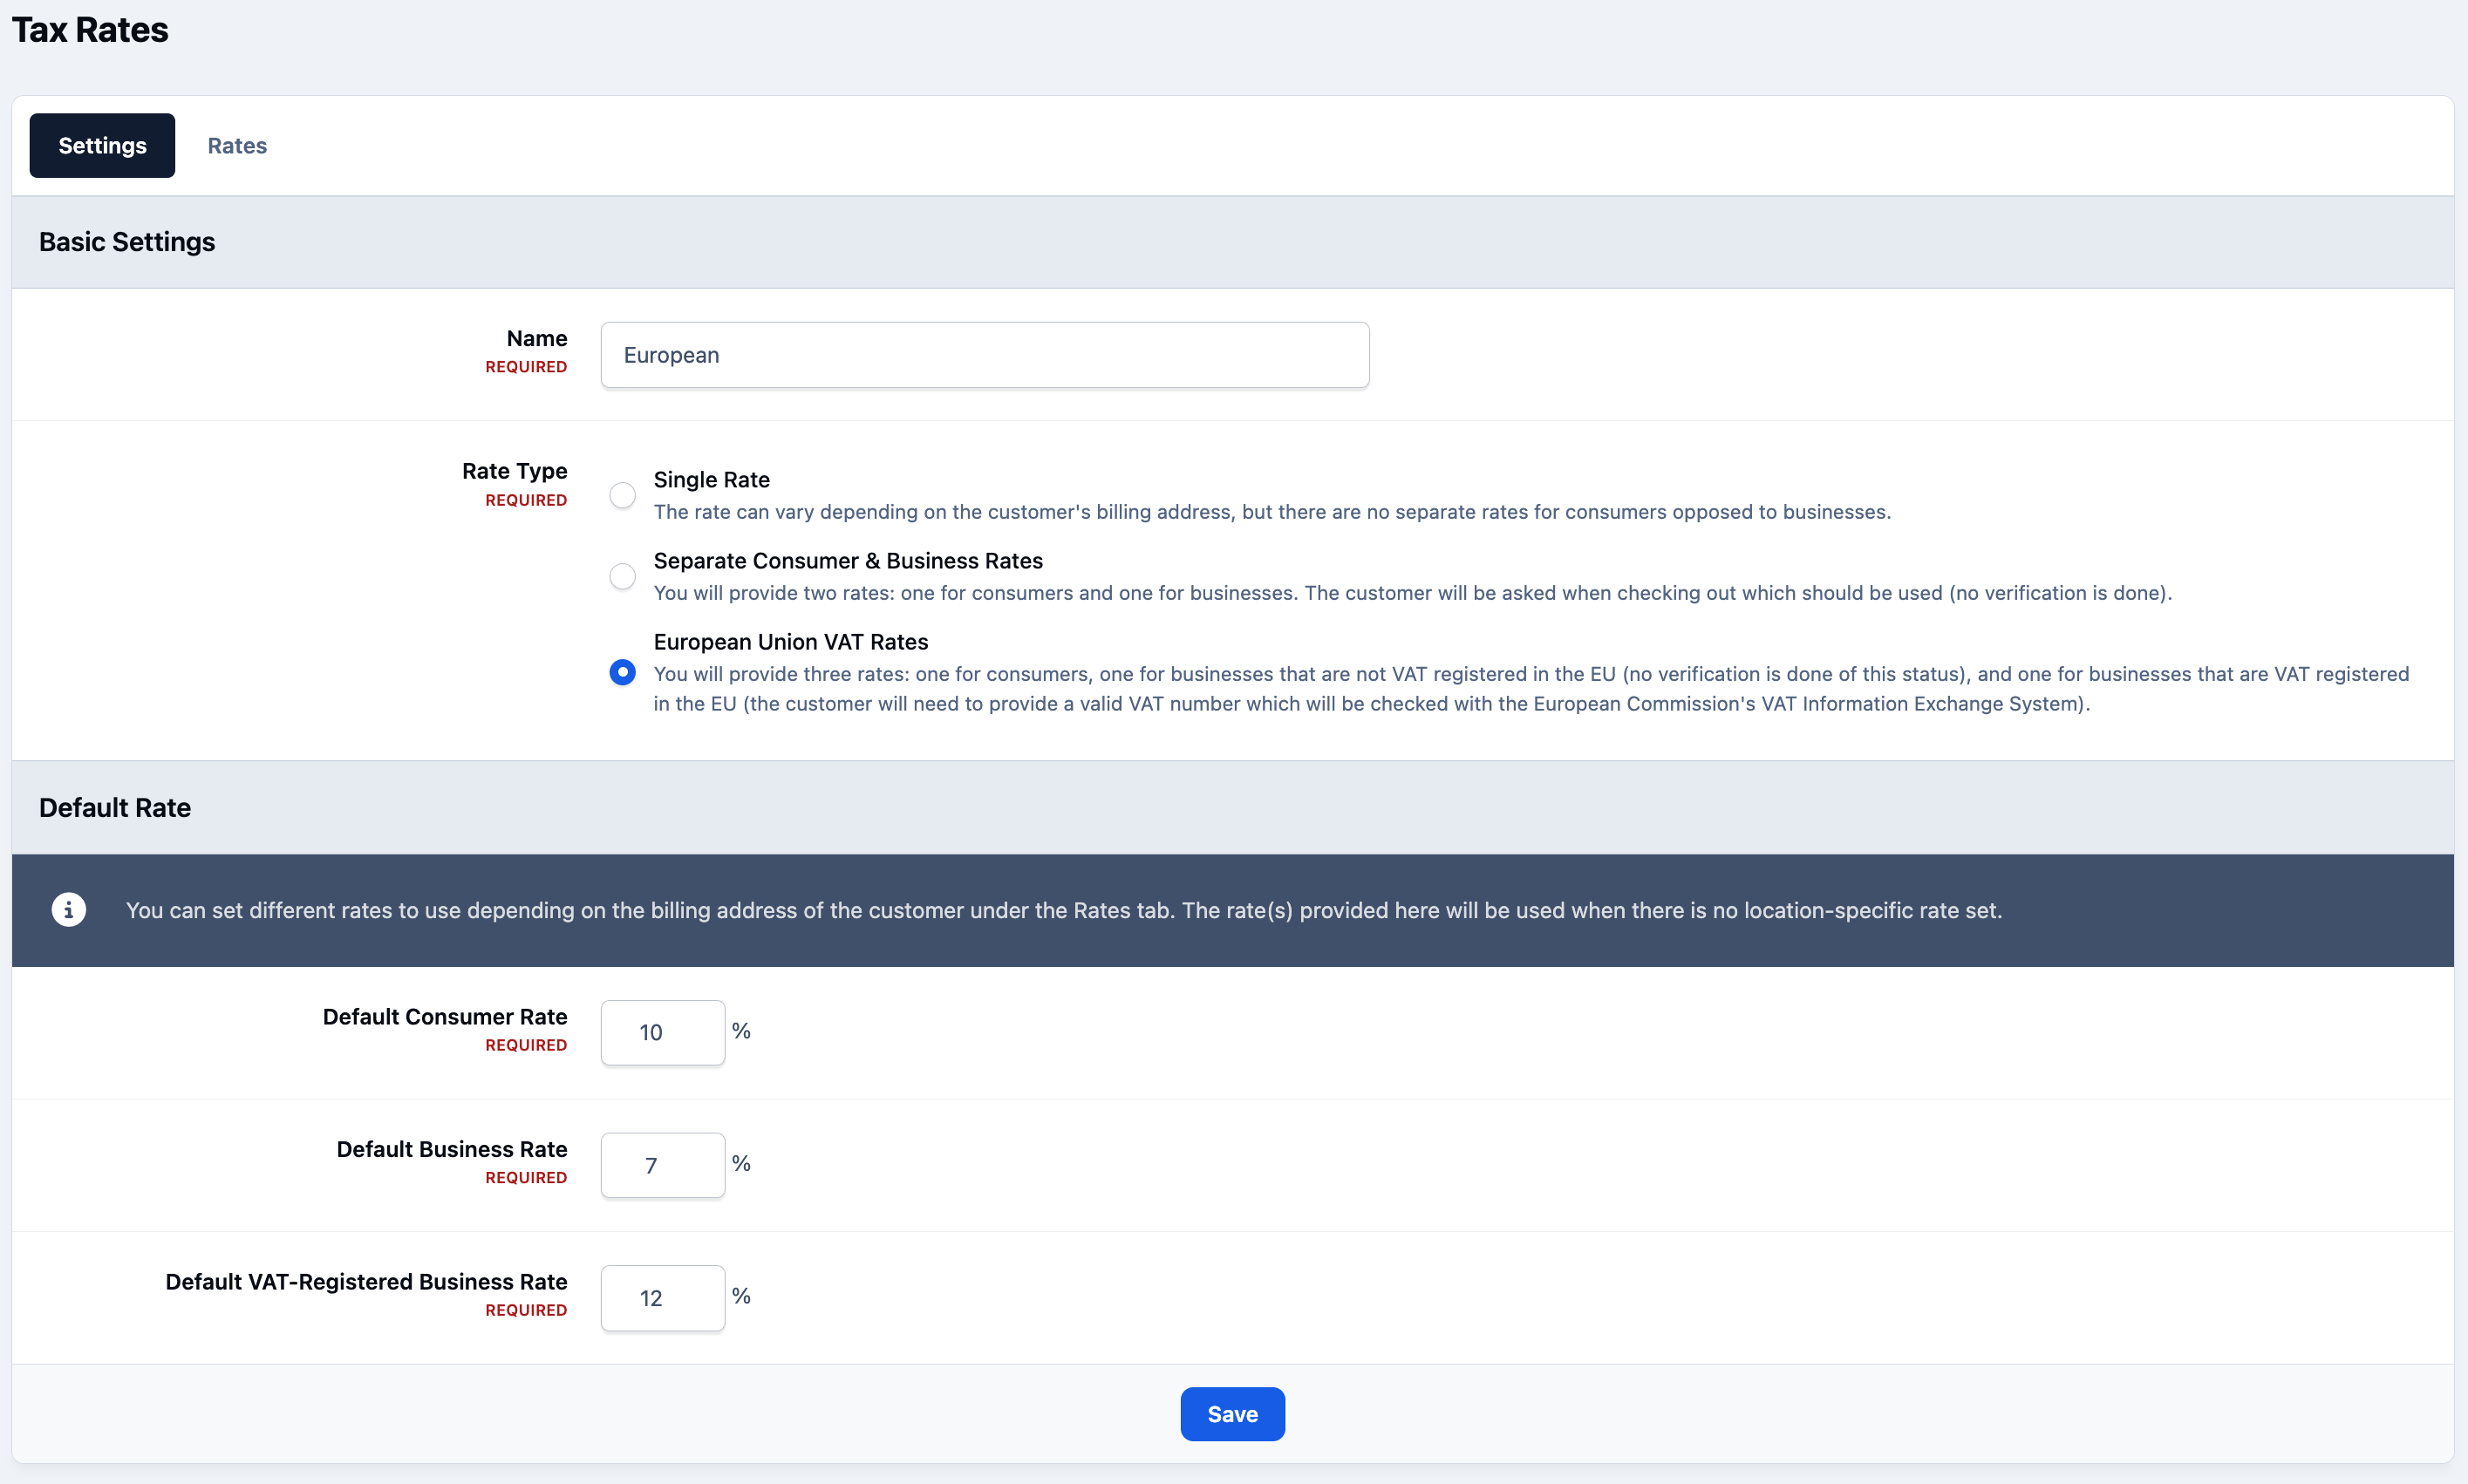
You can also configure different tax rates for business customers if required. In addition, the system supports EU-style VAT handling, including special rules for VAT-registered companies, allowing you to apply the correct tax treatment where applicable.
European Tax Rates
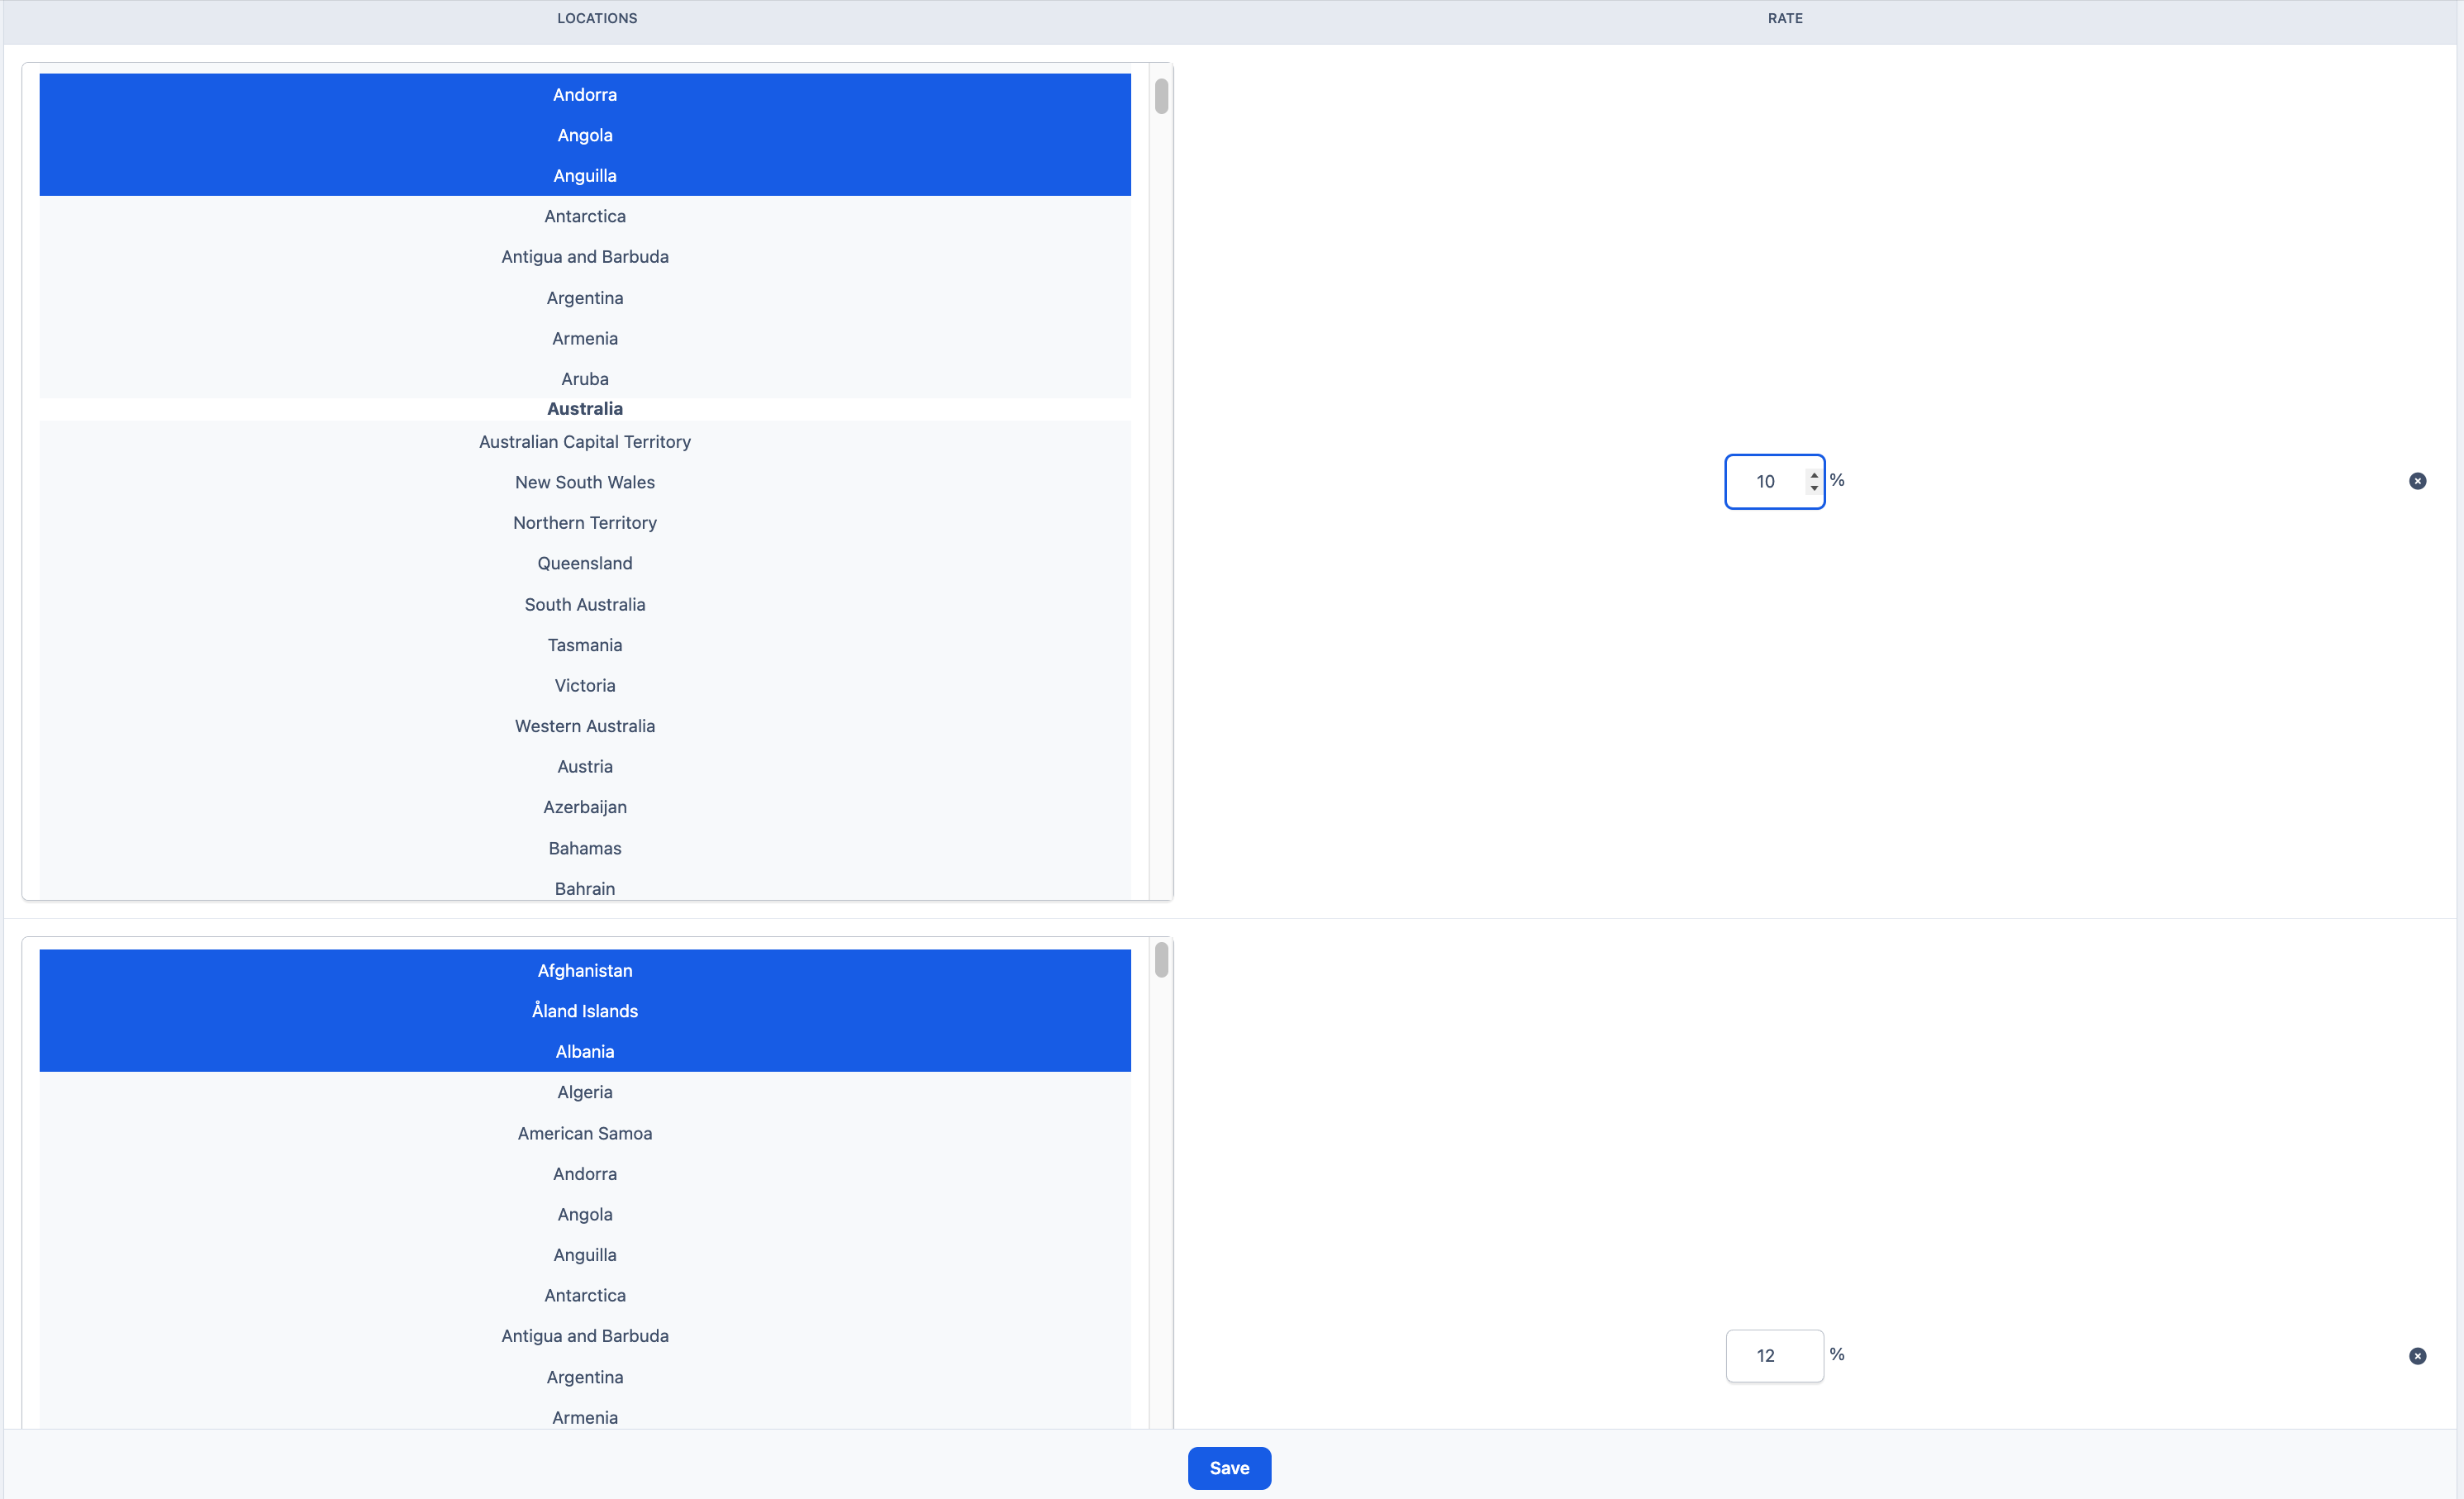
The Rates tab allows you to configure tax rates for different locations around the world. As shown in the example below.
You can add additional locations and corresponding tax rates at any time by selecting the Add button in the top-right corner.
Location Specific Tax
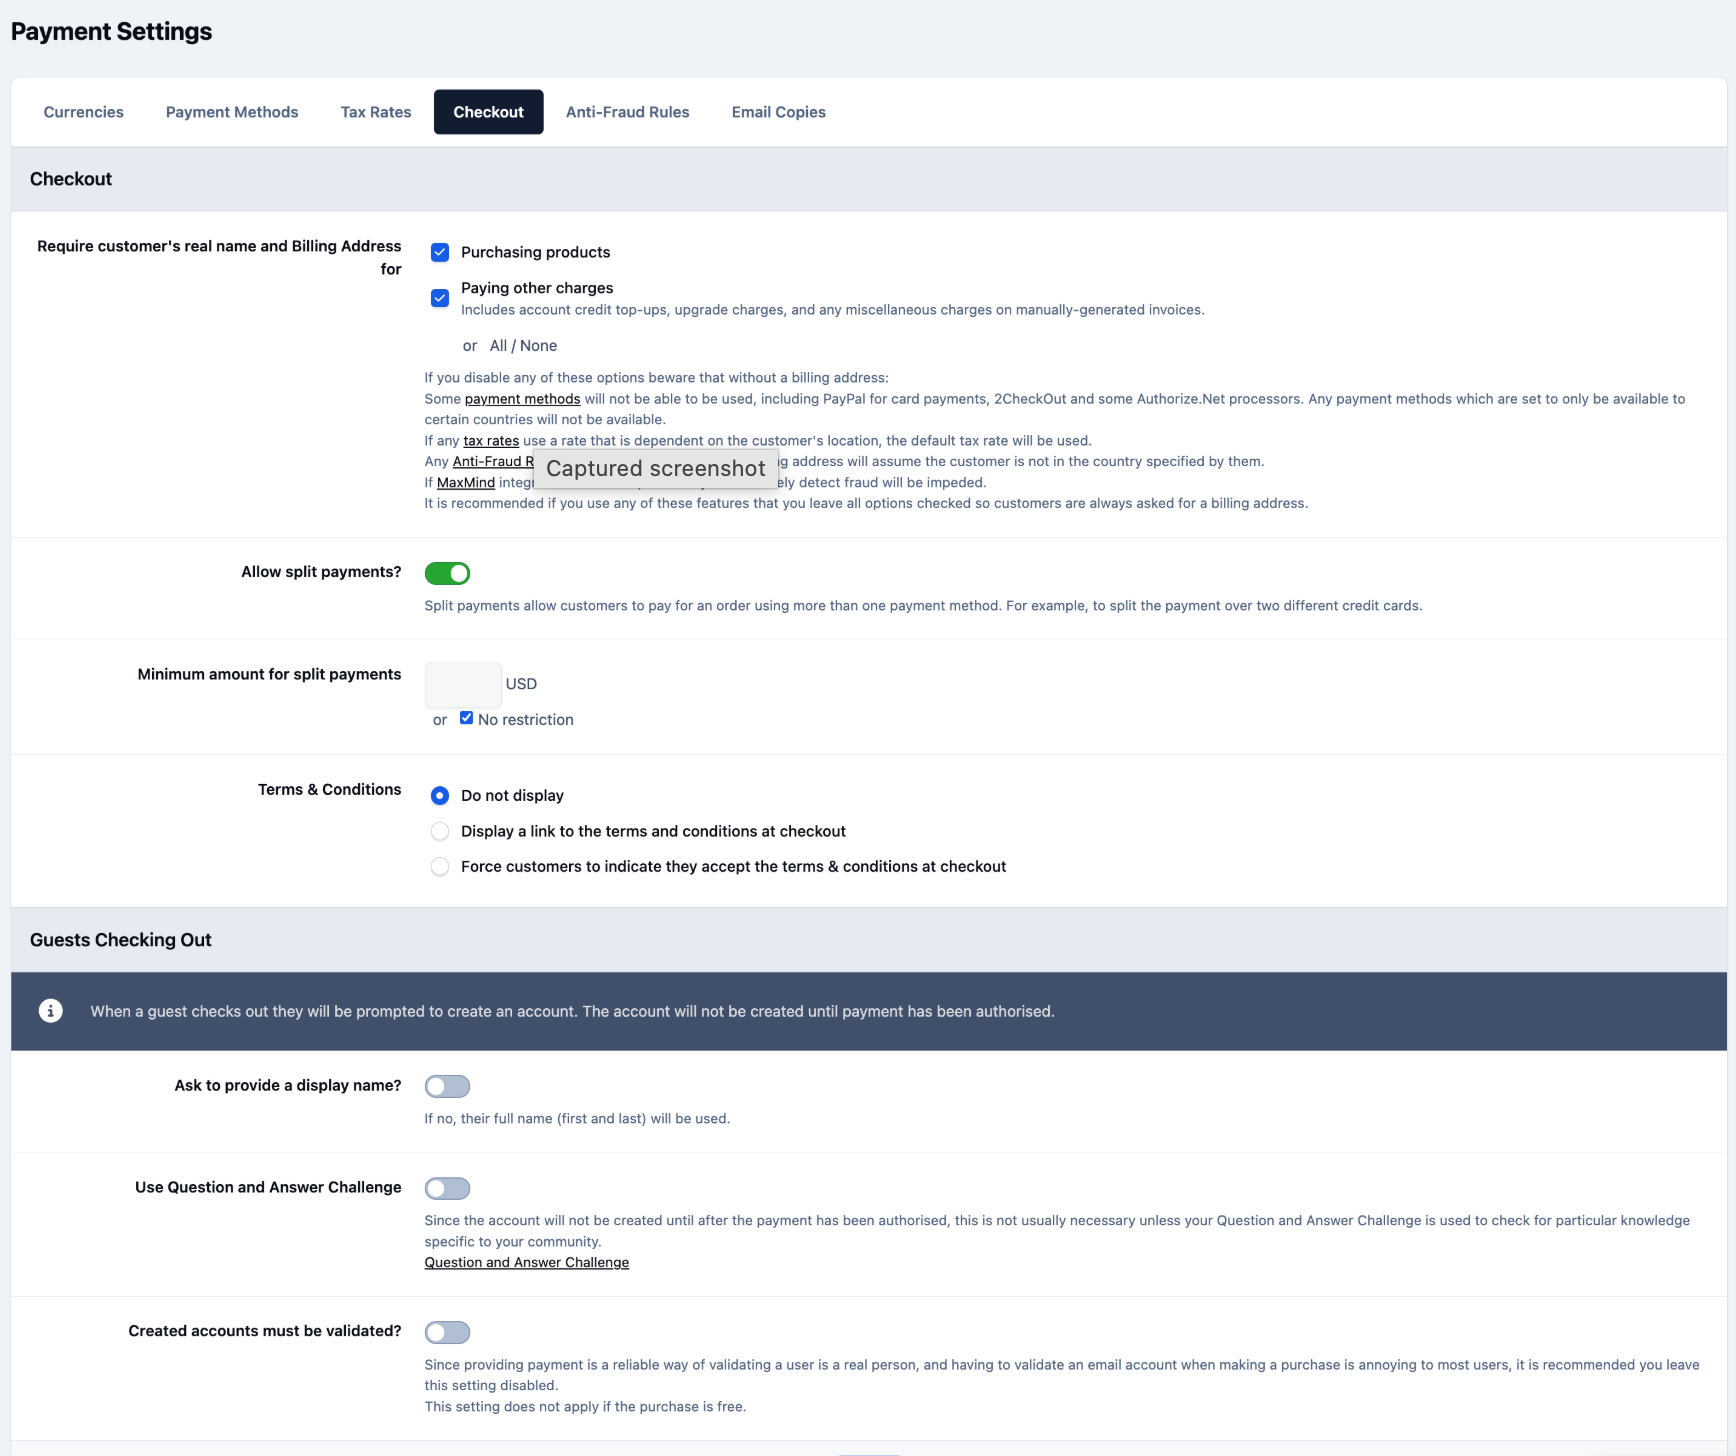
Checkout Settings
Within the Checkout tab, you can configure a variety of settings that control the customer checkout experience.
From here, you can decide whether guests are allowed to check out, configure your terms and conditions, enable a secure checkout connection, and adjust other options related to how purchases are completed on your site.
Example Checkout Setup
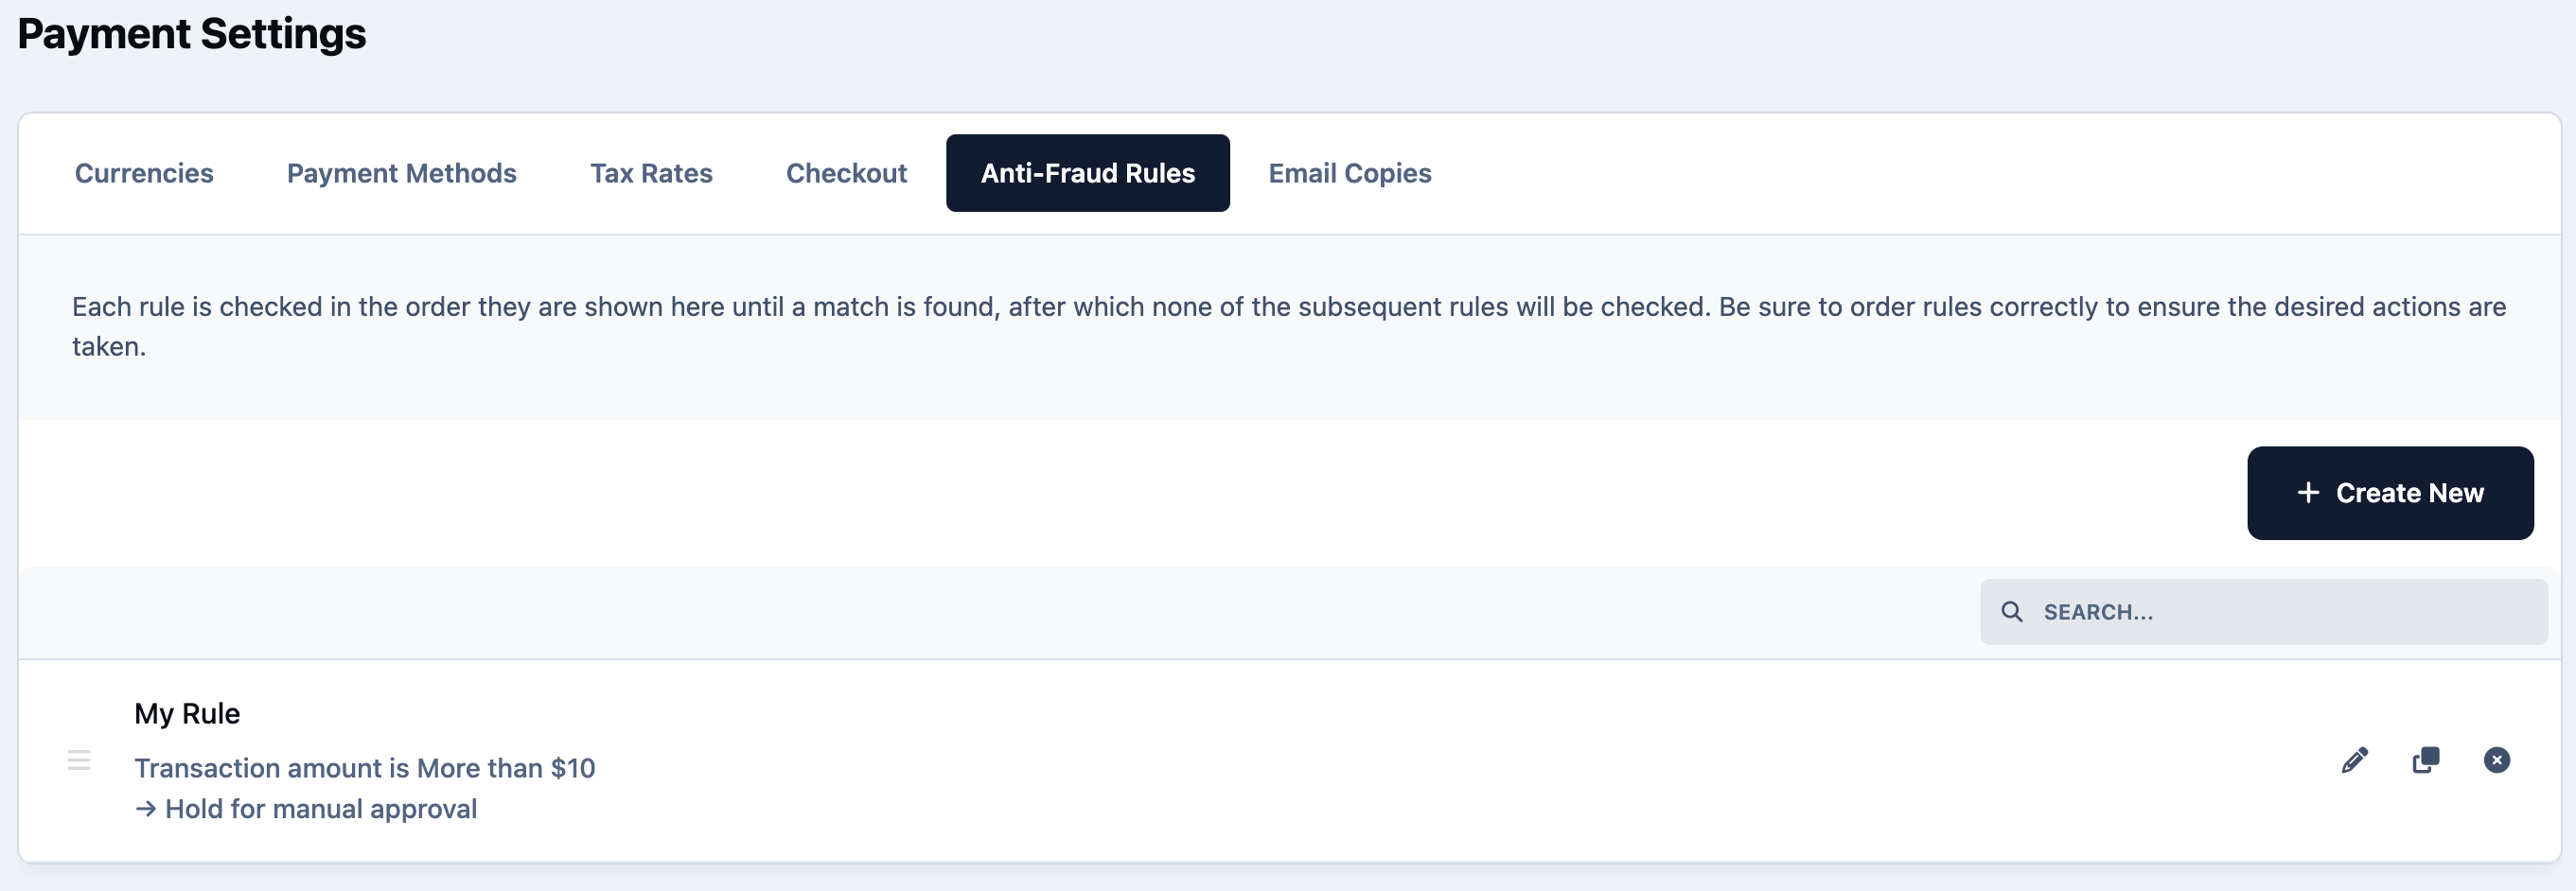
Anti-fraud Rules
The Anti-Fraud Rules tab allows you to define specific conditions under which a payment should be reviewed or automatically declined.
Any existing rules will be displayed in a list on this page, and you can create a new rule at any time by selecting the 'Create New' button.
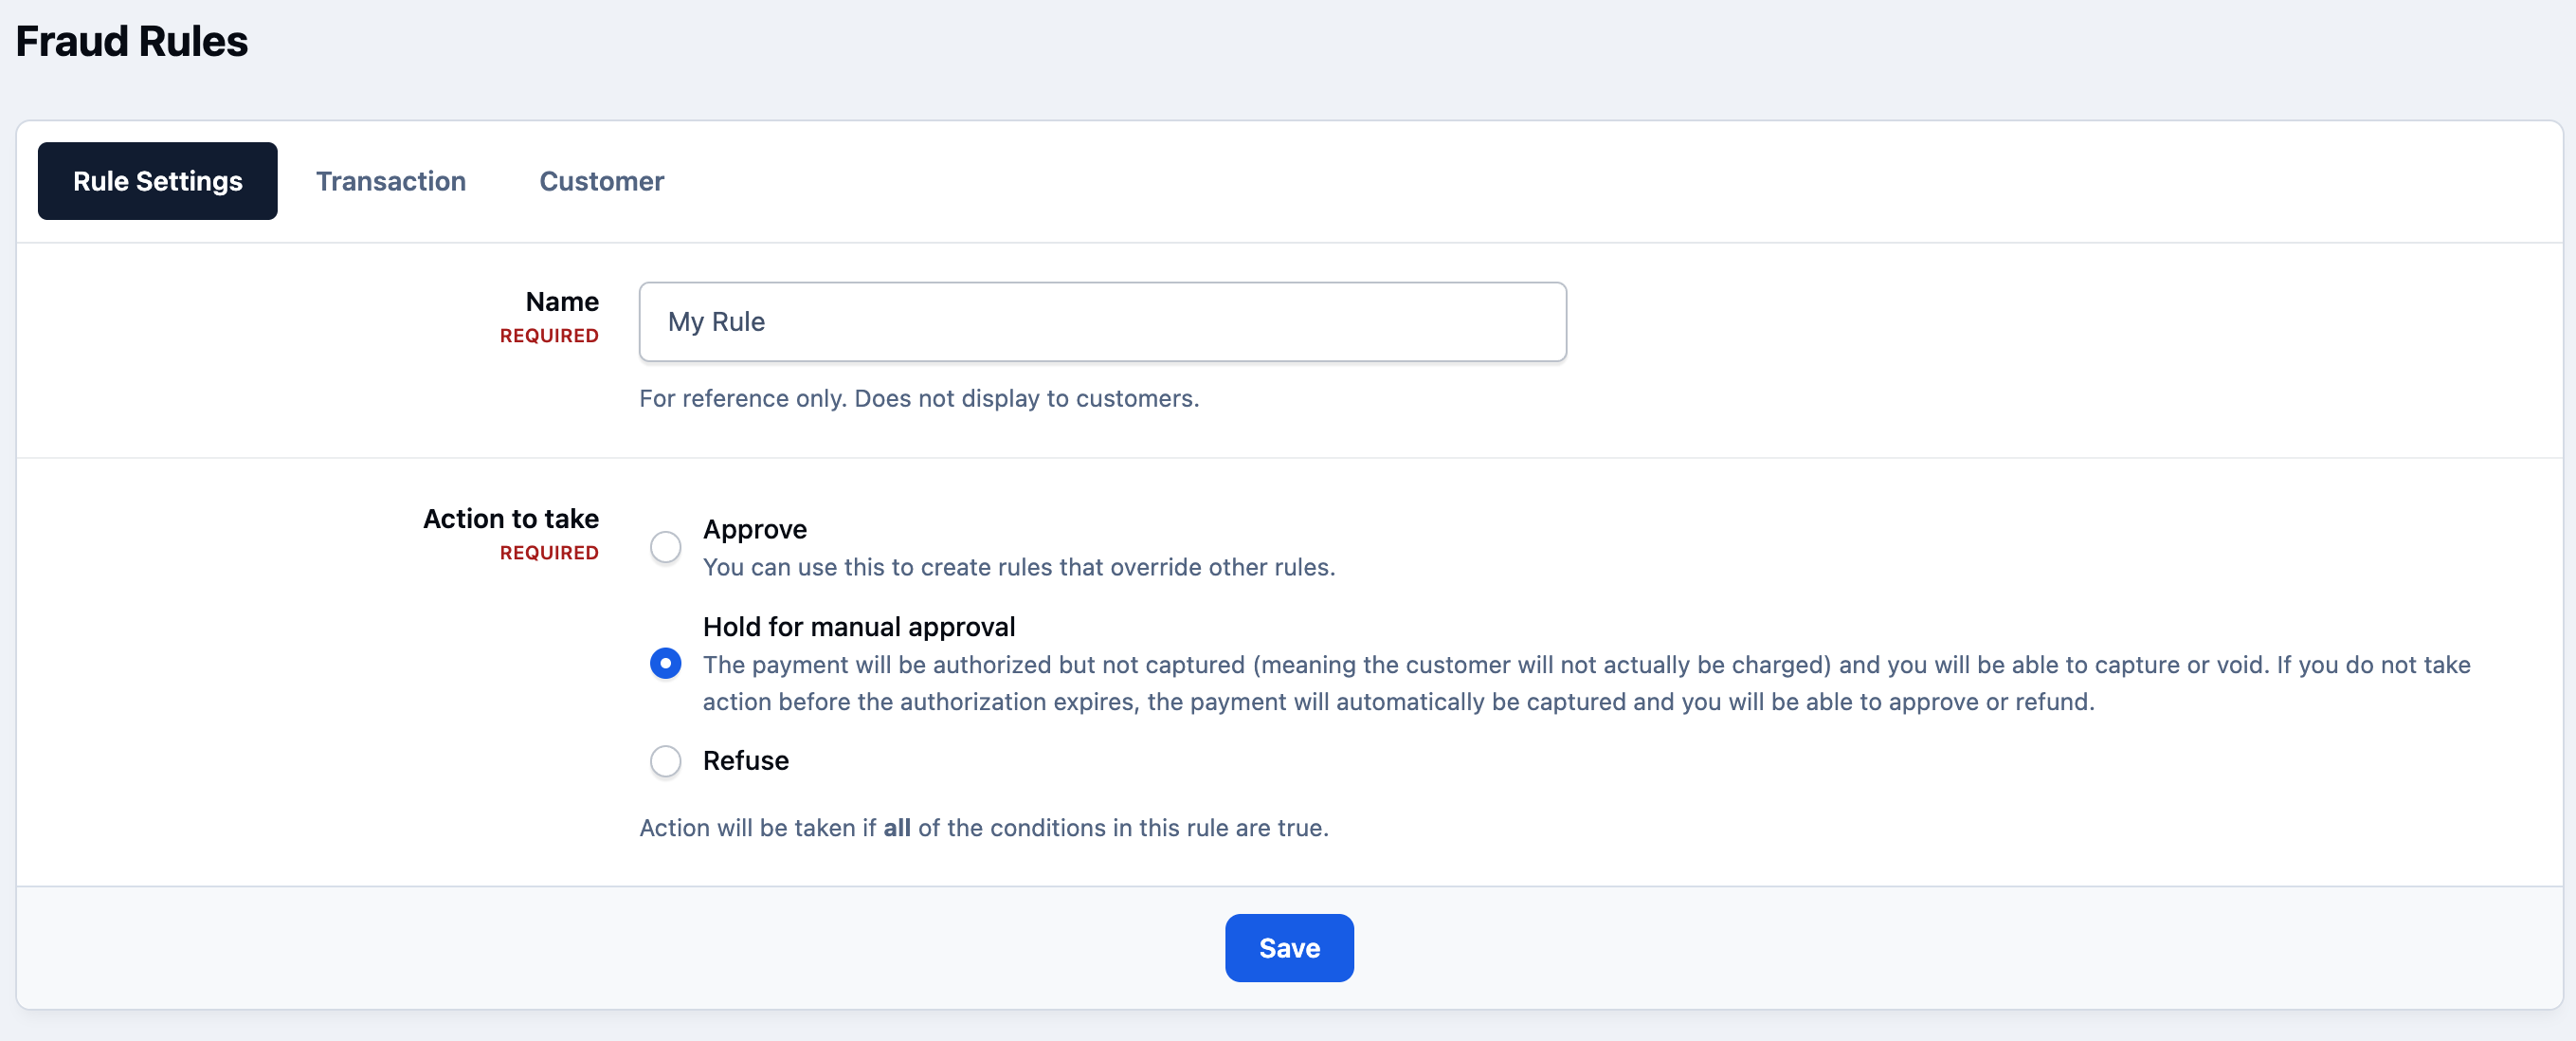
When creating a new fraud rule, the first tab (Rule Settings) is where you define the name of the rule and specify the action to take if the rule is triggered.
You can choose whether the transaction should be automatically approved, placed on hold for manual review, or declined altogether.
New Fraud Rule
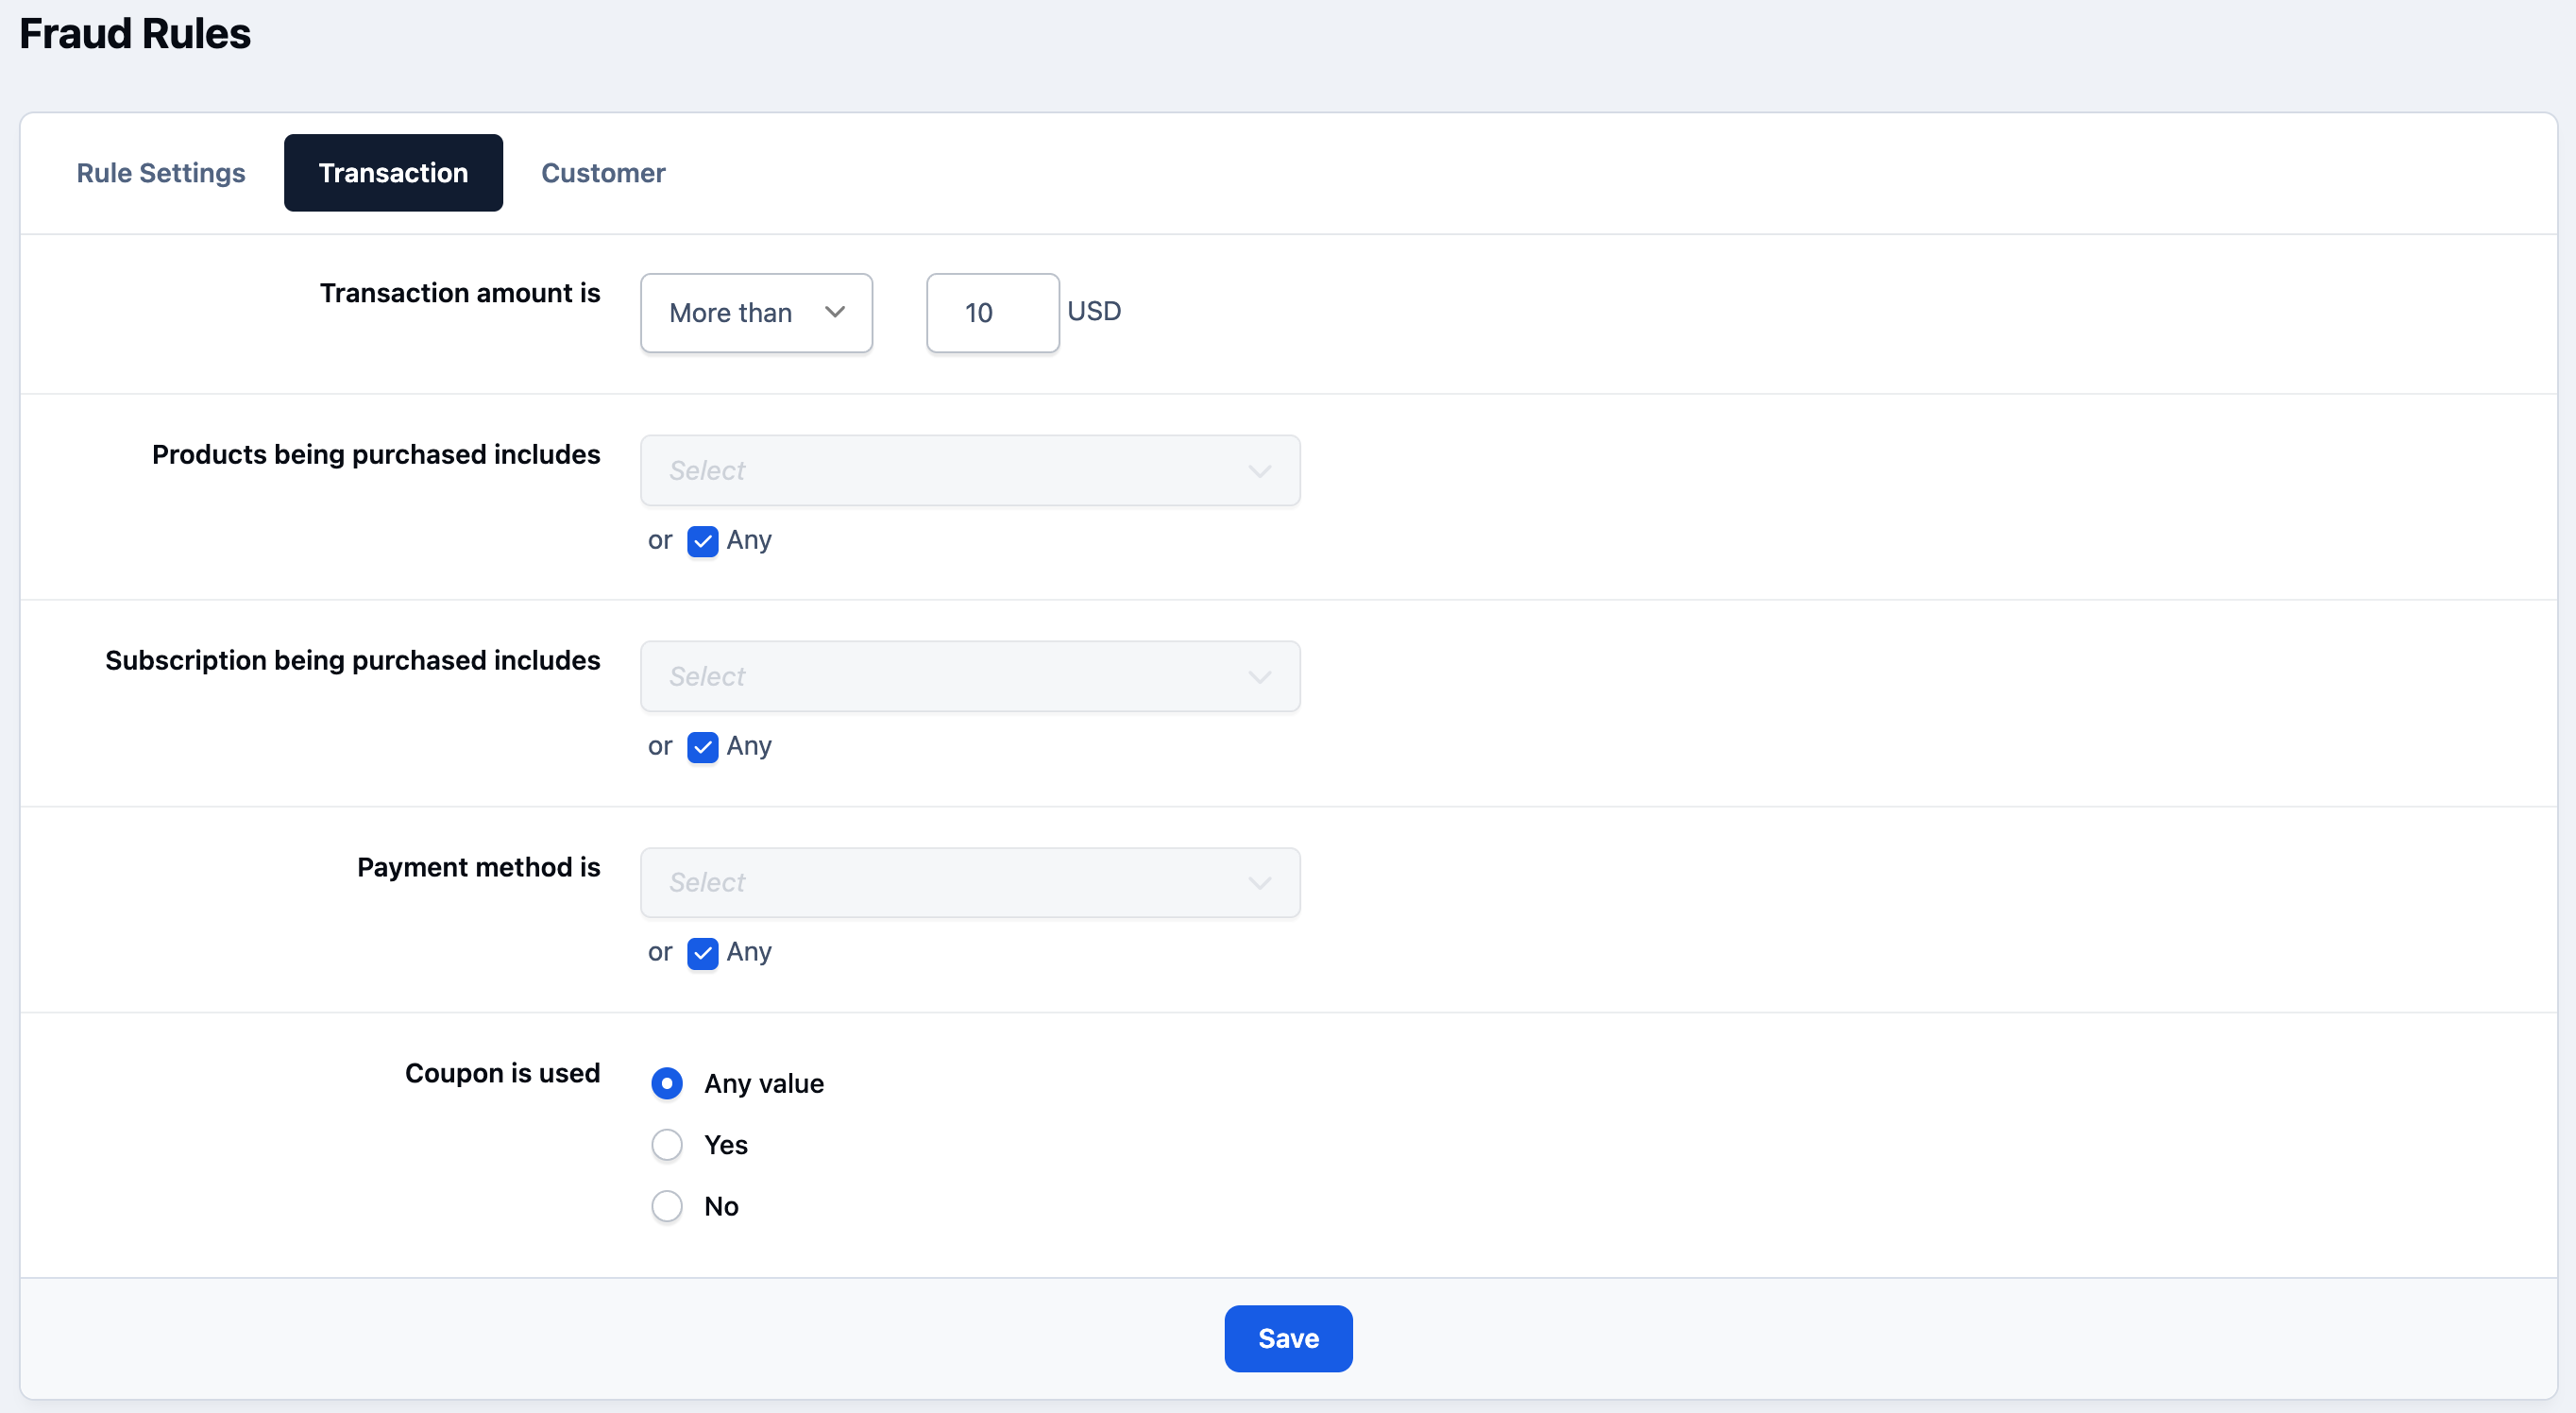
The remaining two tabs allow you to define the criteria that will trigger the fraud rule.
Within the Transaction tab, you can set conditions based on factors such as transaction value, payment method used, whether a coupon was applied, or any combination of these criteria.
Transaction Type Rules
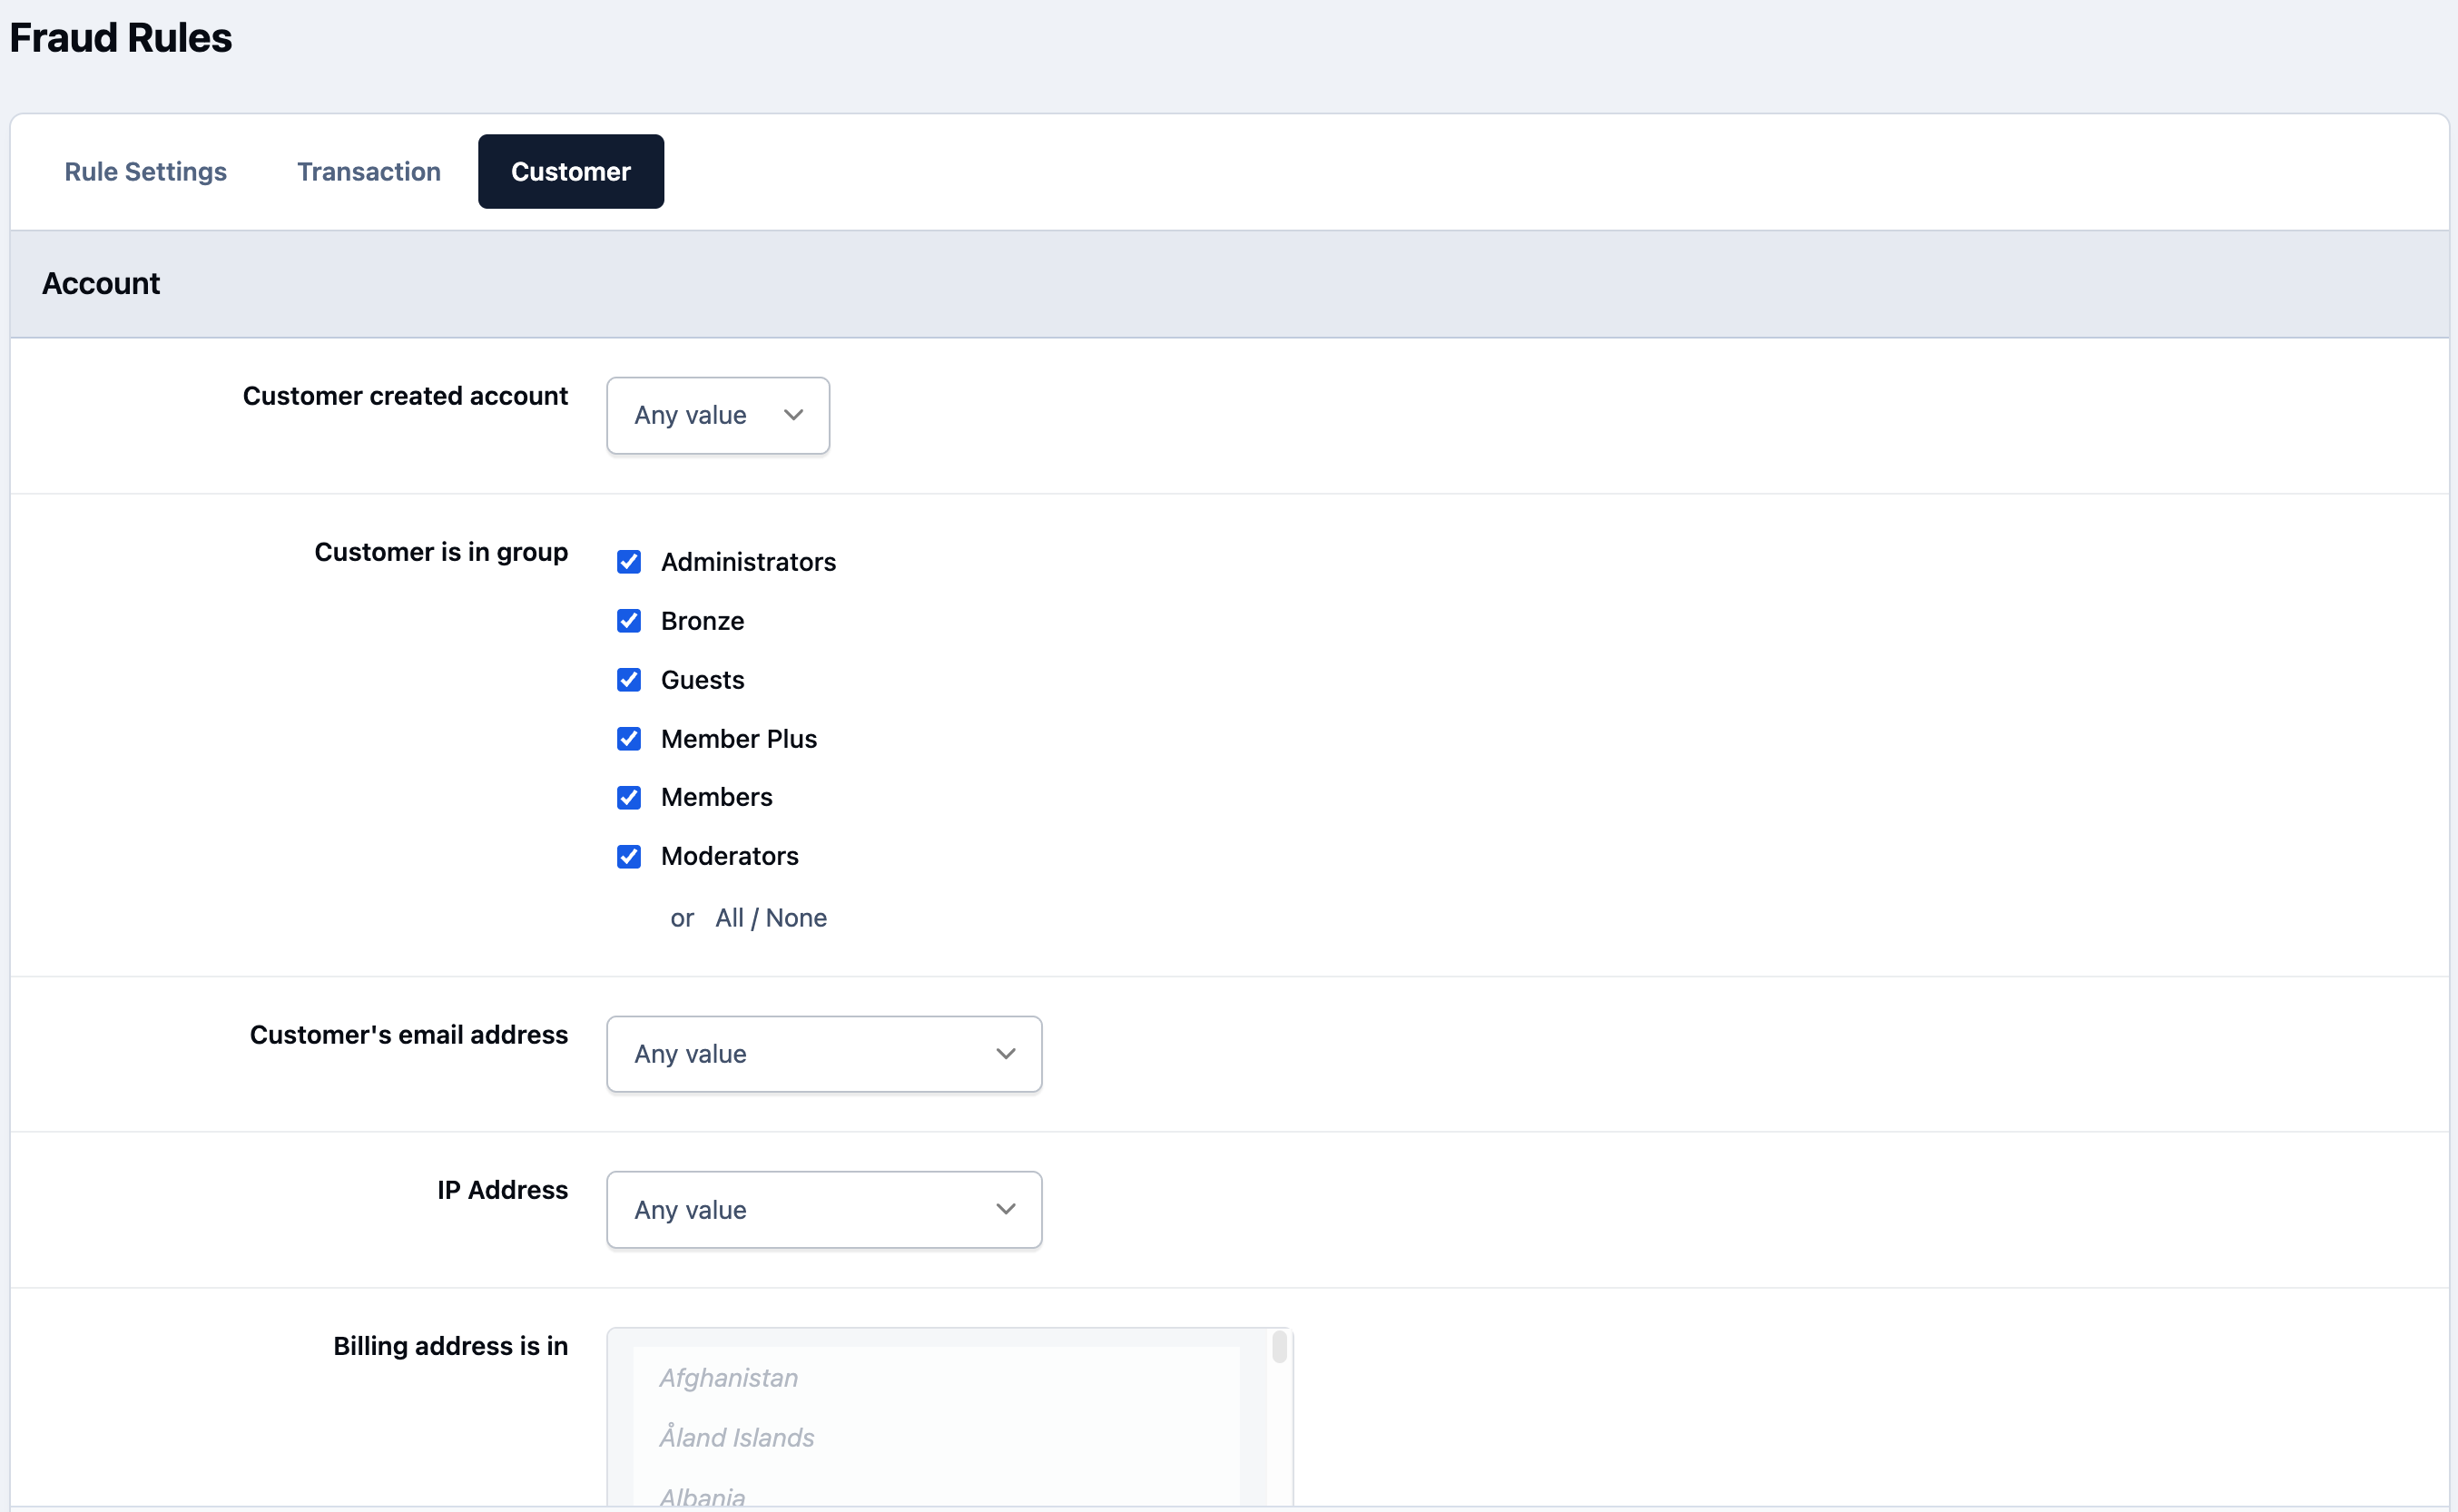
The Customer tab allows you to define rules based on customer-related criteria. This can include their geographic location, email address, or their transaction history — such as previous purchases or prior fraud rule triggers.
Fraud Rules per Customer
Email Copies
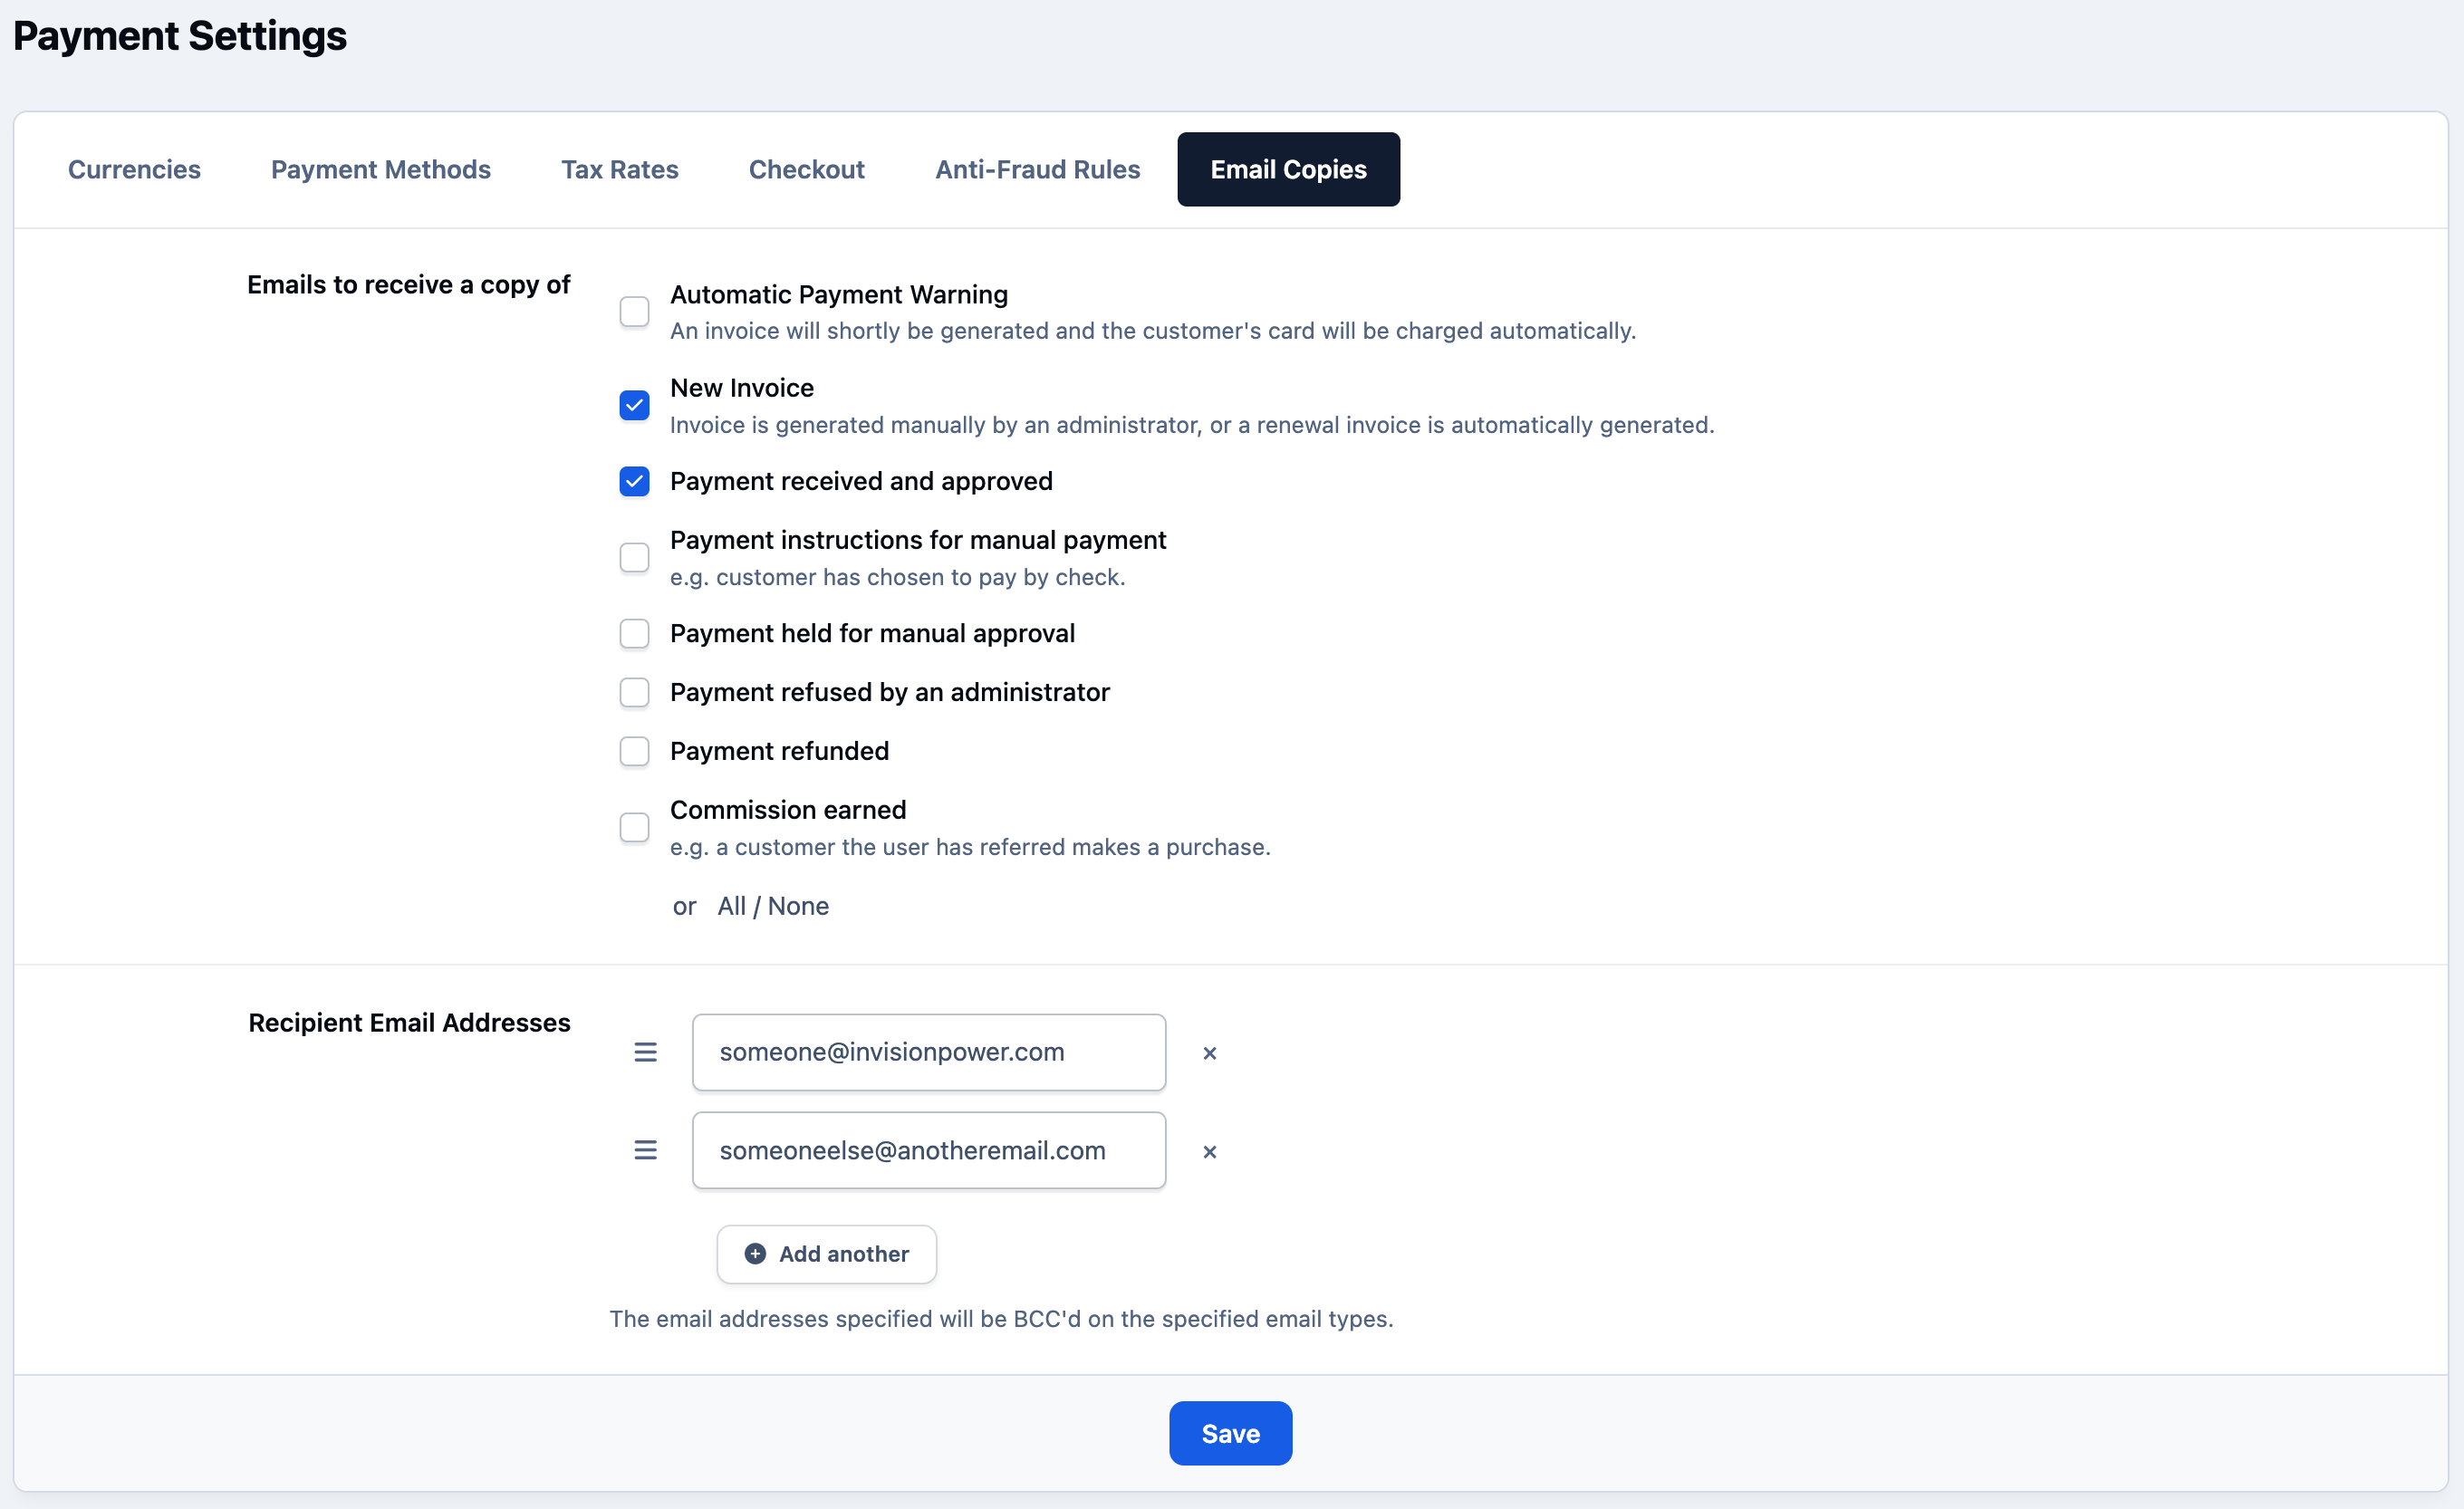
The Email Copies tab allows you to configure additional email addresses that should receive copies of specific Commerce-related communications when they are sent to customers.
This can be particularly useful for internal processes, such as keeping your accounts team informed of new invoices, or maintaining shared records for compliance and auditing purposes. Rather than forwarding emails manually, the system can automatically send copies of selected documents, such as invoices, receipts, or order confirmations, to the designated addresses.
This ensures important transactional information is distributed to the right people within your organization without requiring any additional steps after a purchase is made.
Email Copies for Invoices and Payments
Recommended Comments