


The warning system allows you to formally warn members for unwanted behavior and apply consequences either automatically through predefined rules or manually by moderators. This helps ensure moderation is consistent, transparent, and scalable as your community grows.
The Warning System
The warning system consists of three main areas: Reasons, Actions, and Settings. These are managed from the following location in the Admin CP
Members → Content Moderation → Warnings
Each section is outlined in detail below.
Reasons
When you first enter the warnings area, you’ll be shown the Reasons tab. This contains a list of all predefined reasons that moderators can select when issuing a warning.
Reason List in Admin Cp
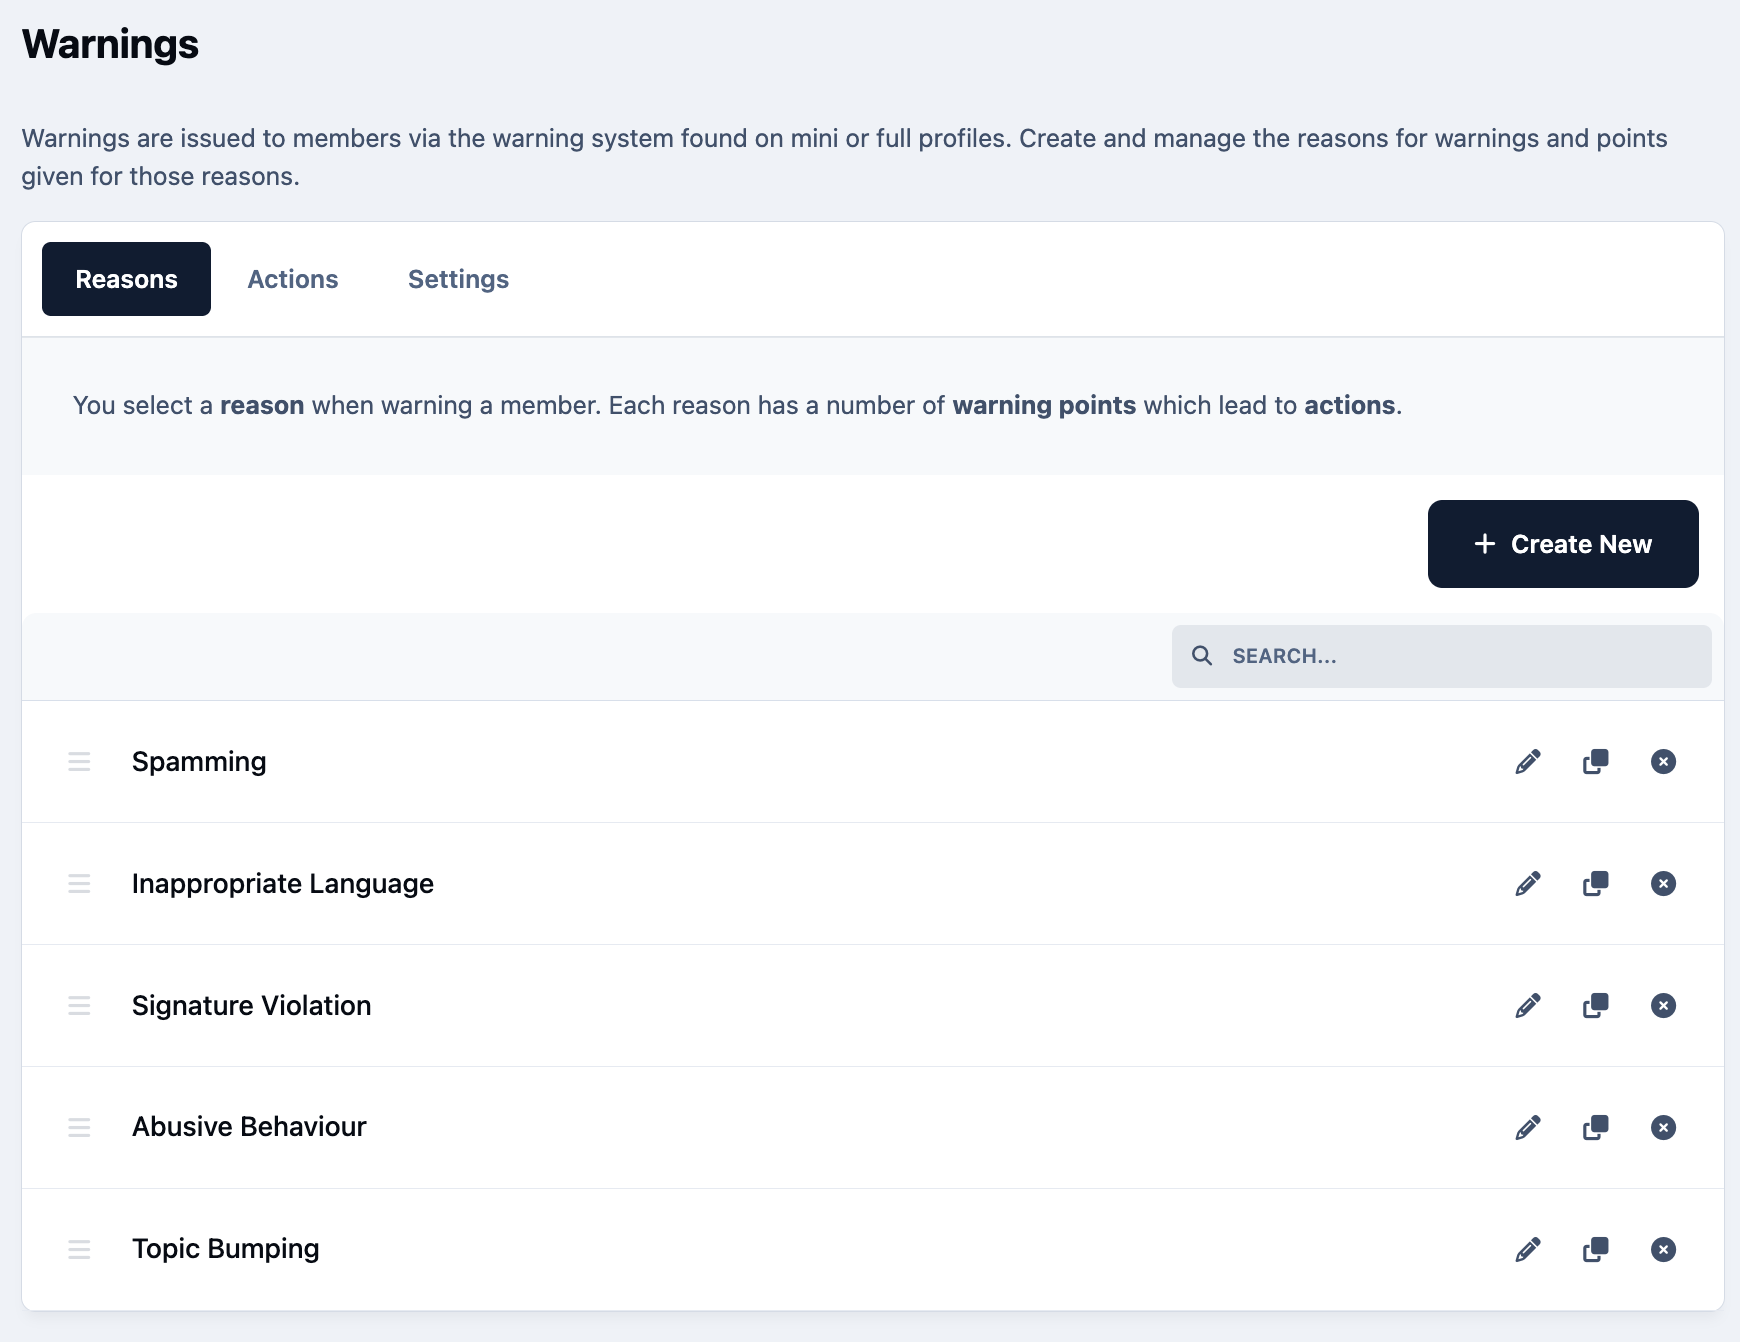
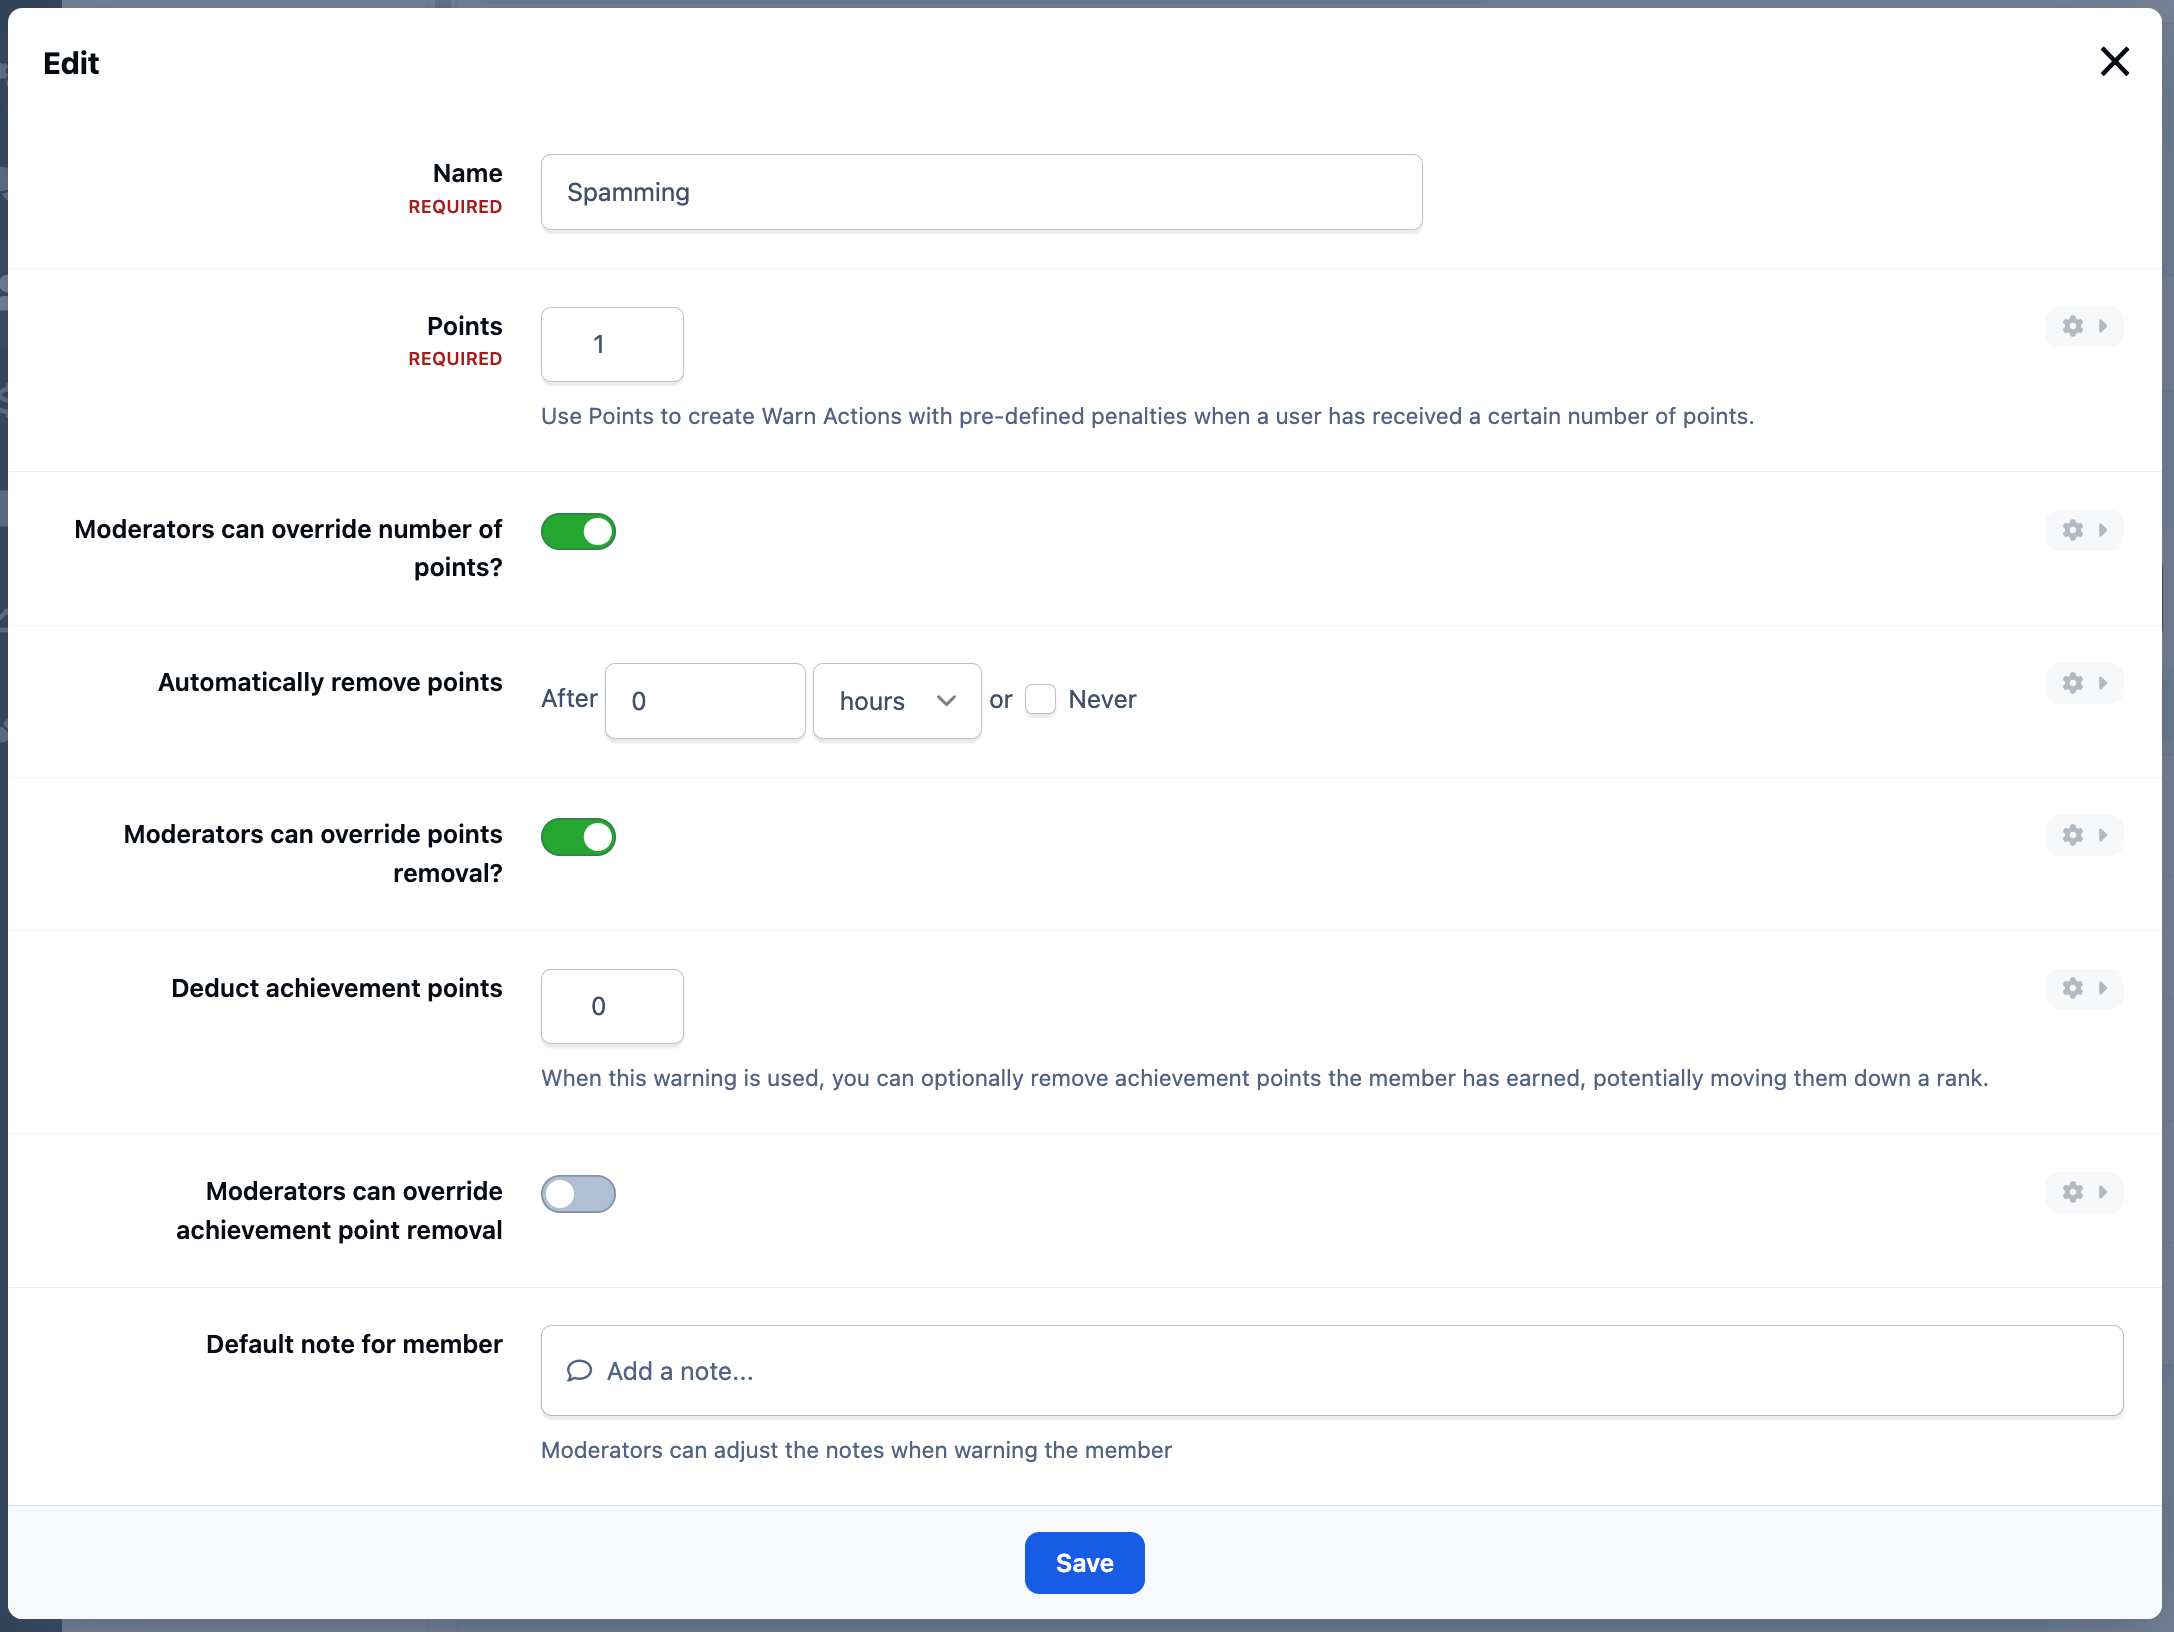
Each reason defines:
The reason name (e.g. Spam, Abusive Language)
The number of warning points assigned
Whether the warning points expire, and after how long
Whether or not achievment points are also deducted
Moderator override abilities
Notes which are automatically filled in for a member
You can create a new reason using the Create New button in the top-right corner, or edit an existing reason using the pencil icon next to it.
Editing an Existing Reason
From the Experts
You can also copy or delete existing reasons using the icons beside each entry, which is useful when creating variations of similar rules.
Actions
Actions work alongside warning reasons and define what happens when a member reaches a certain number of warning points.
These are managed from the Actions tab and allow you to automatically apply restrictions such as:
Moderating a member’s content
Preventing posting or messaging
Temporarily banning the member
Applying permanent restrictions
List of Existing Actions
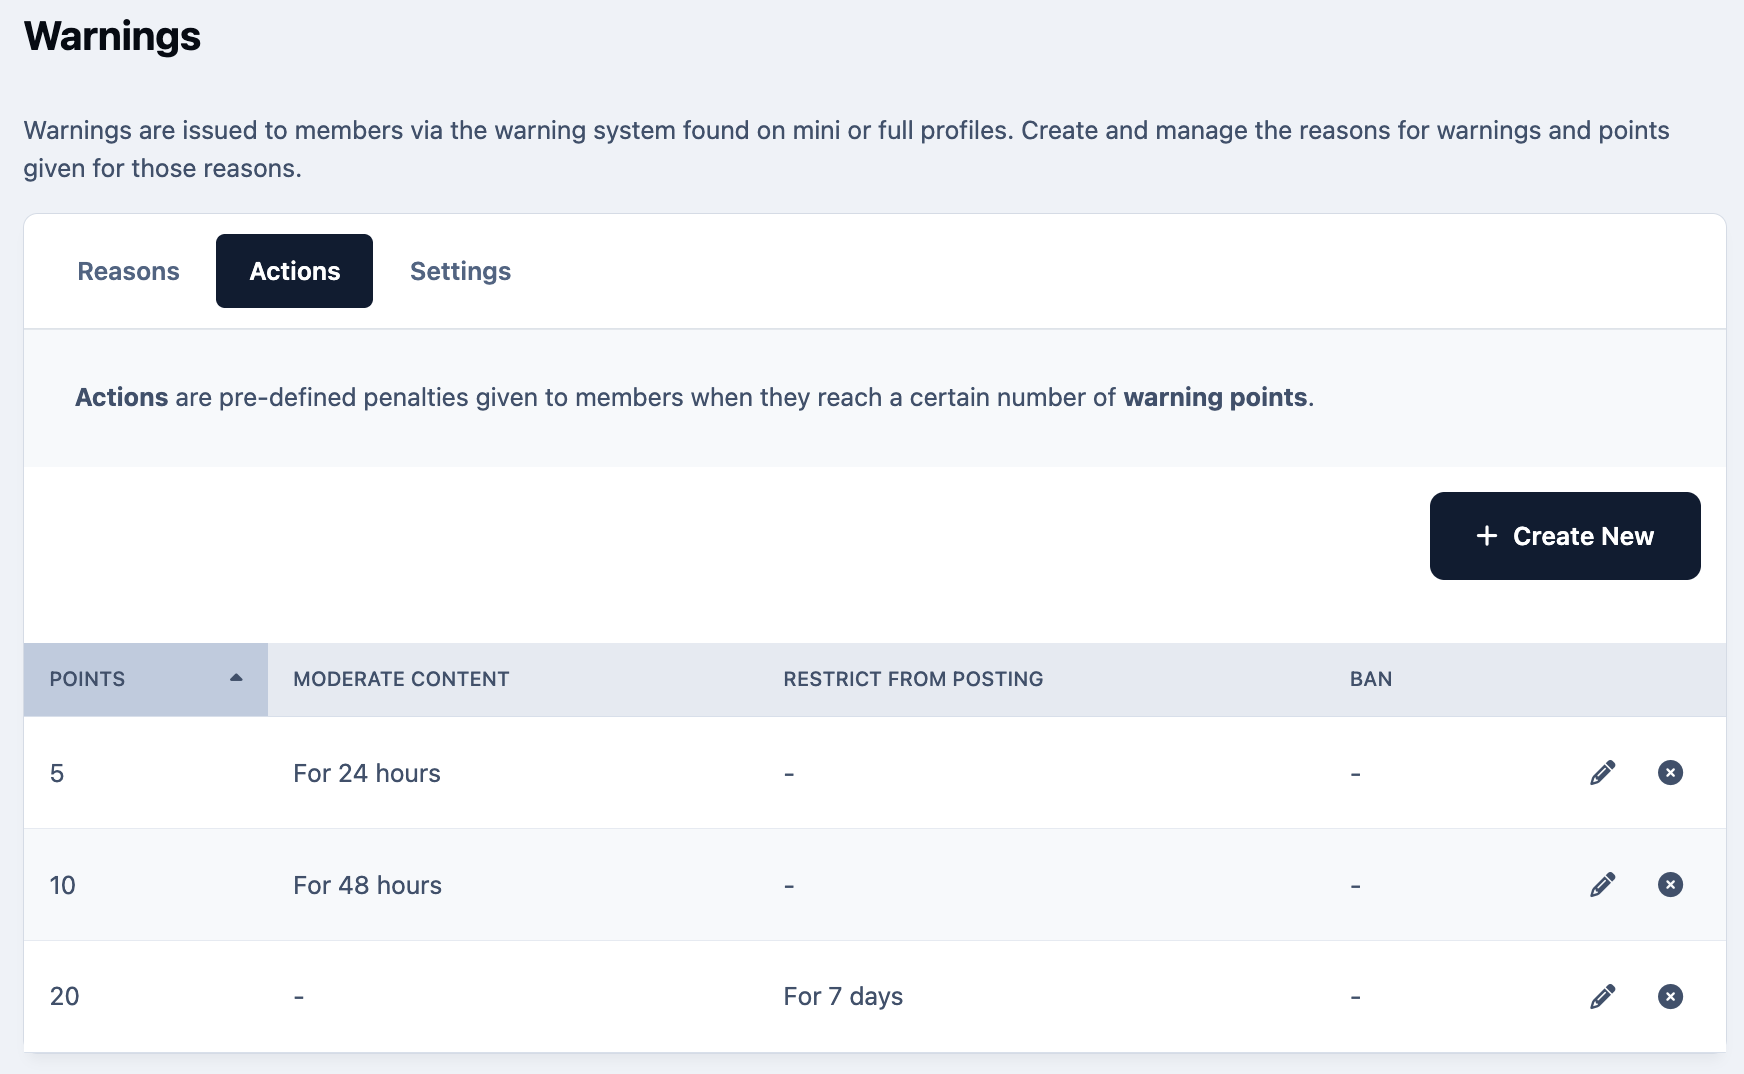
For example, you might configure an action that places a member’s content into moderation for 1 day once they reach 10 warning points.
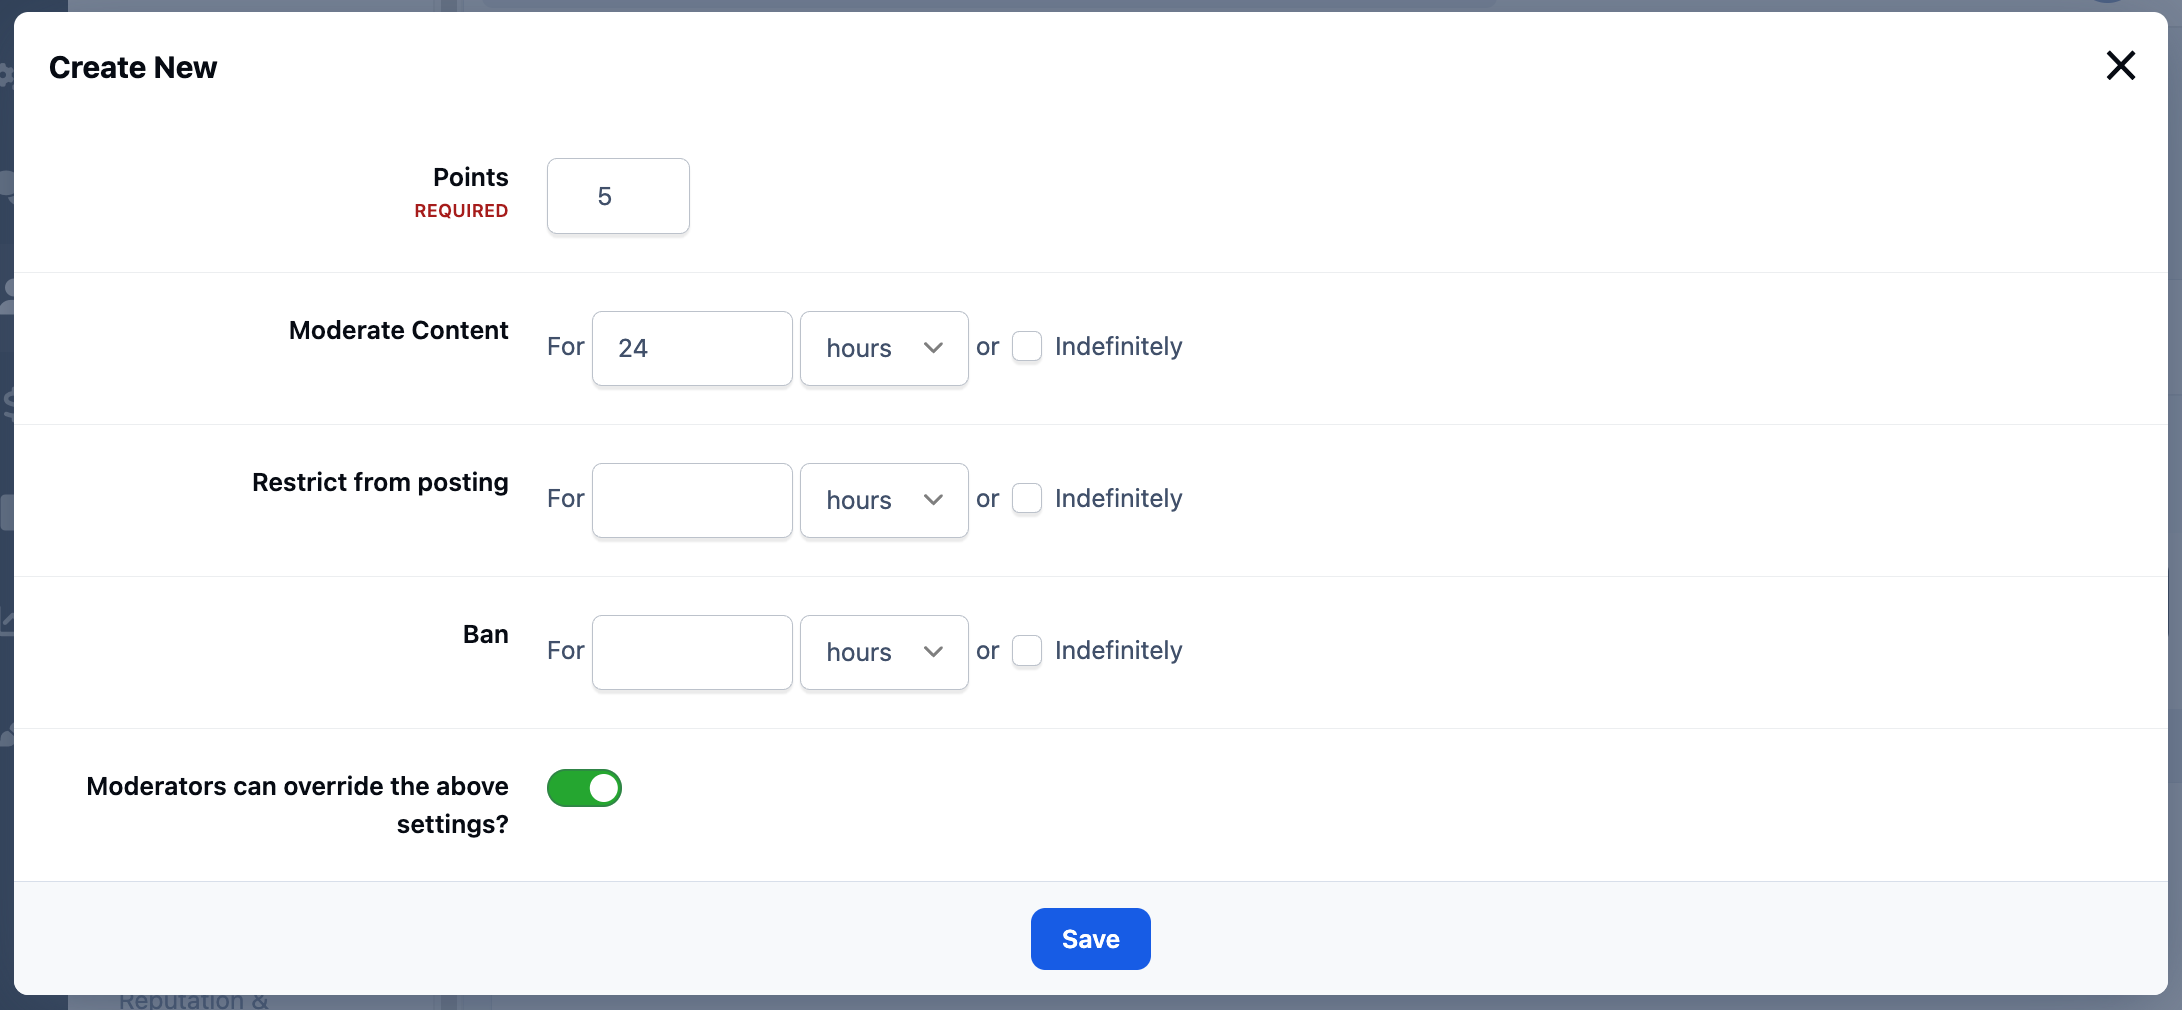
When creating or editing an action, you can also choose whether moderators are allowed to override the automatic action when issuing a warning.
Creating a New Action
Warning Settings
The Settings tab controls the overall behavior of the warning system. From here you can:
Enable or disable the warning system entirely
Exclude specific member groups from receiving warnings
Control whether members can see their own warning points and reasons
Control whether members must acknowledge warnings before continuing to use the site
Warning Settings
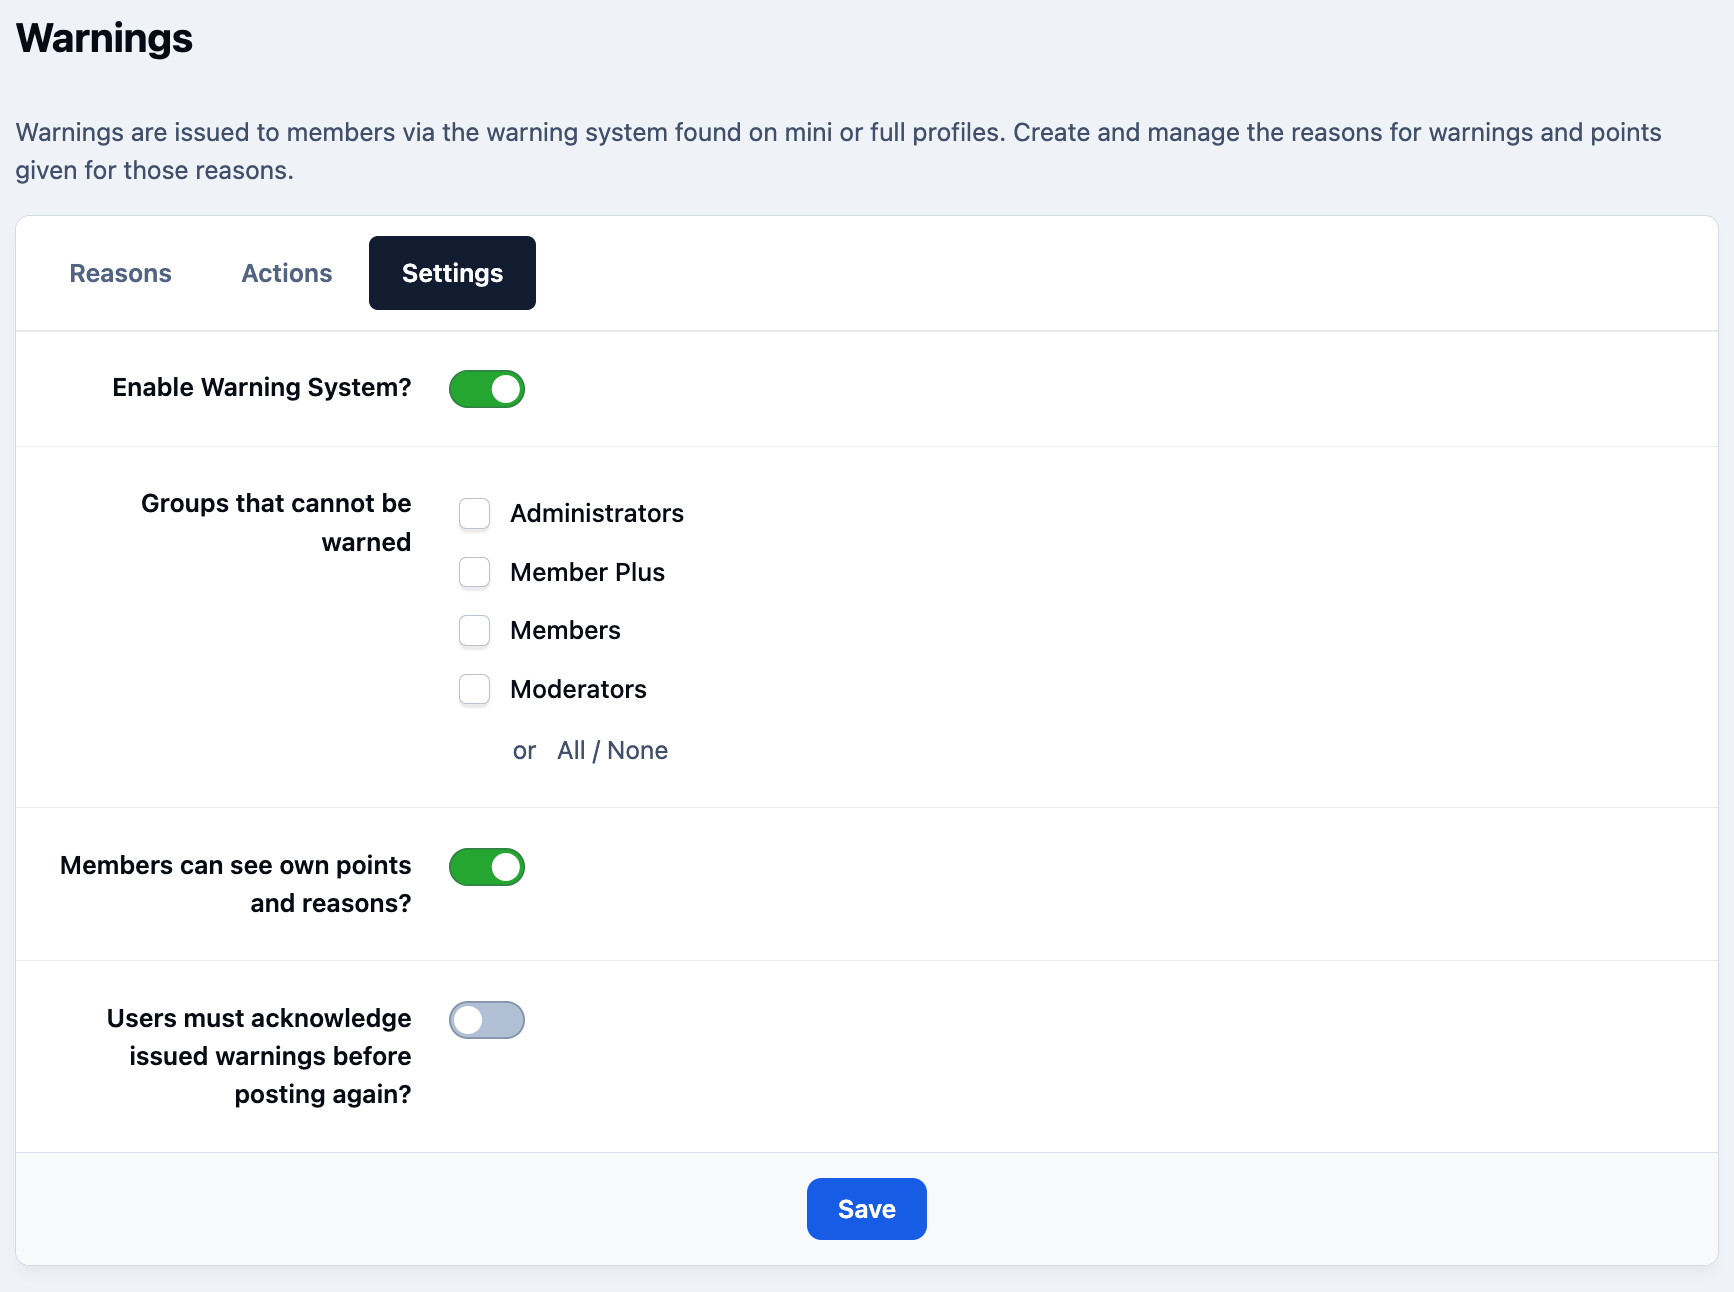
The 'User must acknowledge' option is particularly important and is explained further below.
Issuing Warnings
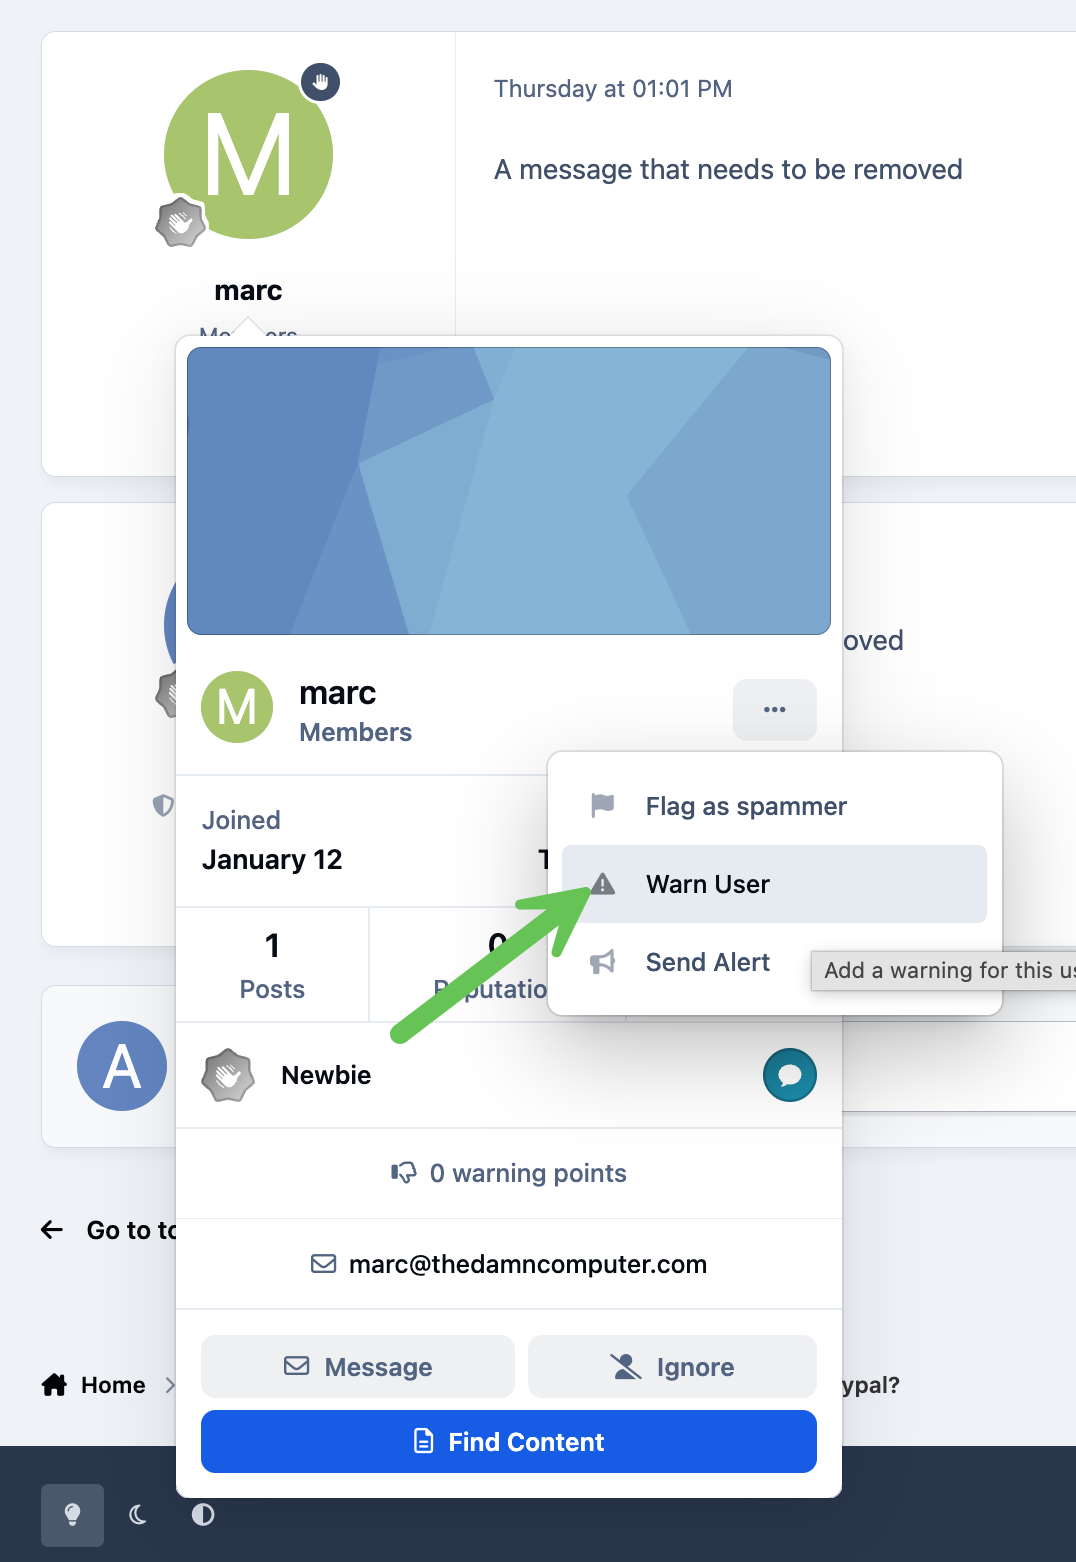
Warnings can be issued directly from a member’s profile, either:
From the mini-profile (member card), or
From the full profile view
Warning a Member from the Member Card
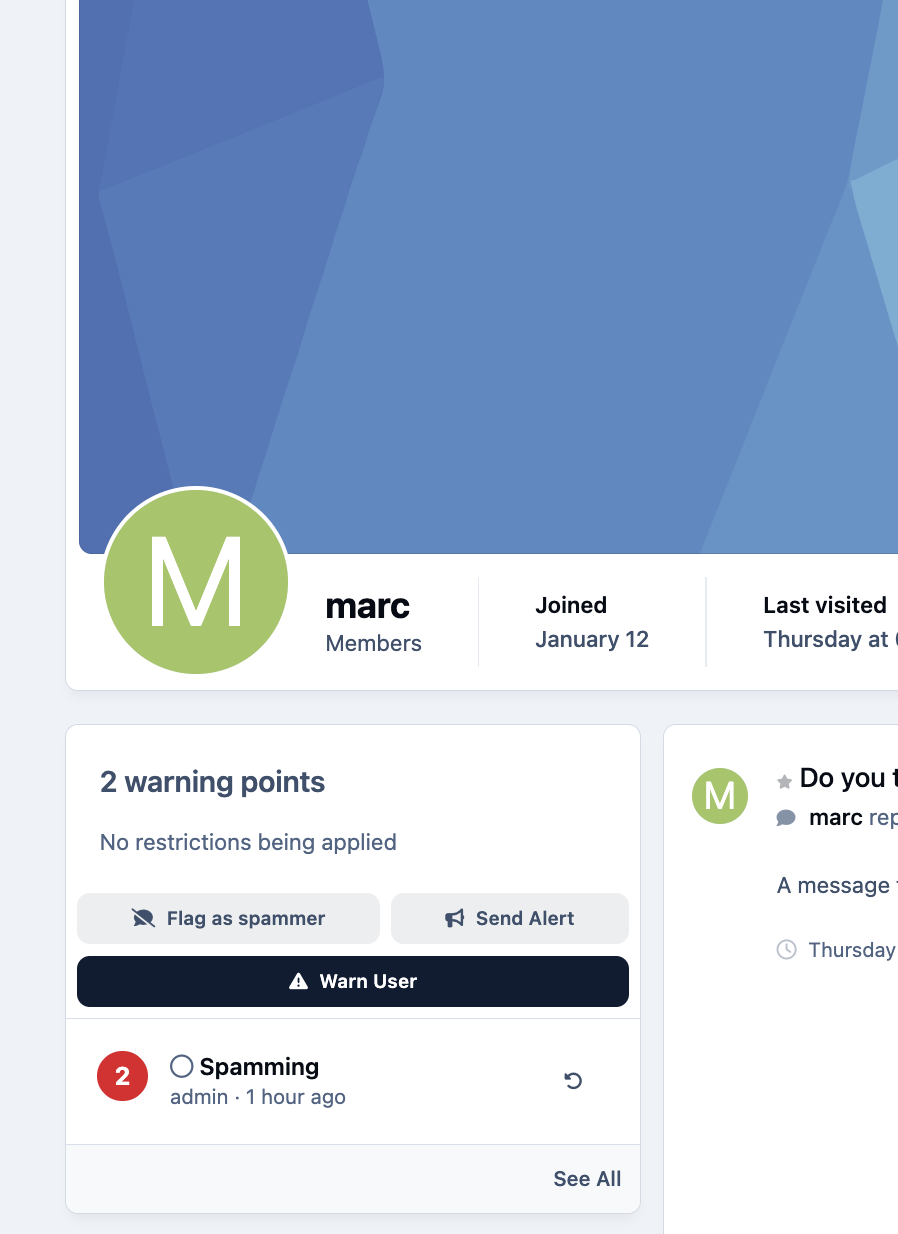
When viewing a member’s full profile, you can also see a list of any existing warnings they have received, as shown below
Warnings Showing Within Member Profiles
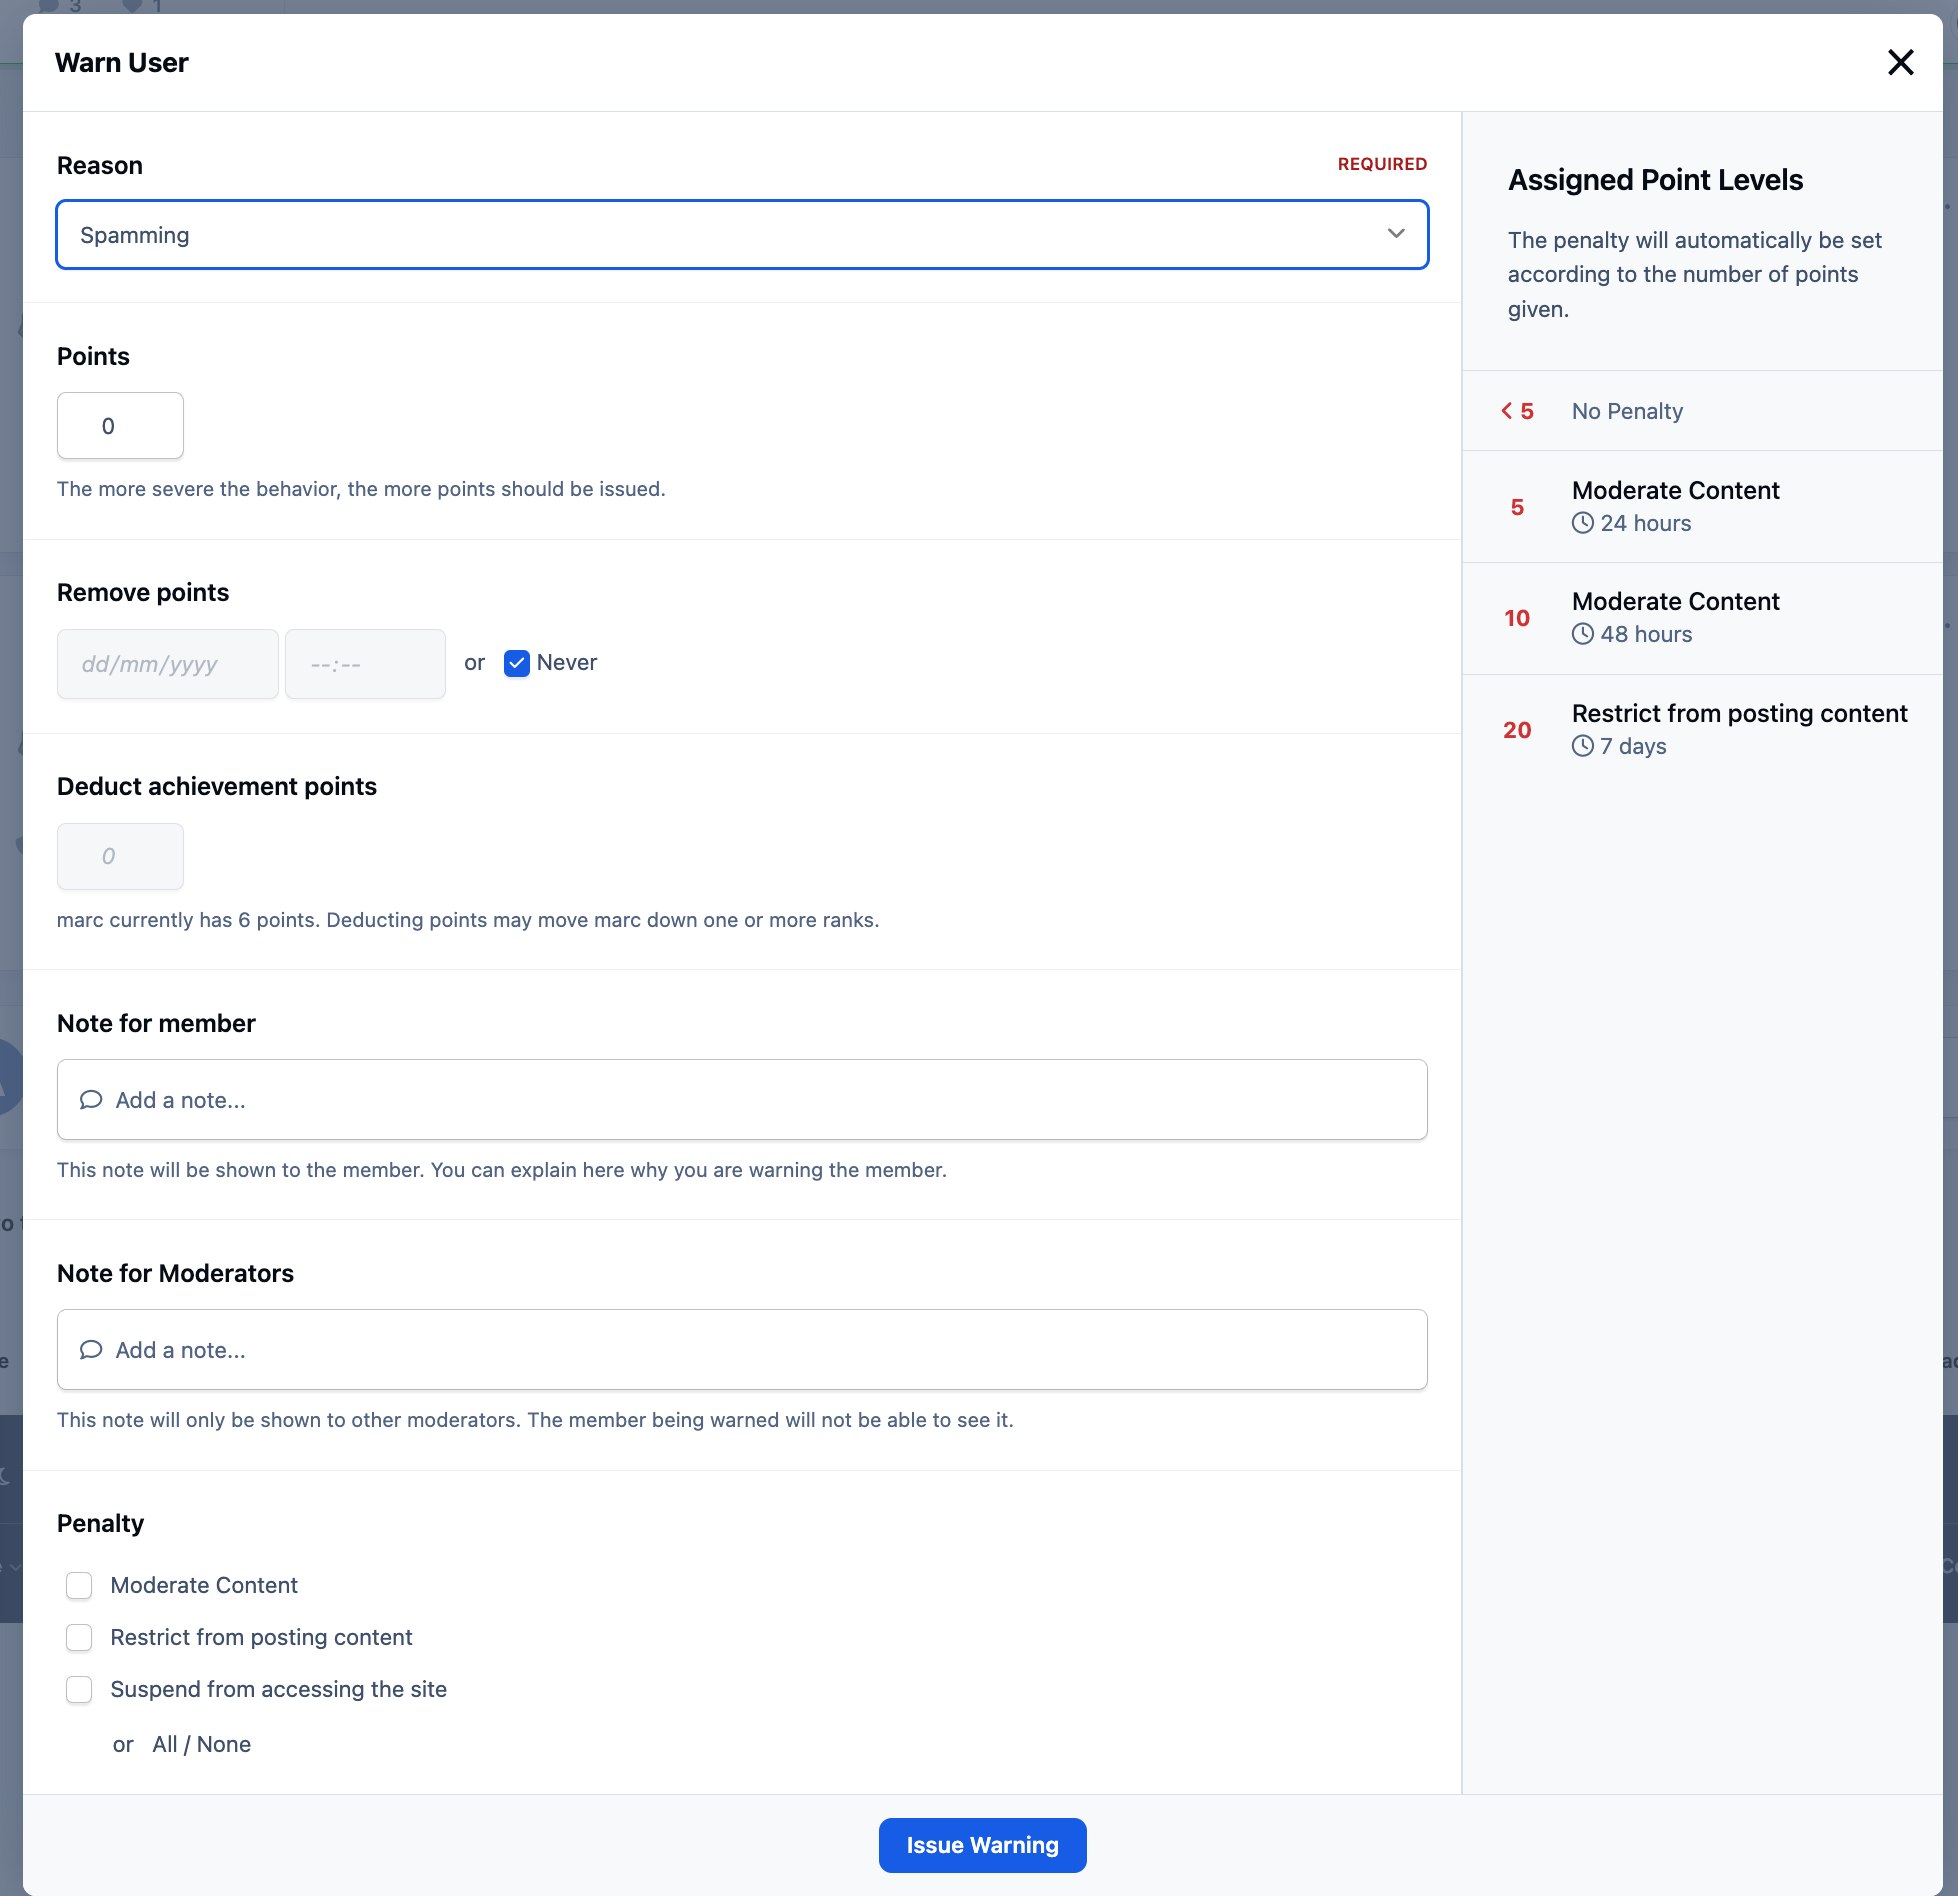
When issuing a warning, moderators are presented with a dialog where they can:
Select one of the predefined warning reasons
Assign a custom reason (if permissions allow)
Add a note for moderators (internal only)
Add a note for the member (visible to the member)
Apply a specific penalty
Moderator notes are only visible to staff, while member notes are shown to the warned user as part of the warning notification.
Warning a Member
After issuing the warning, moderators can review its details and, if necessary, revoke it at a later time.
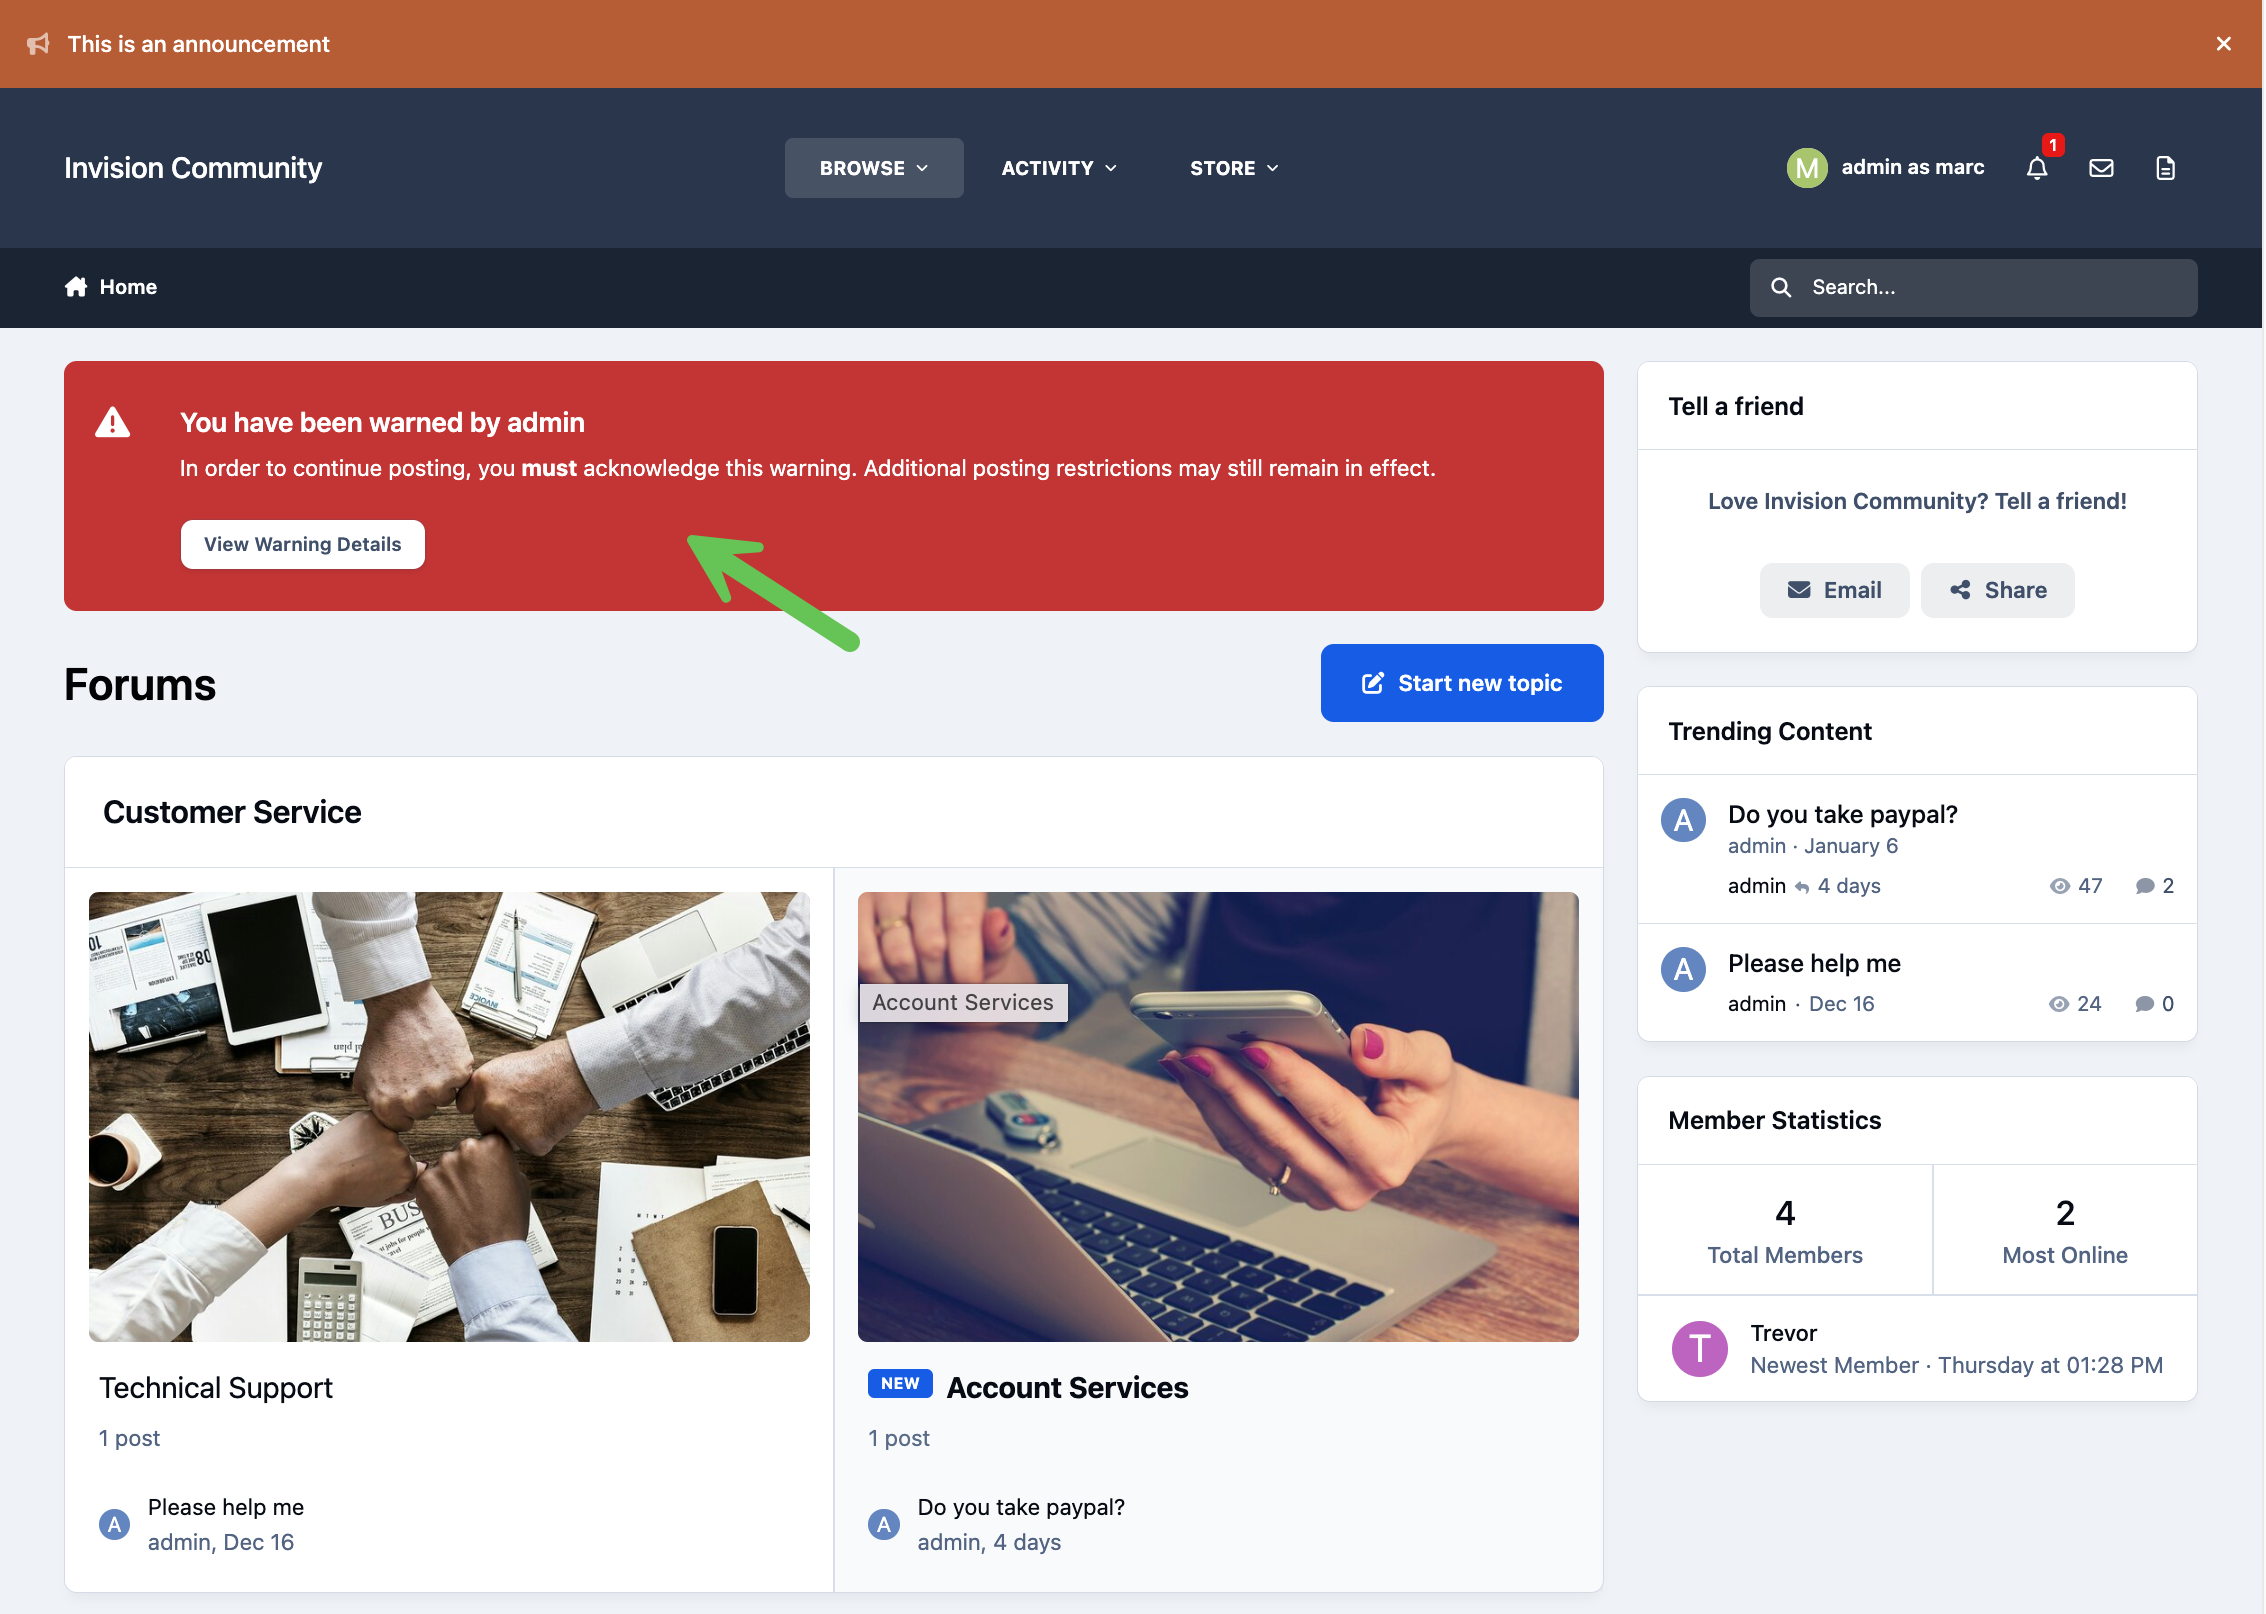
If your settings require members to acknowledge warnings, they will see a prominent notification bar at the top of the site after receiving one.
The member must click the notification, review the warning details, and acknowledge it before they can continue using the community normally.
This ensures members are fully aware of the warning and the reason it was issued.
Member Warning Acknowledgement
Manual Actions
In some cases, automatic actions may not be sufficient. Administrators can manually apply restrictions or bans directly from a member’s account, by looking up the member and clicking the pencil icon to edit that member in the Admin CP
Members → Members
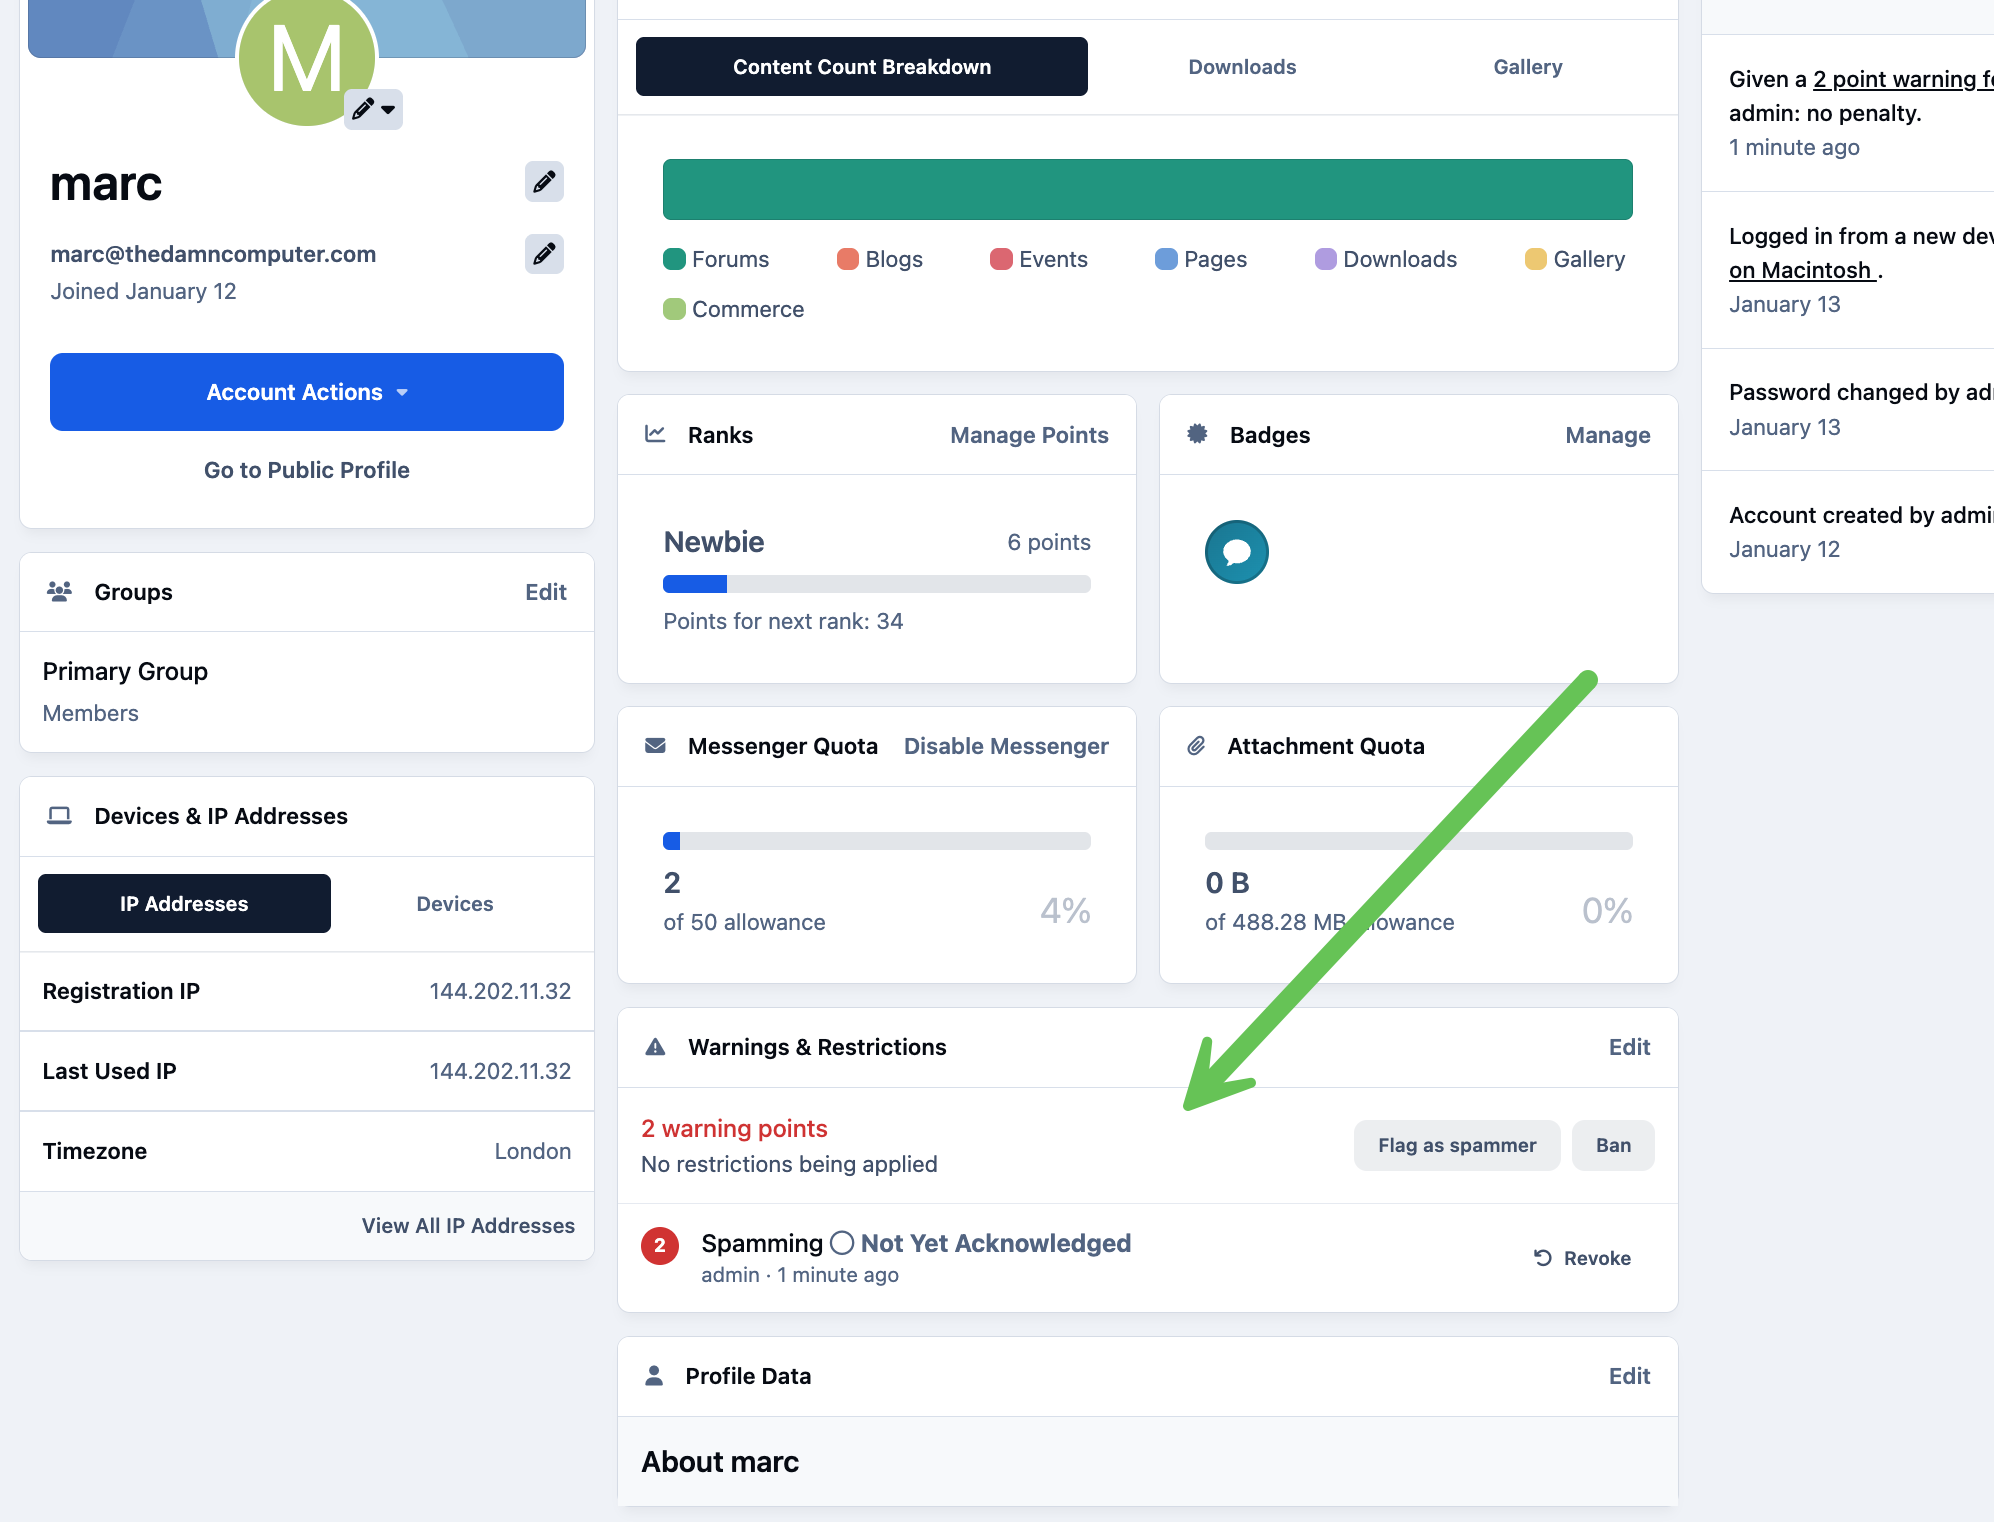
Within a member’s account, the Warnings & Restrictions section shows:
Current warning level
Any active restrictions
Warnings & Restrictions Location
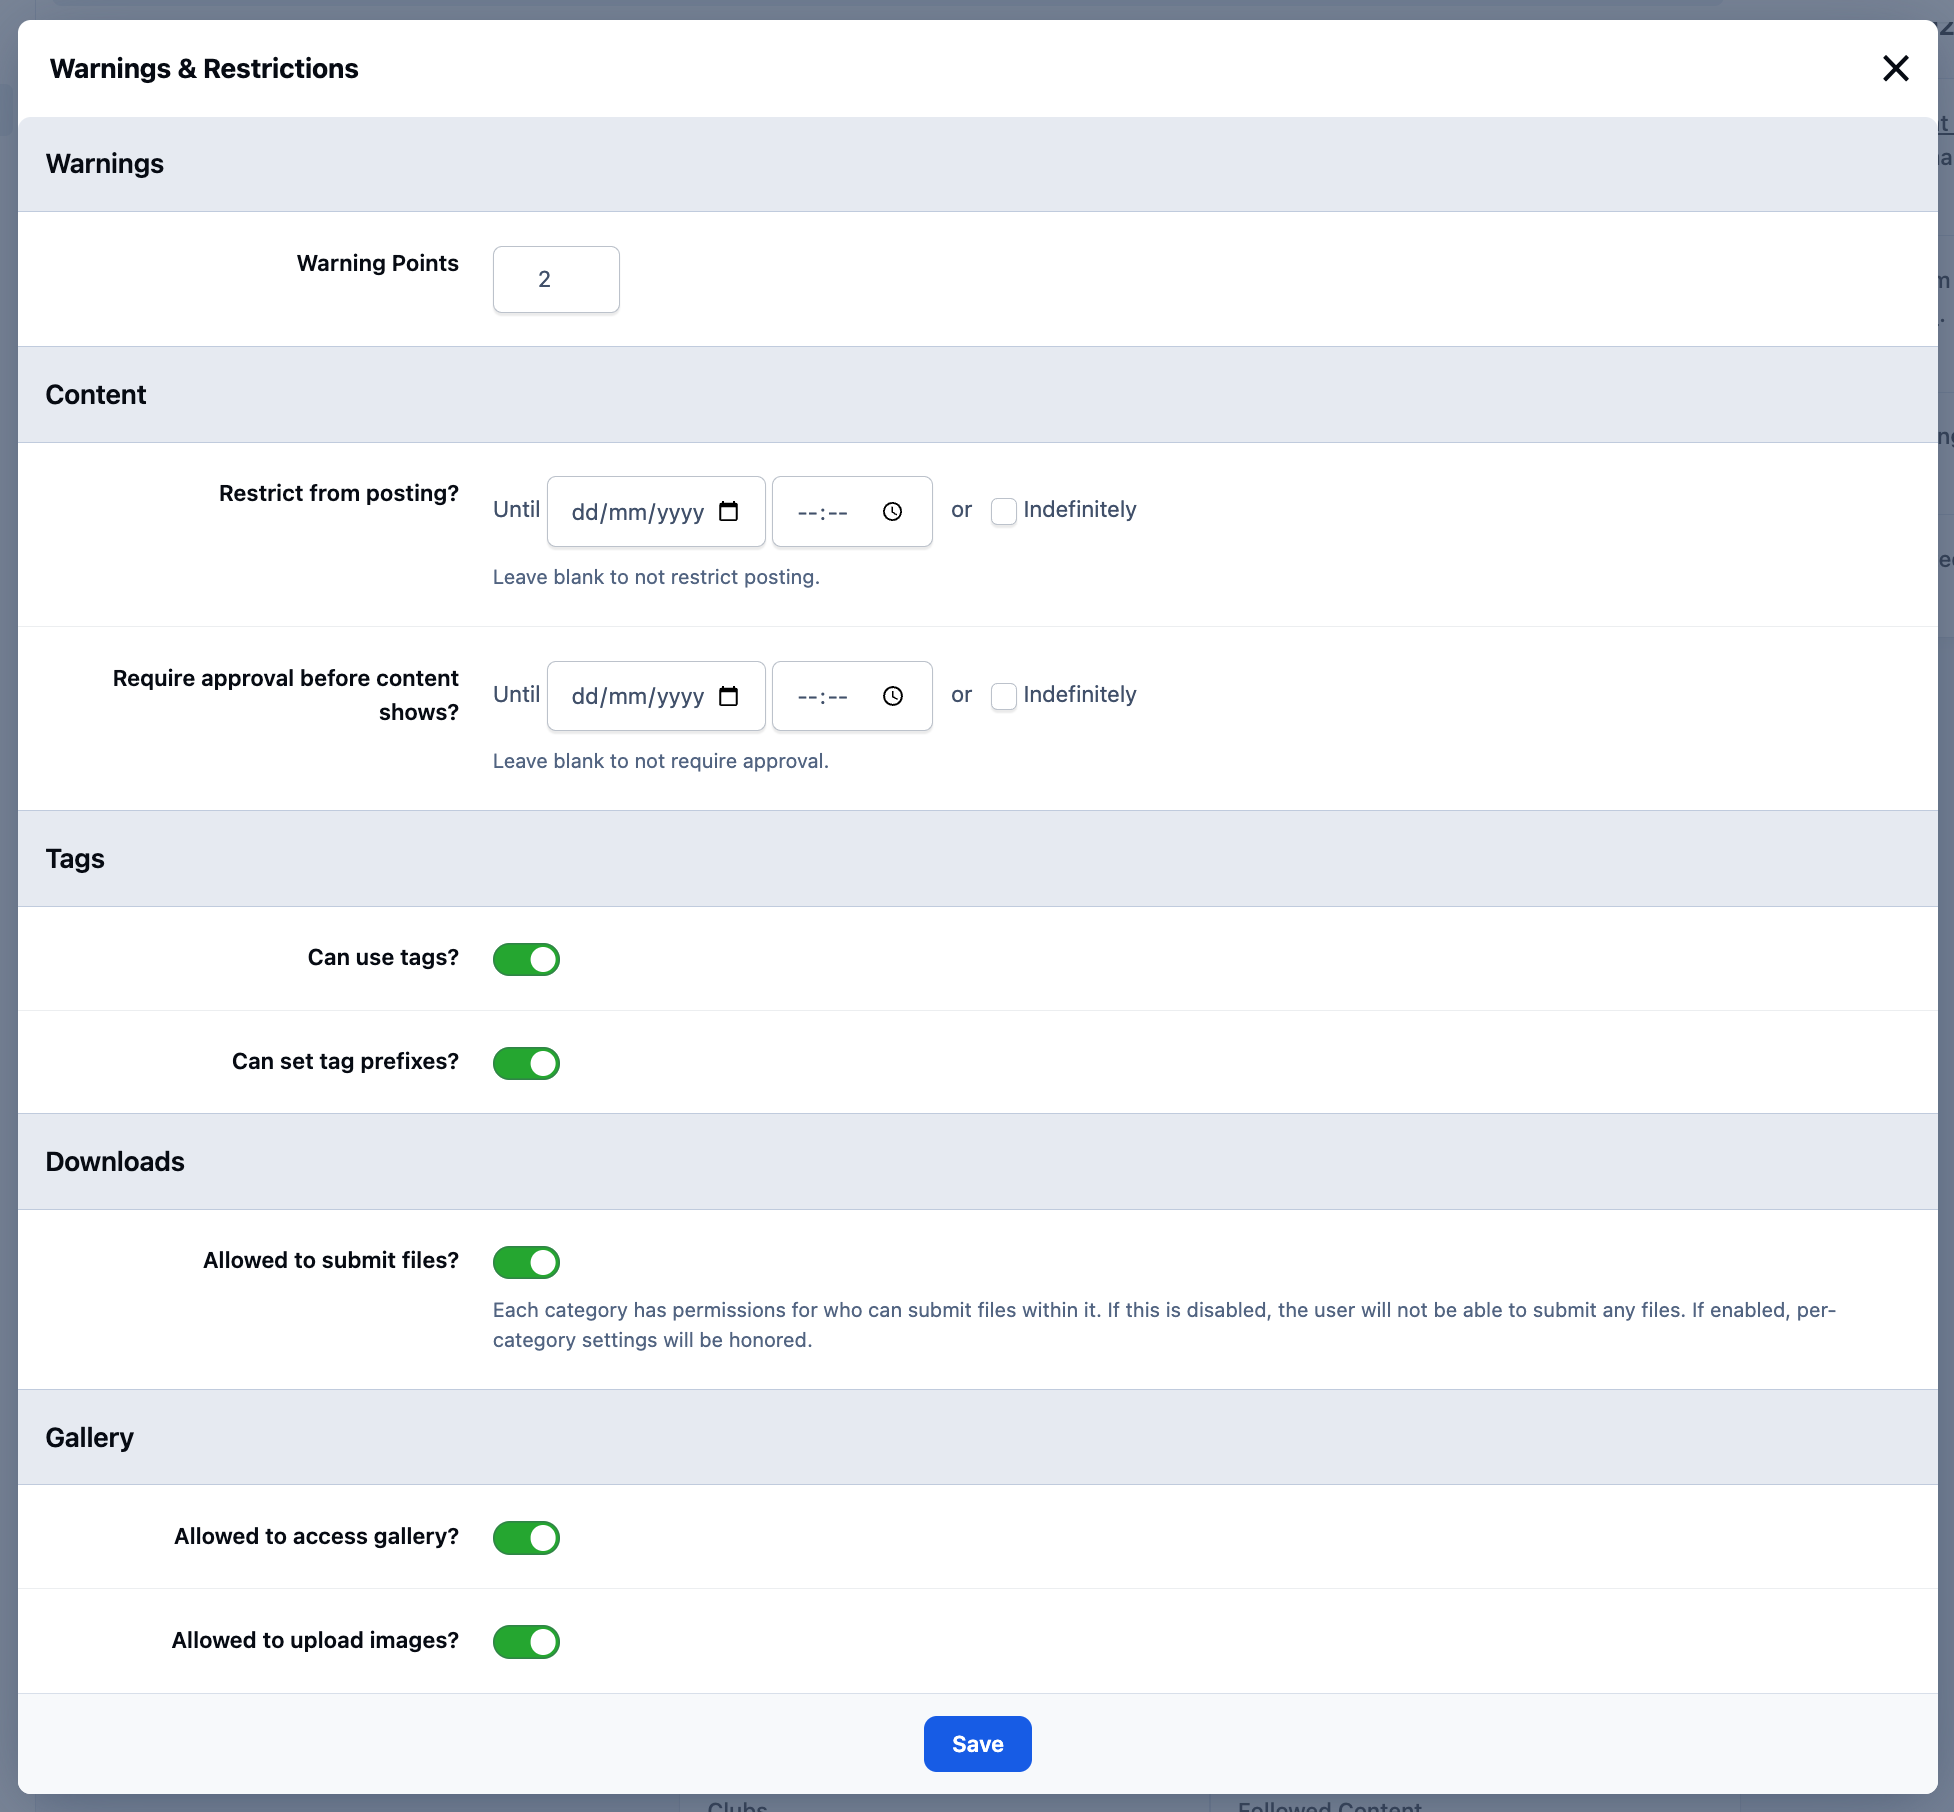
By selecting Edit, administrators can manually apply or remove restrictions such as:
Preventing posting
Restricting status updates
Limiting messaging
These controls provide fine-grained moderation for individual cases.
Editing Warnings & Restrictions in the Admin CP
Banning & Ban Filters
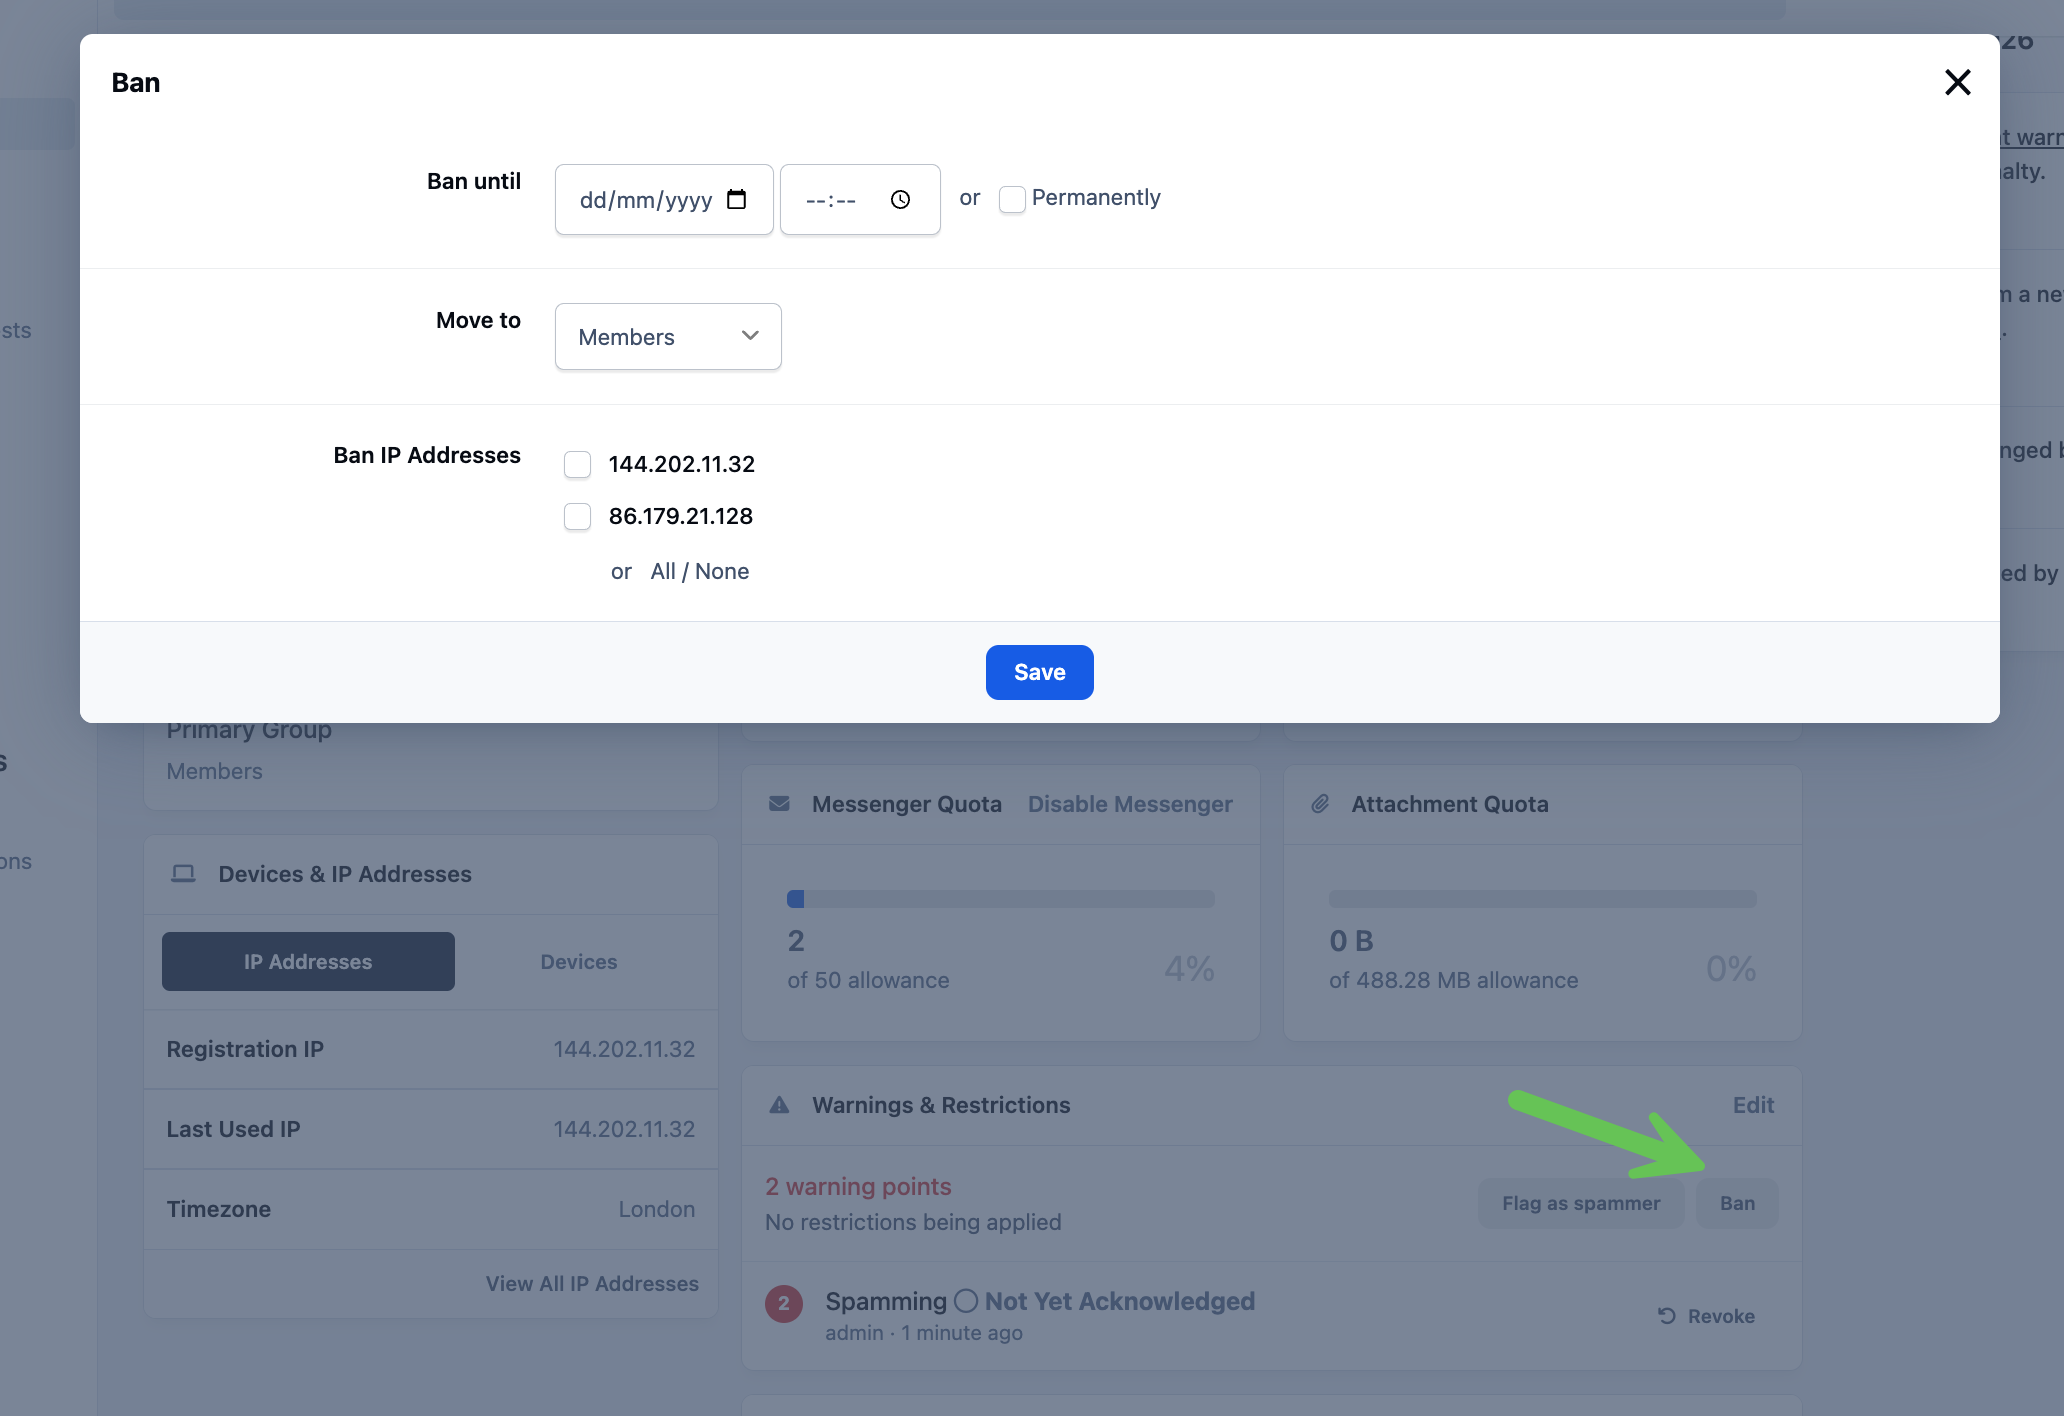
As a last resort, members can be banned from the site. This can be done directly from the Warnings & Restrictions section of a member’s account.
When banning a member, you can:
Specify the duration of the ban
Optionally ban the associated IP address
Move the member to another group if required
Banning a User
When IP banning is enabled, the IP address is added to your ban filters, which are managed from:
Members → Member Settings → Ban Settings
From here, you can restrict:
IP addresses
Email domains
Specific usernames or patterns
This is useful for blocking disposable email services or preventing usernames containing reserved terms such as admin or mod.
Wildcard characters (*) can be used to match partial values.
For example, *admin* would prevent usernames like I_am_admin_user from being registered.
Ban Settings Showing an IP Ban

Recommended Comments