


Search Engine Optimization (SEO) helps ensure your community is easy for search engines to crawl, index, and rank when people search for topics related to your community’s focus.
SEO is not an exact science. Best practices evolve, opinions differ, and search engine algorithms change regularly. Invision Community follows widely accepted and proven SEO standards, and these are continuously refined with new releases to help keep your site aligned with current search engine expectations.
All referenced items below, can be found within the following location of the Admin CP
System → Site Promotion → Search Engine Optimization
Built-in Automatic Features
There are many SEO-related features that work automatically behind the scenes, requiring no action from you. These are designed to help your community perform well in search engines and are outlined in the sections below.
JSON-LD Markup
This markup is generated automatically and adds structured microdata to your pages. Search engines and other systems use this information to better understand the content they are indexing.
Details such as dates, titles, images, and content snippets can be included, allowing search engines to more accurately interpret and display your content when it appears in search results or is shared elsewhere.
Proper HTTP Codes
When a page cannot be found, the system returns a 404 response. Pages that exist but are restricted return a 403, and situations such as an upgrade in progress return a 503, among other standard responses.
These response codes are automatically handled and correctly inform search engine crawlers about the status of your site and its pages, allowing them to index and react to your content appropriately.
Site Map
Your sitemap is an XML-formatted file that search engines use to discover and index the pages on your community. In most cases, the default settings are recommended and work well for nearly all sites, requiring no changes.
For more advanced use cases, additional options are available that allow you to adjust things such as page weighting, result limits, and other sitemap-related behavior. These can be found in the 'Search Engine Optimization' section if you wish to fine-tune how your site is indexed.
Friendly URLs
Friendly URLs (FURLs) transform technical-looking links like:
http://example.com/?app=forums&module=forums&controller=topic&id=1
into cleaner, more readable URLs such as:
http://example.com/topic/1-my-latest-hobbies/
This is important because search engines take URLs into account when indexing and ranking content. A descriptive URL like the example above is more likely to rank for relevant keywords and phrases such as “hobbies” or “latest hobbies”, compared to a generic query-based link.
Friendly URLs are enabled automatically on Invision Community Cloud services, so no additional configuration is required.
Community Classic Self-Hosting
To set up Friendly URLs (FURLs) on a self-hosted installation, these instructions assume you are running an Apache web server. While FURLs can be configured on other server types, the steps below are specific to Apache.
You’ll need the mod_rewrite module enabled, along with permission to upload a .htaccess file to your server. If you’re unsure whether this is available, please contact your hosting provider to confirm.
To enable FURLs, go to the Search Engine Optimization section in the Admin CP, enable Friendly URLs, and download the generated .htaccess file. Upload this file to the root directory where Invision Community is installed, then click Continue.
Your community will automatically check whether Friendly URLs are working correctly and confirm once setup is complete.
Meta Tags
Meta tags are pieces of text that help describe the content of a page to search engines. While Invision Community deals with the appropriate tagging automatically through other means, it also allows you to add meta tags at several level, site-wide, by content type, or for individual page. This gives you fine-grained control over how your site is indexed.
Search engines use meta tags such as keywords and descriptions to better understand your content and determine when it should appear in relevant search results. For example, you might want your downloads area to be indexed under a description like “news”, with keywords such as tech or politics.
That said, meta tags are generally considered an advanced and optional feature. Much of the essential metadata is already handled automatically through the platform’s JSON-LD (structured data) system, which provides search engines with rich context about your content without additional configuration.
Meta tags can be added from the Search Engine Optimization section by selecting the Meta Tags tab. From there, choose Add Meta Tags and provide the relevant details for the page or pages you want to target.
You can assign meta tags by specifying:
A page address (URL)
A page title
One or more meta tags
The available meta tag types include:
Keywords – Words or phrases that describe the topic of the page
Description – A summary of the page content (often shown in search results)
Robots – Instructions for search engines, such as
NOINDEXorNOFOLLOWOther – Additional tags such as author, copyright, language, and more
You can also use the * wildcard to apply meta tags to multiple pages at once, making it easier to manage larger sections of your site.
Adding Meta Tags From ACP
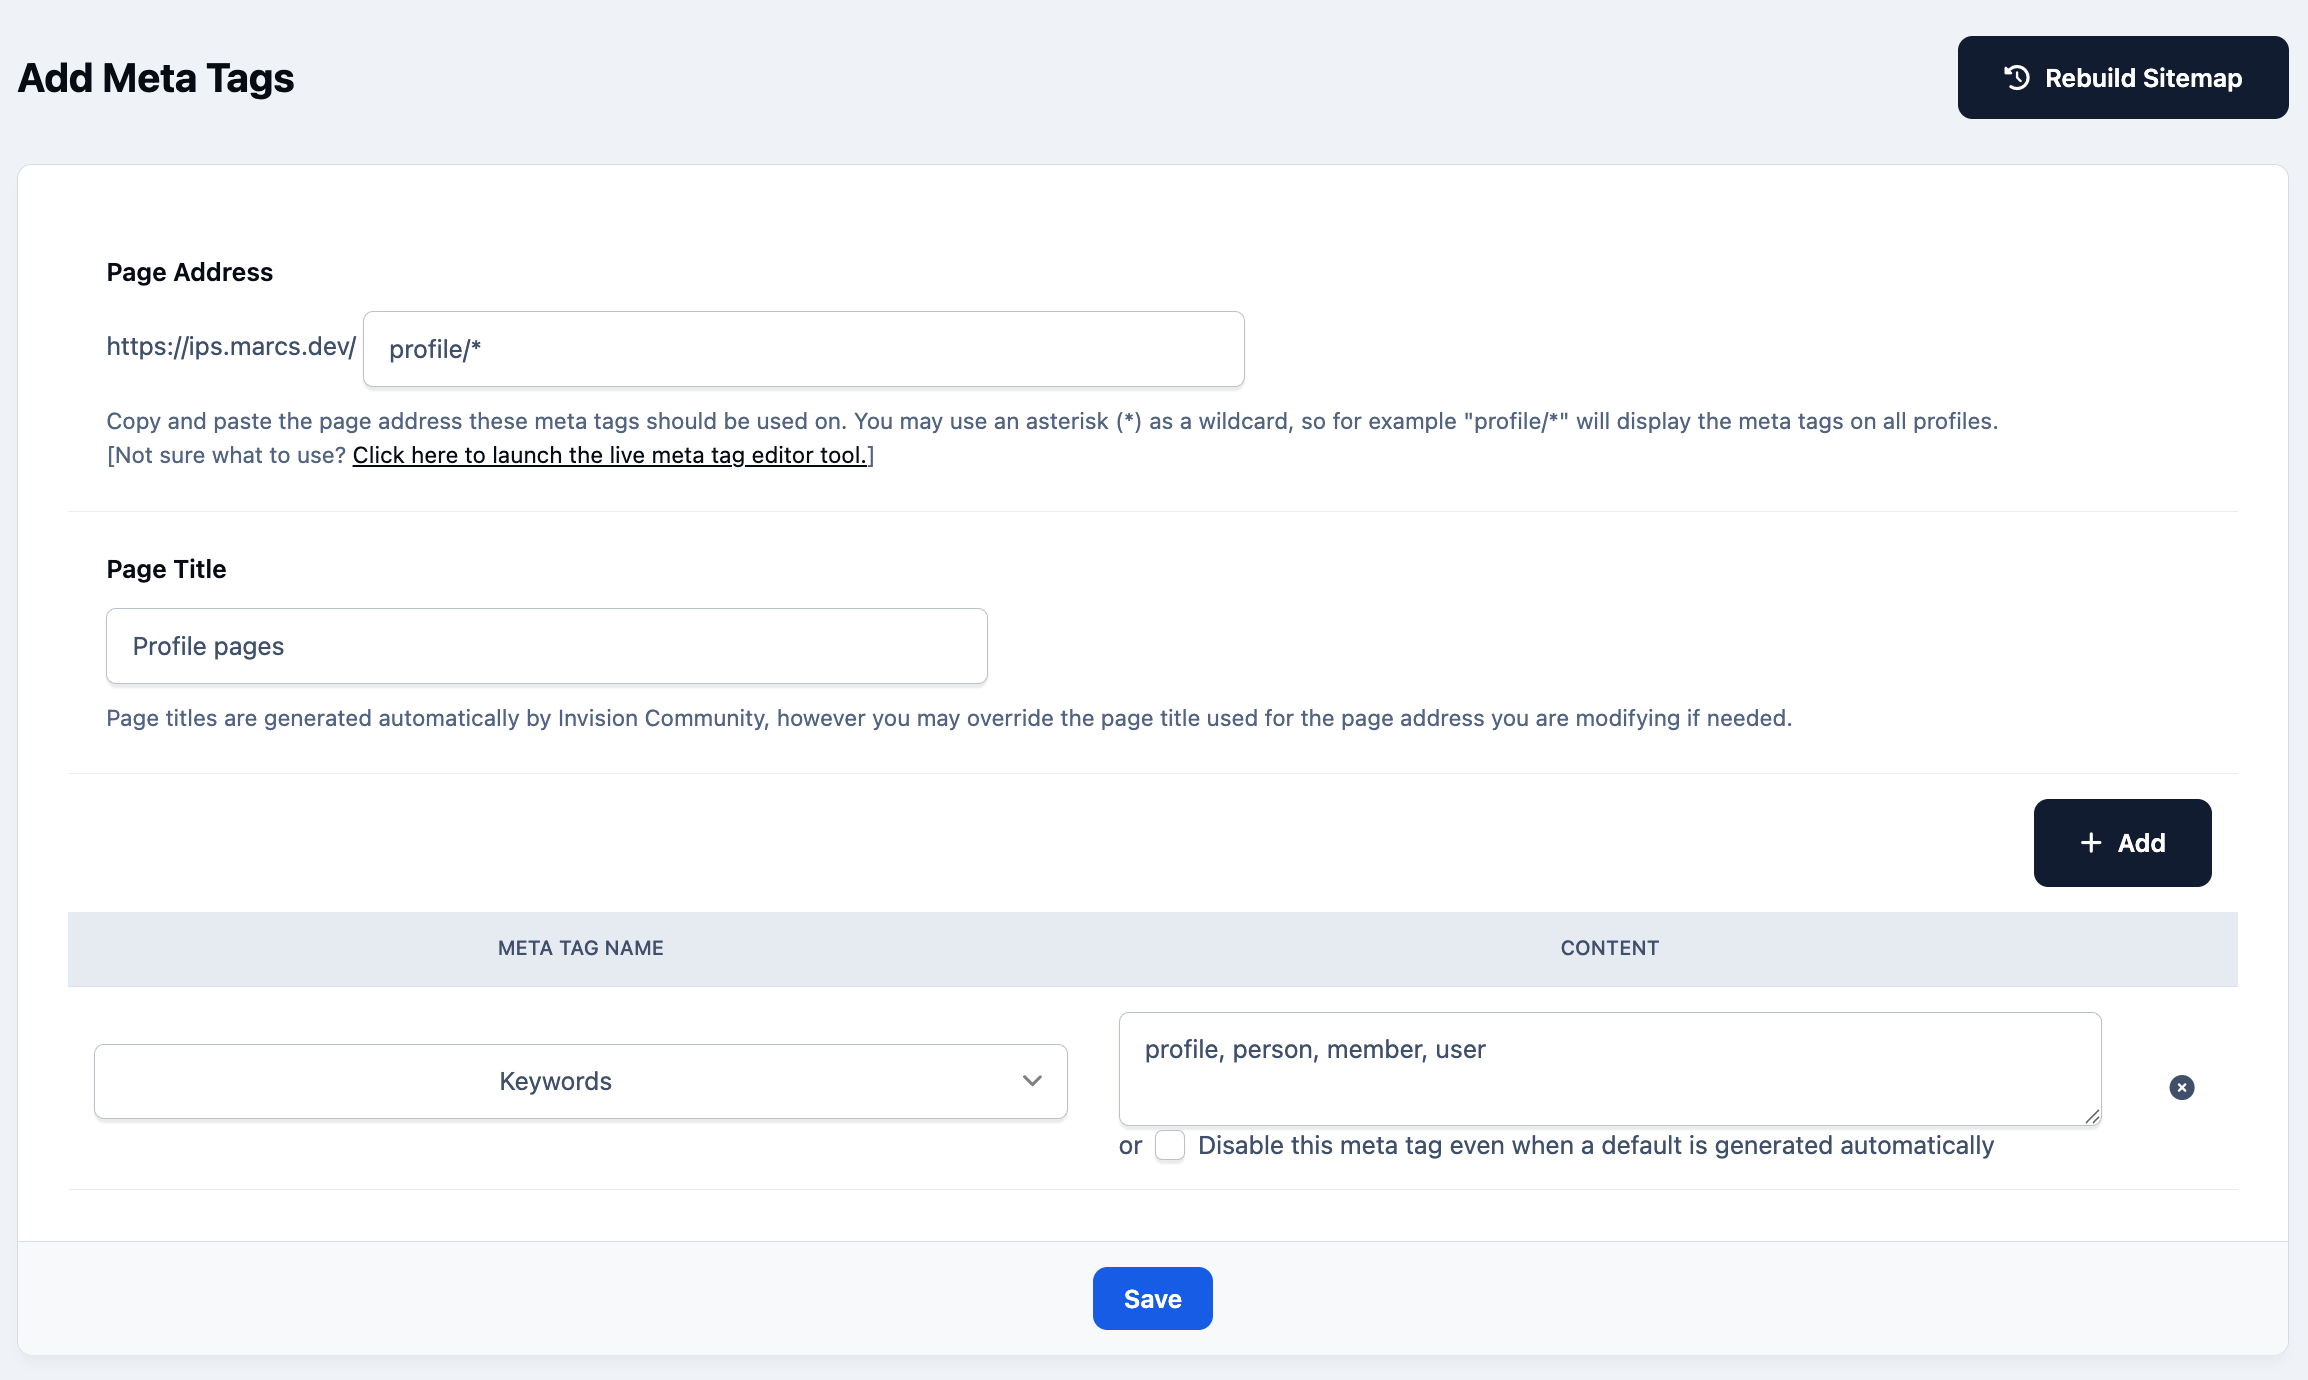
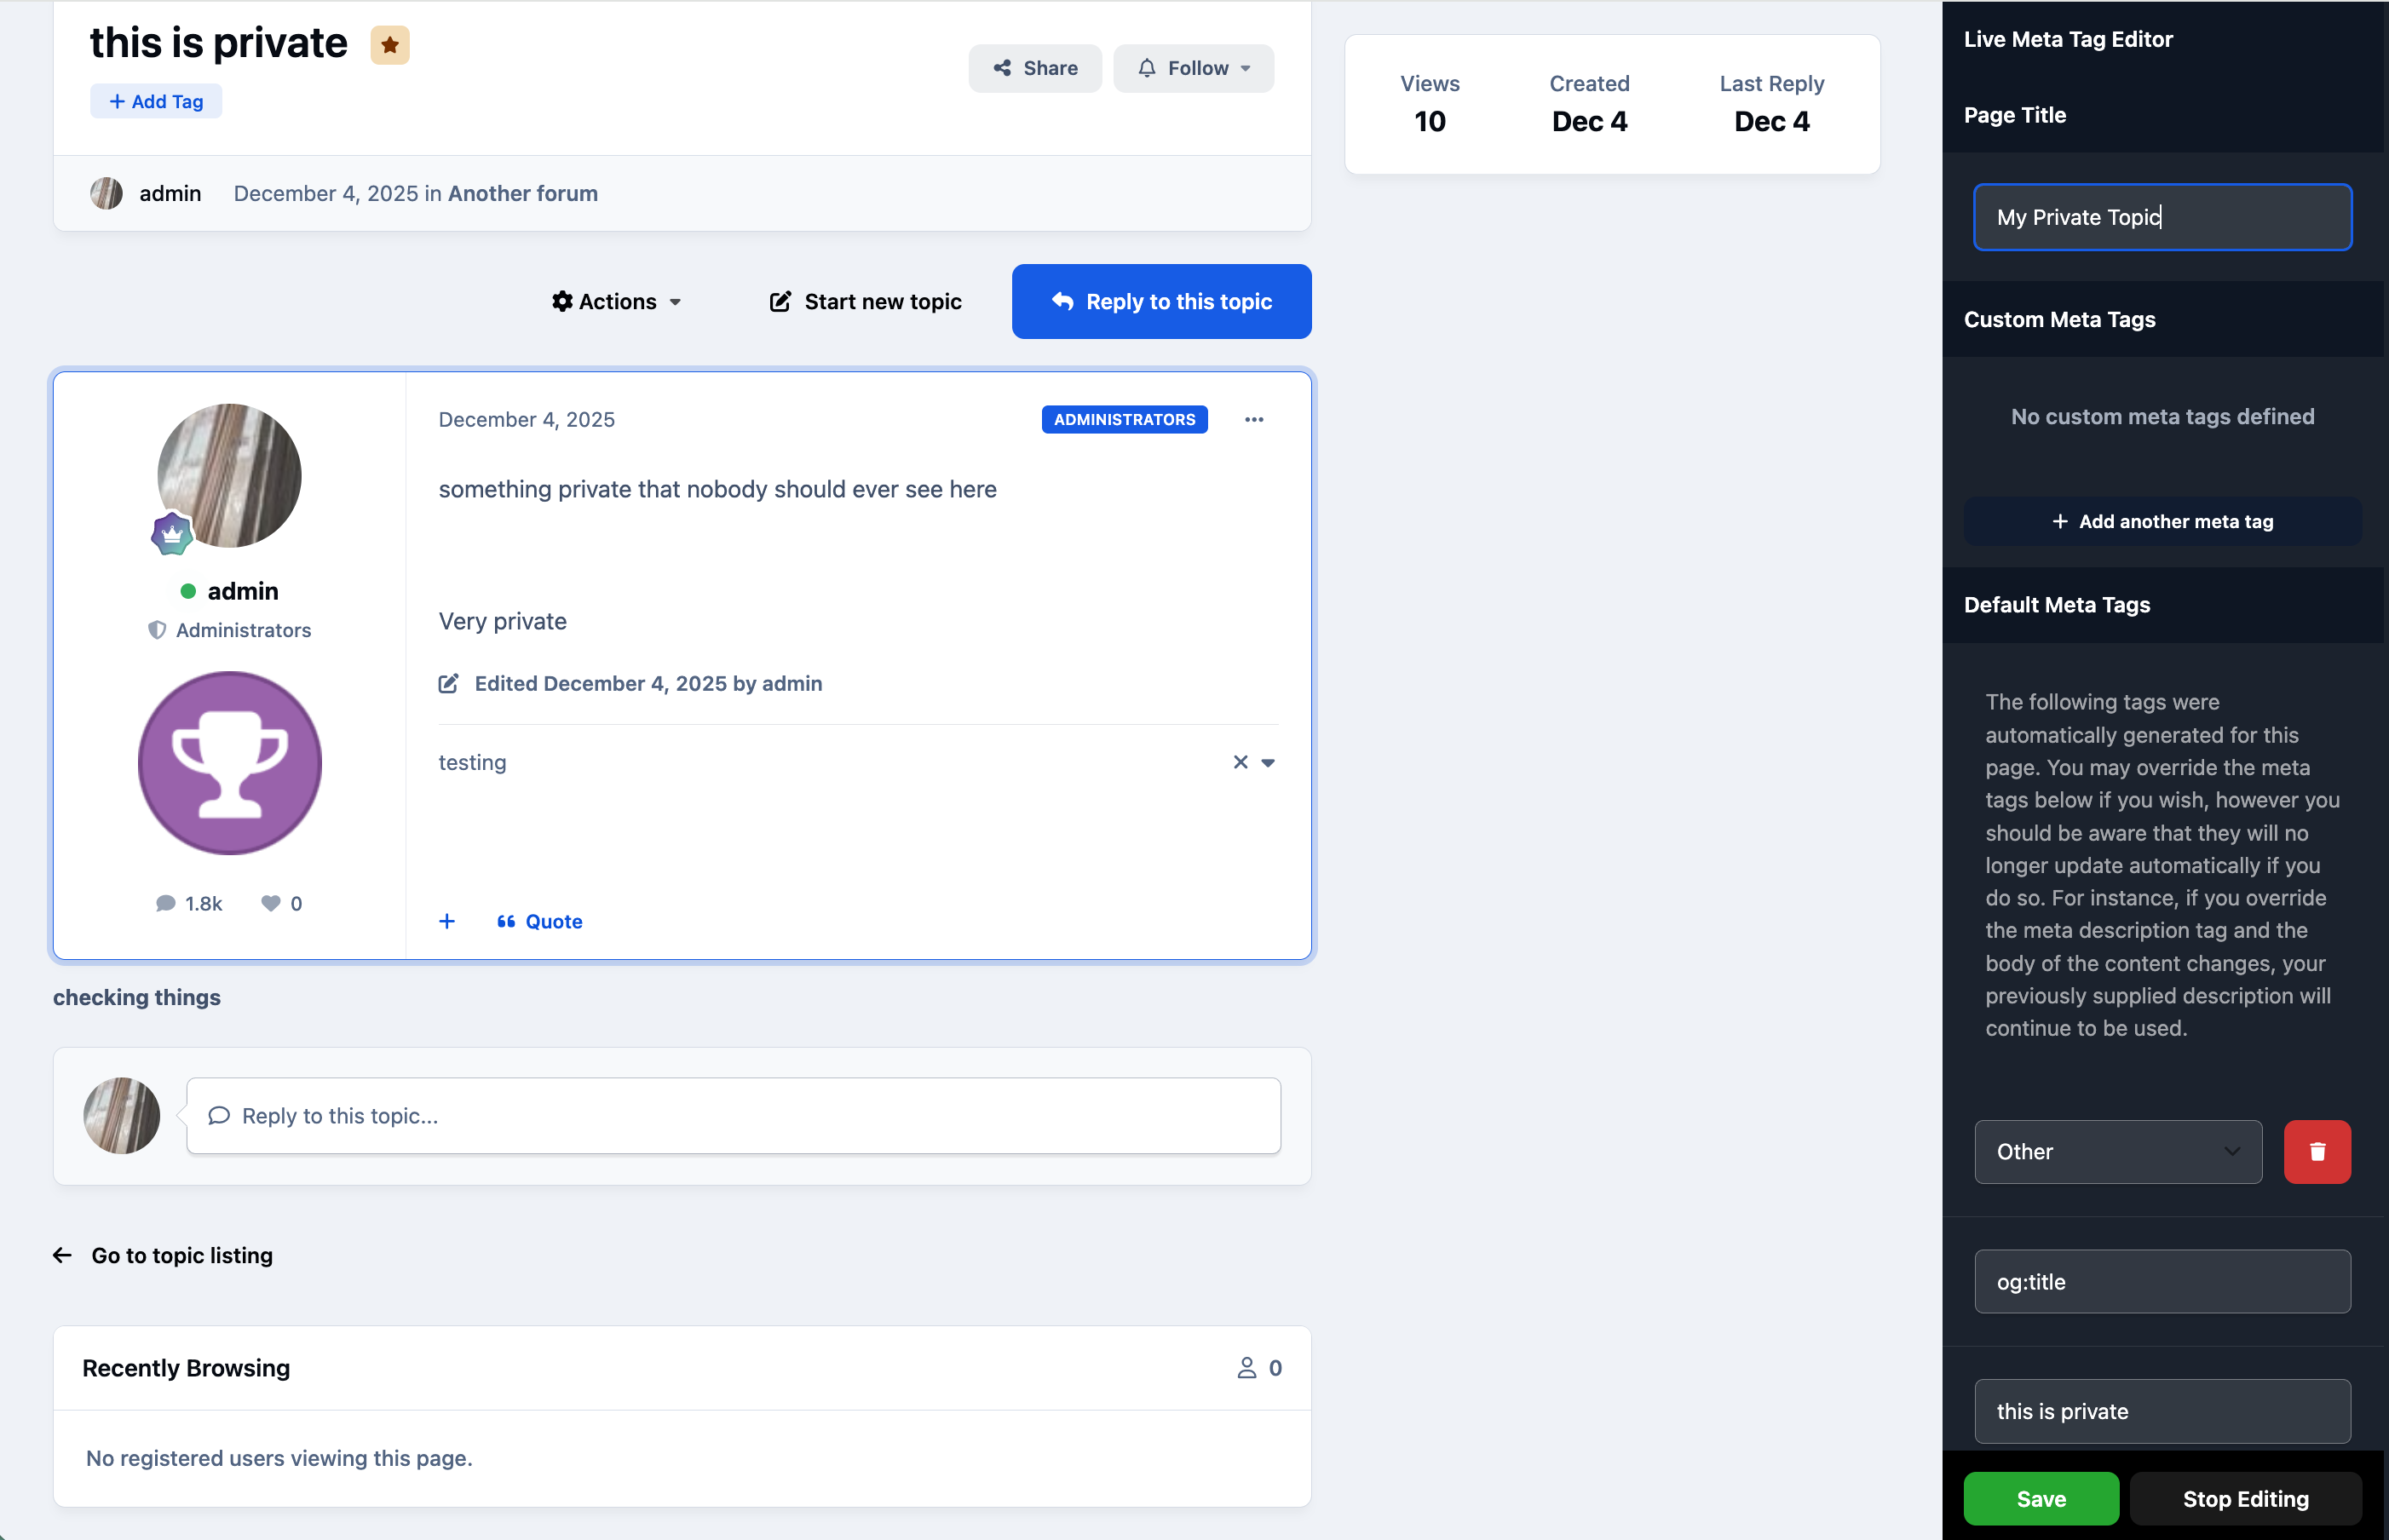
In addition to the manual meta tag editor, Invision Community also provides a 'Live Meta Tag Editor', which allows you to edit meta tags directly while viewing the page itself.
This makes it easy to see changes in context and fine-tune your metadata as needed. The Live Meta Tag Editor can be accessed by selecting the Launch Live Meta Editor link, as shown in the example below.
Adding Meta Tags From Live Editor
Things to Check
Finally, it’s worth reviewing a few additional areas to make sure your community is set up exactly as you intend:
Browse your community as a guest - Viewing the site while logged out lets you see what search engine crawlers can access. If you can’t view an area as a guest, it won’t be indexed. Likewise, if you can see content that should be private, it’s a good indication that permissions need adjusting.
Customize permission error messages - Many applications allow you to replace generic “Permission Denied” messages with more helpful text, such as encouraging visitors to register or subscribe to gain access.
Enable HTTPS - Using HTTPS can improve trust, reduce browser security warnings for visitors, and may also provide a small boost to search engine rankings.
Taking a few moments to review these areas can help ensure your community is both search-engine friendly and aligned with your privacy and access goals.
Advanced FURL Configuration
Advanced Friendly URL (FURL) configuration is a powerful feature, but it can also have unintended consequences if used incorrectly. Because it changes the underlying URL structure of your community, it should only be adjusted if you are confident in what you’re doing. You can find this within the following location in the Admin CP
System → Settings → Advanced Confguration
For the vast majority of sites, the default FURL configuration is more than sufficient, and no changes are required.
Below is an example of how advanced Friendly URL (FURL) customization might be used in practice.
For instance, if your previous system used a URL such as /oldLogin for its login page, you could add a custom FURL rule that automatically redirects visitors from that address to the Invision Community login page.
FURL Configuration
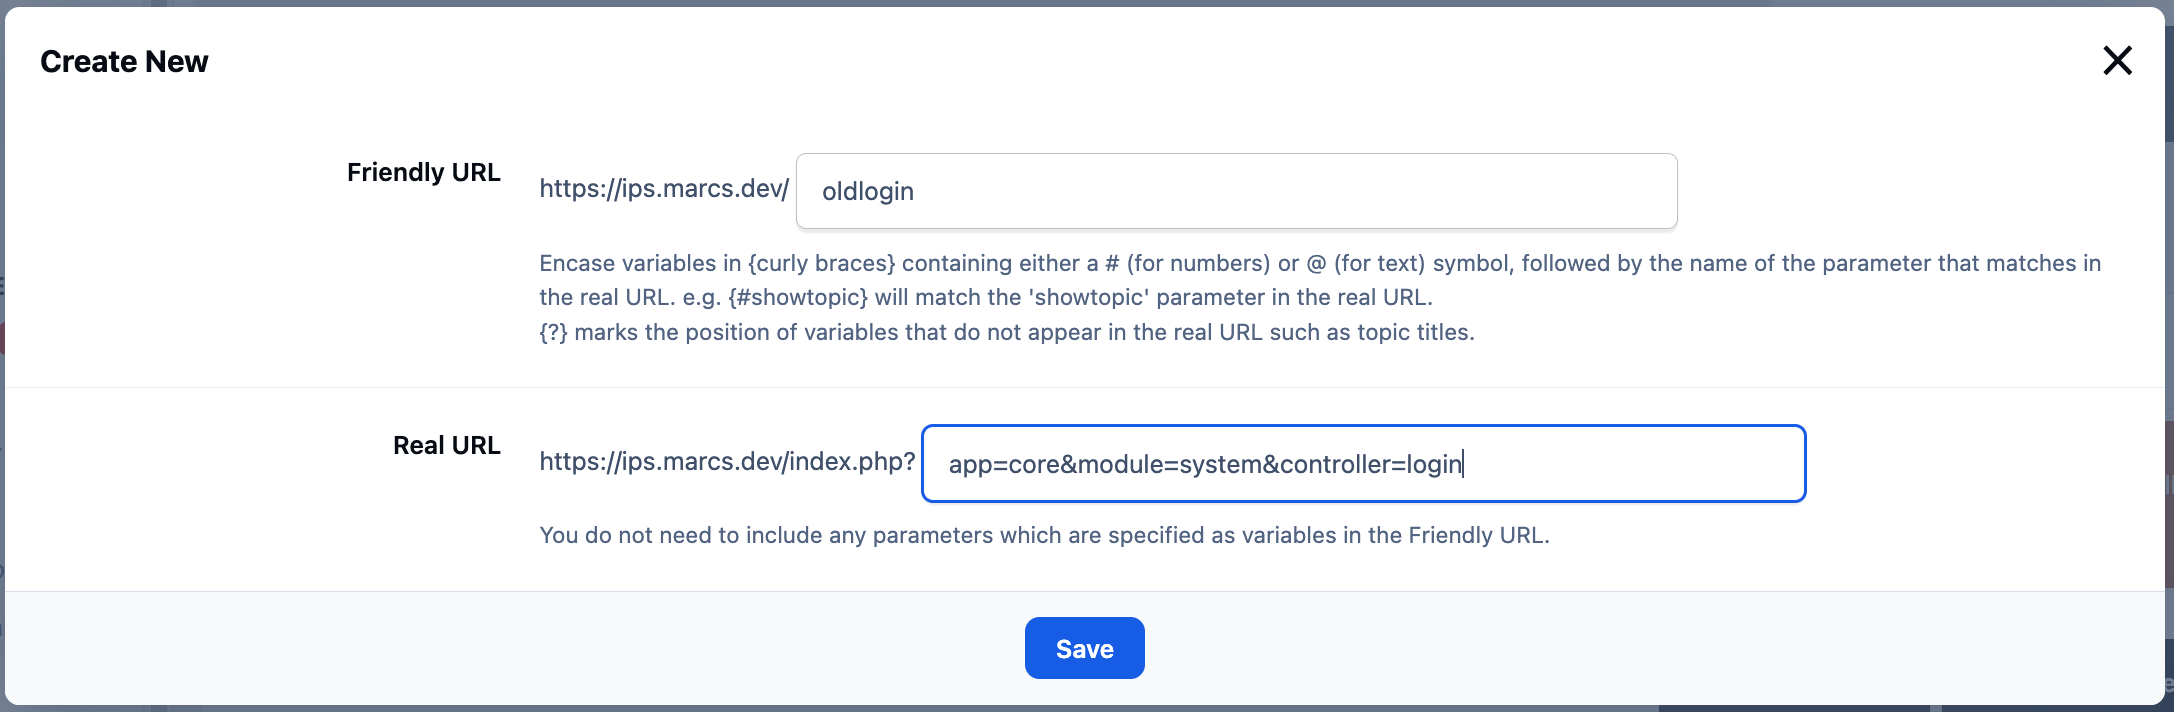
Other possible use cases include renaming specific URLs to better match how your community is structured, creating aliases for commonly used pages, or capturing legacy links that need to be redirected to their new locations. This can be particularly helpful when migrating from another platform or maintaining compatibility with older bookmarks and external links.
A Note on Conversions
If you converted to Invision Community from another product, in most cases the system will automatically redirect links from your old software to the new locations. This uses an HTTP 301 redirect to ensure that the search engine knows to update to the new location.
Recommended Comments