
What is a Template Block?
Template blocks provide a powerful way to create structured, reusable content within your community, without requiring users with access on the front end having to write or edit HTML.
Using template blocks in the Admin CP, you can define a set of custom fields (such as text, images, editors or numbers ), and then control exactly how that content is displayed using your own HTML layout. This means you can design a consistent look and feel for blocks on your community, while keeping the editing process simple for your team.
Once created, these blocks can be added directly from the front-end page editor. Instead of working with code, moderators simply fill in the fields you’ve defined, and the block will automatically render in the format you’ve designed. This helps maintain consistency across your site, reduces the risk of formatting issues, and allows non-technical staff to confidently manage content.
Creating Template Blocks
Template blocks are created from the following location within your Admin CP:
Pages > Page Management > Blocks
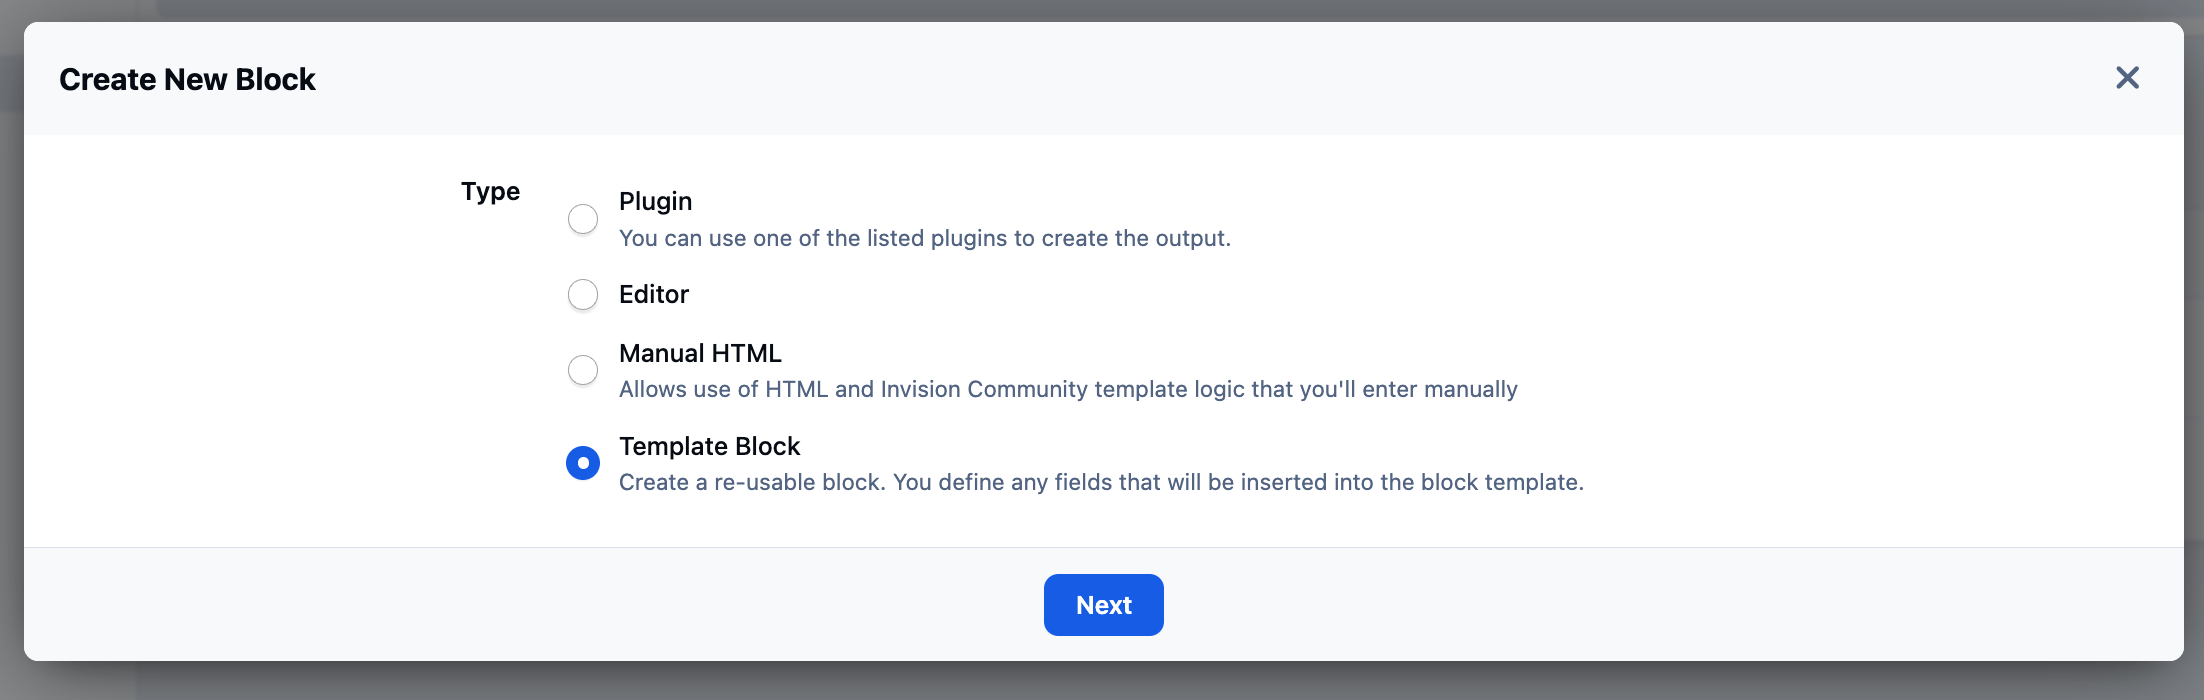
Once you’re in this area, select "Create New Block". When prompted for the block type, choose Template Block, then click Save to proceed.
Block Creation
From here, you’ll be able to define the custom fields your block will use, along with the HTML template that controls how those fields are displayed on the front end.
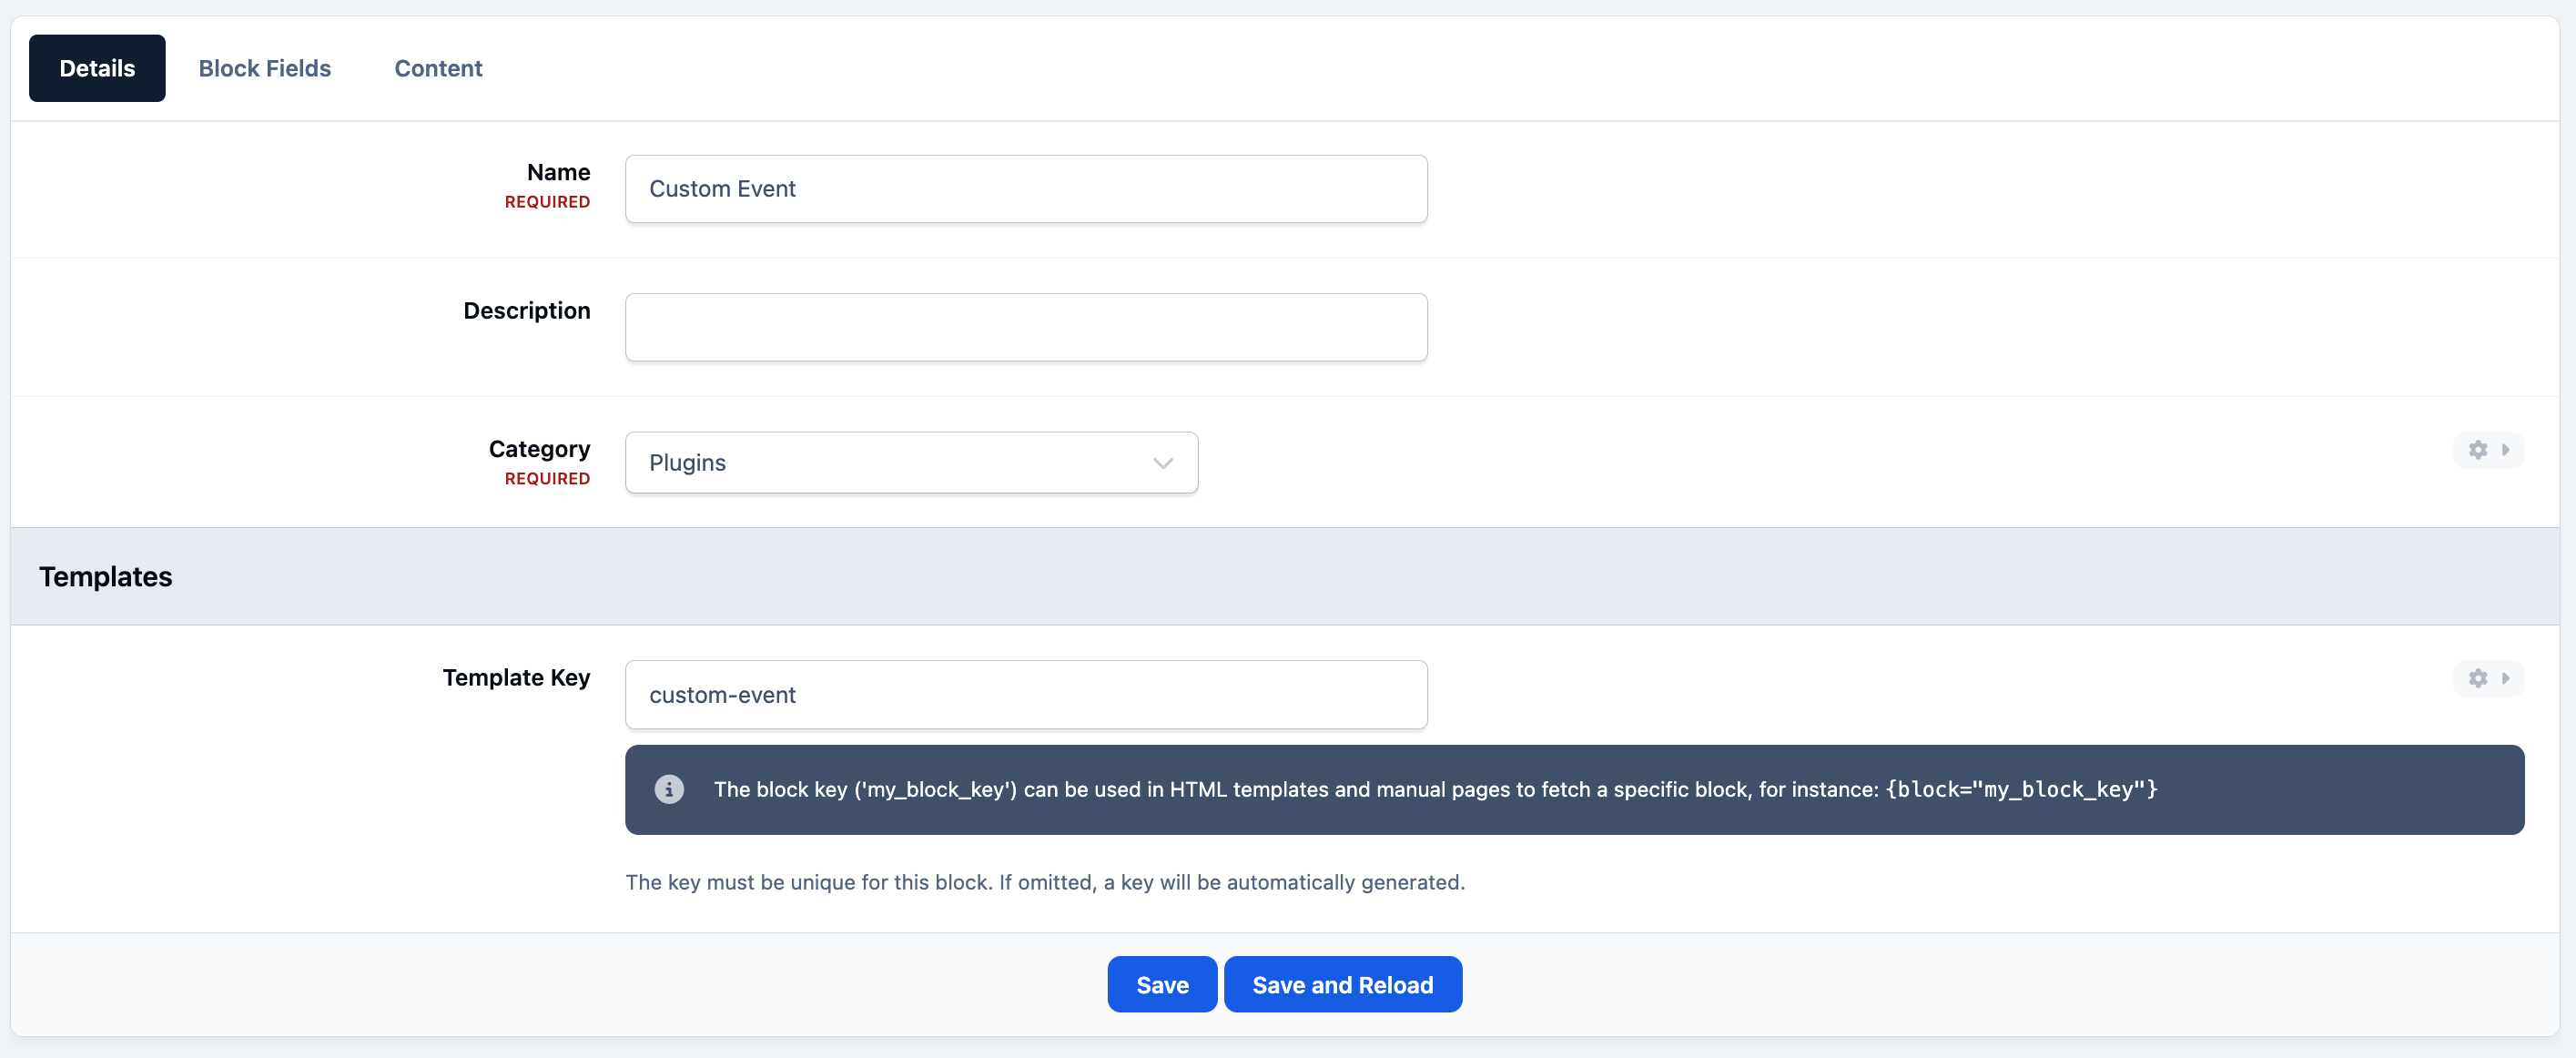
The first tab you’ll see is the Details tab. Here, you should enter the name you would like the block to display as on the front end, along with the category it should appear under within the Admin CP. The remaining options can generally be left as their defaults unless you have a specific need to change them. That said, adding a clear description is recommended, as it can help others understand the purpose of the block when selecting it later.
Adding Details
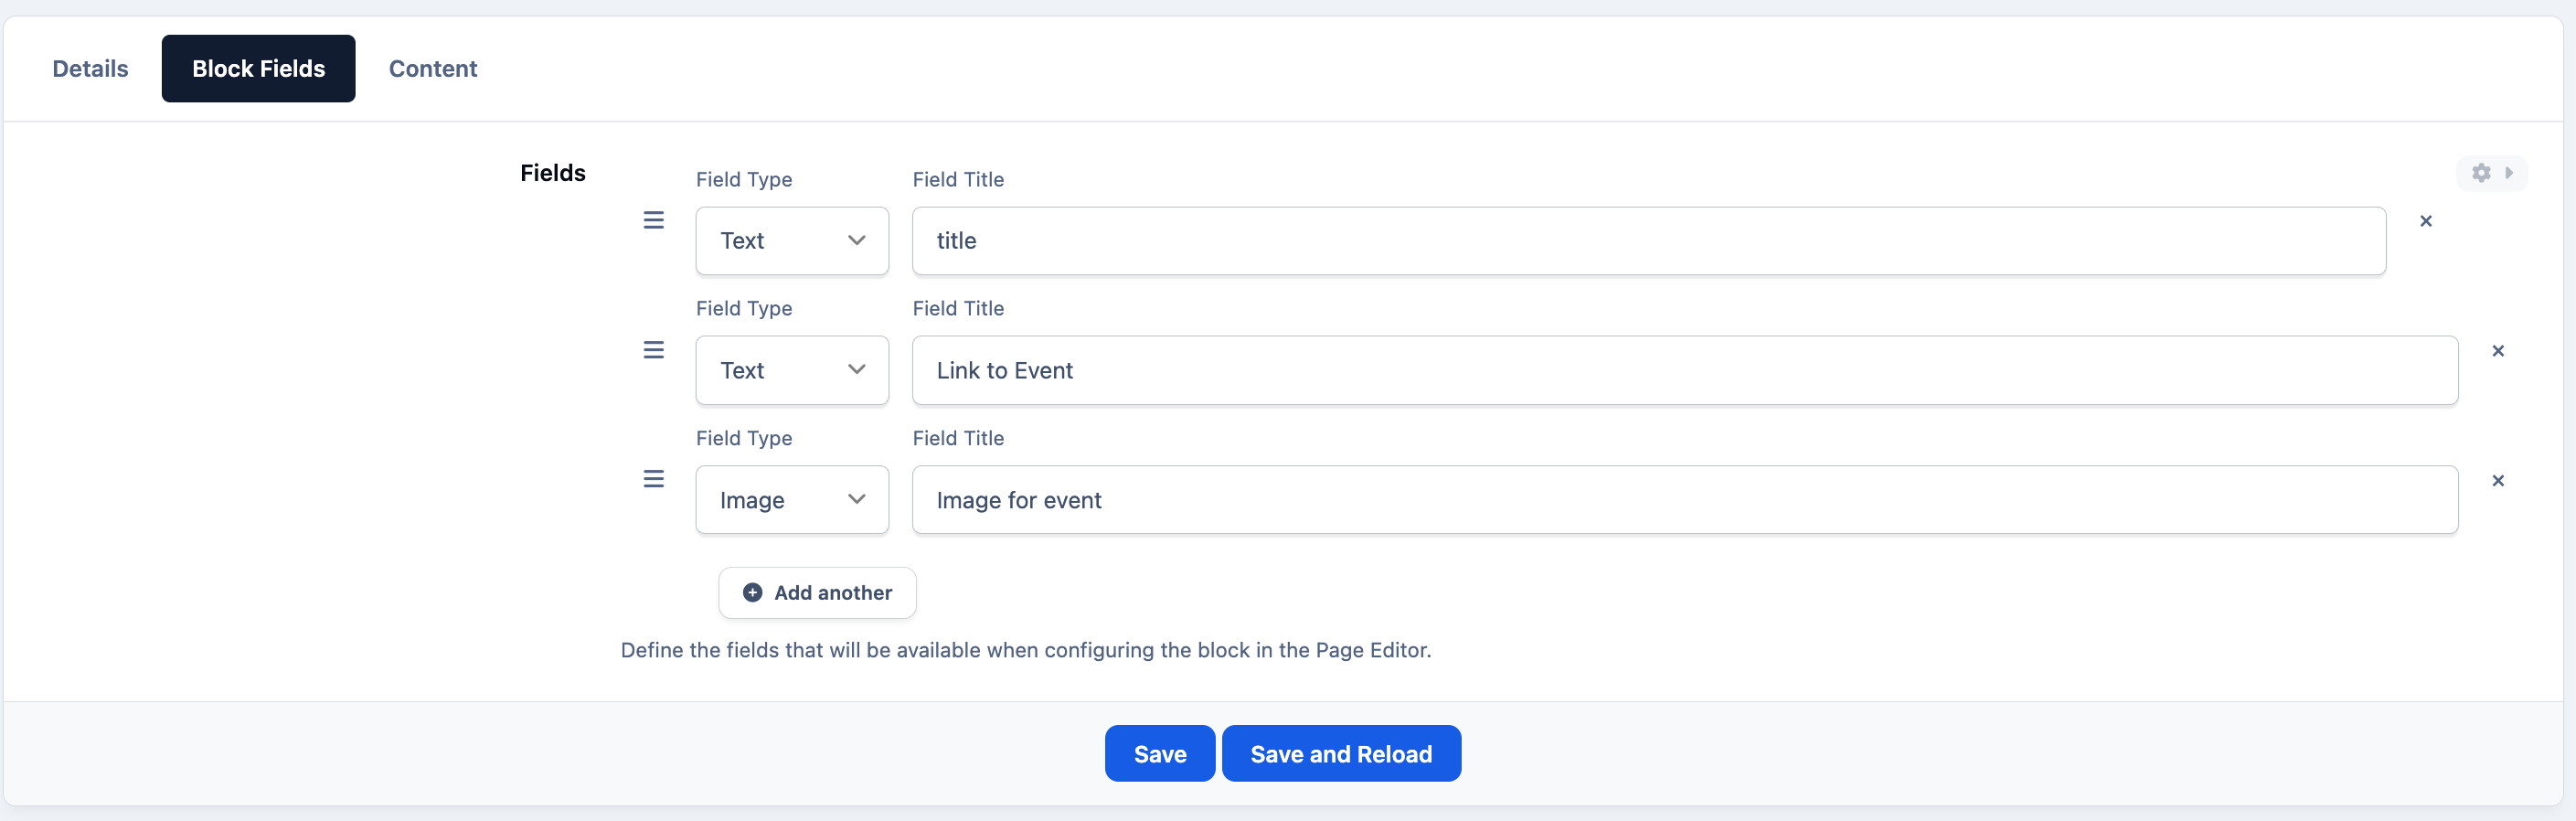
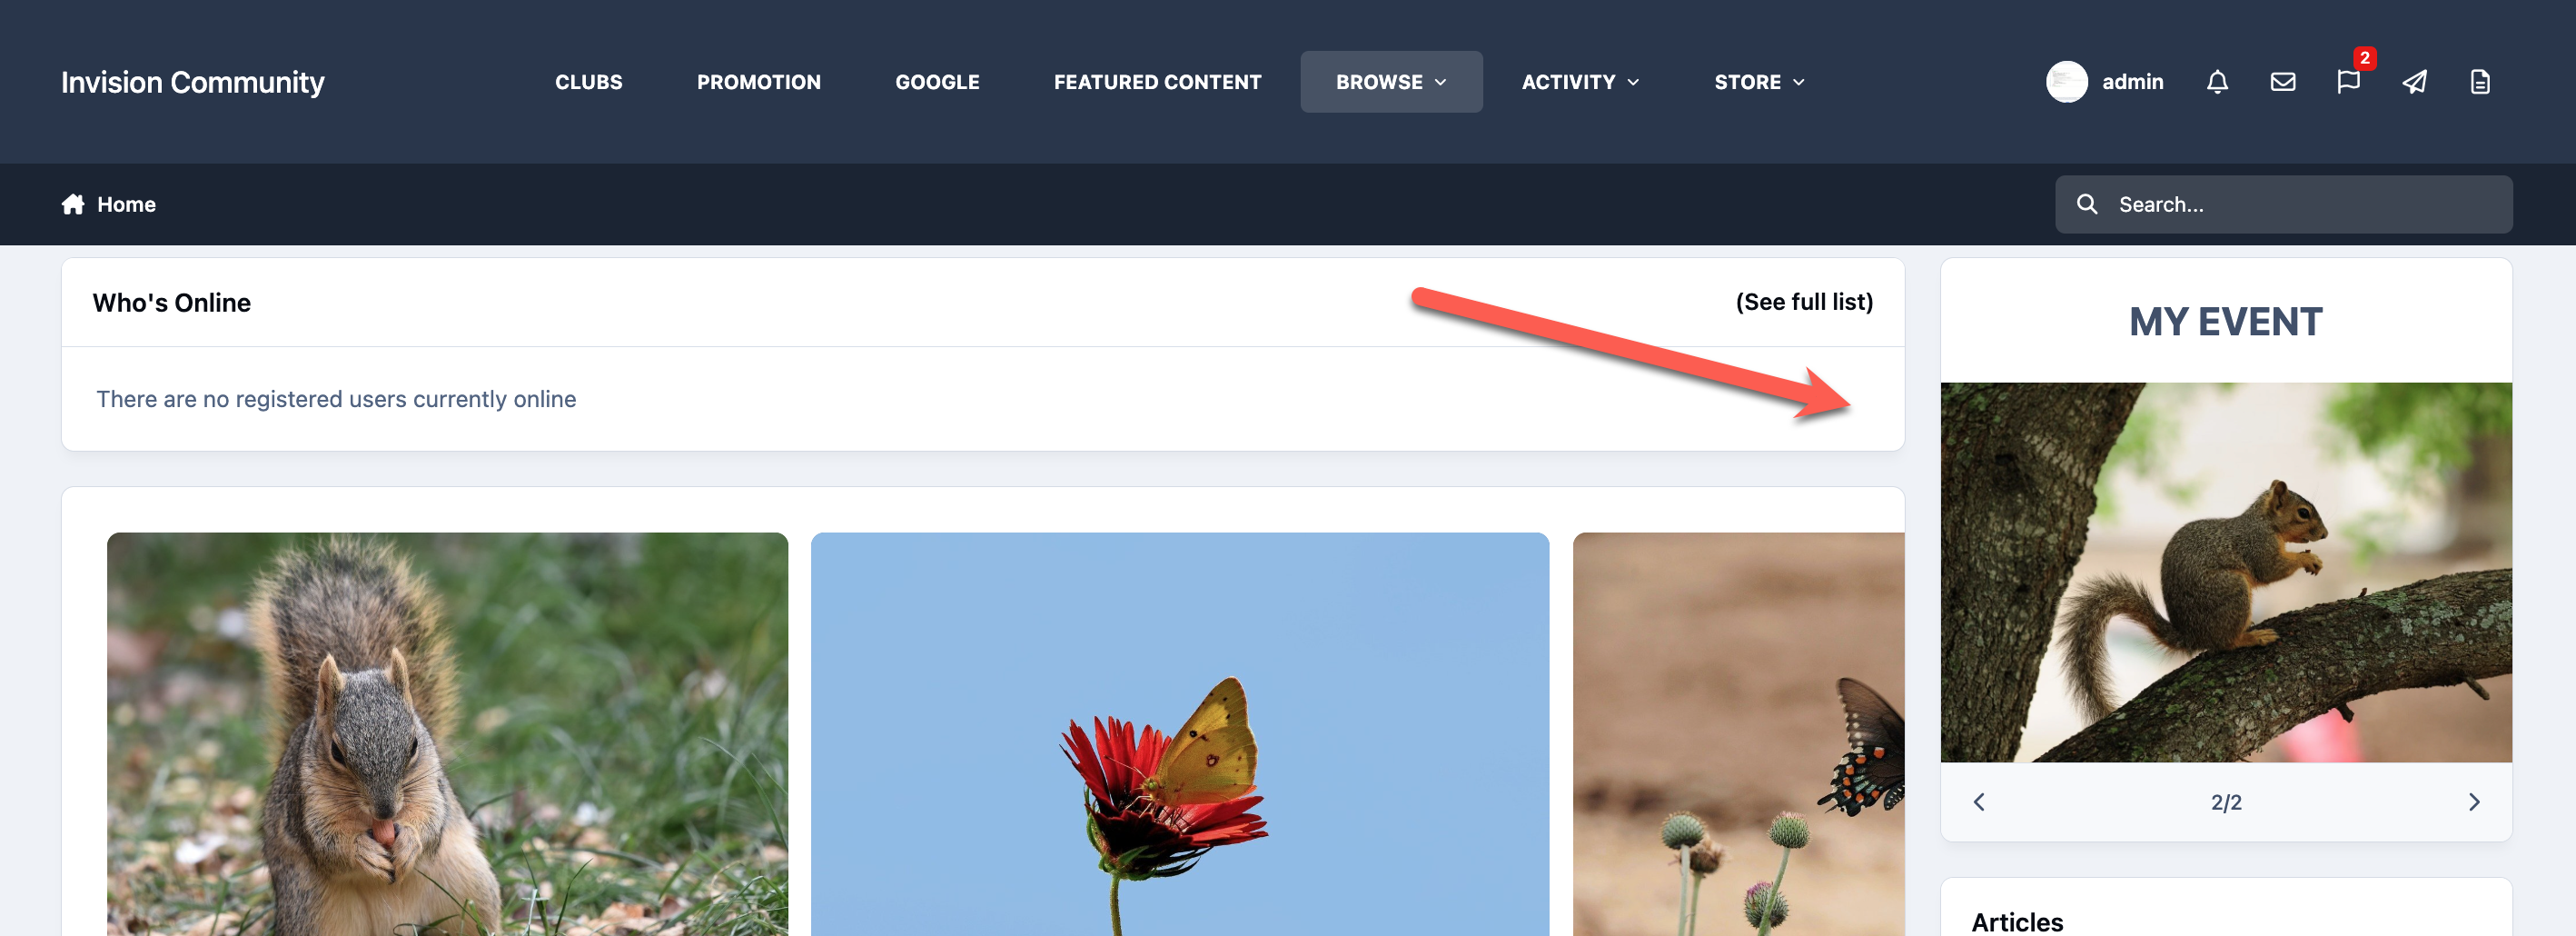
Now we can create the block fields. For our example, I want a block my moderators can use to show events. I want it to have just a clickable image and a title. So I have created 3 fields for these items
Next, you can move on to creating the block fields.
For this example, we’re creating a simple block that moderators can use to highlight events. The aim is to keep things quick and easy to fill out, while still producing a consistent and visually appealing result. In this case, we’ll use a clickable image with a title.
To achieve this, we’ve created three fields:
A text field (for the event title)
Another text field (so the image can be clicked and link to the event)
An image field (for the event image)
These fields will then be used within your HTML template to control exactly how the block is displayed on the front end
Creating New Fields
We now head to the content block, where we define the HTML template which will show the content. You will notes that the fields are shown as tags on the right. You can click on these to add them to your code where needed
Creating the HTML Template

Using the Block
The block can then be used from the page editor You can read more about using the page editor here if you are not yet familiar with this
Your new block will appear within the Custom Blocks section of the page editor. From there, it can be dragged into position on the page like any other widget.
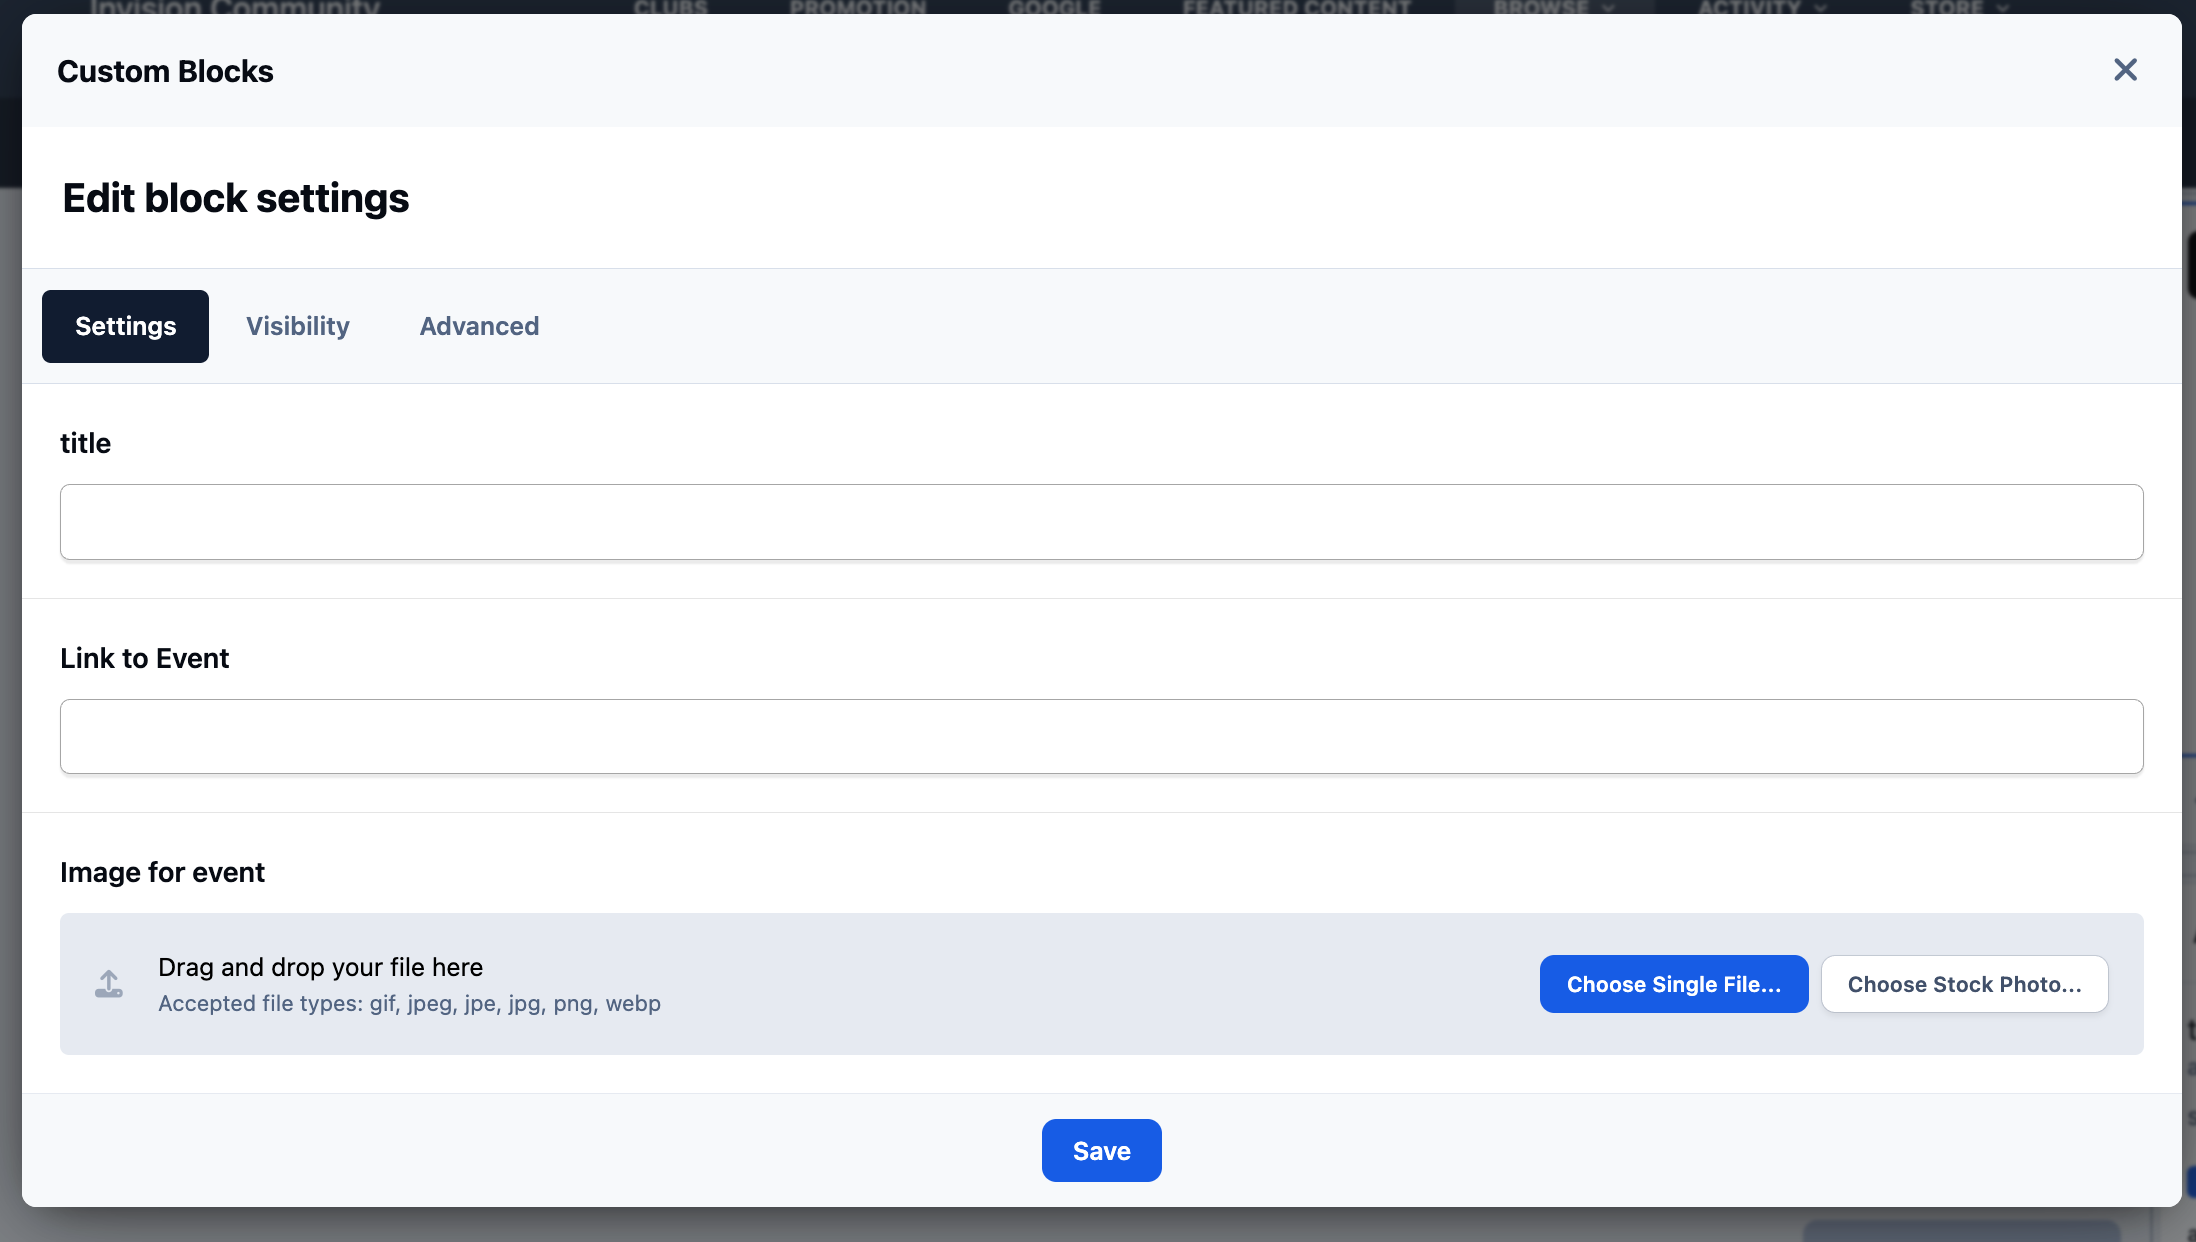
Once placed, selecting the edit icon will present the user with the fields you defined when creating the template block. Rather than working with code, they can simply fill in these fields, and the block will automatically display using the layout you’ve designed.
Using a Template Block
You can see an example of the one we have just created here, where I have used the custom block
Added Template Block
Recommended Comments