
Templates, CSS, and JavaScript files allow you to customise the default output of various parts of Pages, enabling you to build unique areas of your site.
Important
Only those familiar with HTML, CSS, and some PHP should modify templates. As these involve editing code, it is possible to unintentionally break parts of your site.
Main Templates Page
Types of template in Pages
Templates allow for advanced customizing of your Pages areas, so that they're unique to your site and to your particular use of them. There's three primary types of template you can customize:
Database templates
Databases templates let you change the output of just about every part of your databases. There's four main types of template:Category Index
The templates that render the category index of a database, and subcategories when browsing the record listing.Listing
Templates that render the record listingDisplay
Templates that render record view itself, including comments & reviewsForm
Templates for the add/edit form, allowing you to customize this form per-database
Page templates
By default, a page will use the suite wrapper, which includes the header, navigation, user bar etc. leaving your page content to control the actual content area. However, you can instead choose to use a custom page wrapper, allowing you to control the entire output of the page. Wrappers are created as page templates, and selected when you create your page.Block templates
When you create a plugin block showing a feed of data, IPS4 uses a default template. You can however customize this template or create a new one, allowing each block to have a unique appearance.
Block Templates
Blocks can make use of the full range of Invision template syntax, offering a high level of flexibility. The data available to each template depends on its type—for example, a database listing template will receive data from the database category, while a block template will receive data based on its filters. All templates also have access to the underlying Invision PHP framework.
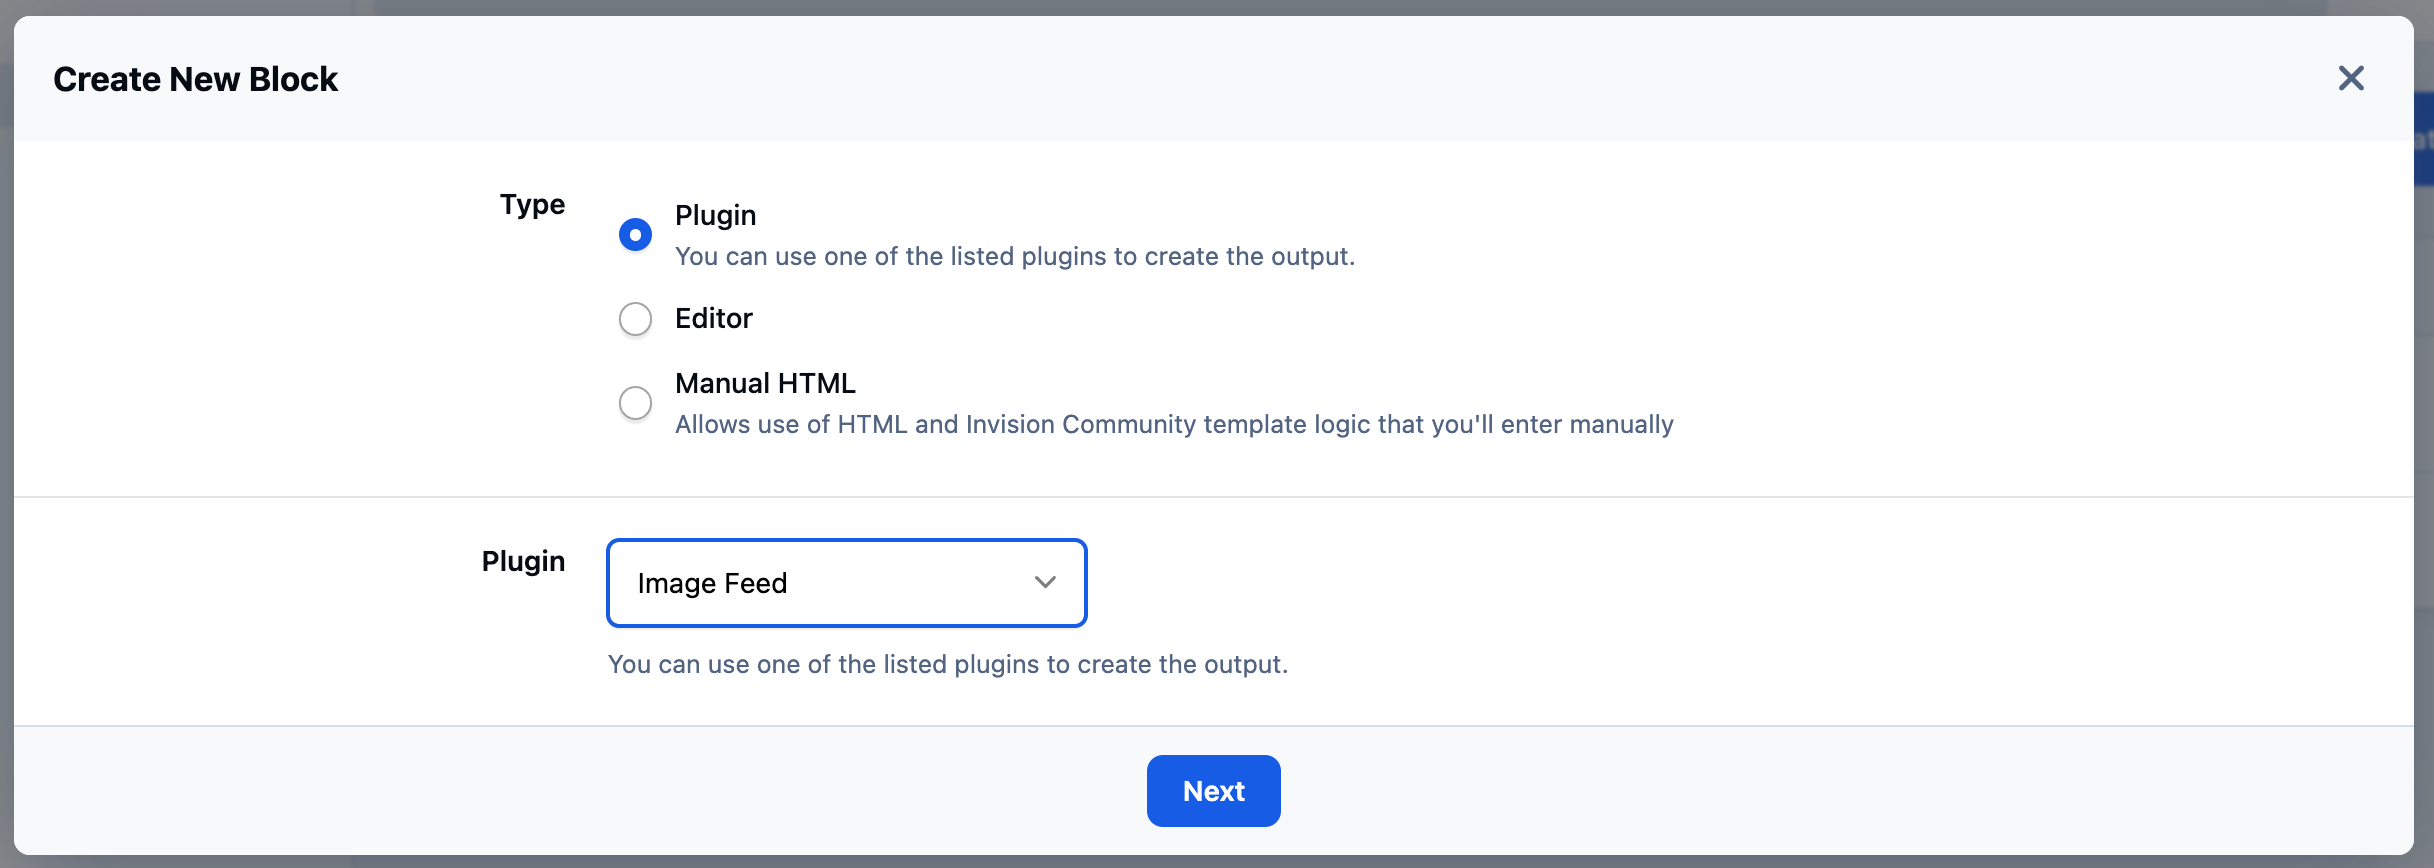
Existing block templates can be edited when creating a block using an existing block plugin type. A block plugin can be thought of as a predefined block type. In the example below, a new block is created using the Image Feed plugin. This can be done from the following area:
Pages → Page Management → Blocks
Creating a New Block from Plugins
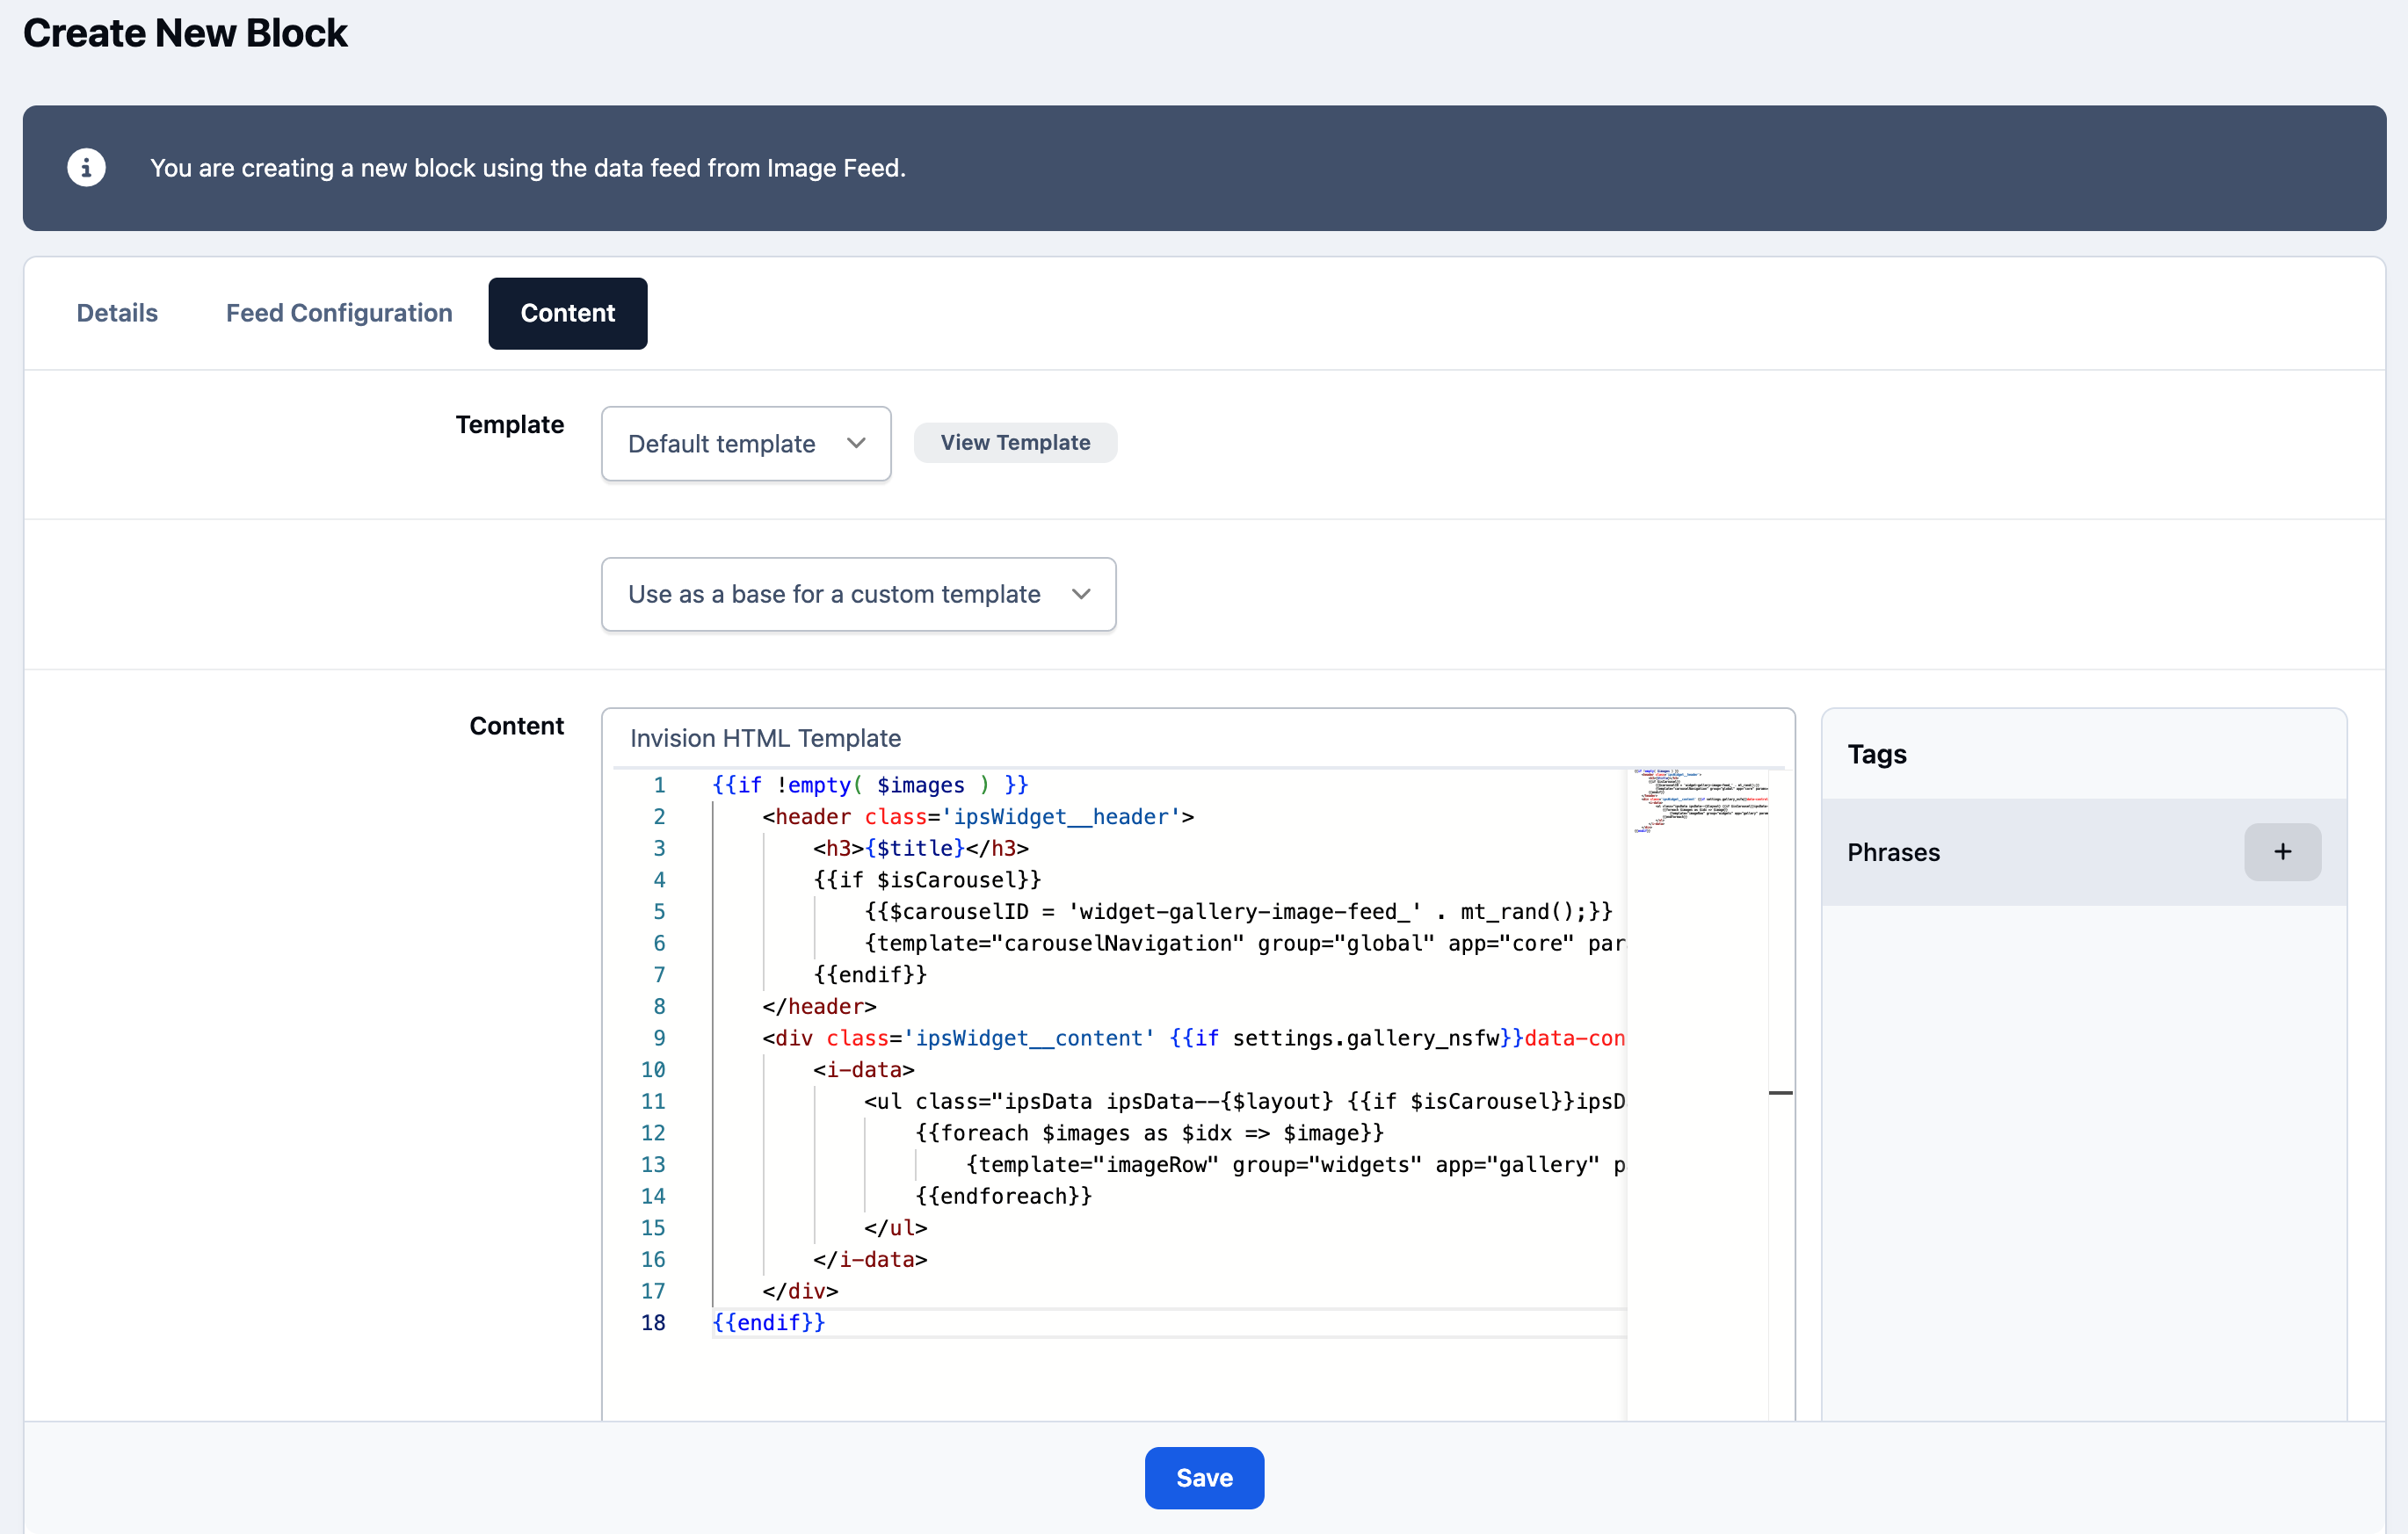
Once you have selected the block plugin, you will see on the Content tab that you can use the plugin’s template as a base for a custom template, allowing you to tailor it to your specific needs.
Block Template Editing
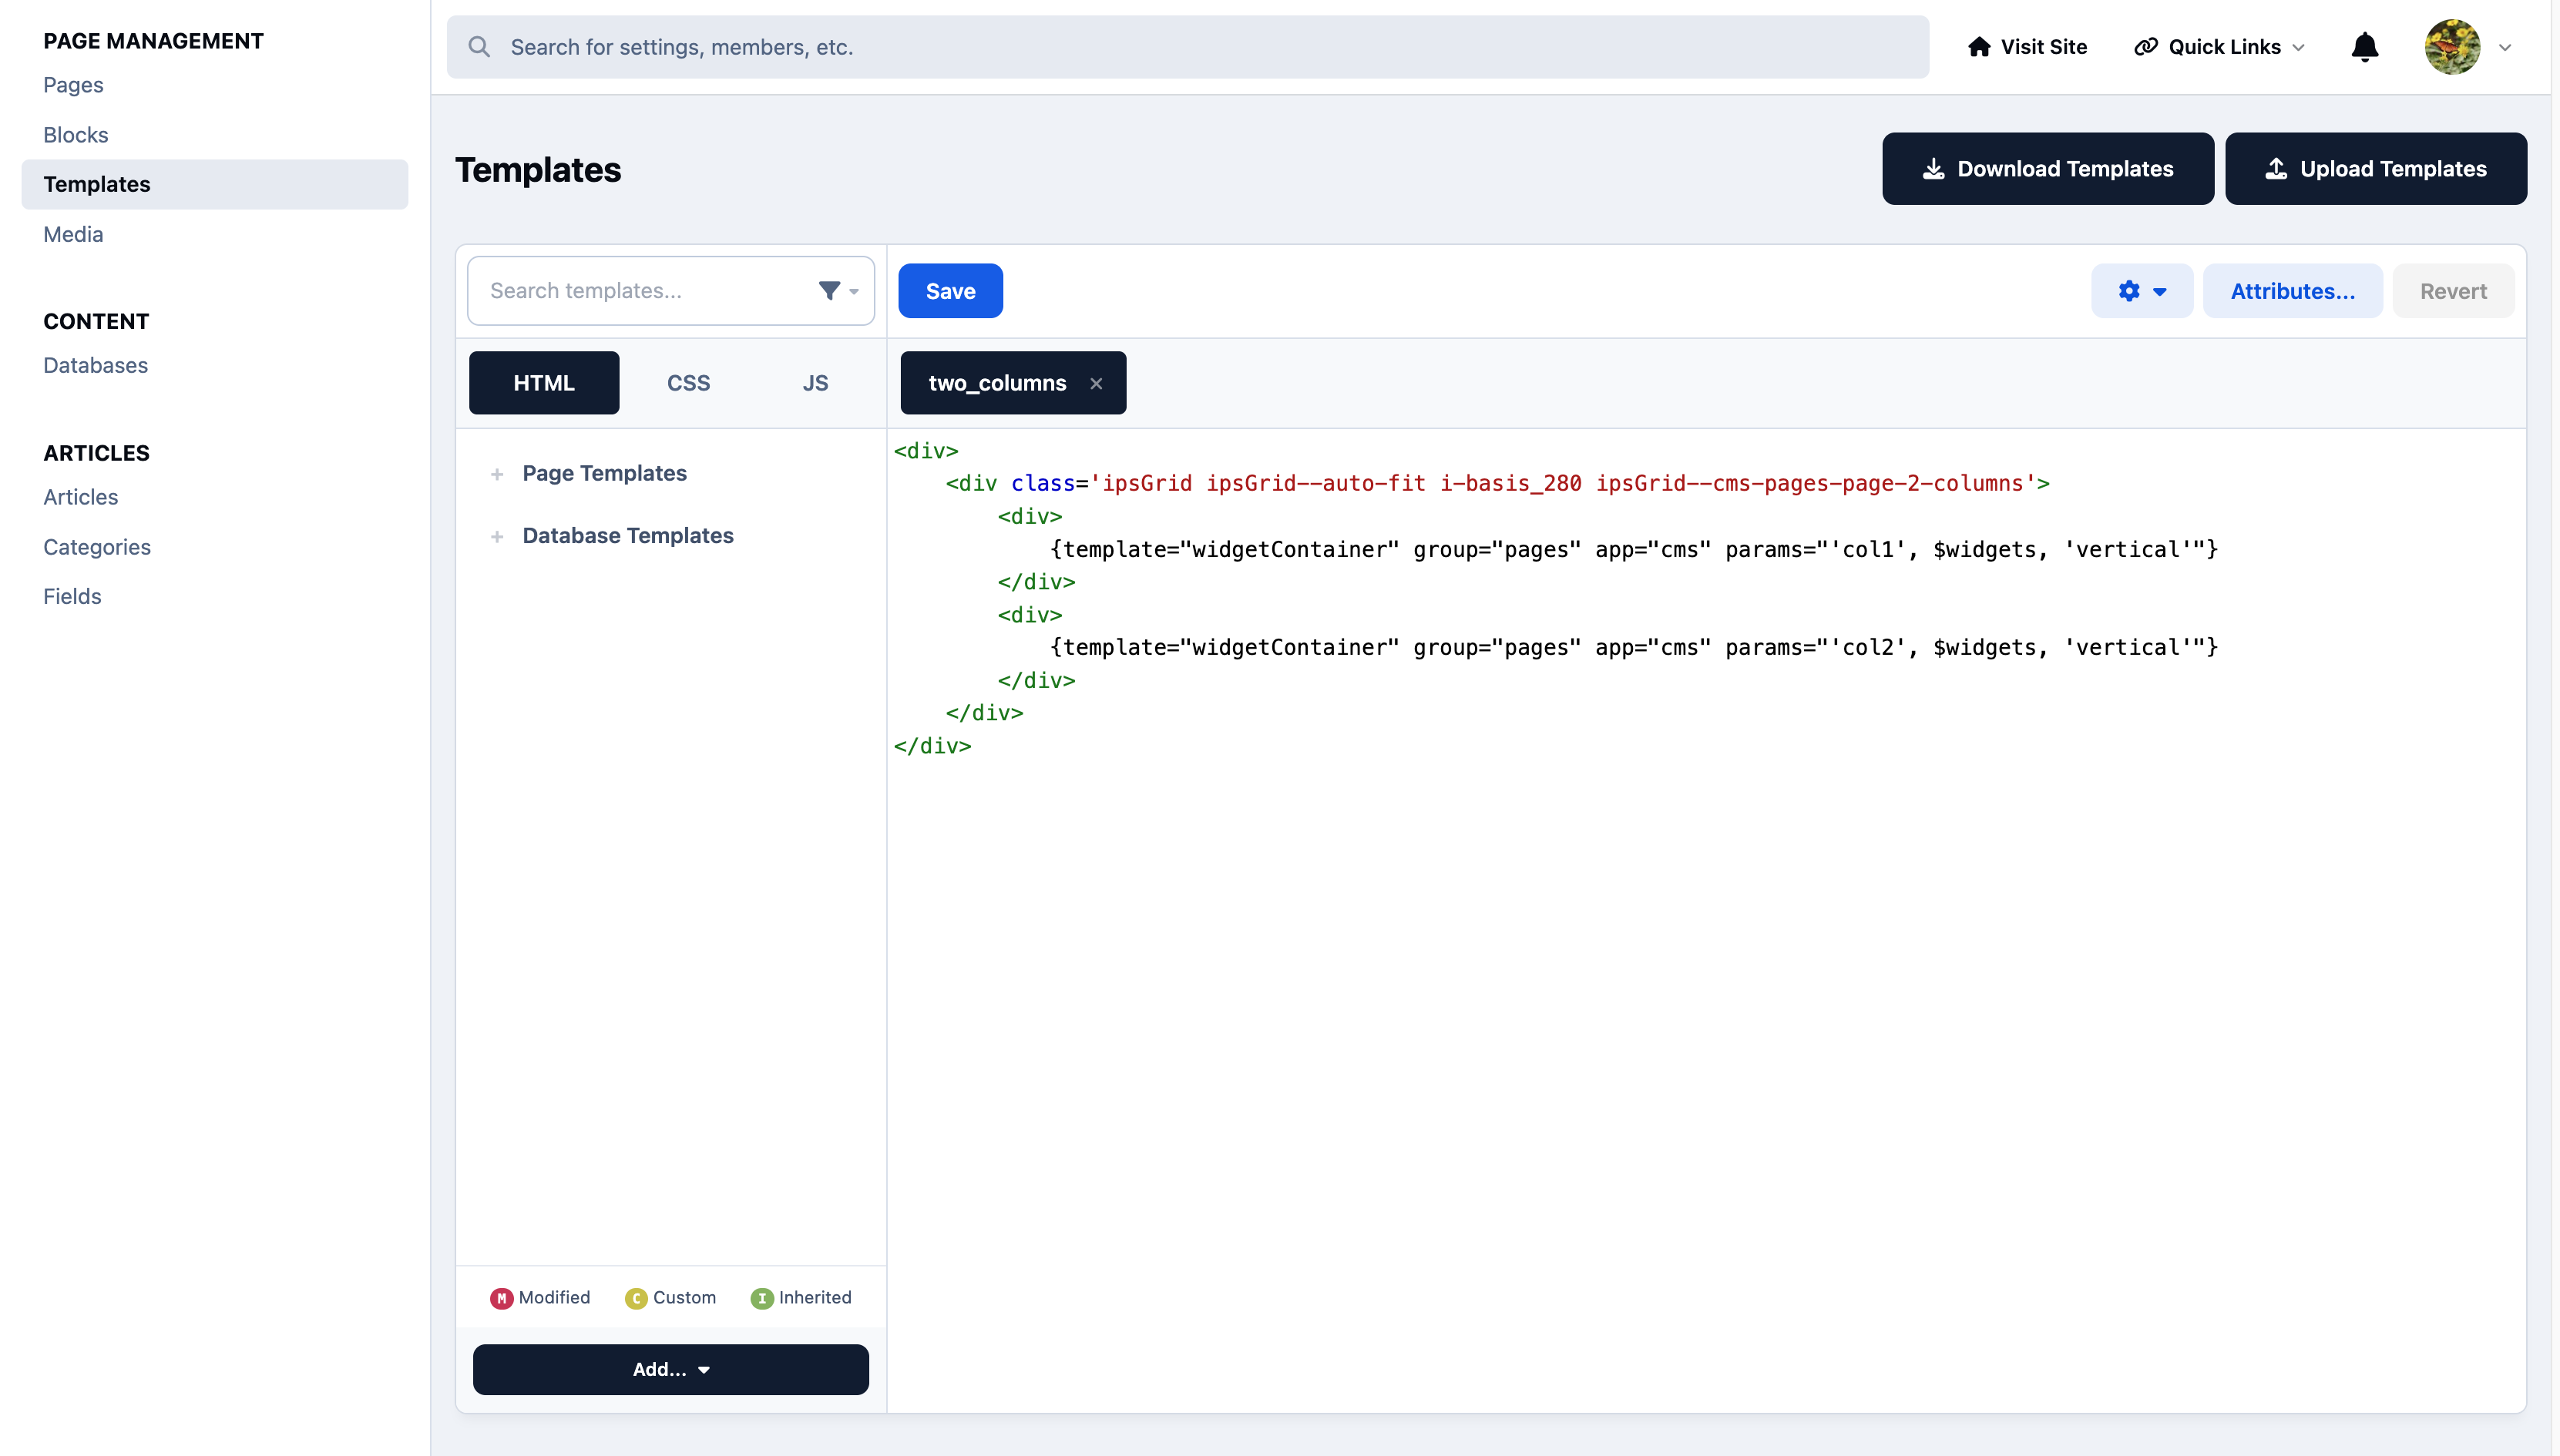
Page/Database Templates
Database and page templates are managed in the Pages template editor, accessed via the following location in the Admin CP:
Pages → Templates
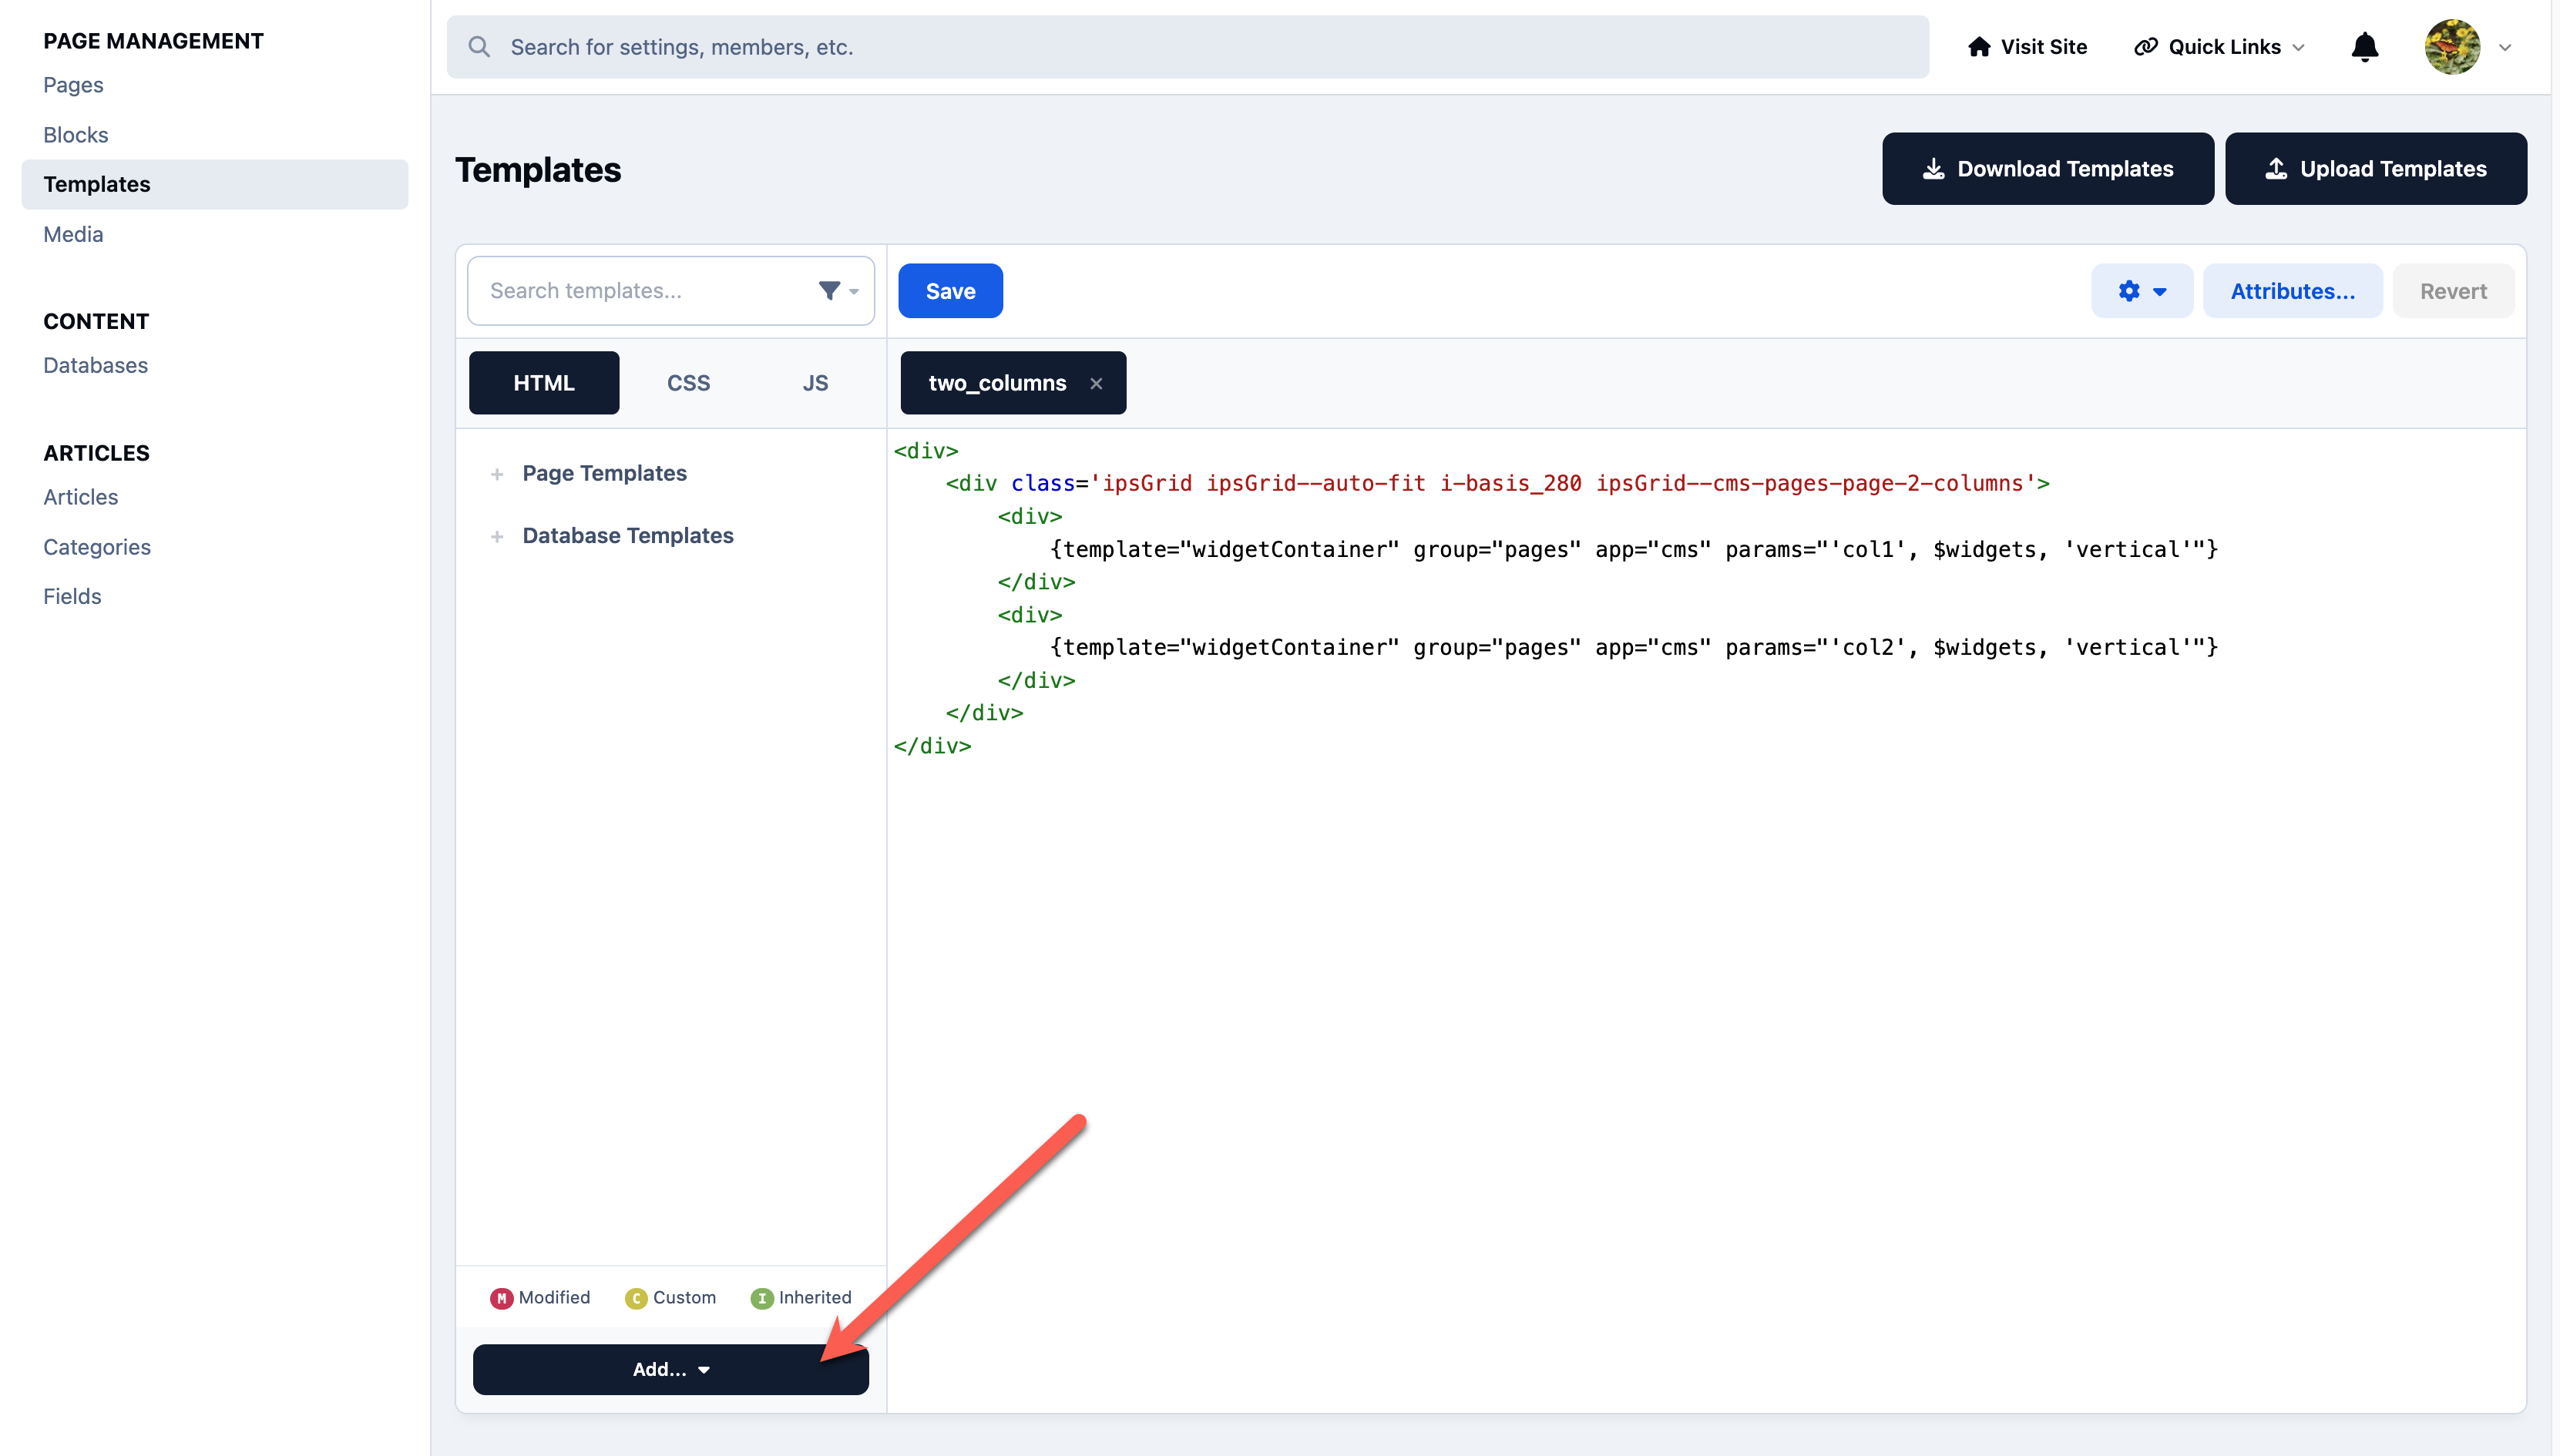
here you can create new templates using the 'New' button.
Adding New Templates
Recommended Comments