
When creating a new database template, there may be times when you want to display custom fields in specific locations. This guide explains how to use custom fields within your database templates, provides examples of how to include them, and gives a brief overview of each field display type.
The Basics
To understand how custom fields are used within templates, it’s important to be familiar with the items available in your template code.
When creating a custom field, the Display tab will show a screen similar to the one below. Each section is described below and will be relevant when adding items to your custom templates.
Display Options for Custom Fields
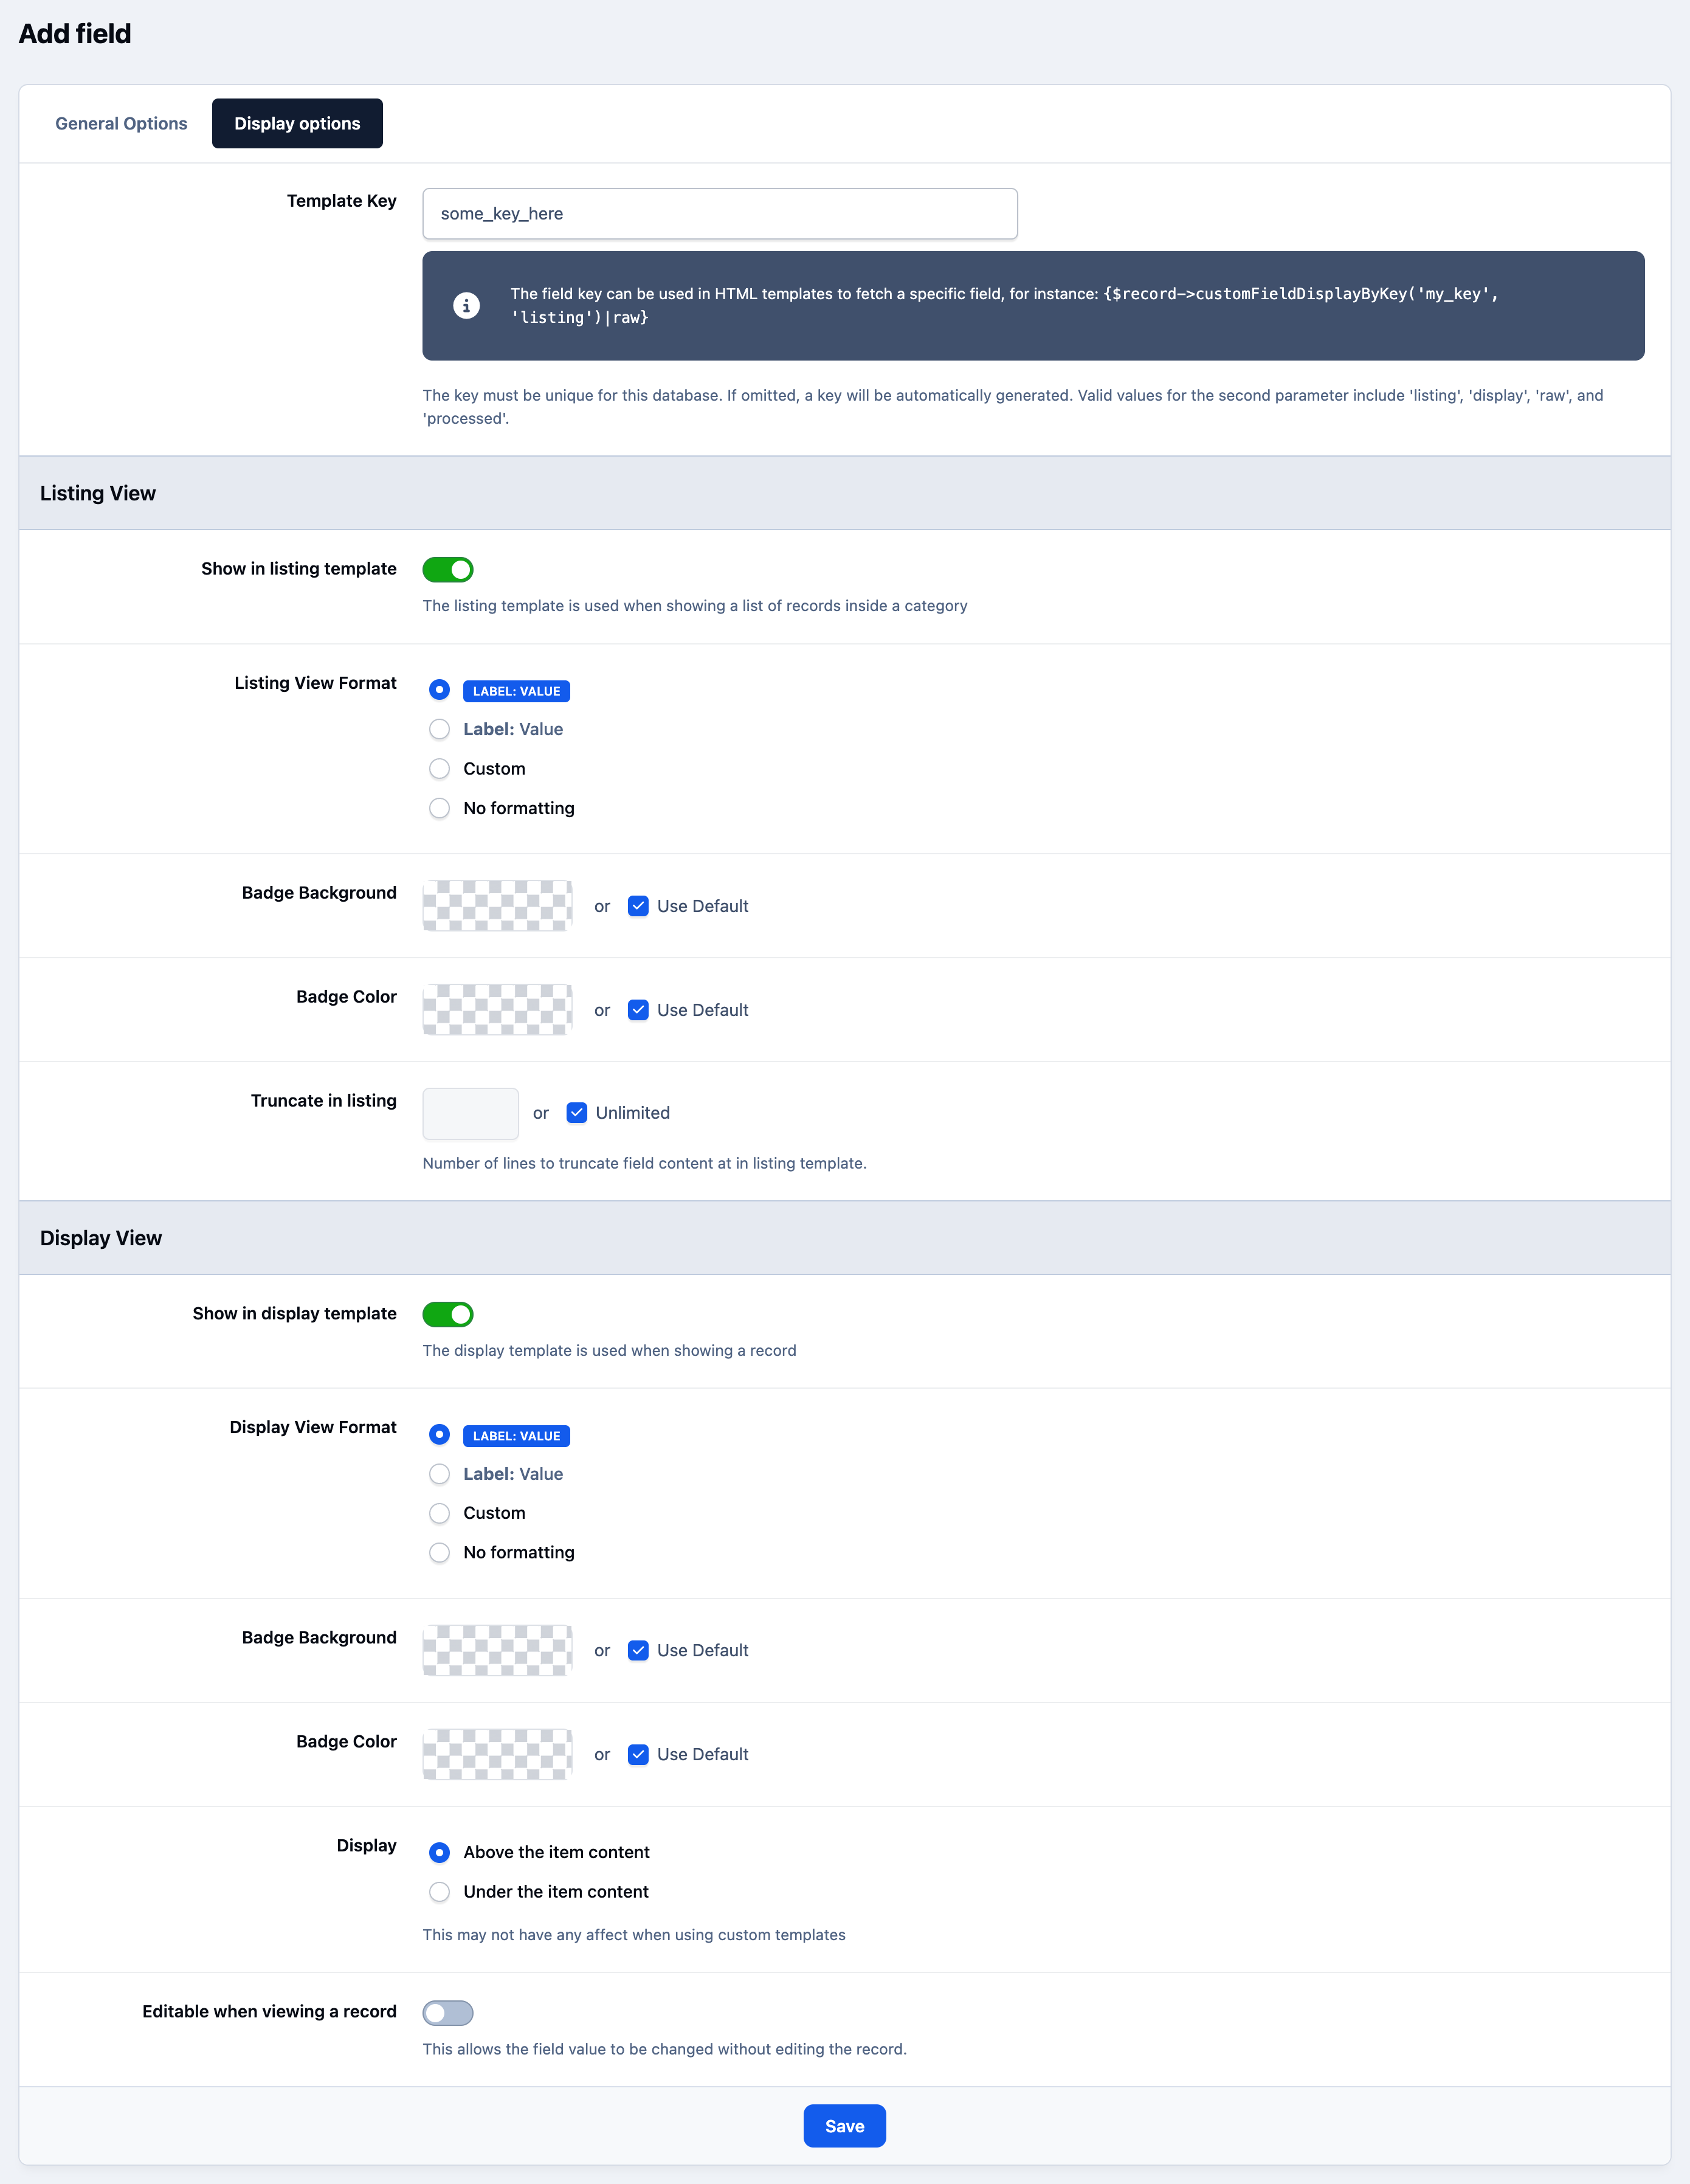
Template Key - This is how you will reference your field within your template. When creating fields, try to stick to a convention of naming which is relevant to what the field contains, and the database if you have more than one.
So for example I may have 'bugs_area_text' which would be clear to me in my instance, that it's the bugs database, the field which shows the area where the bug is, and it's a text field. Sticking to some sort of convention may help make your templates easier to read as you are developing them.Listing View Format - This is the format used when referencing the listing view, which will be discussed below.
Display View Format - This is the format used when referencing the display view, which will be discussed below. Note also that display is the default view to be used if no other is specified.
Display - In addition to the Display View Format, there is also a specifier for where this should be placed. You can reference each of these options specifically in your template code.
Template Syntax
Any field you create can be used within your database templates using the following code:
{$record->customFieldDisplayByKey('your_template_key', 'viewtype')|raw}The template key parameter should match the value entered in the Template Key field on the Display tab of your custom field.
The view type parameter specifies the format you want to display, based on the options available in the Display tab. The available view types are as follows:
listing - This will show the value as per any listing badge preferences as set up on your custom field. This is usually used within a record list.
display/display_top/display_bottom - Each of these show the value as per any display value set up in your custom field. Display on its own will just show the format, however you can use display top and bottom to display based on which of these items is selected within that field for the display section.
thumbs - returns an array of \IPS\File objects . Returned only with image types, where thumbnail creation is selected.
upload- returns an array of \IPS\File objects . Returned only with upload field type.
raw - this will show the value as store in the database, unless there are muliple upload (returned as an array of URLs) or they are a Reciprocal field type (returned as an array of record objects)
processed - this will show the raw value as specified above, however is also passed through the form helper
Adding |raw means the value will not be escaped. This can be useful for fields that contain URLs or HTML output, such as thumbnails or YouTube embeds. However, when used with plain text fields, be aware that this allows unescaped content to be output directly to the page.
An Example
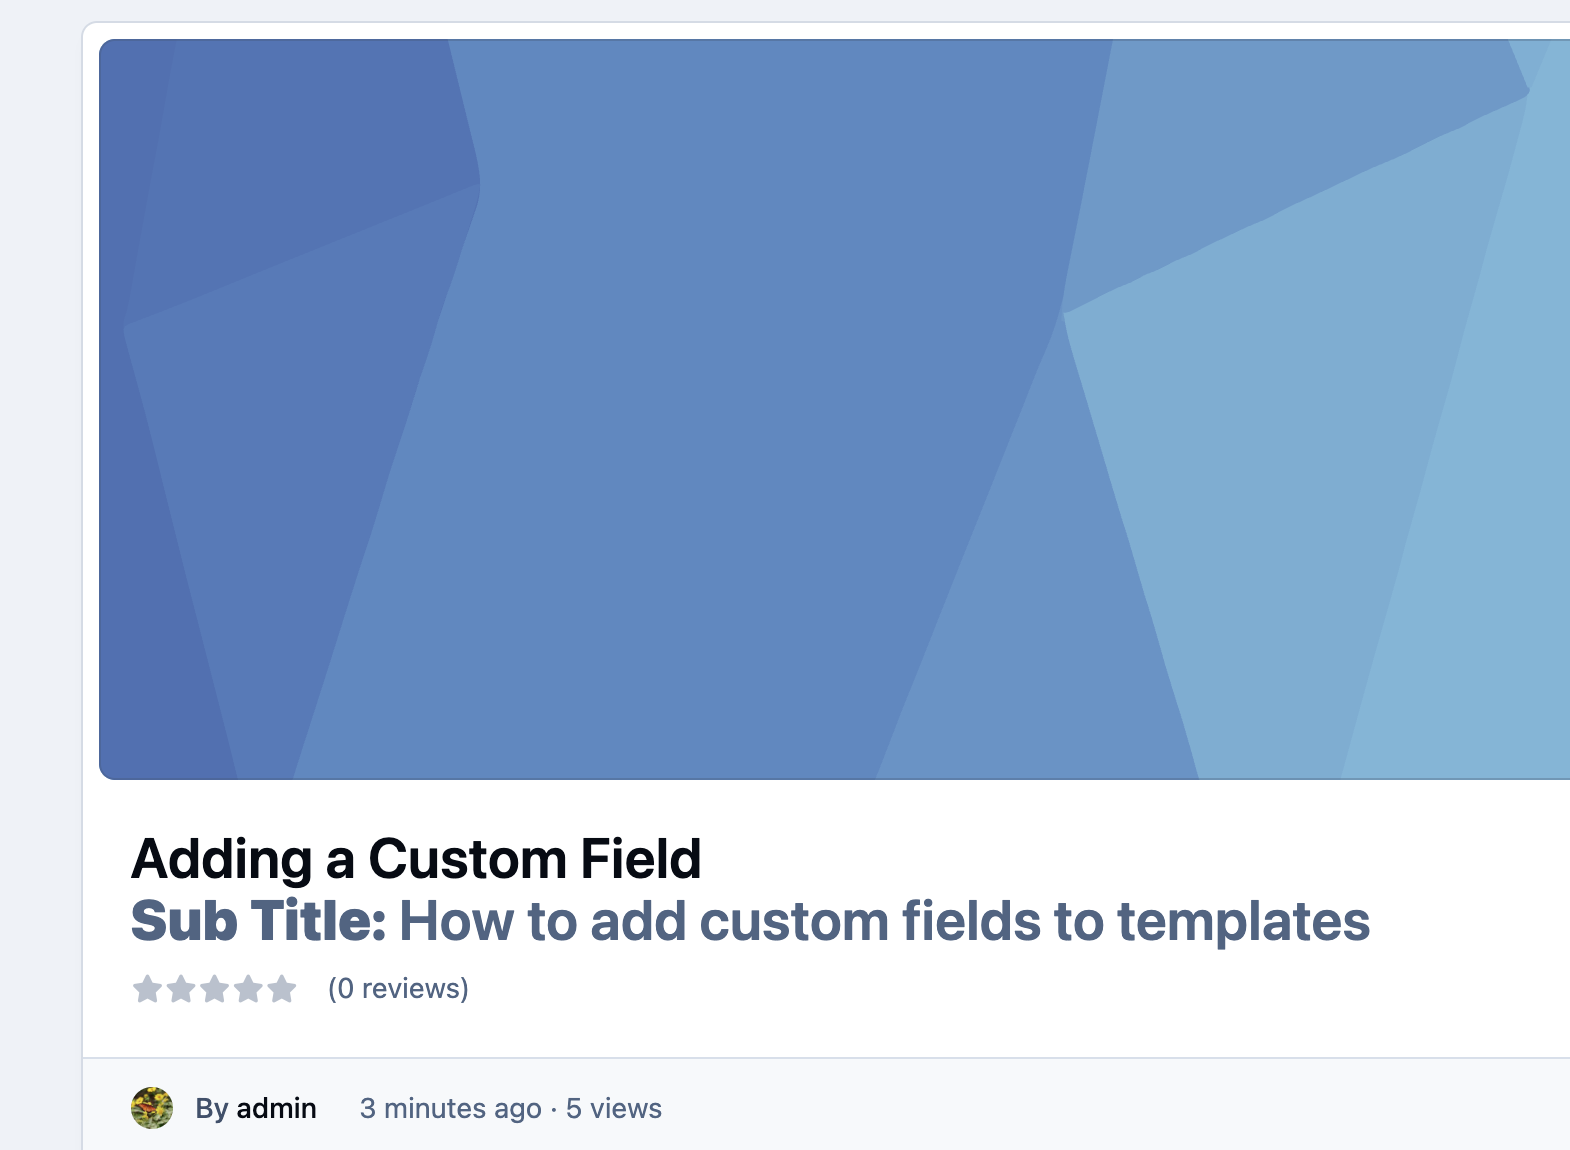
For this example, we have created a field named 'Sub Title'. The field has been configured, and in this case, it will be used to display a subtitle for the record, as shown below.
Template Key for Use in Custom Templates

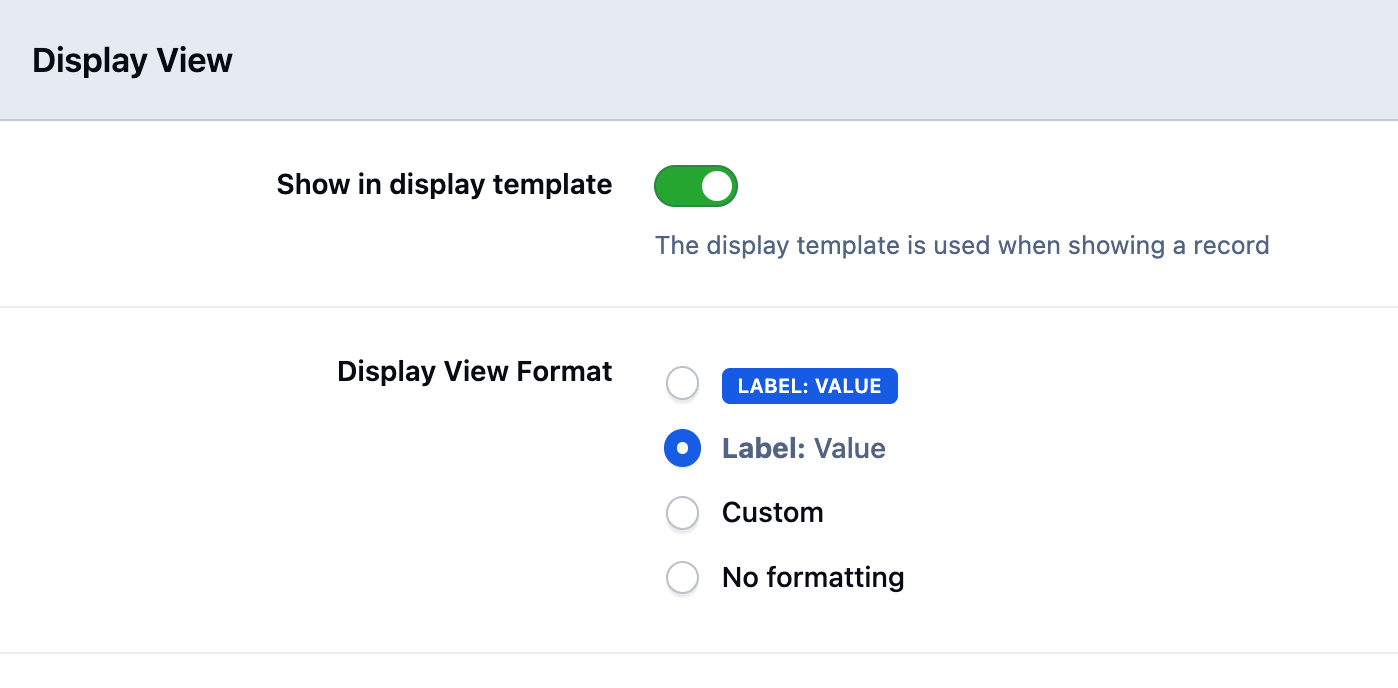
We are happy with one of the preset display options, so have selected the one below
Changing Display View Format
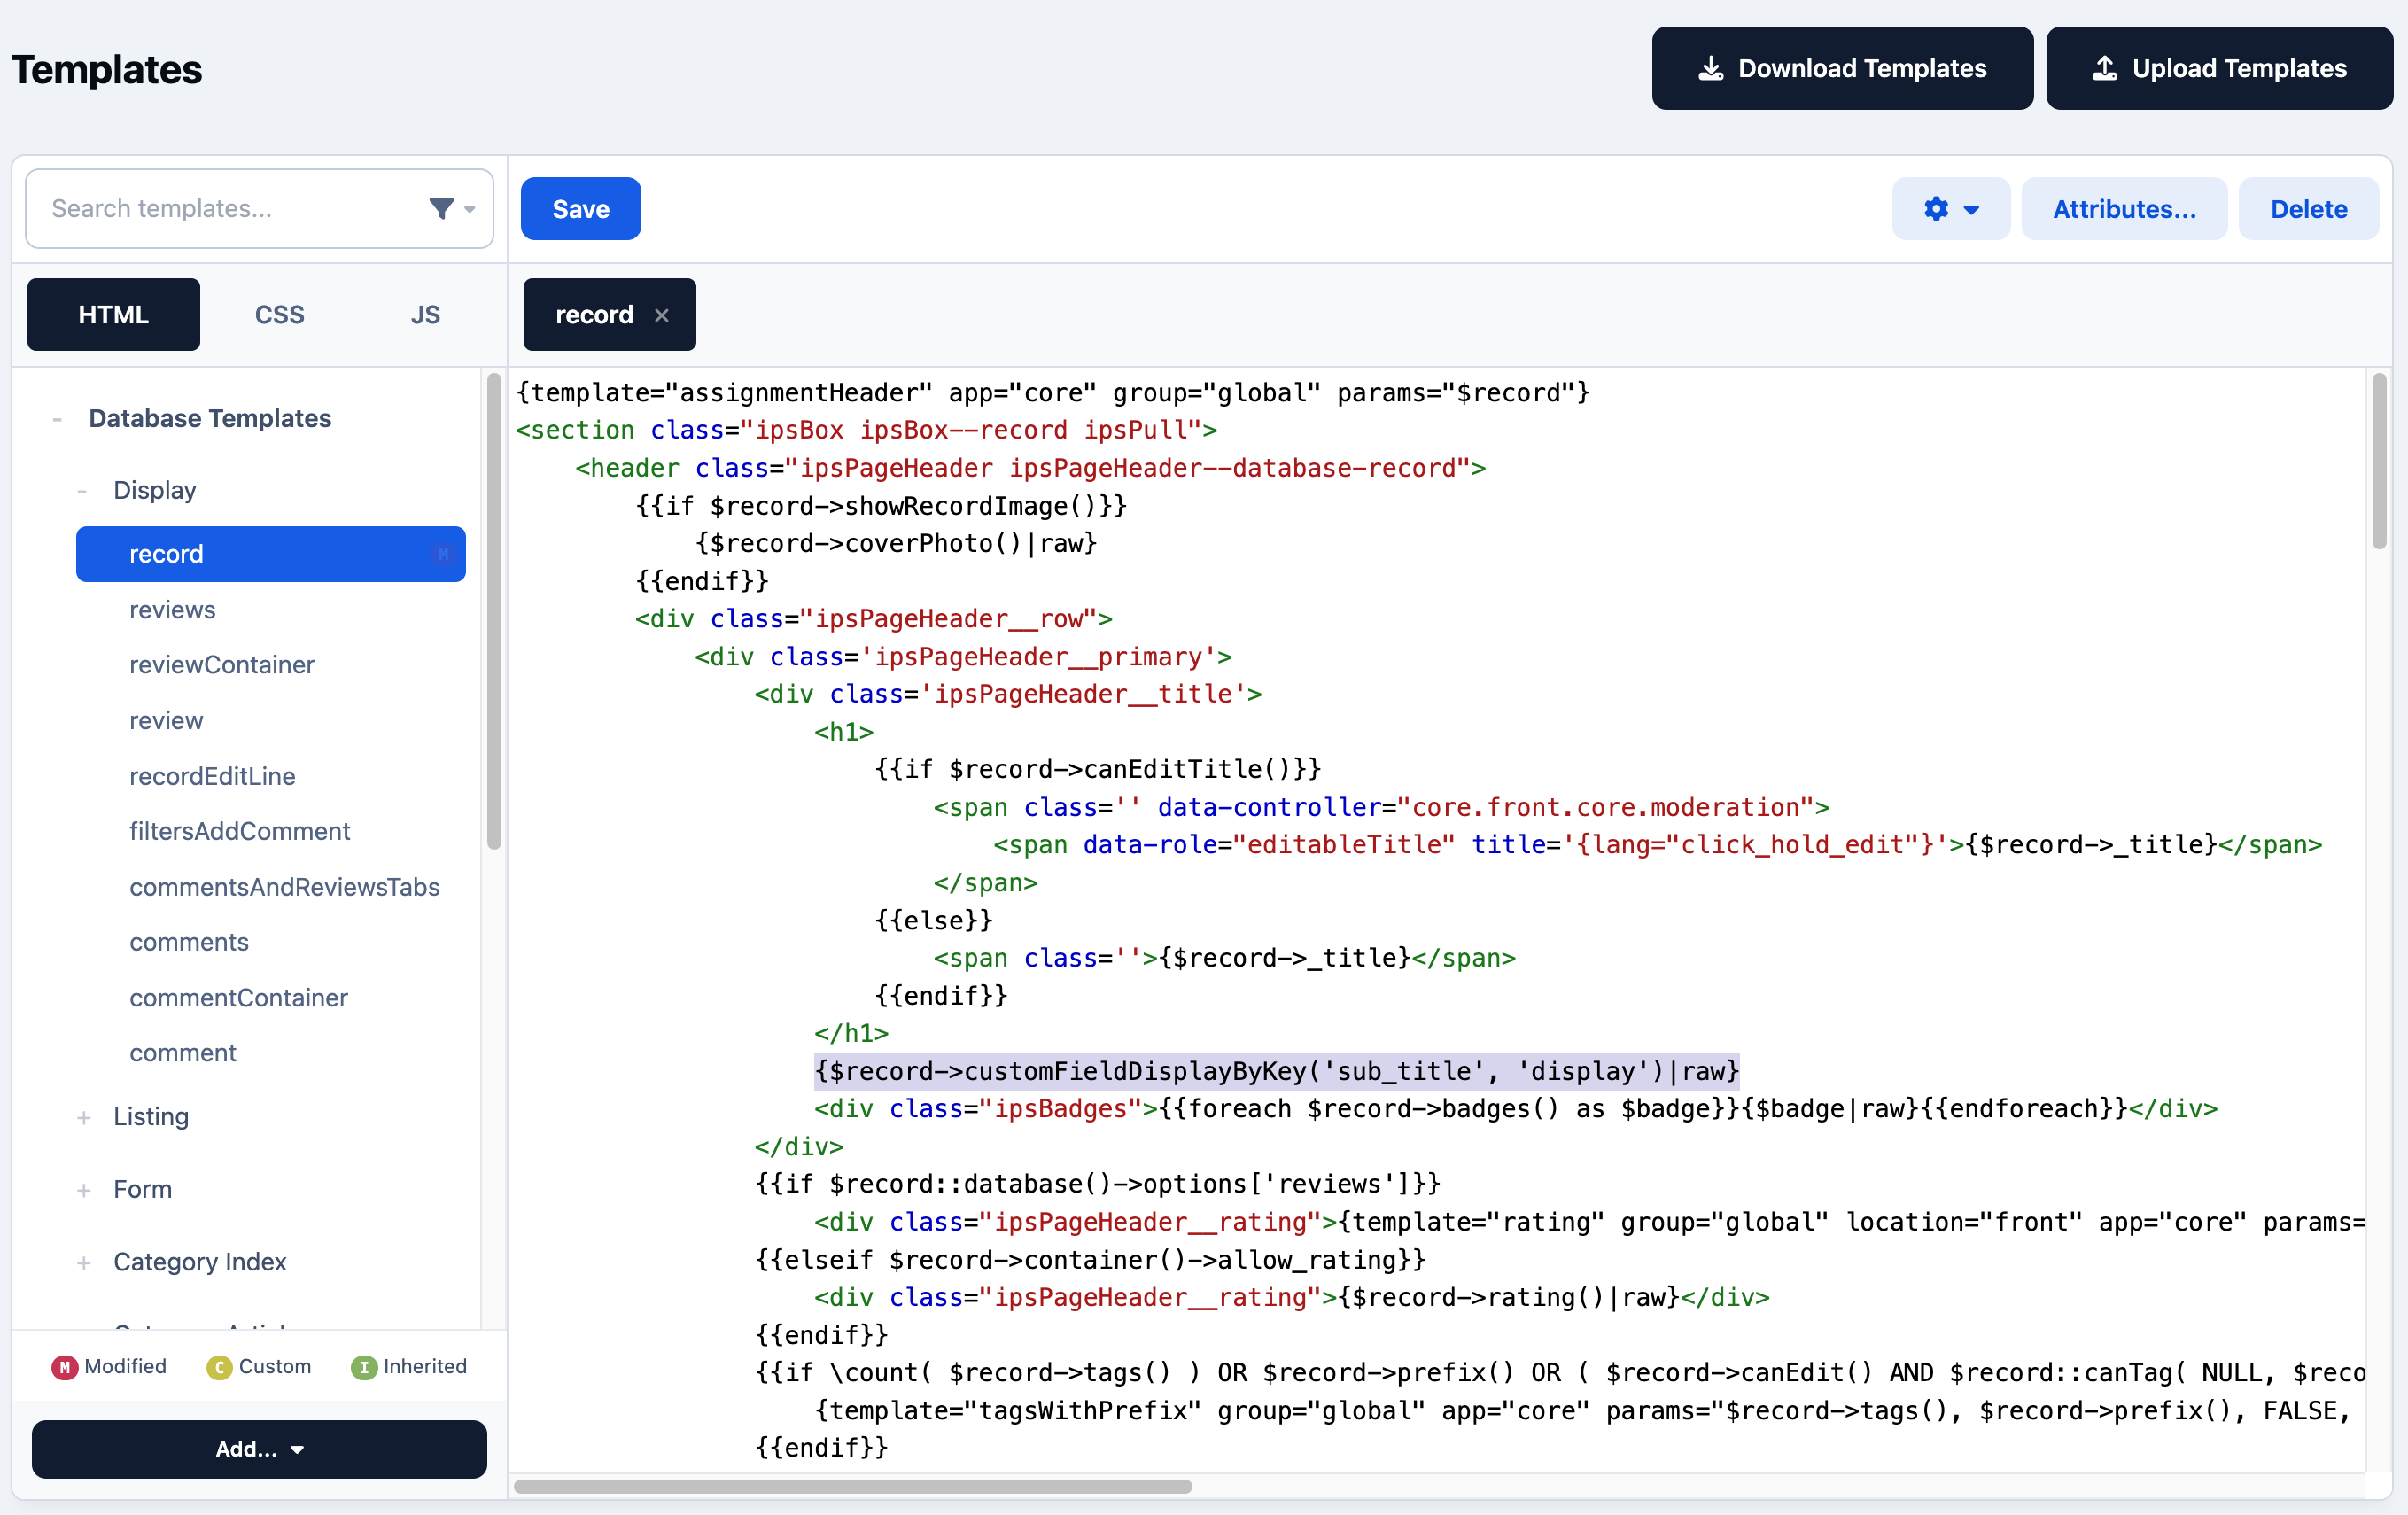
We now need to edit the record template and add the line where we want it to appear—in this case, just below the title.
Adding to the Template
Info
Note that the syntax used here includes the |raw at the end. This is because what will be returned will the the HTML from the standard display format I have chosen, and I dont wish for this to be escaped.
{$record->customFieldDisplayByKey('sub_title', 'display')|raw}
We have added in a default format here, however of course you may wish to use "No formatting" and then apply your own CSS formatting to your custom items
Example
Recommended Comments