
Introduction
As mentioned in the Introduction to Pages guide, unlike other applications, Pages starts as a blank slate. Its purpose is to provide the tools needed to build your own areas of your community. As a result, it can feel a little intimidating to new users—especially those without coding experience—since you are responsible for creating what you need using the tools provided.
This tutorial will help you get started by walking through the creation of a simple recipe section, with concepts that can be applied to many different types of content.
Creating the Database
Databases are set up in the Admin CP by navigating to Pages → Databases.
Here, you will see a list of the current databases in your community. Click the 'Create New' button to add a new one. Each tabs content will then be explained here
Details
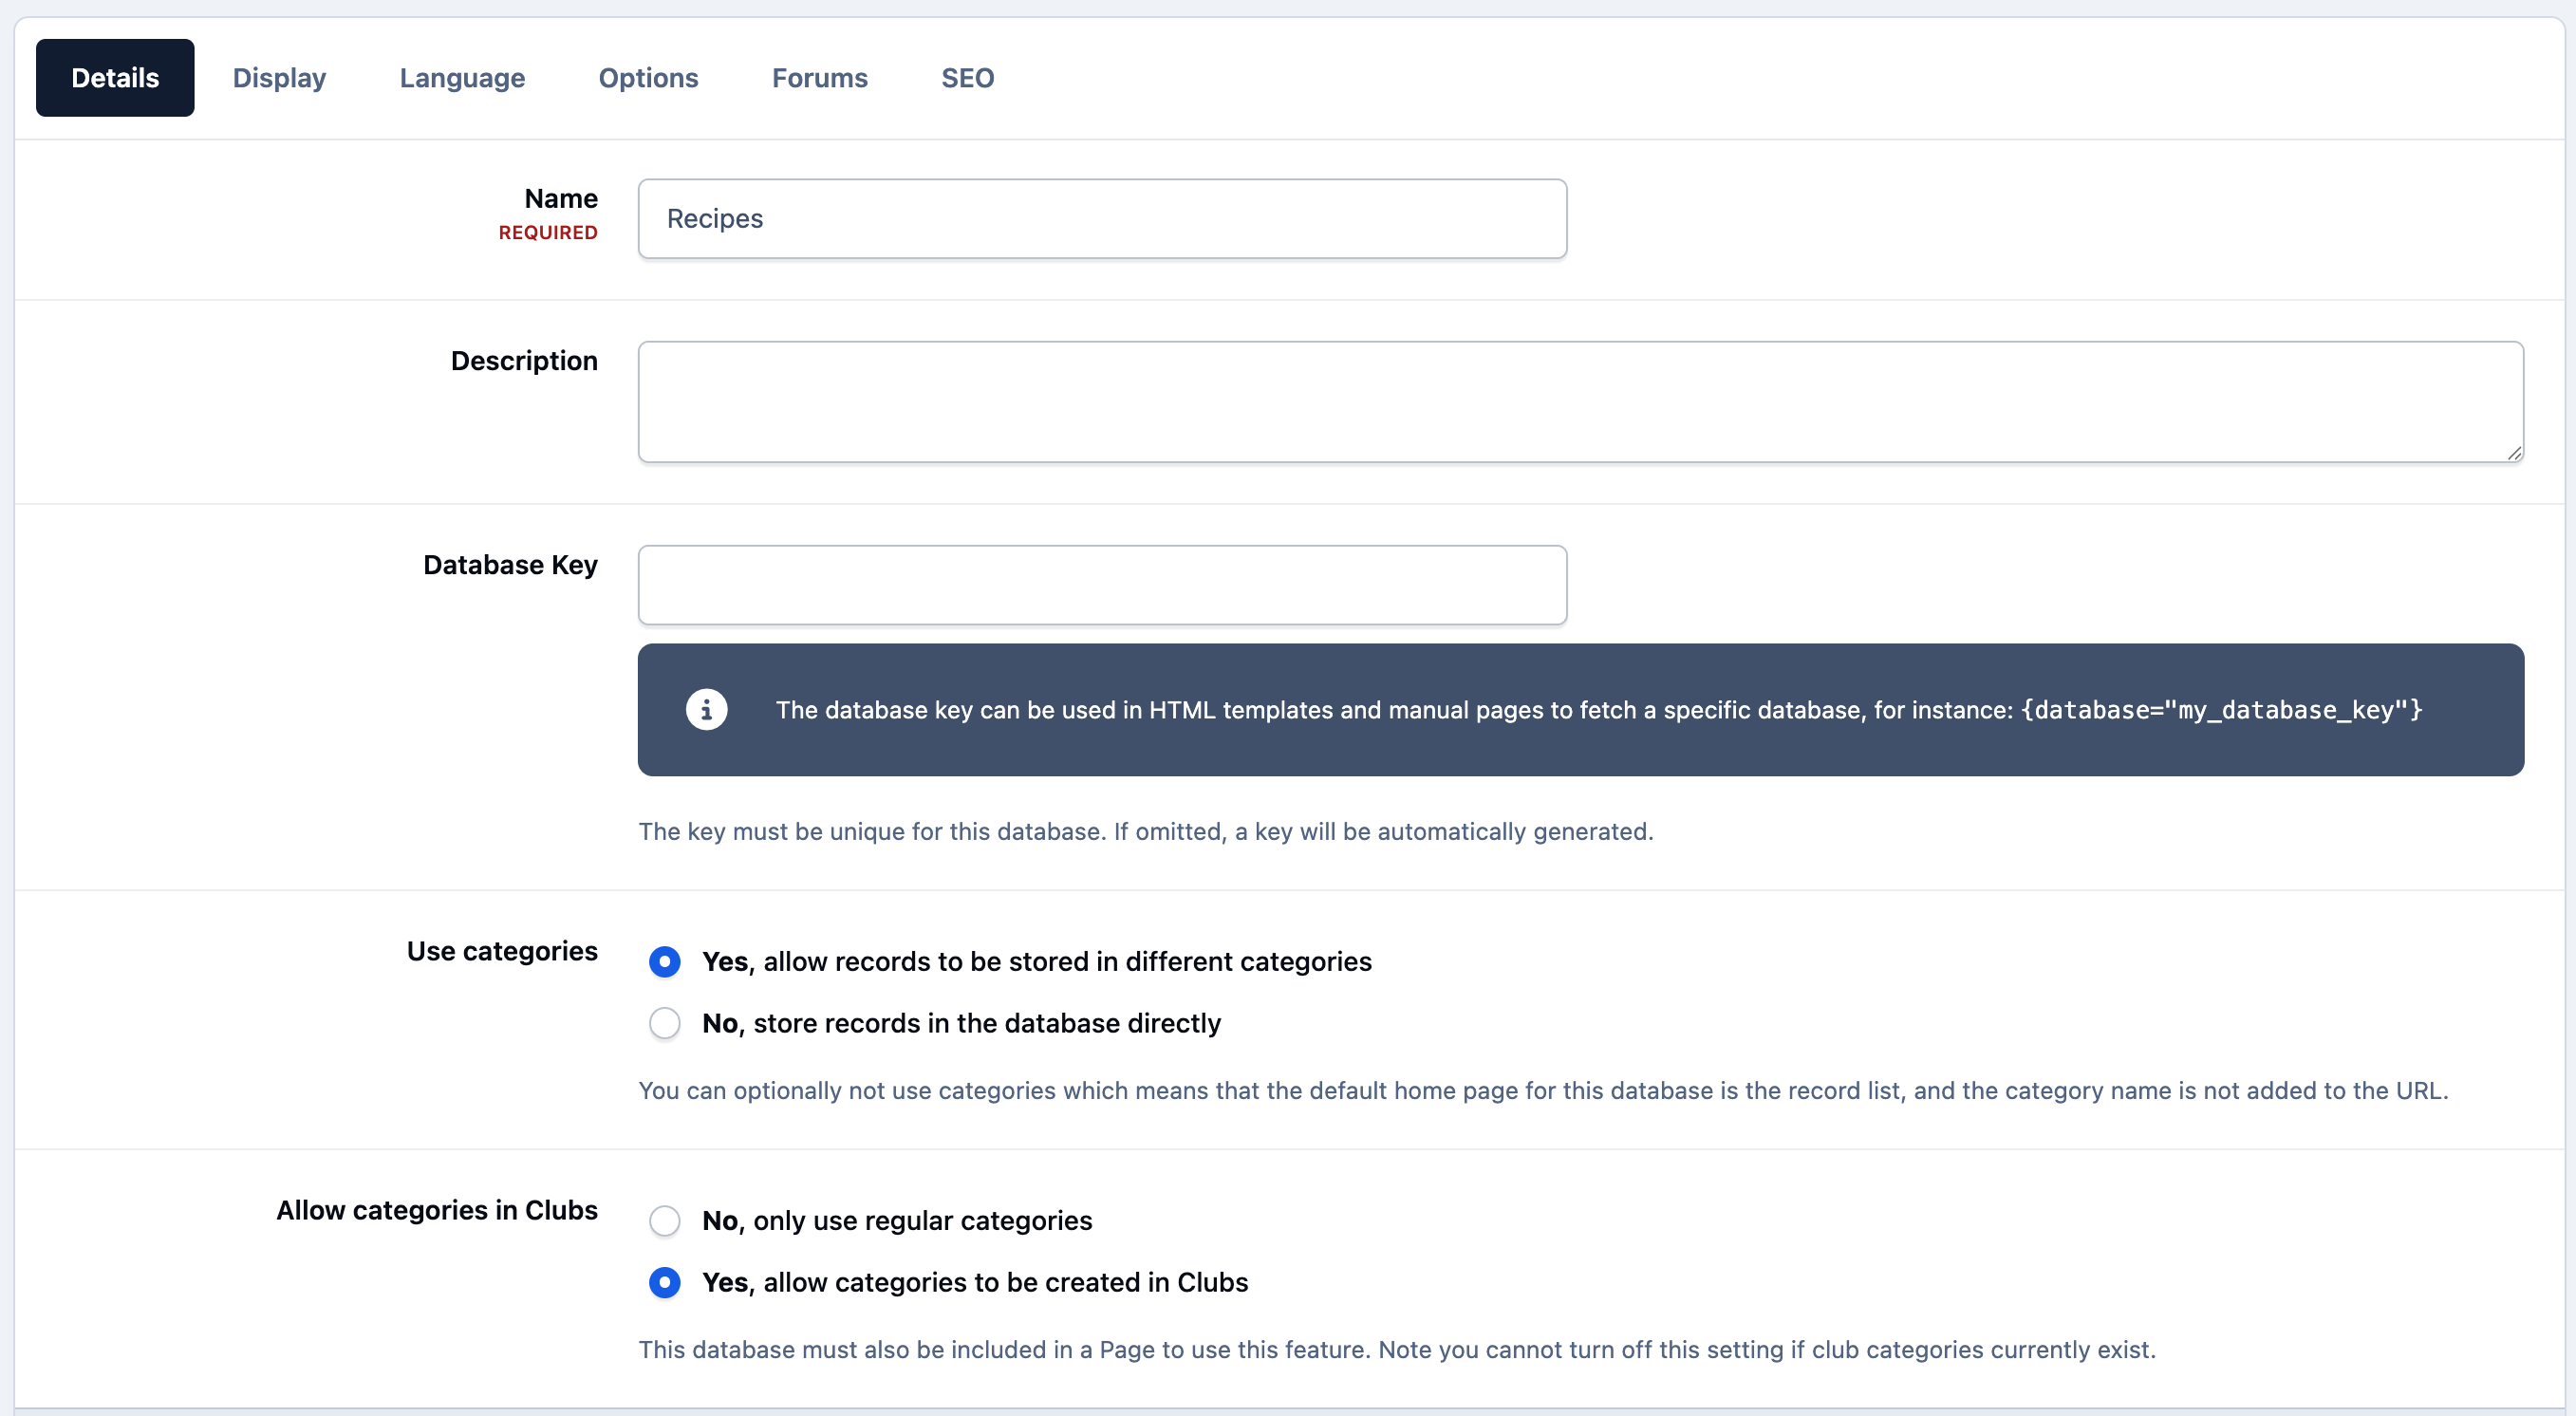
On the first tab, you will set up the basic details of your database. Enter 'Recipes' as the name. This is how it will appear throughout the community, such as in search results.
You can also enter a description if desired, which will be shown on the database homepage when users visit.
The next settings control how categories and records are handled. You can choose whether to use categories, and if enabled, whether users see a category listing or a blog-style layout. For this example, select the options to use categories and display the category listing. We will also be allowing categories for Recipe entries within members own clubs. Further enhancing deep integration between your sites features
General Database Details
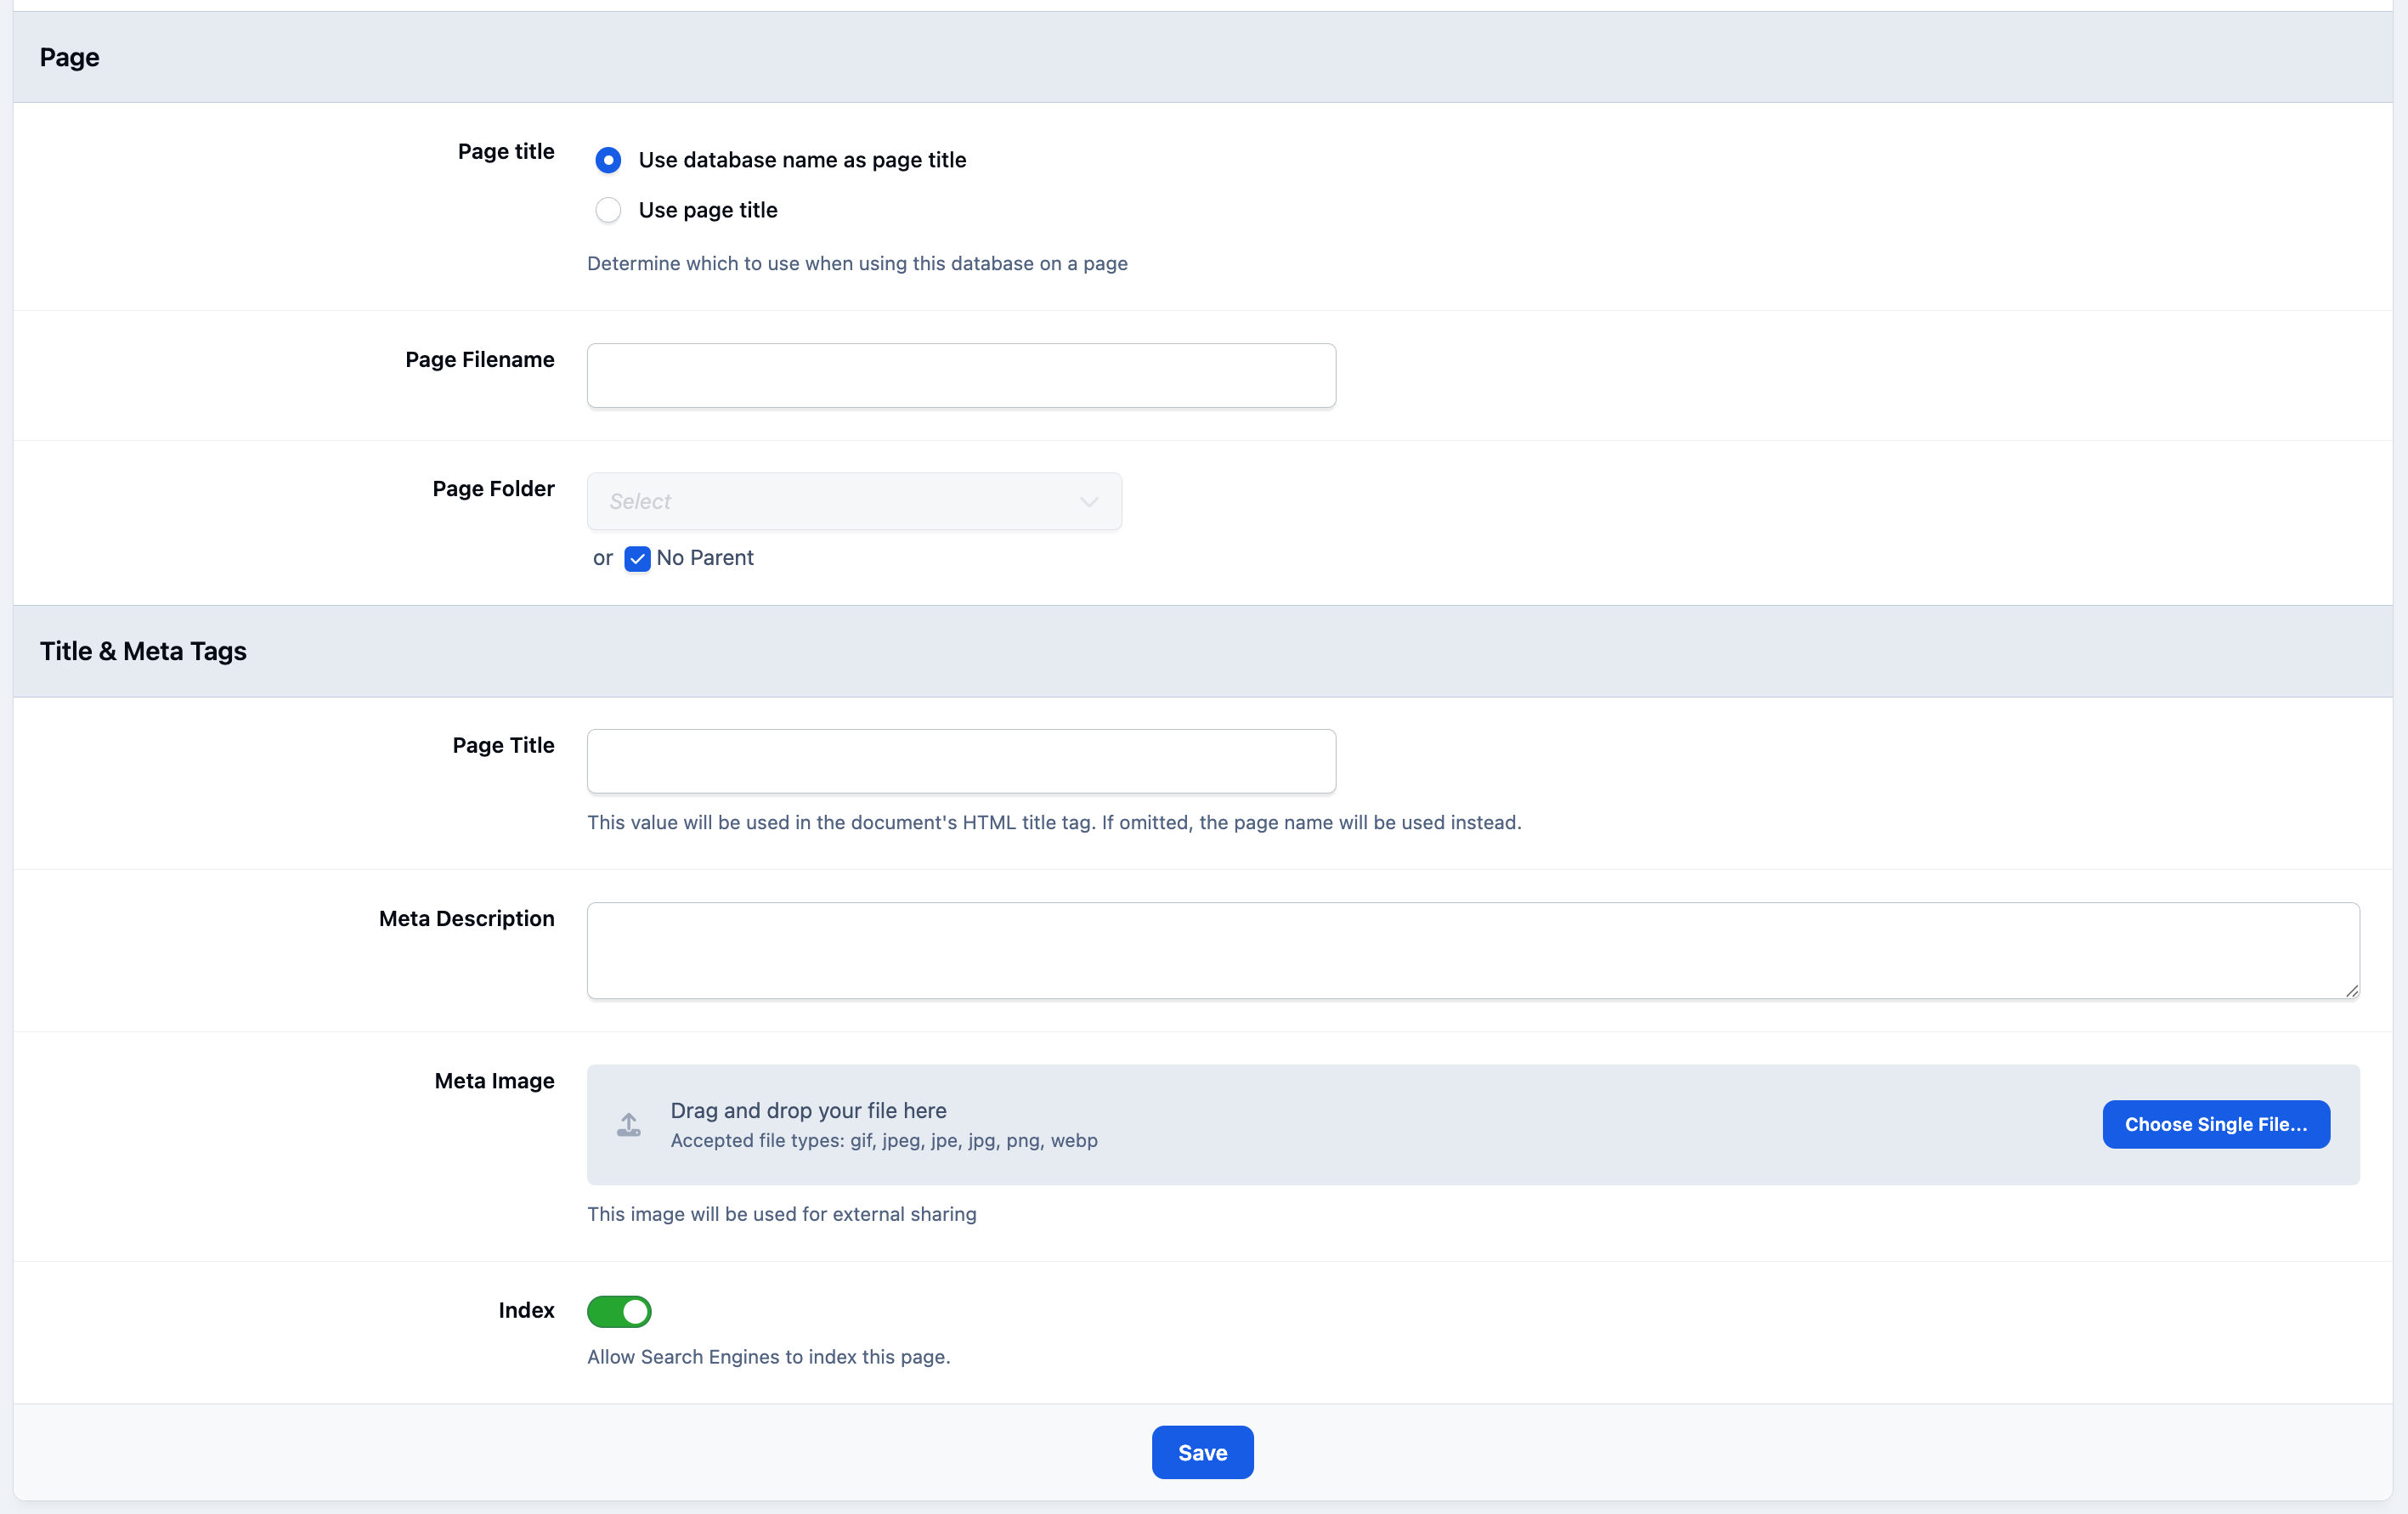
Creating a database will automatically generate a page for users to view. You can customise items such as the page name, titles, and other settings if you wish. For this example, these will be left blank, meaning page titles and meta tags will default to the database name.
Database Page Settings
Display
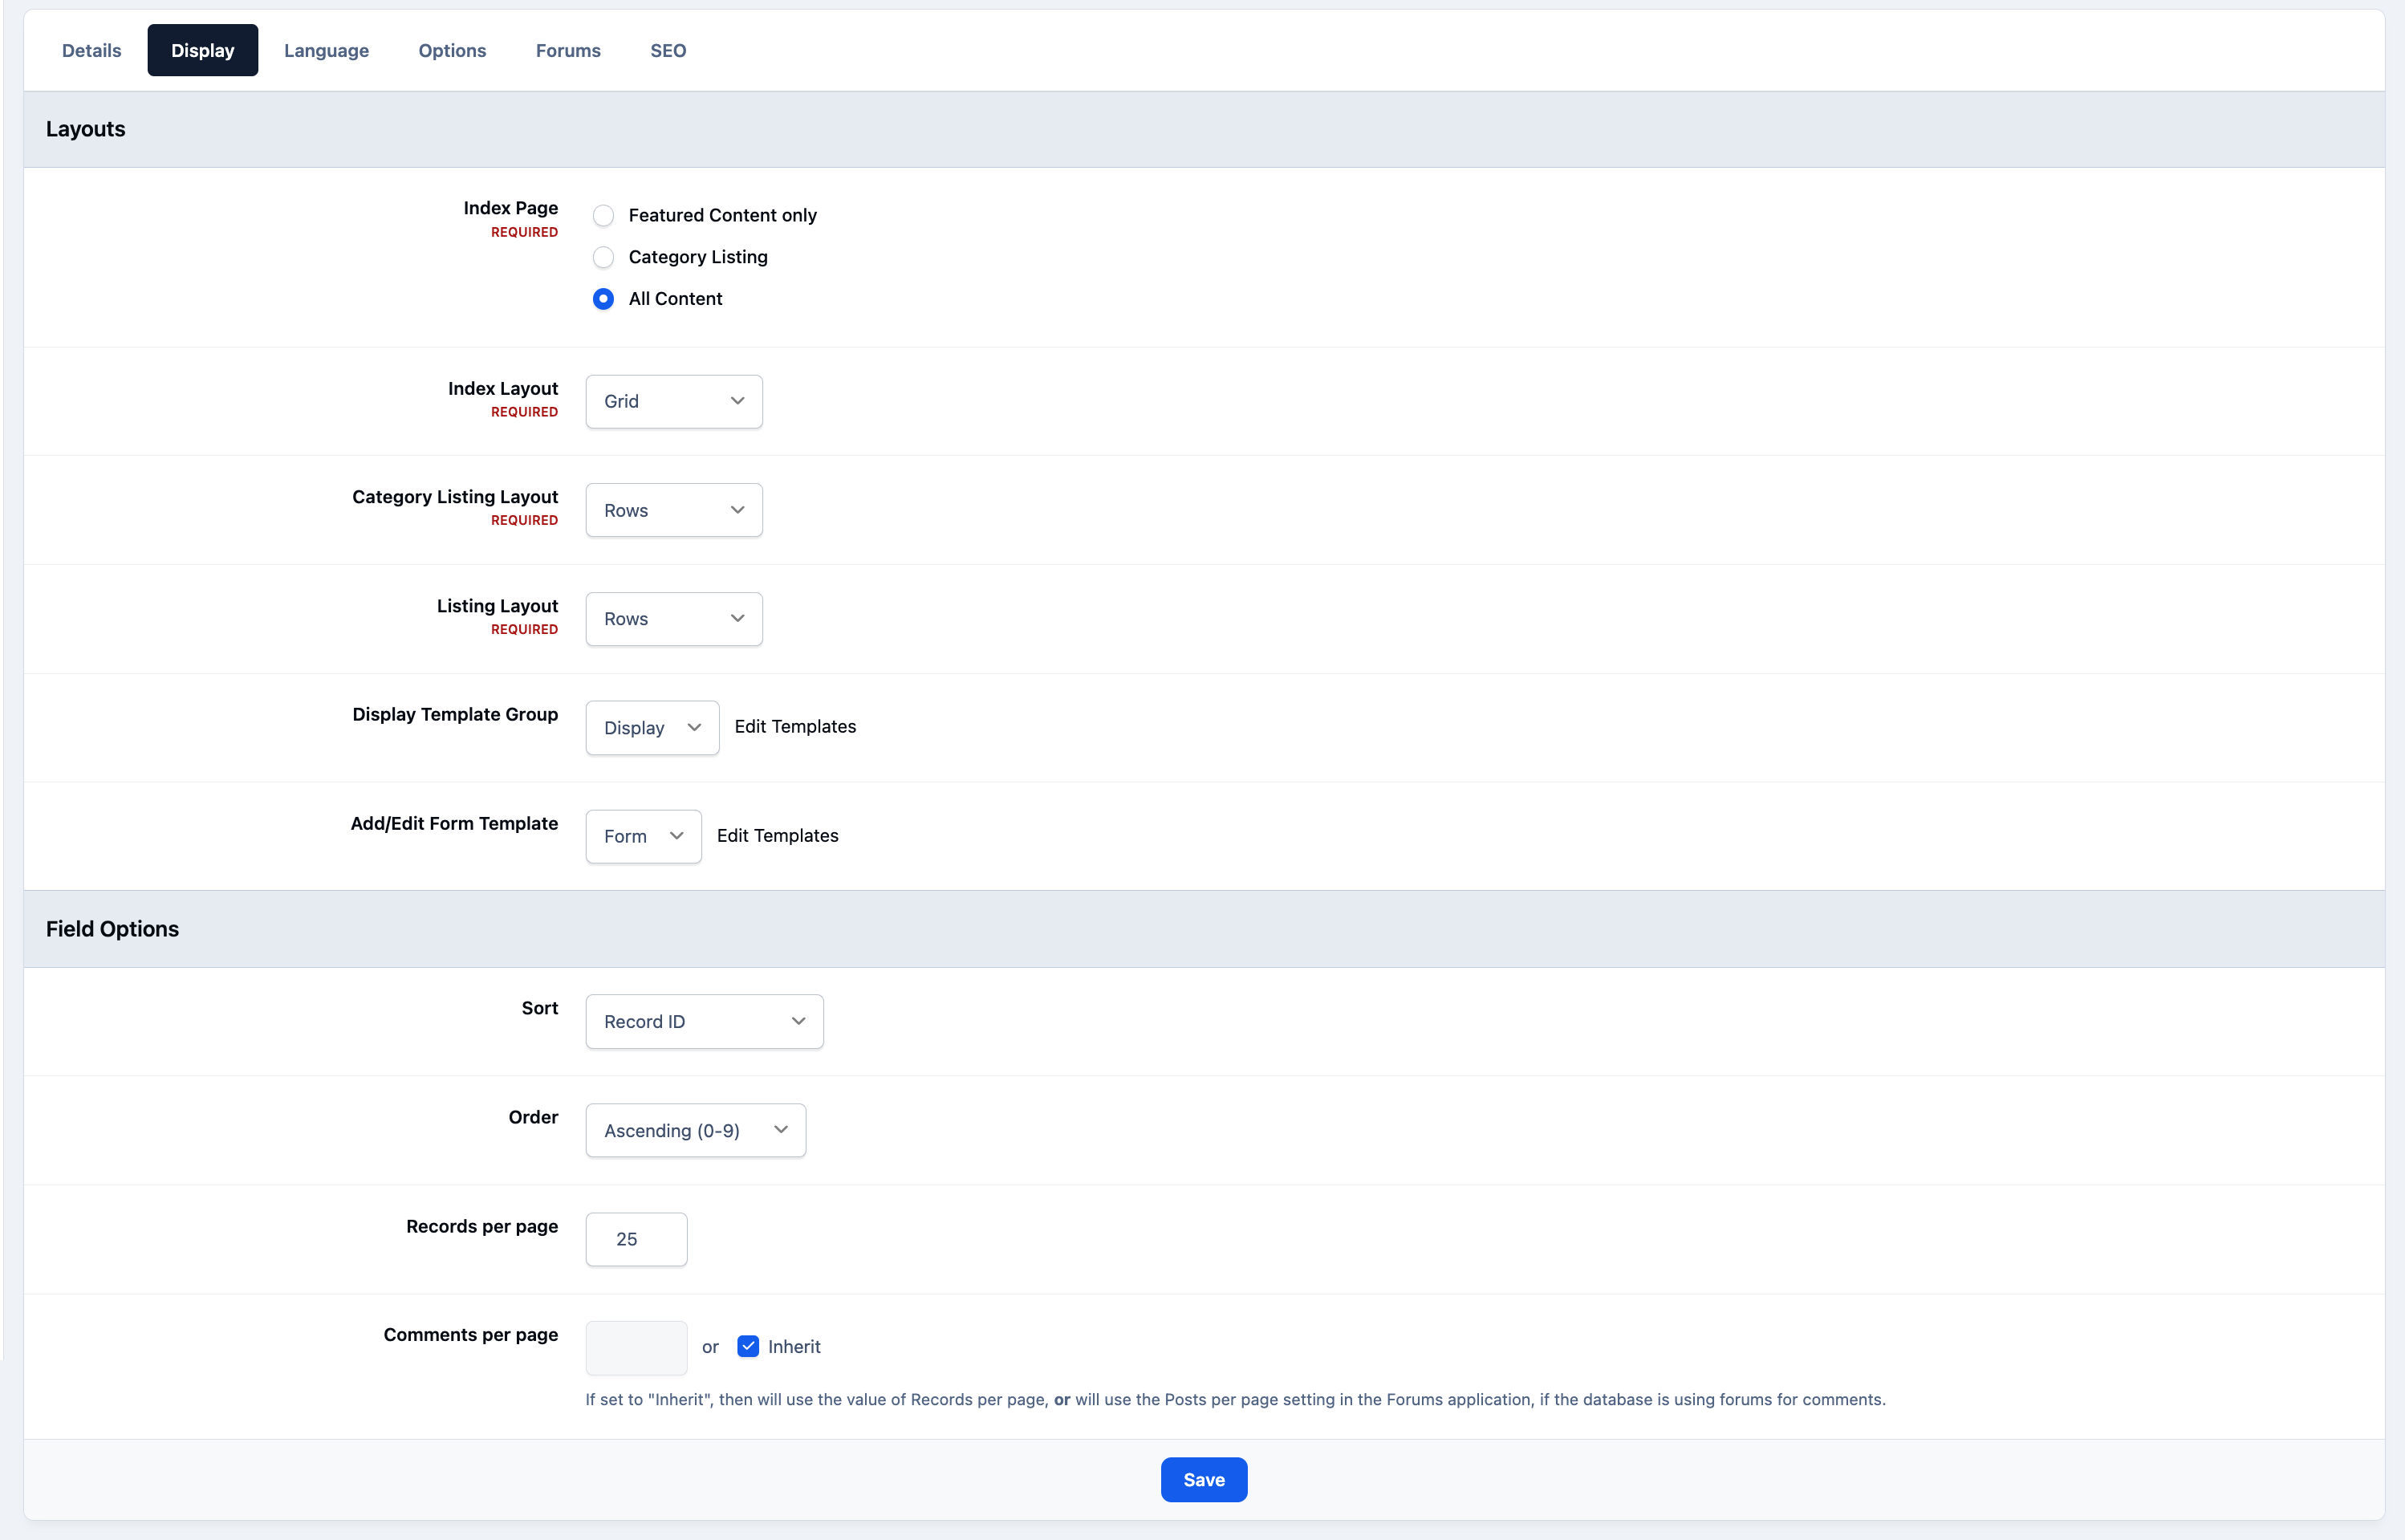
Next, you can choose the templates this database will use, along with other visual options. While custom templates are available for more advanced setups, we will use the defaults here so no code editing is required.
Database Display Tab
Language
The fields on the Language tab allow you to customise the terms Invision uses to refer to records in your database, since 'records' is quite generic. As different languages have different grammar rules, there are five variations to define. For English, we will use items such as 'recipe' and 'recipes', as shown below
Database Languages Tab

Options
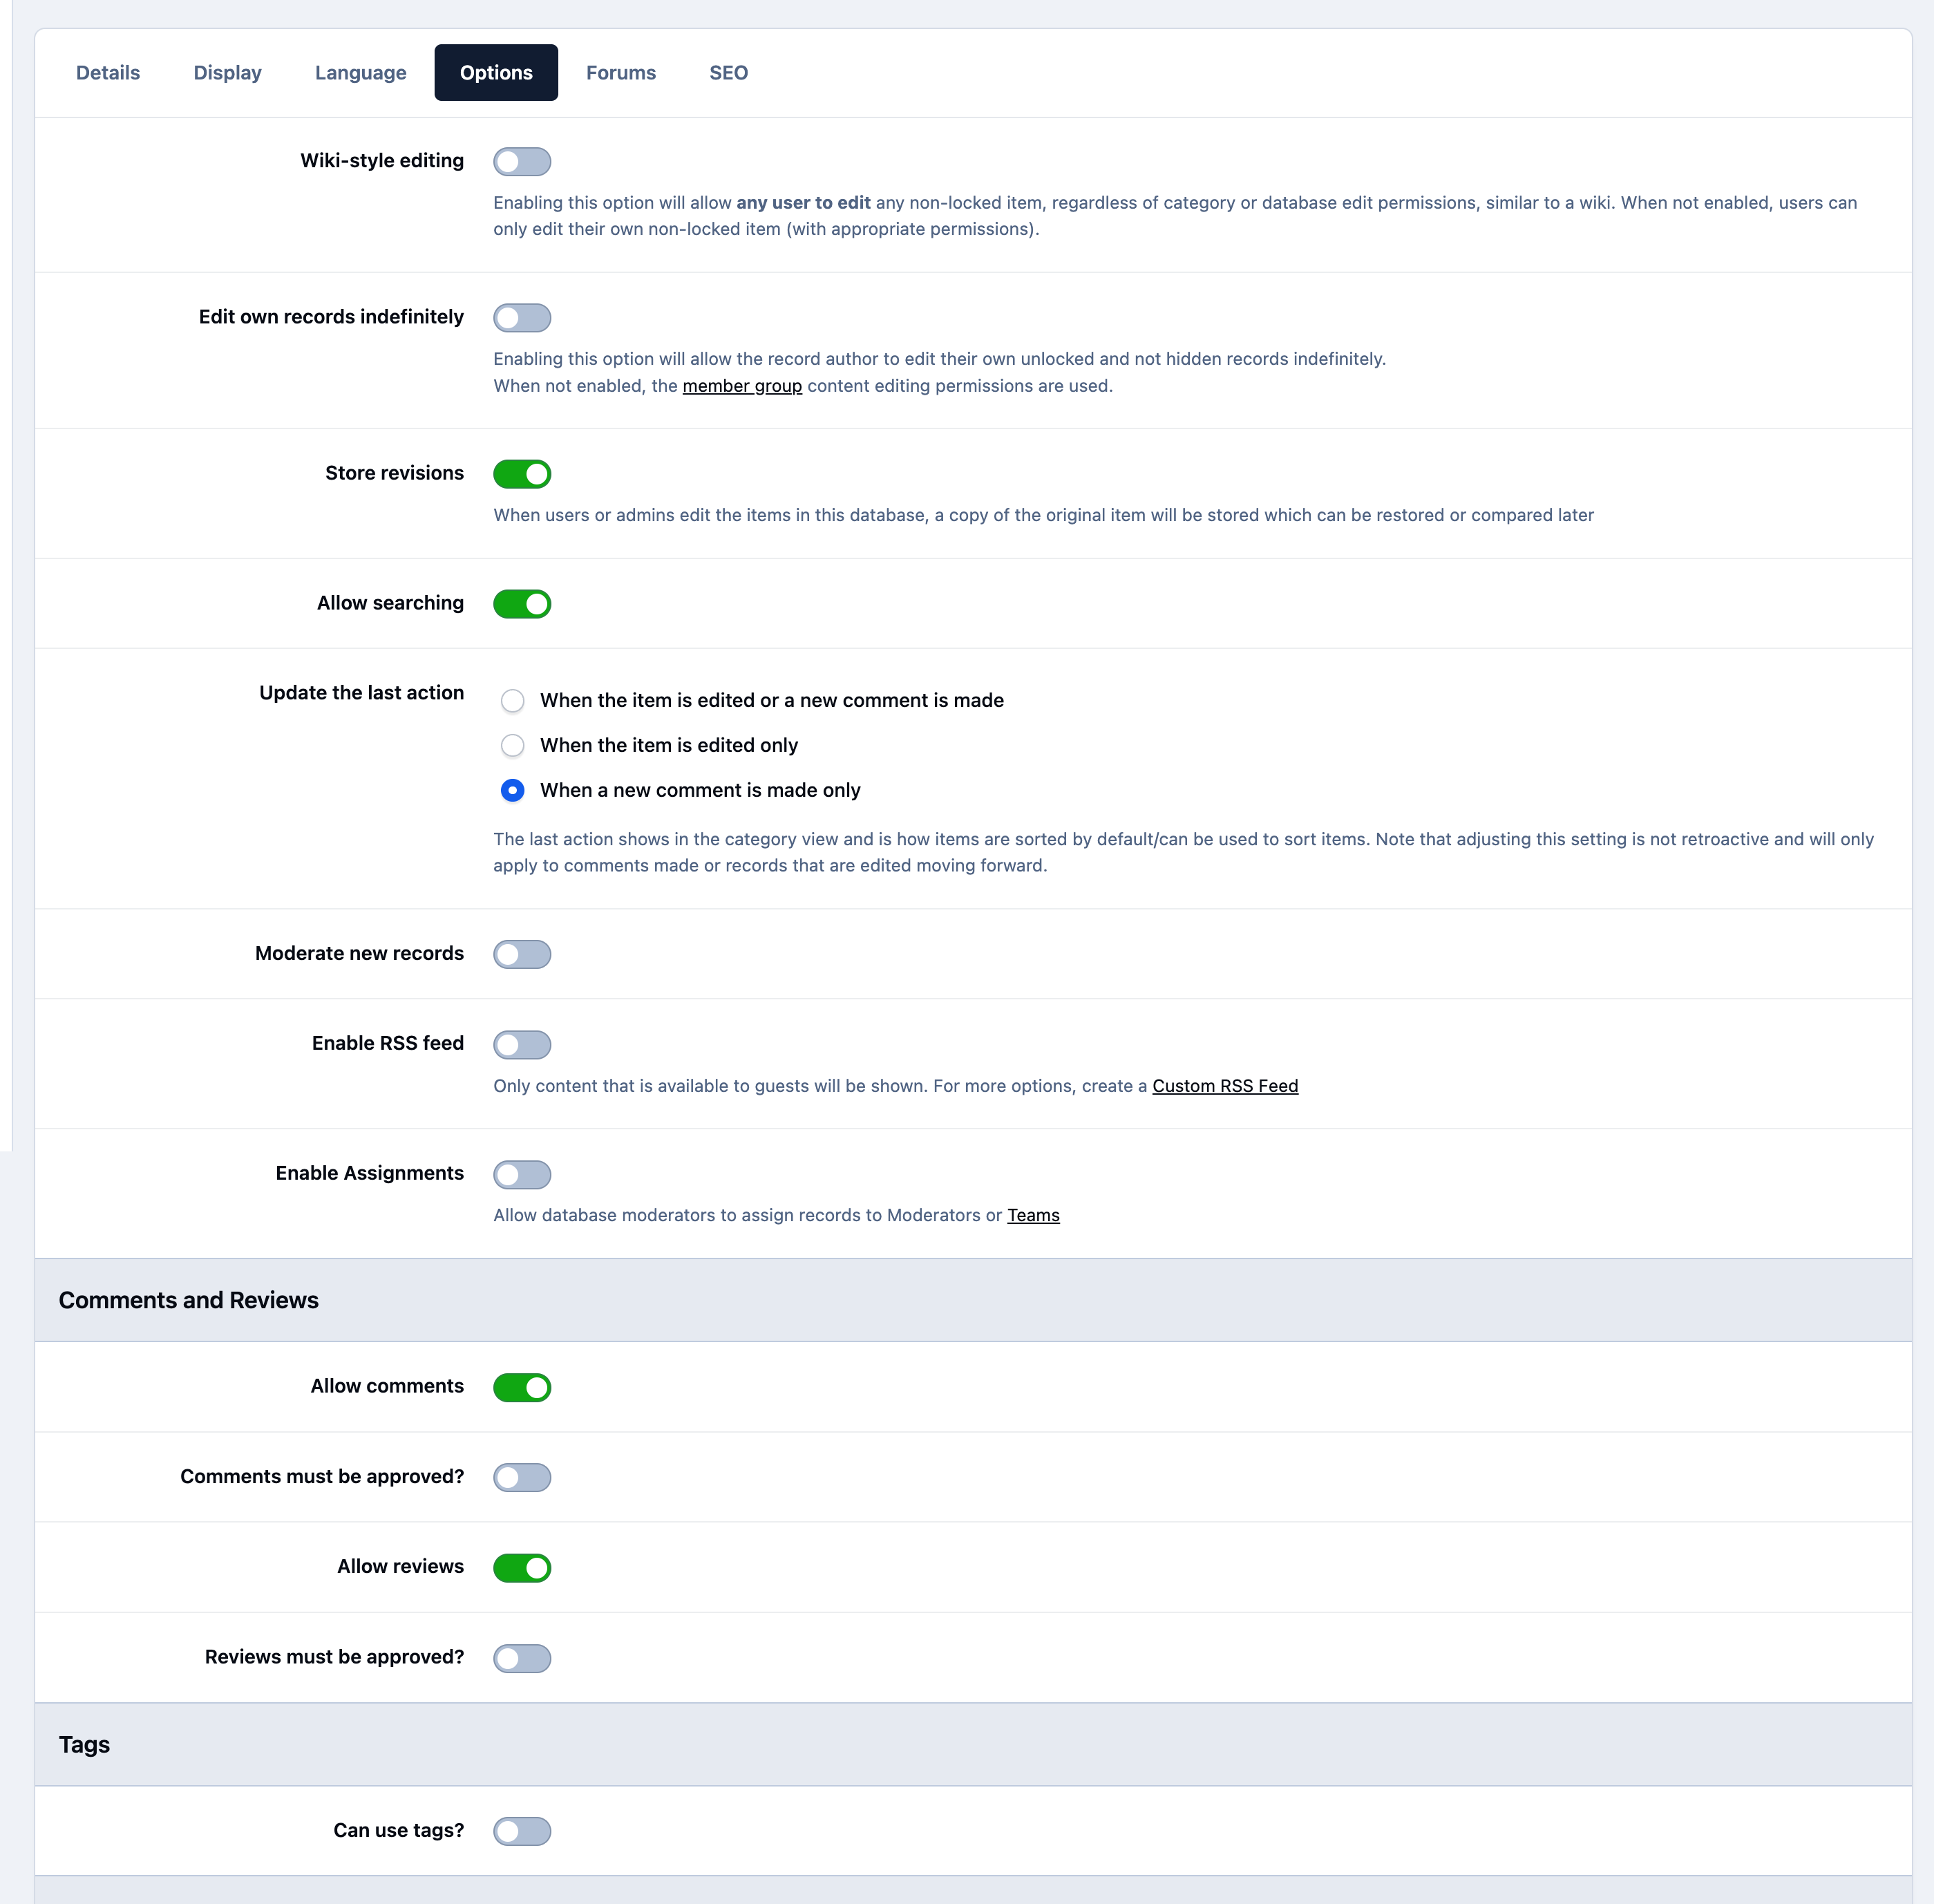
The Options tab is where more detailed configuration of the database takes place. For this example, we won’t enable wiki-style editing (where any member can edit any record), and we don’t need to store revisions. However, we will enable searching, and allow both comments and reviews. The first half of the form should therefore be configured as follows:
Database Options Tab
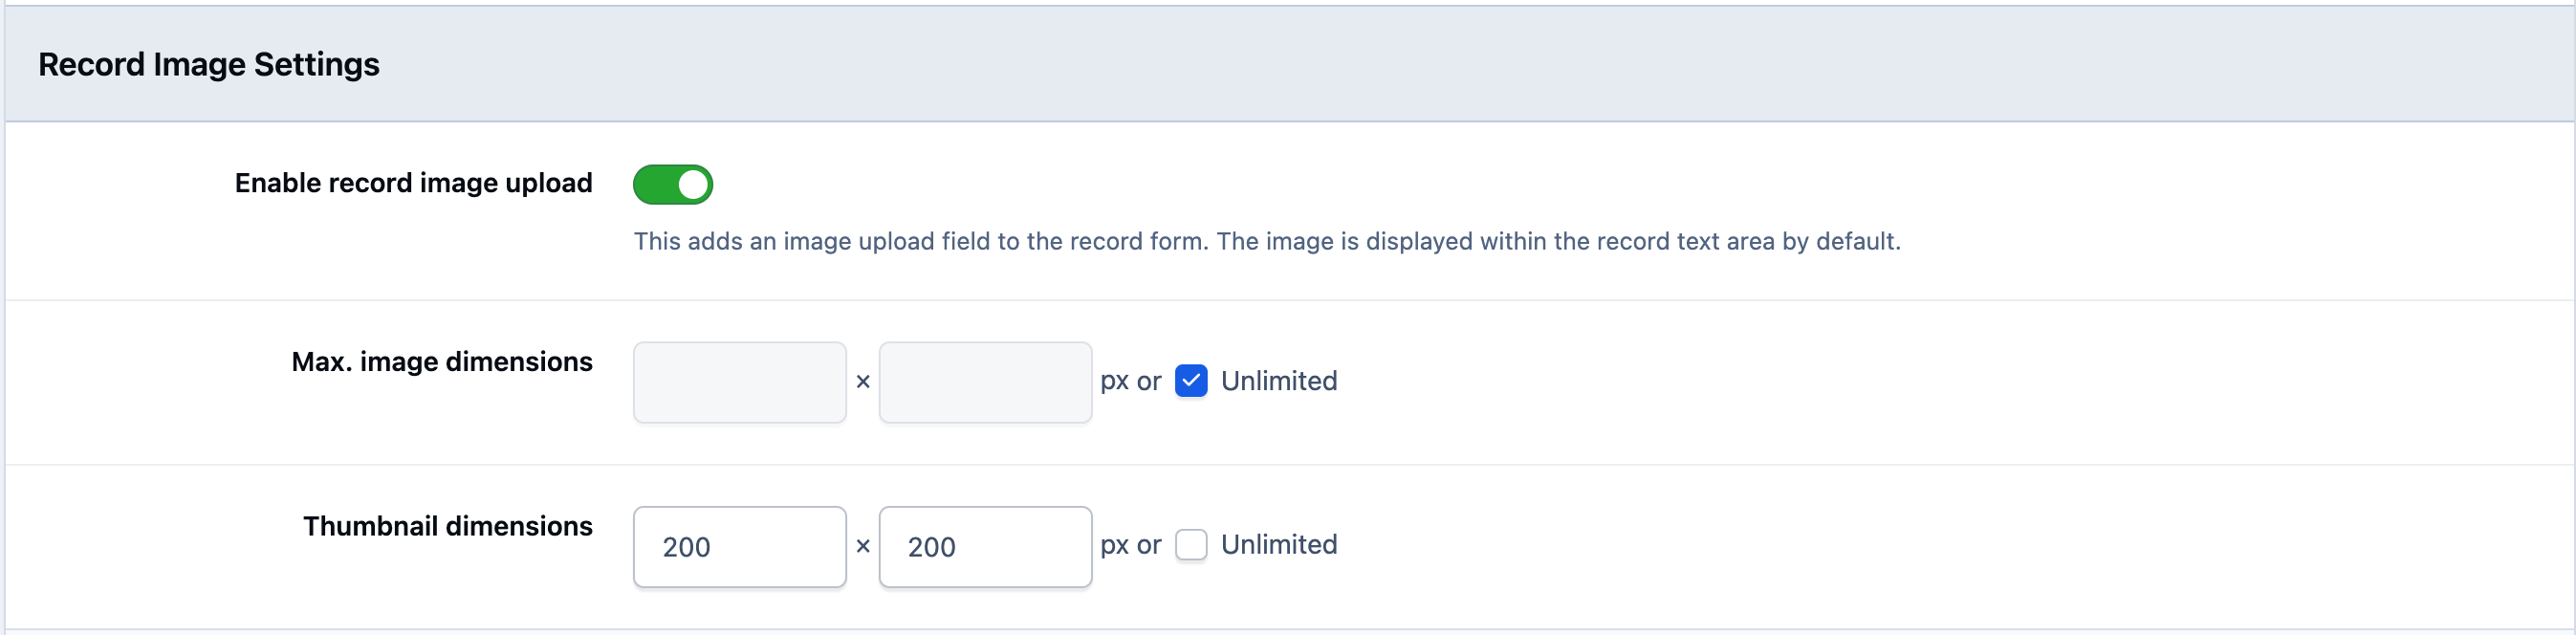
The final section of this tab covers the record image. This built-in field allows users to upload an image to represent each record. We will use this feature, and the default settings are suitable for our needs:
Image Settings
Forums & SEO Tabs
We will be leaving both these tabs as they are for the purpose of this example. However both are described here
Forums - This area will allow you to post to a specific forum when an entry is added
SEO - This area will allow you to set how search engines should view content in this area
On save, you will be given options to set the permissions on the database to your choosing. Permissions are outside the scope of this guide, however you can see more on permissions under the security & rules section.
Creating Categories
Next, we’ll focus on creating categories. If you’ve created categories in other Invision applications, the process will feel very similar.
When you hover over the Pages tab in the Admin CP, you will see your database listed as a menu item, with a Categories link beneath it. Click this to view your current categories, where you will see a default Records category.
Select 'Create New' to add a new category. For this example, name it Main Courses. There is no need to manually enter a friendly URL slug, as one will be automatically generated based on the category name (e.g. <yourcommunity>/recipes/main-courses/record).
Category Setup
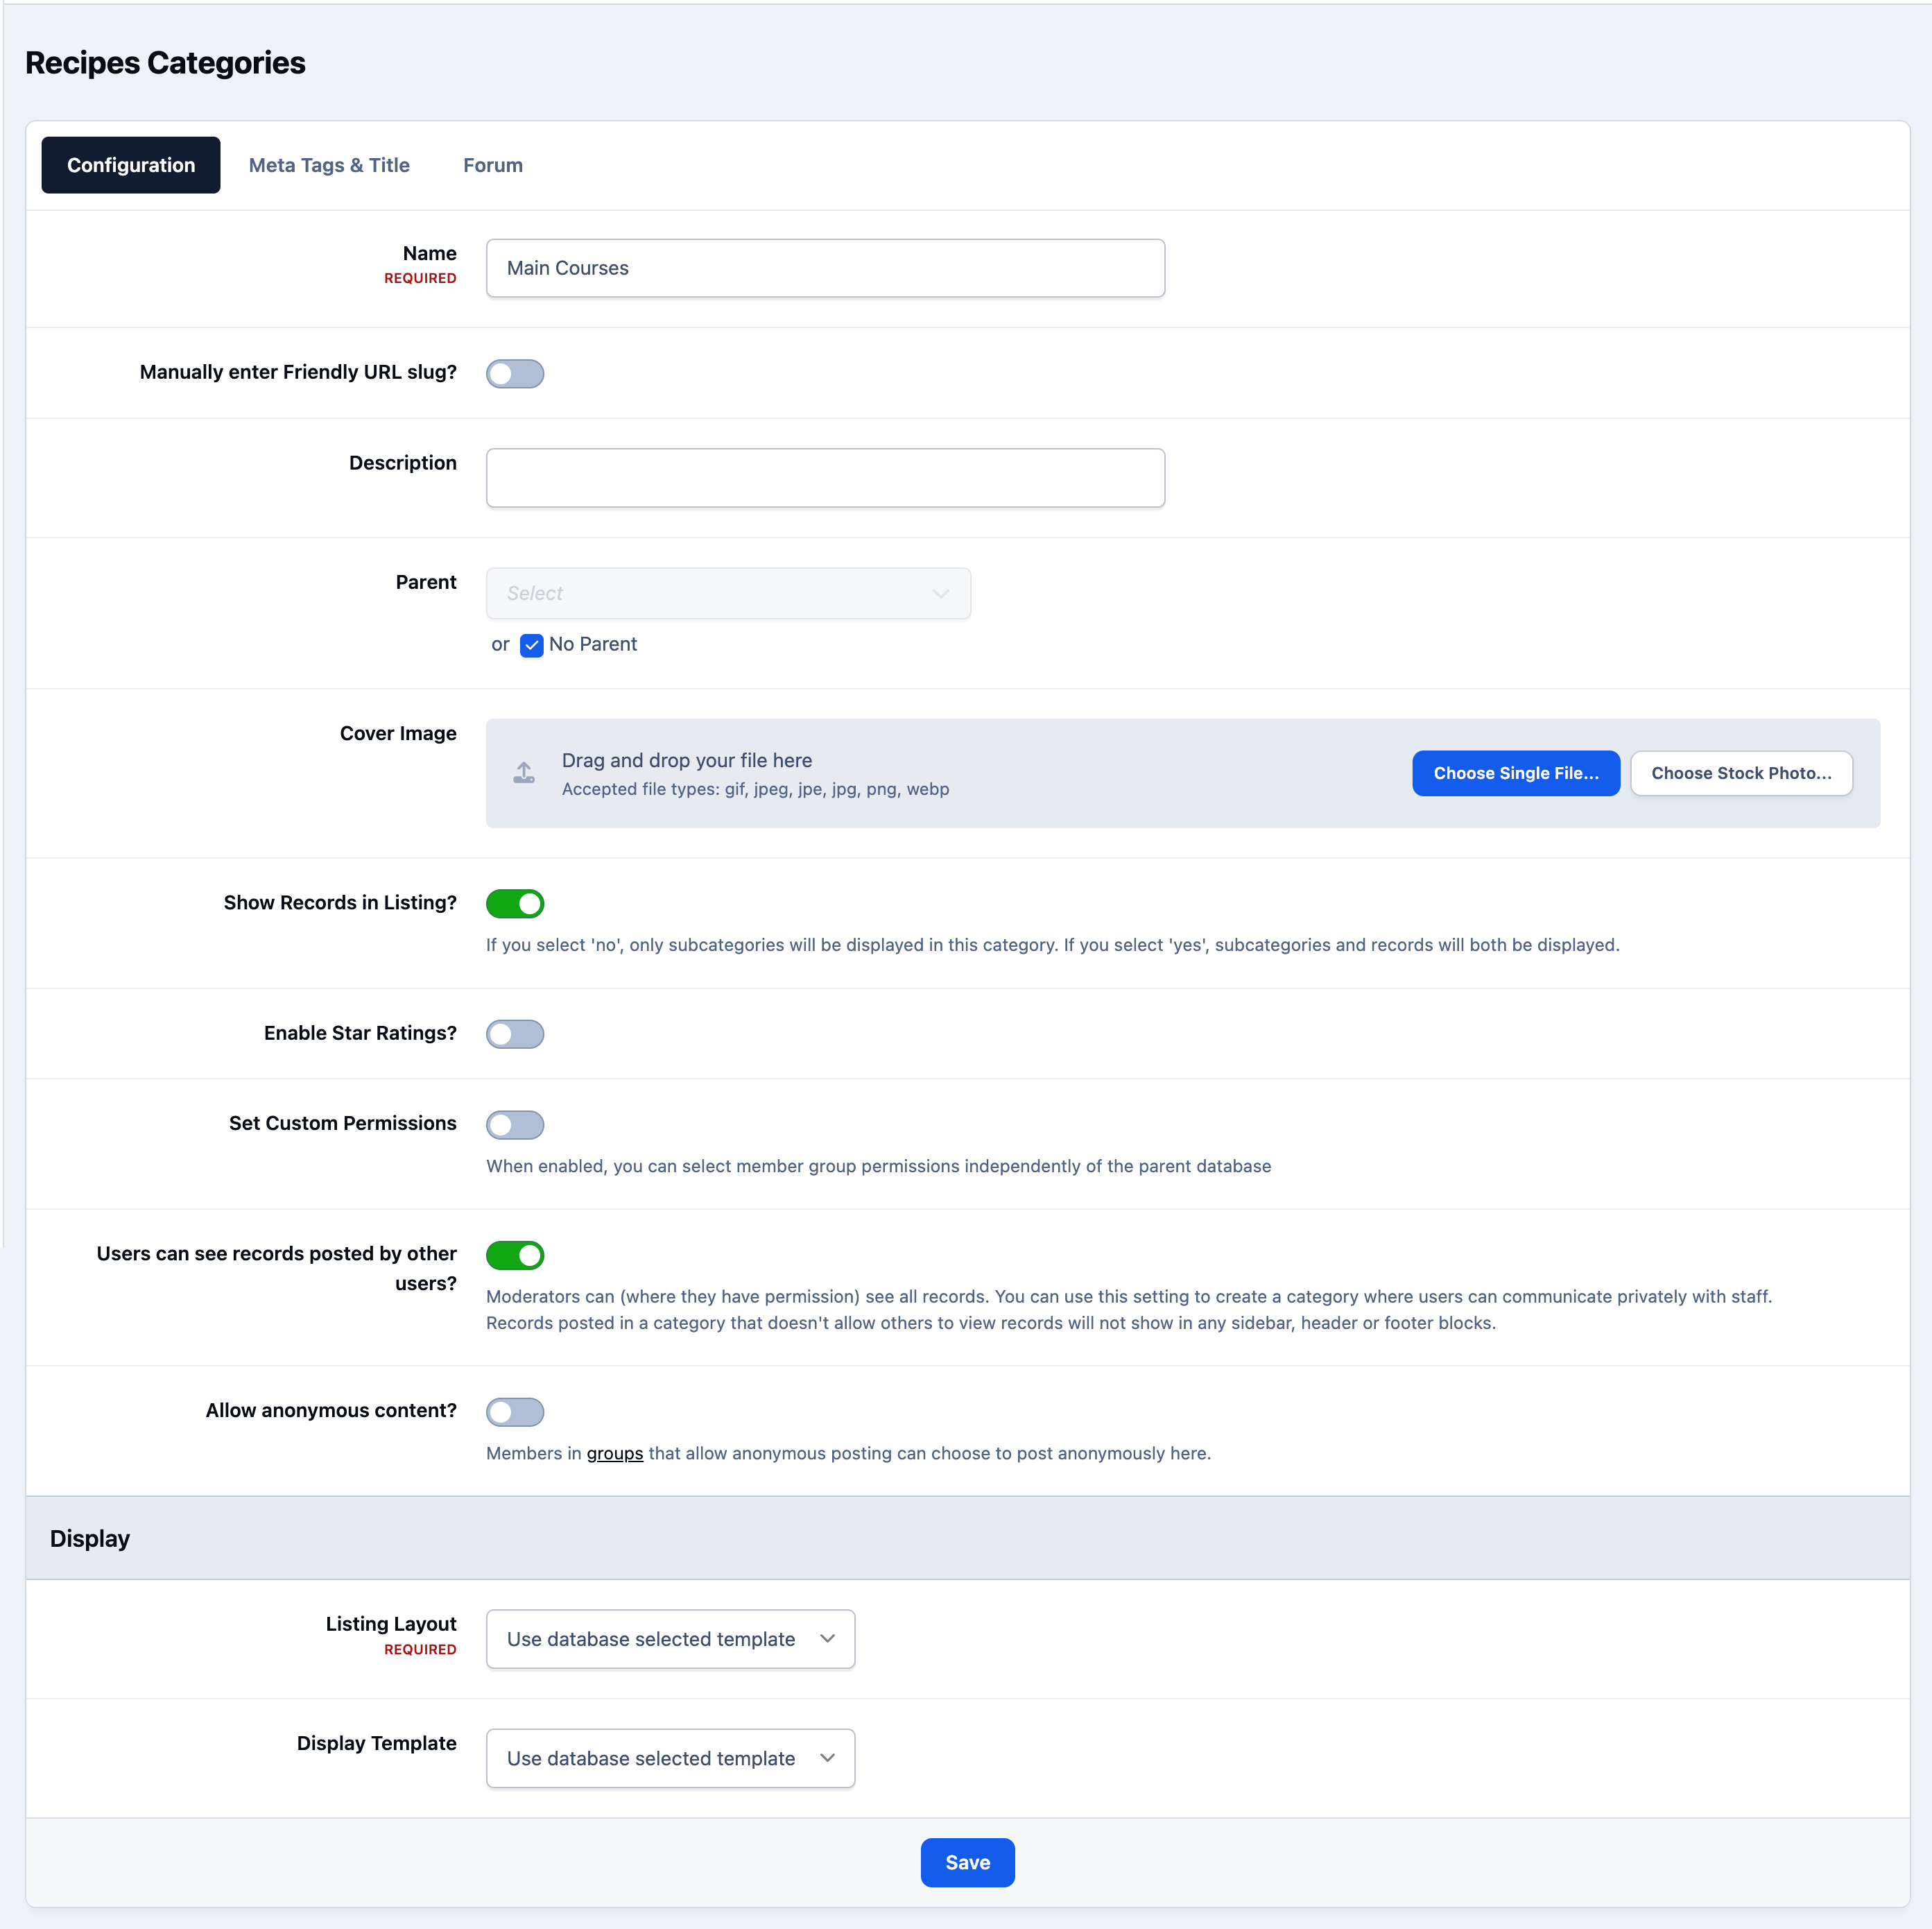
We do want to show the record listing for this category, as it will display our recipes. We will leave Star Ratings disabled, and also leave Set Custom Permissions disabled. However, if you need different permissions for a specific category, you can enable this option and configure them here.
We will also keep the default database templates selected. If required, you can assign different templates per category using these settings.
For now, the remaining tabs can be ignored, as we are not using those features.
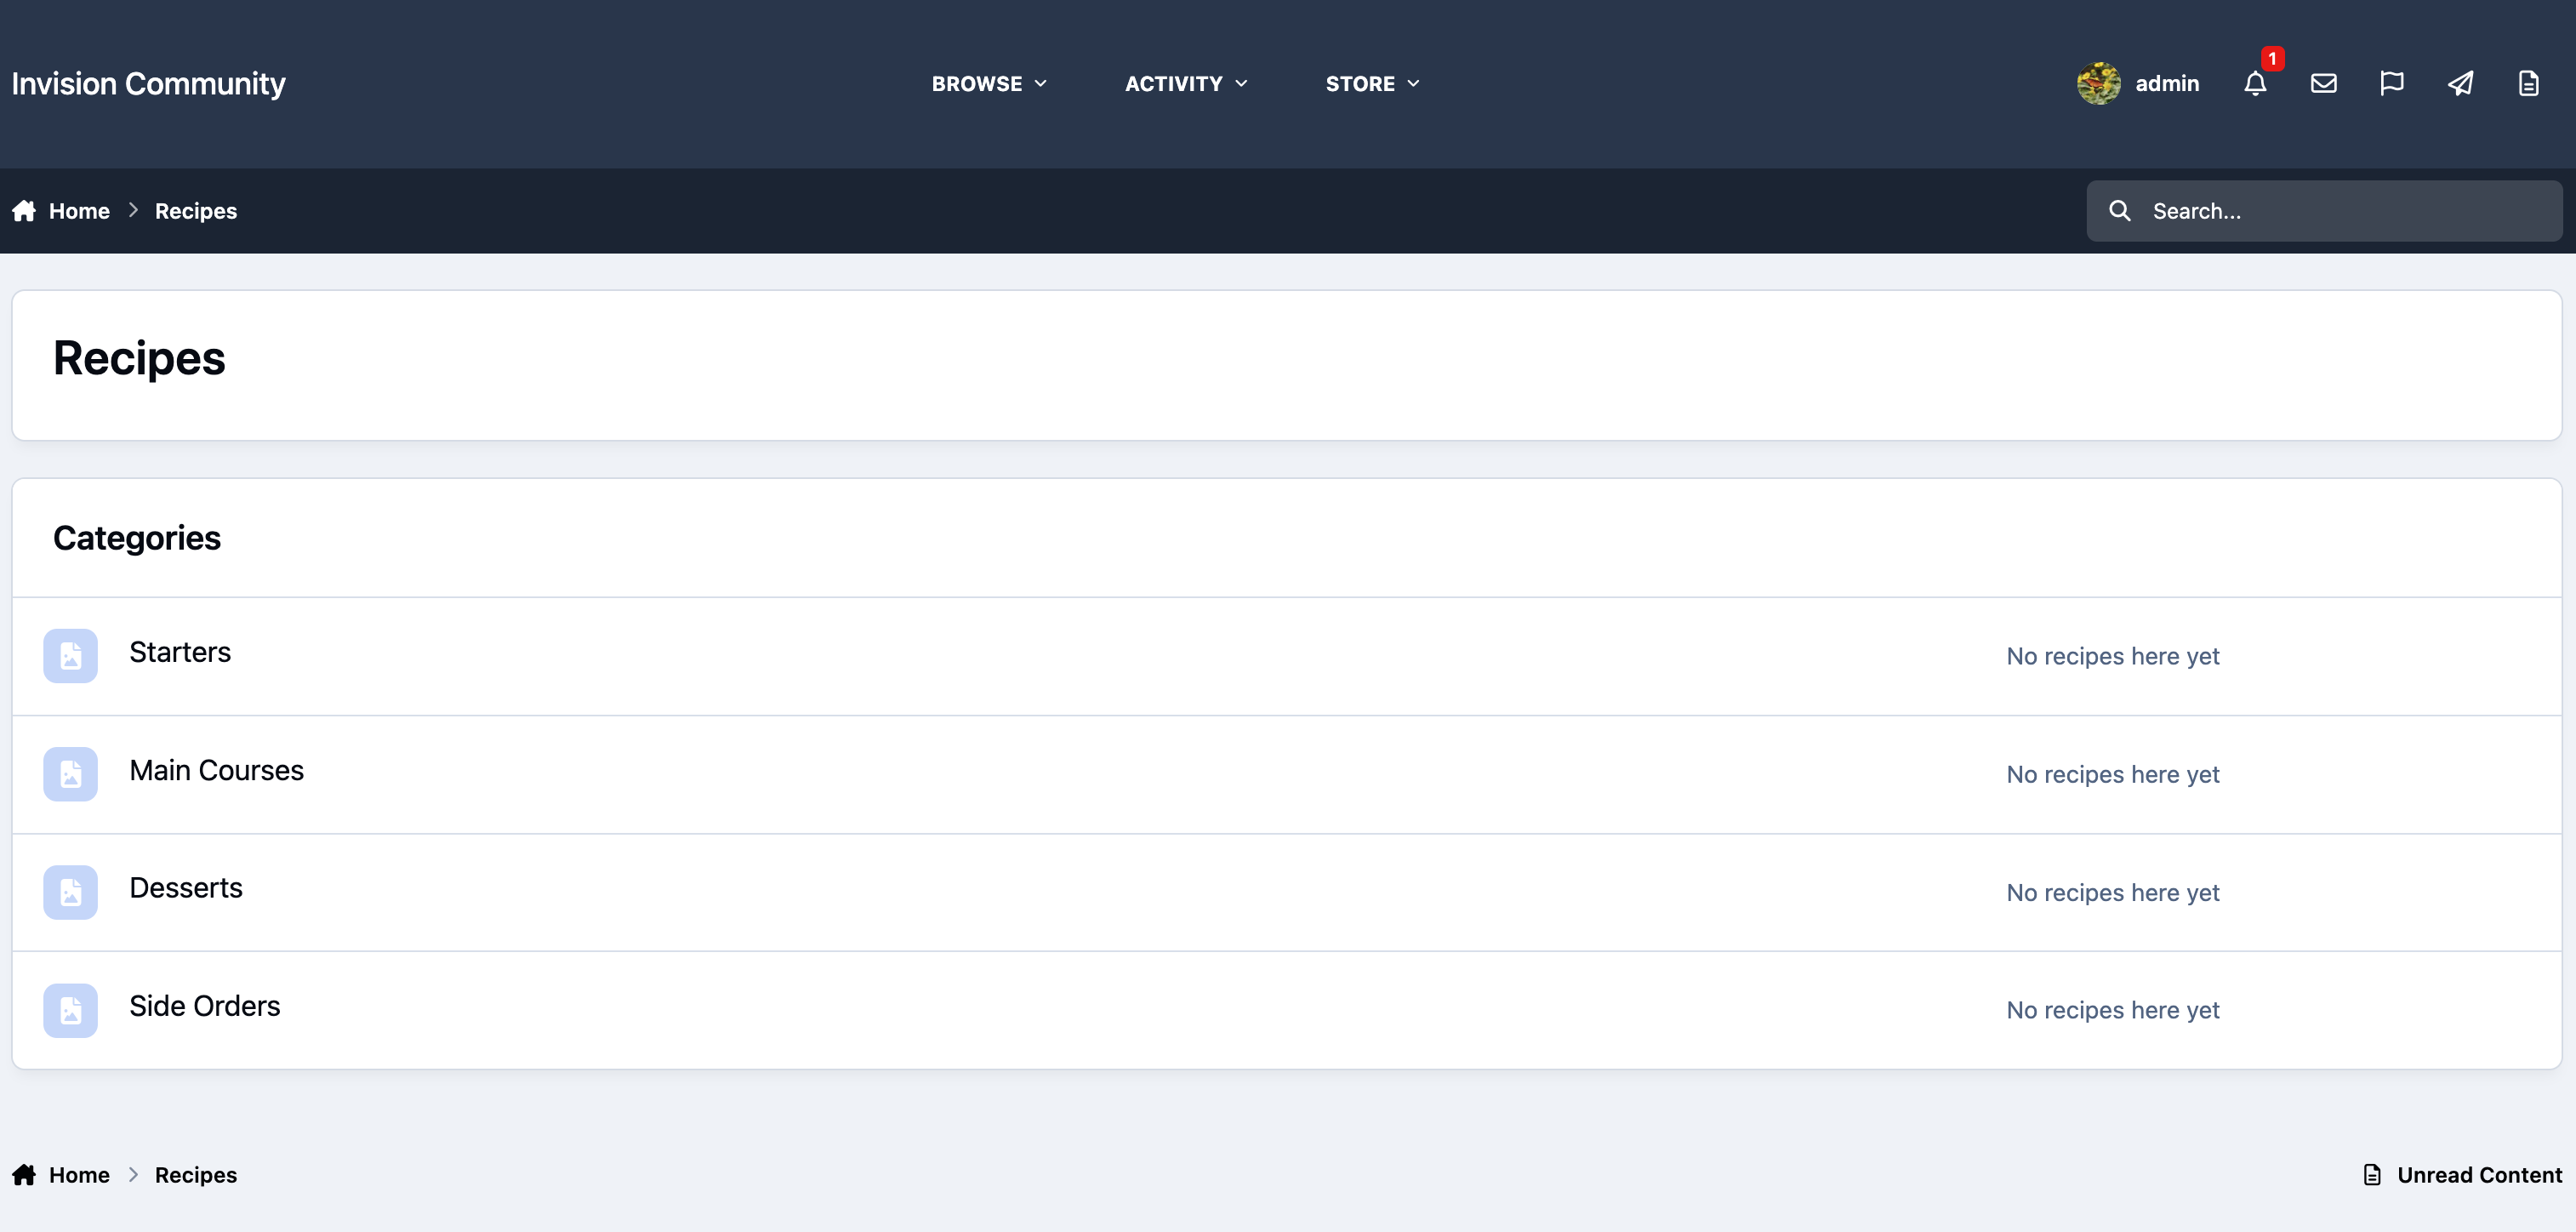
After refreshing the front end, you will see your new category. In this example, additional categories have also been created to better organise the recipes section, along with deleting the default records category
Category Listing
Custom Fields
Custom fields allow you to tailor a database to your specific needs. IPS4 supports a wide range of field types, from text and numbers to uploads and YouTube embeds, ensuring you can capture data in the most suitable format.
For this example, we will create the following fields for each recipe:
List of ingredients
Prep time
Cook time
Cuisine
A link to a YouTube video recipe
There is no need to create fields for the recipe title or instructions, as the database already includes a title field, and we will use the built-in content field for the instructions.
Next, we’ll look at how to set up these custom fields and customise how they are displayed.
How to do it
To create a new field, hover over the Pages tab in the Admin CP, then select Fields under the Recipes database. You will see a list of the default built-in fields, including Title and Content.
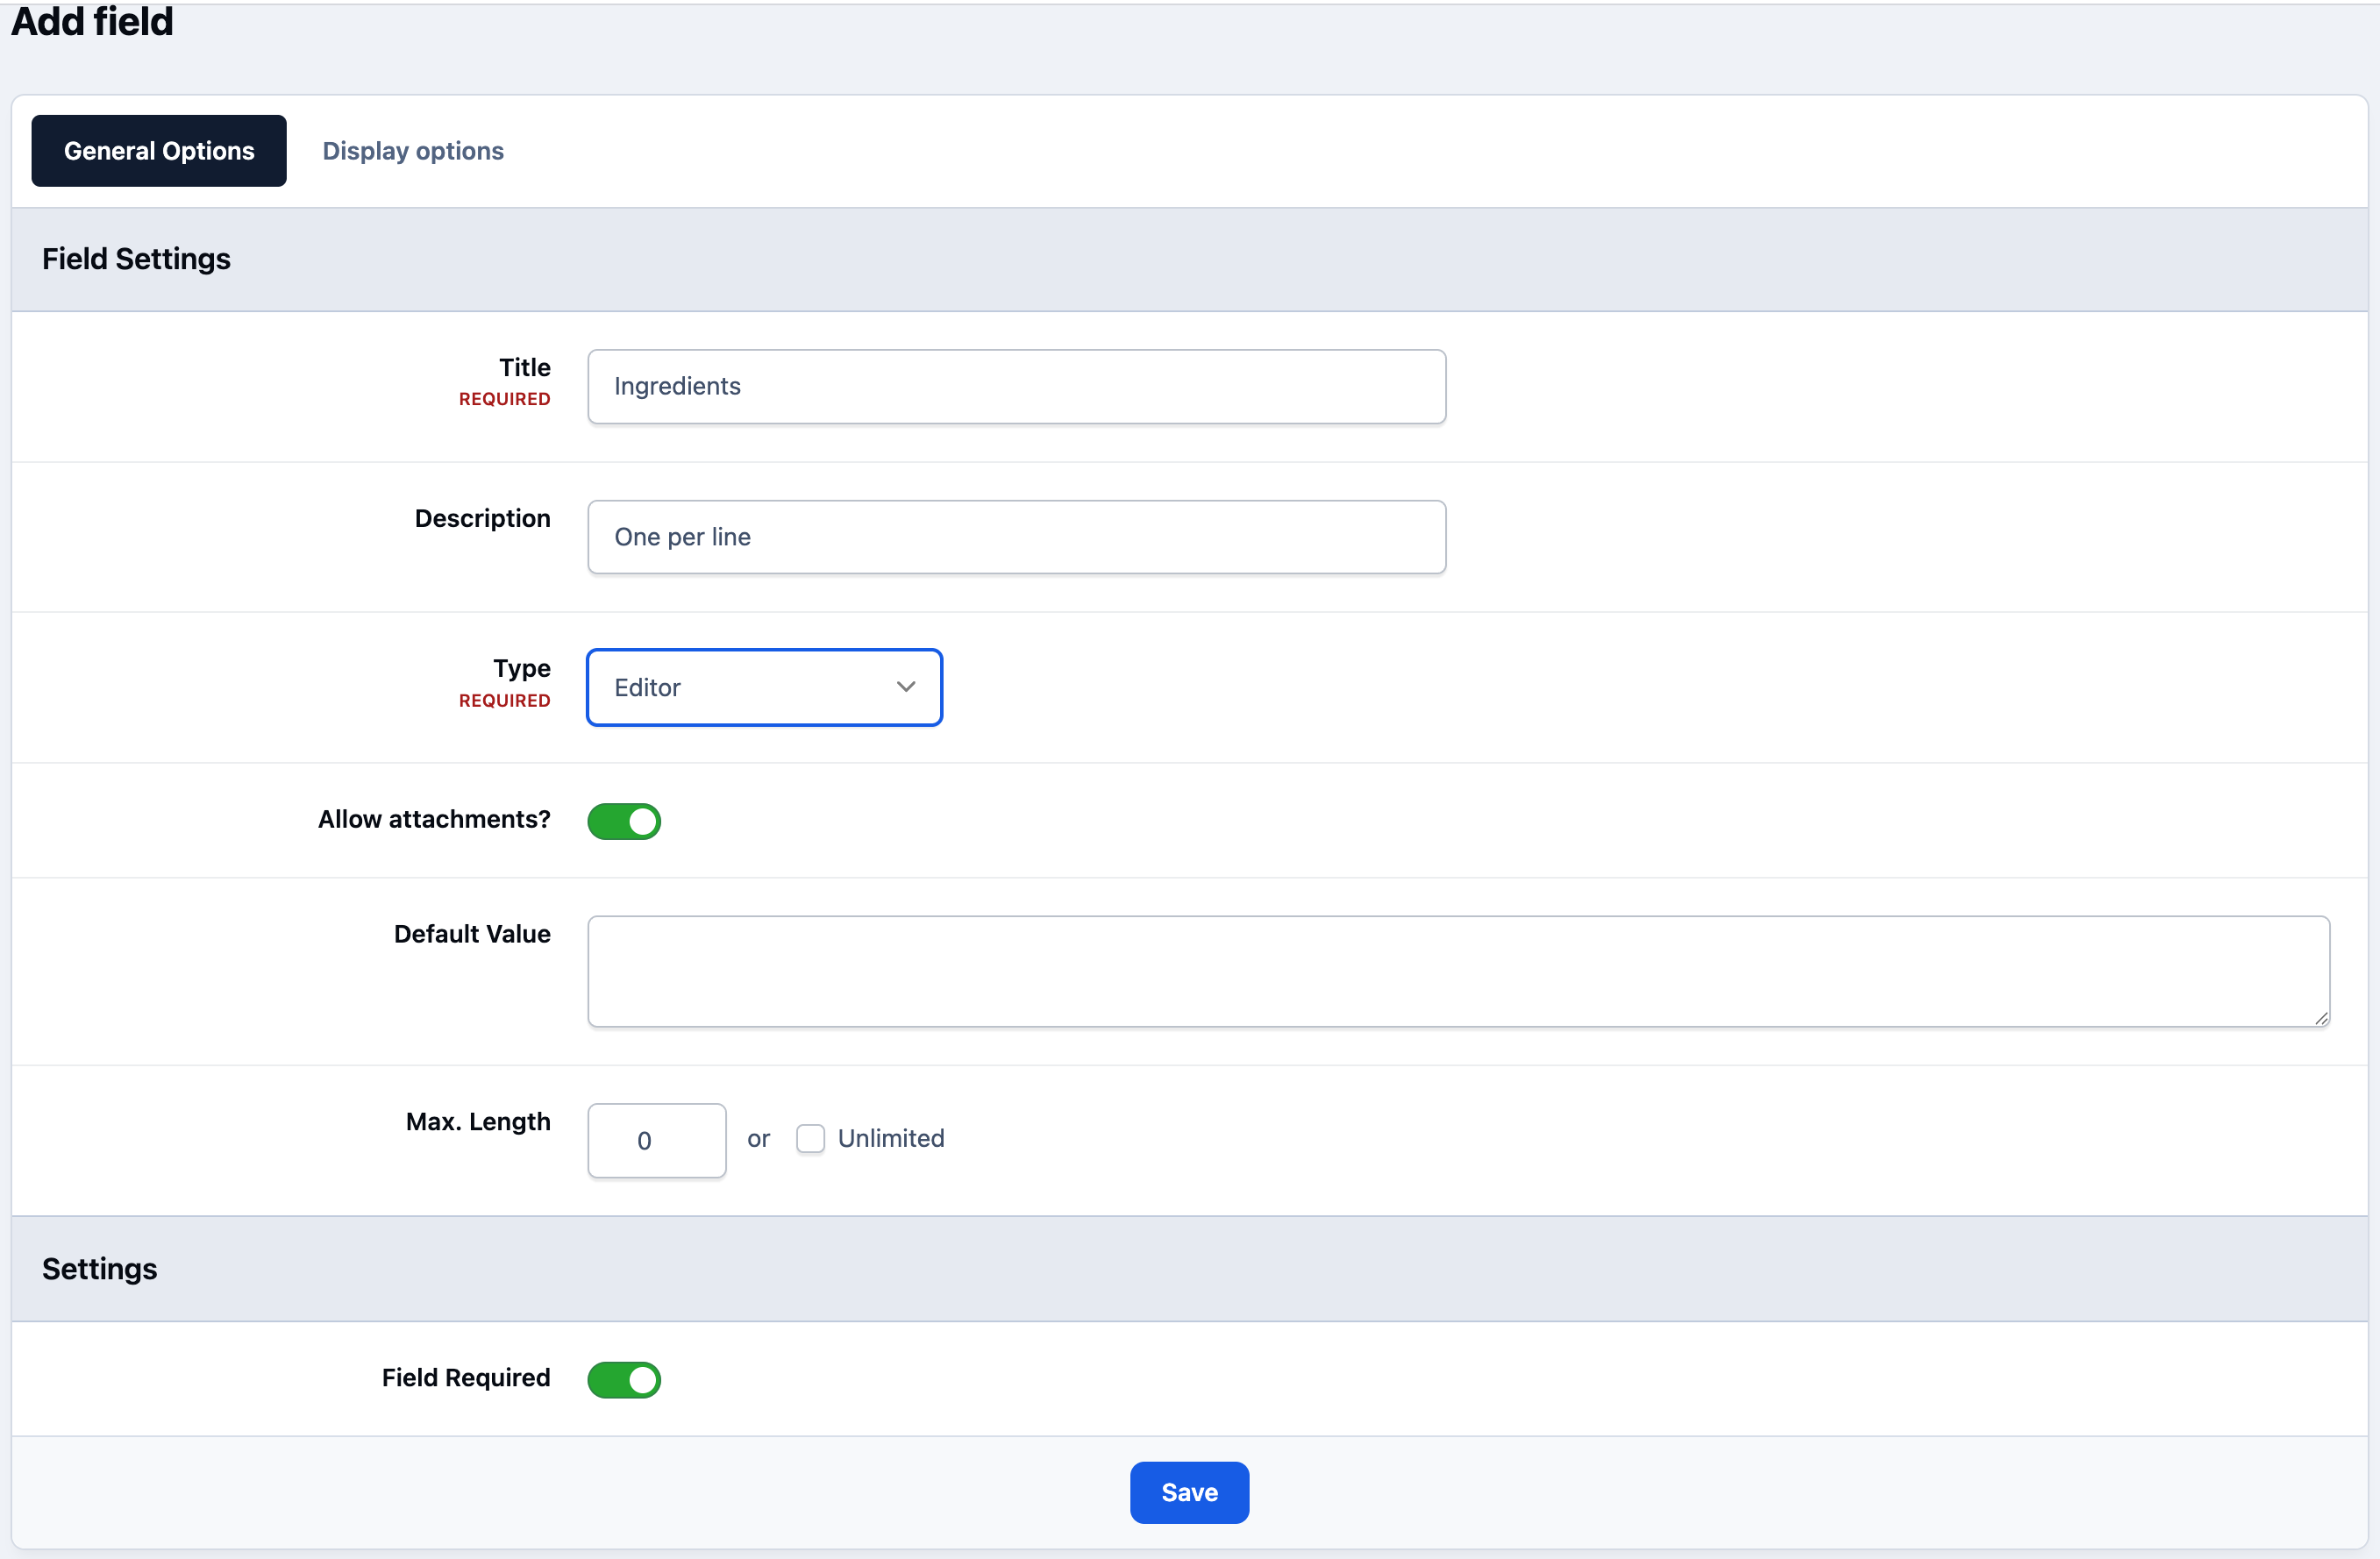
Click 'Create New' to open the field configuration form and enter Ingredients as the title. In the description, enter “One per line”. This is only shown on the add/edit form and is useful for providing input guidance.
For the field type, select Editor, as this allows users to format the list if needed. Leave the maximum length at its default, but ensure the field is required so it must be completed.
General Field Options
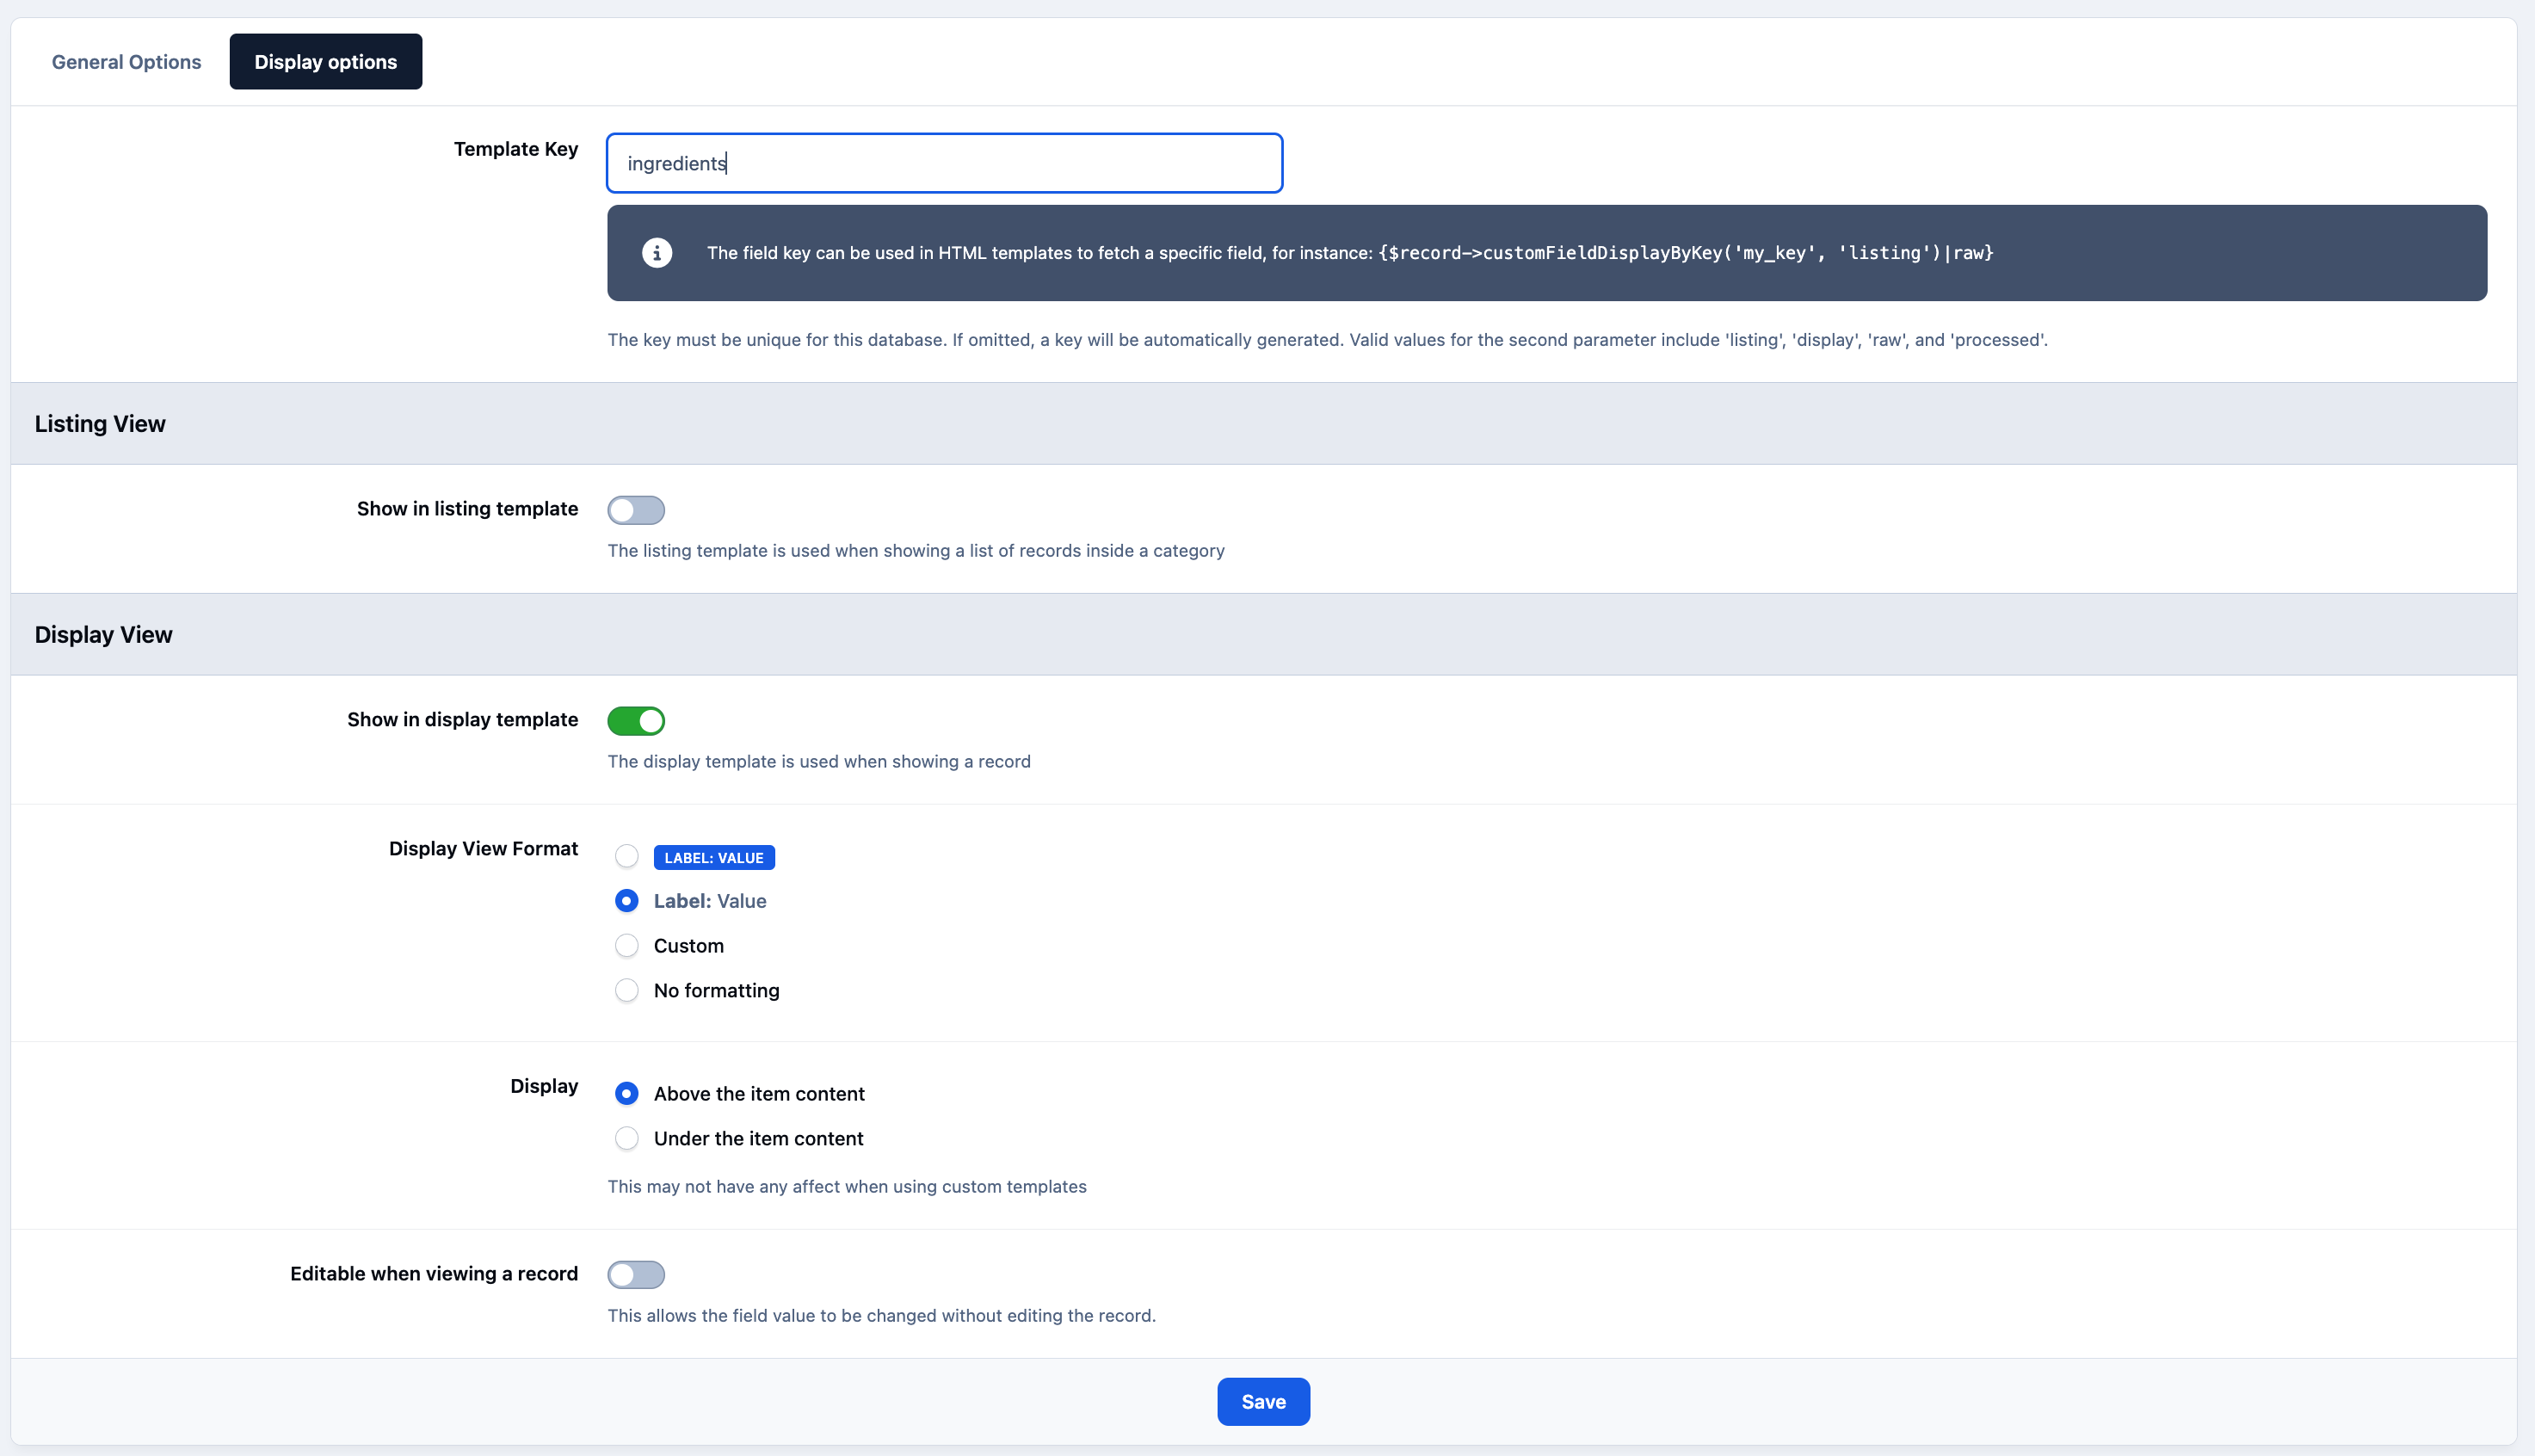
Next, switch to the Display tab. Enter ingredients as the field key, which is used to reference the field in templates. Disable the option to show this field on the listing screen, but enable it for the record display screen, as this is where recipe details are viewed. Finally, set the display format to Label: Value, as this is more suitable for content created with the Editor.
We'll show the list of ingredients above the main record content, so make sure Above the item content is selected for the Display option.
Field Display Options
Other Fields
Other fields can be created in the same way. Rather than repeating the full process, use the configuration options below for each field, leaving any settings not mentioned at their default values.
Note
Some field types, such as the Select Box used for Cuisine (see below), allow you to define a fixed set of options for users to choose from. These are set up as key/value pairs in the Admin CP, though only the values are shown to users. The key is used internally by Invision and within custom templates, and is best kept as a single lowercase word.
Prep time
Name: Prep Time
Type: Text
Required: No
Template key: prep-time
Listing view format: Label: Value
Display view format: Label: Value
Cook time
Name: Cook Time
Type: Text
Required: No
Template key: cook-time
Listing view format: Label: Value
Display view format: Label: Value
Cuisine
Name: Cuisine
Type: Select Box
Content: (key/value)
indian / Indian
italian / Italian
american / American
mexican / Mexican
Allow filtering: Yes
Required: Yes
Template key: cuisine
Listing view format: Label: Value
Display view format: Label: Value
Display: Above the item content
Video recipe
Name: Video tutorial
Type: YouTube
Required: No
Template key: video-tutorial
Show in listing template: No
Show in display template: Yes
In a record, display as: Embedded Player
Result
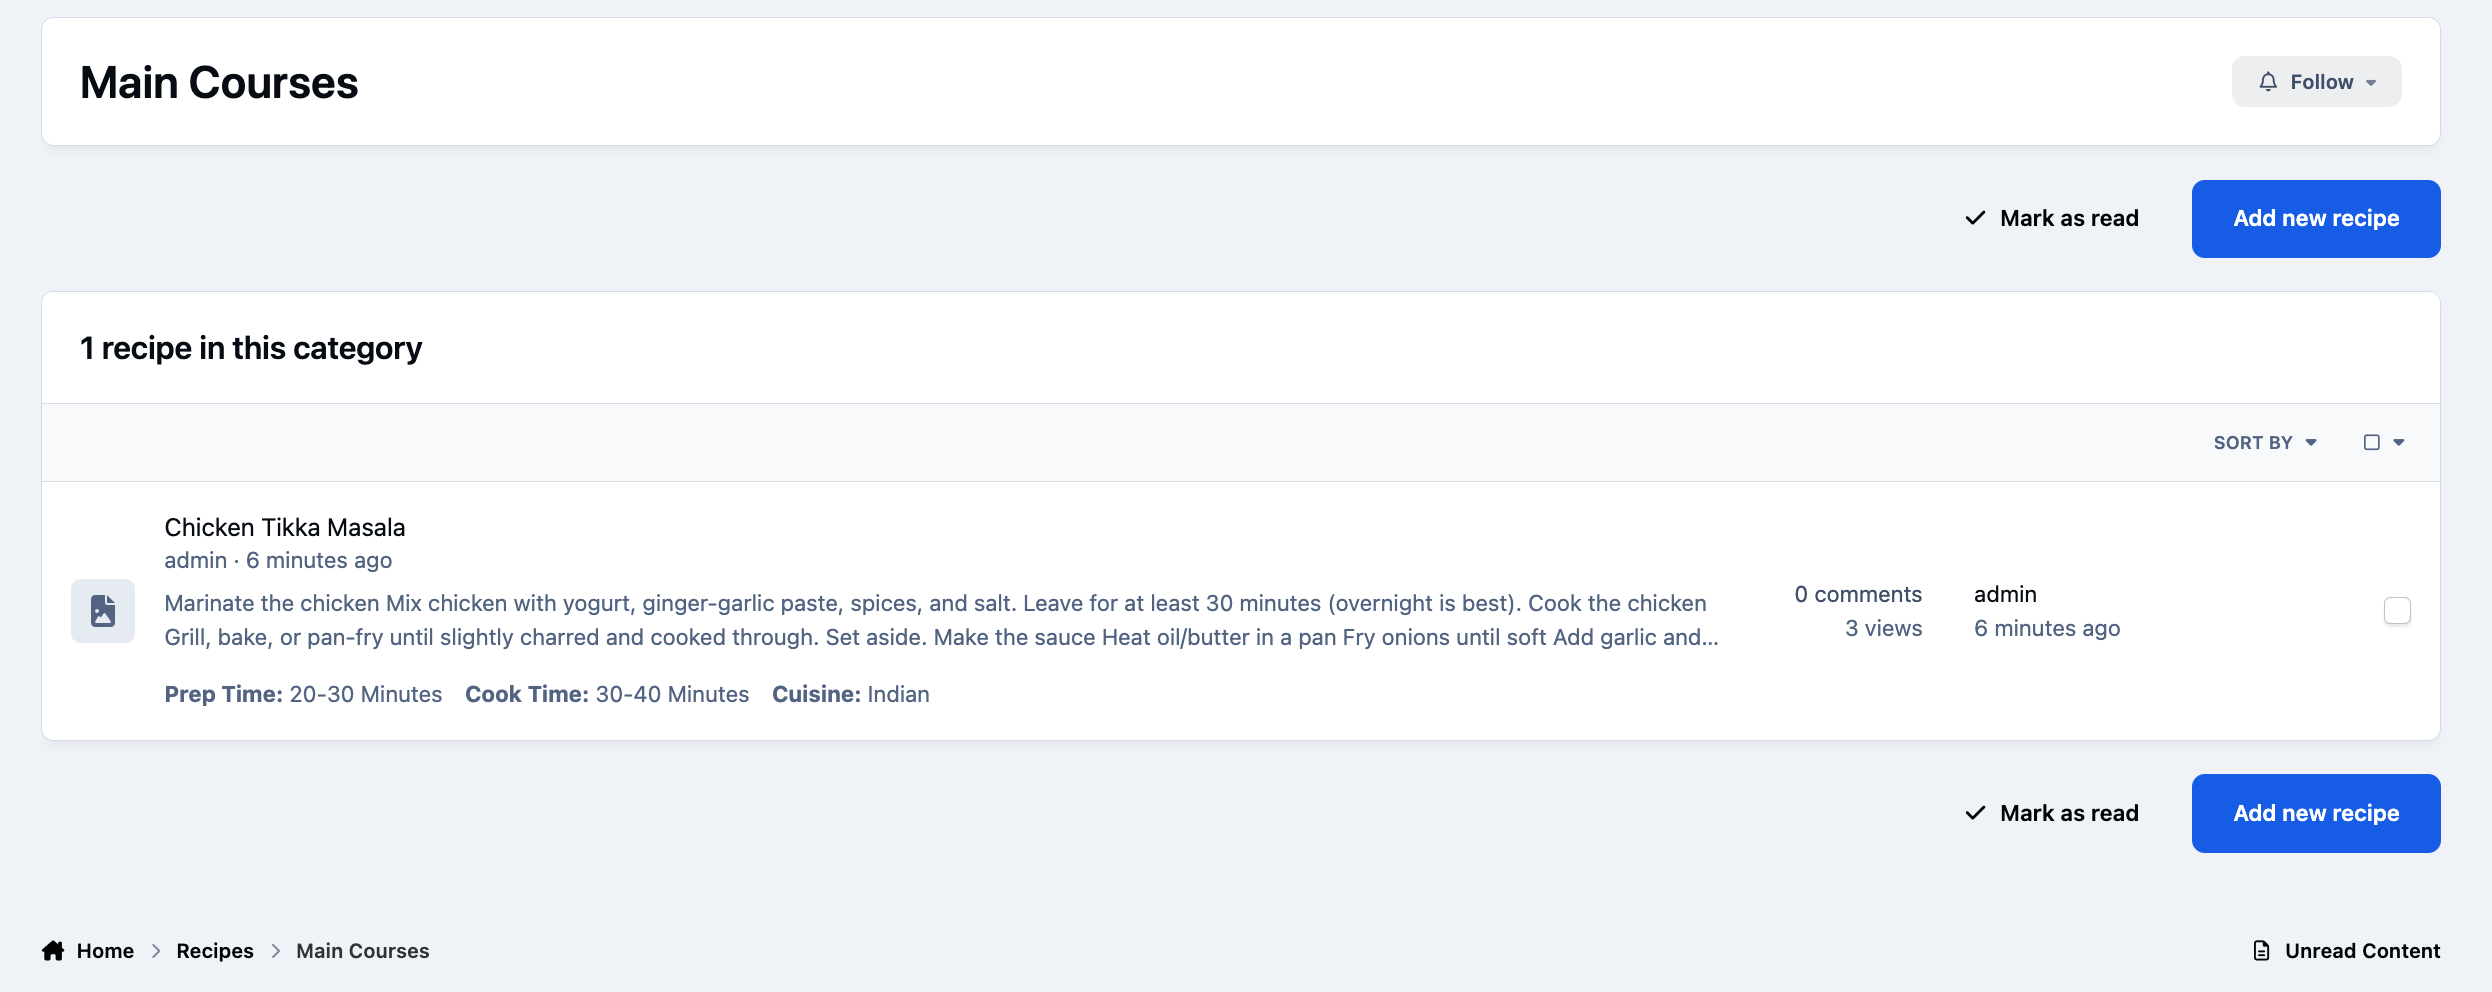
That’s it! If you head over to the front-end page for your database, open a category, and click the Add New Recipe button, you will see your fields on the form, ready to collect information. Feel free to add some sample records to test it out.
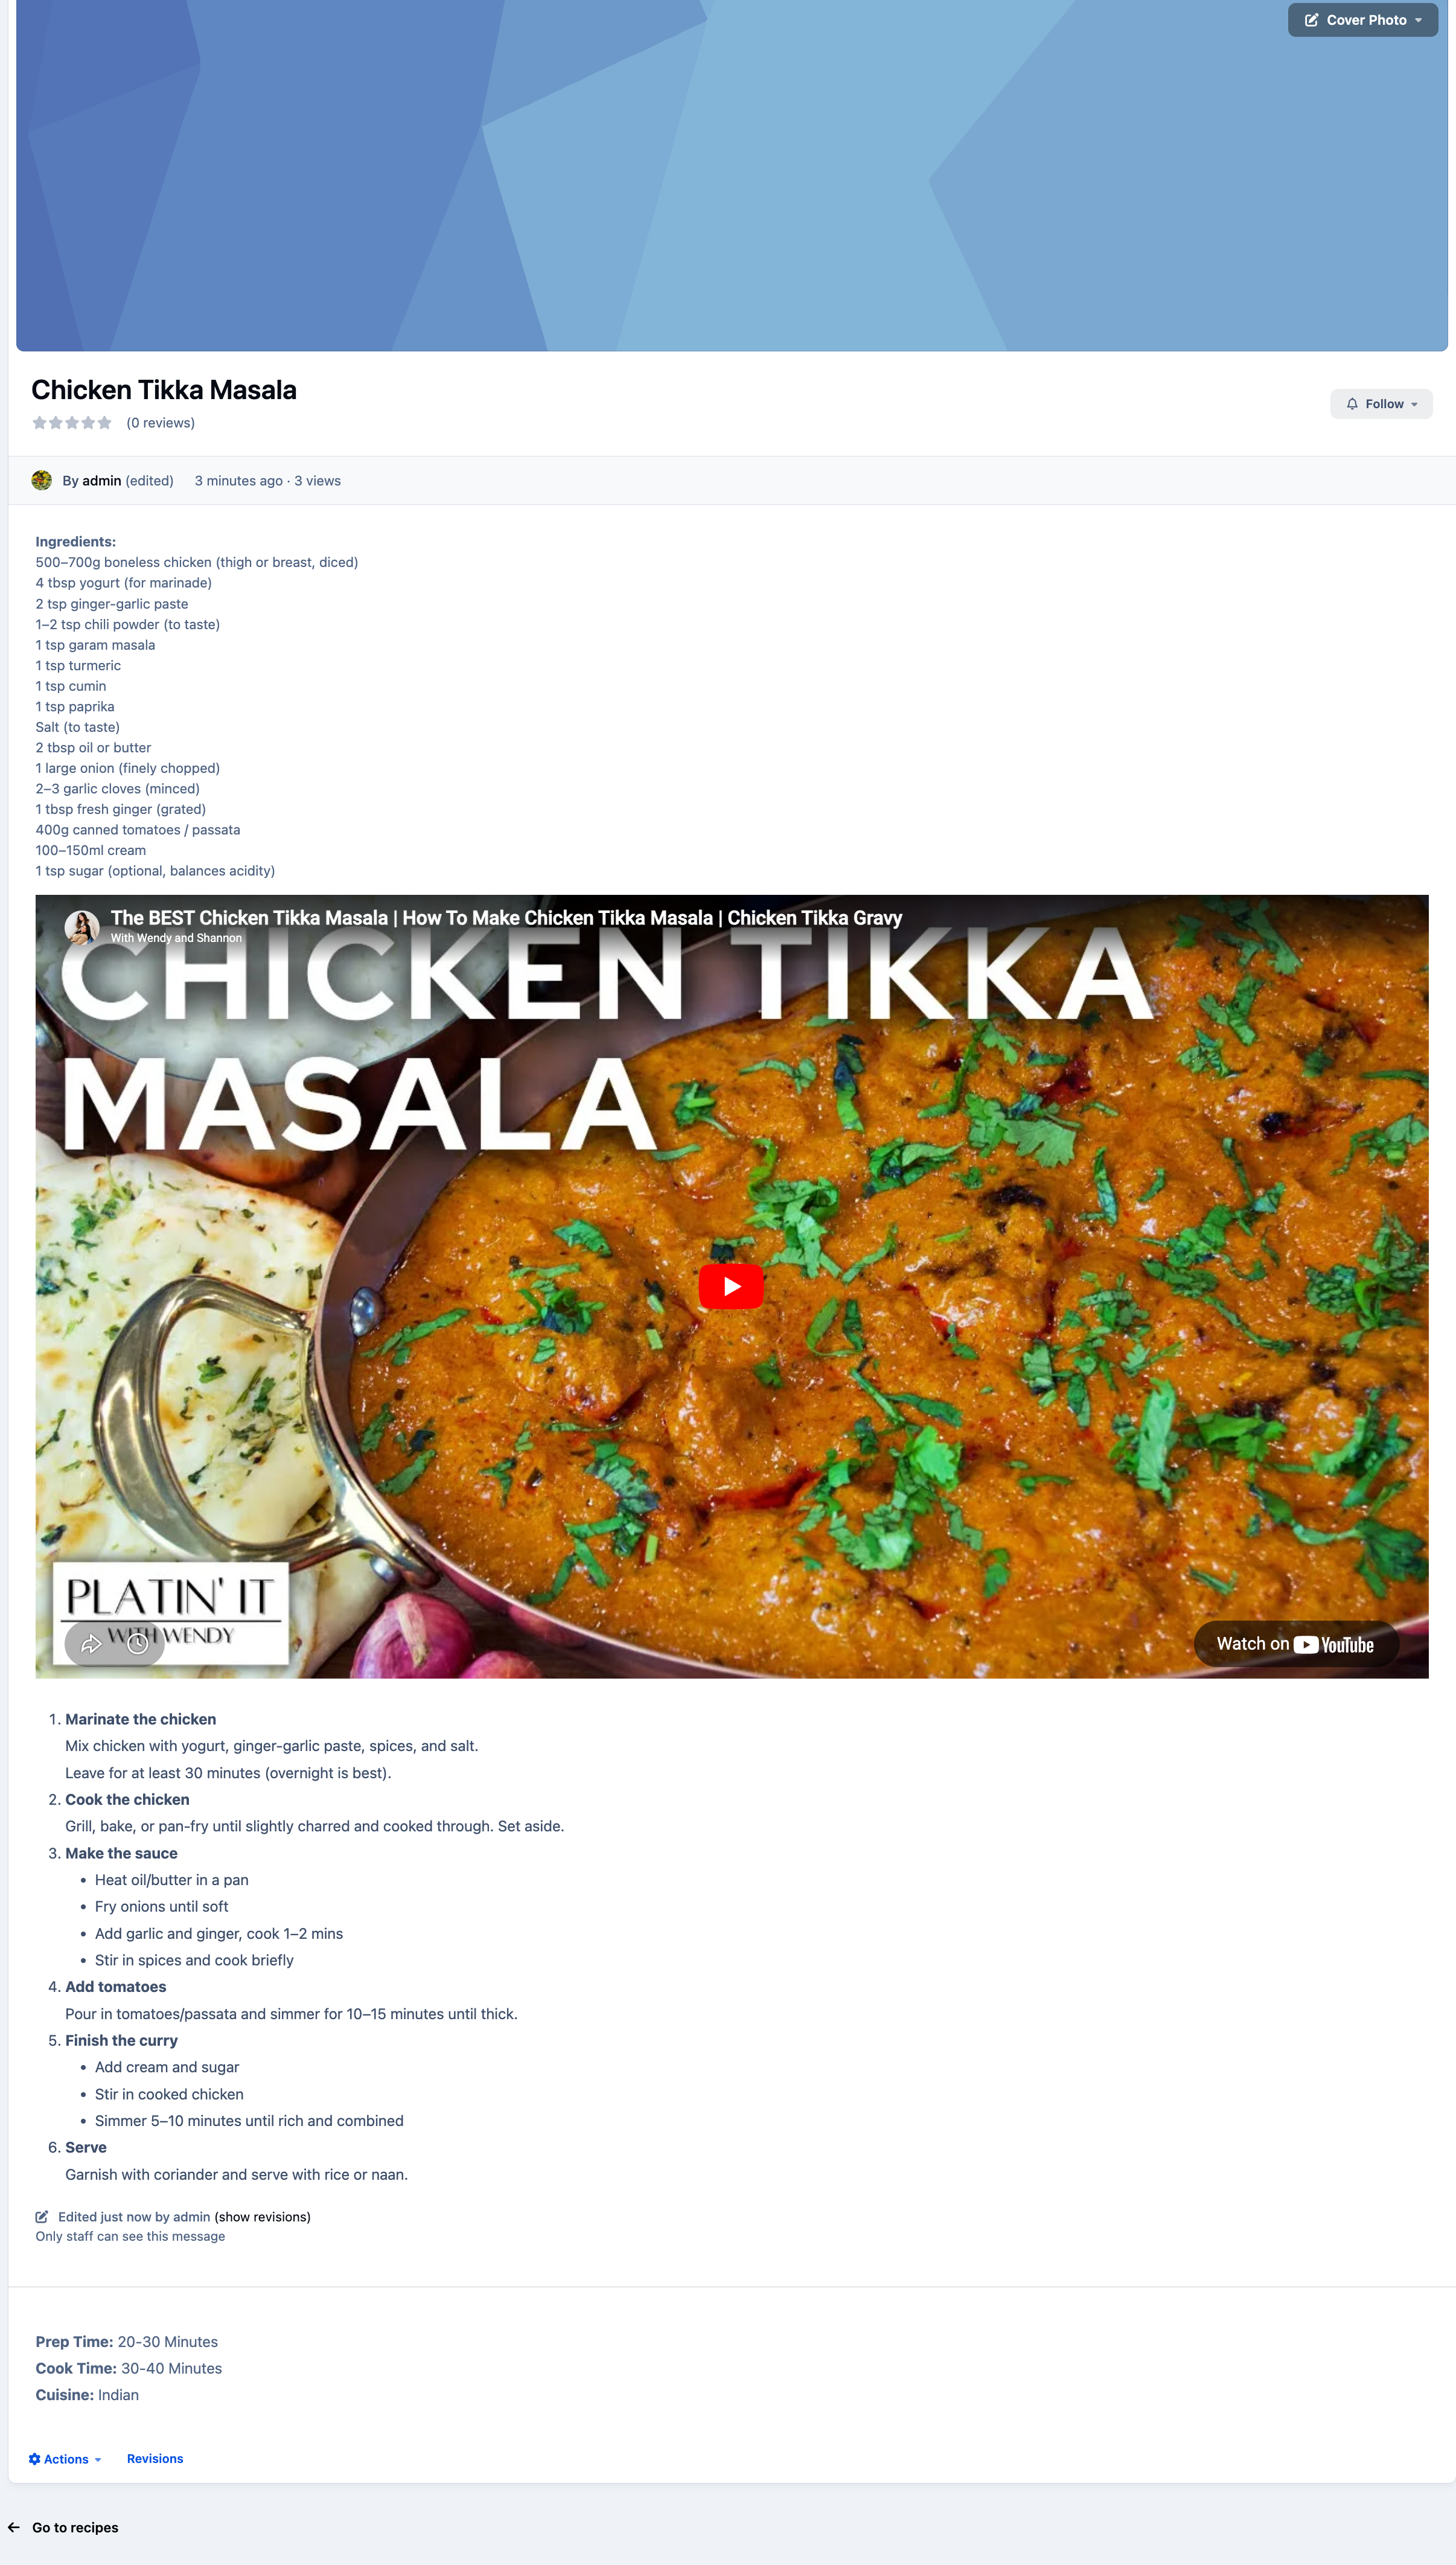
You will also notice the Record Image field provided by the database. When you upload an image here, it will automatically be displayed within the record view.
Recipe Listing
Recipe Record
Recommended Comments