


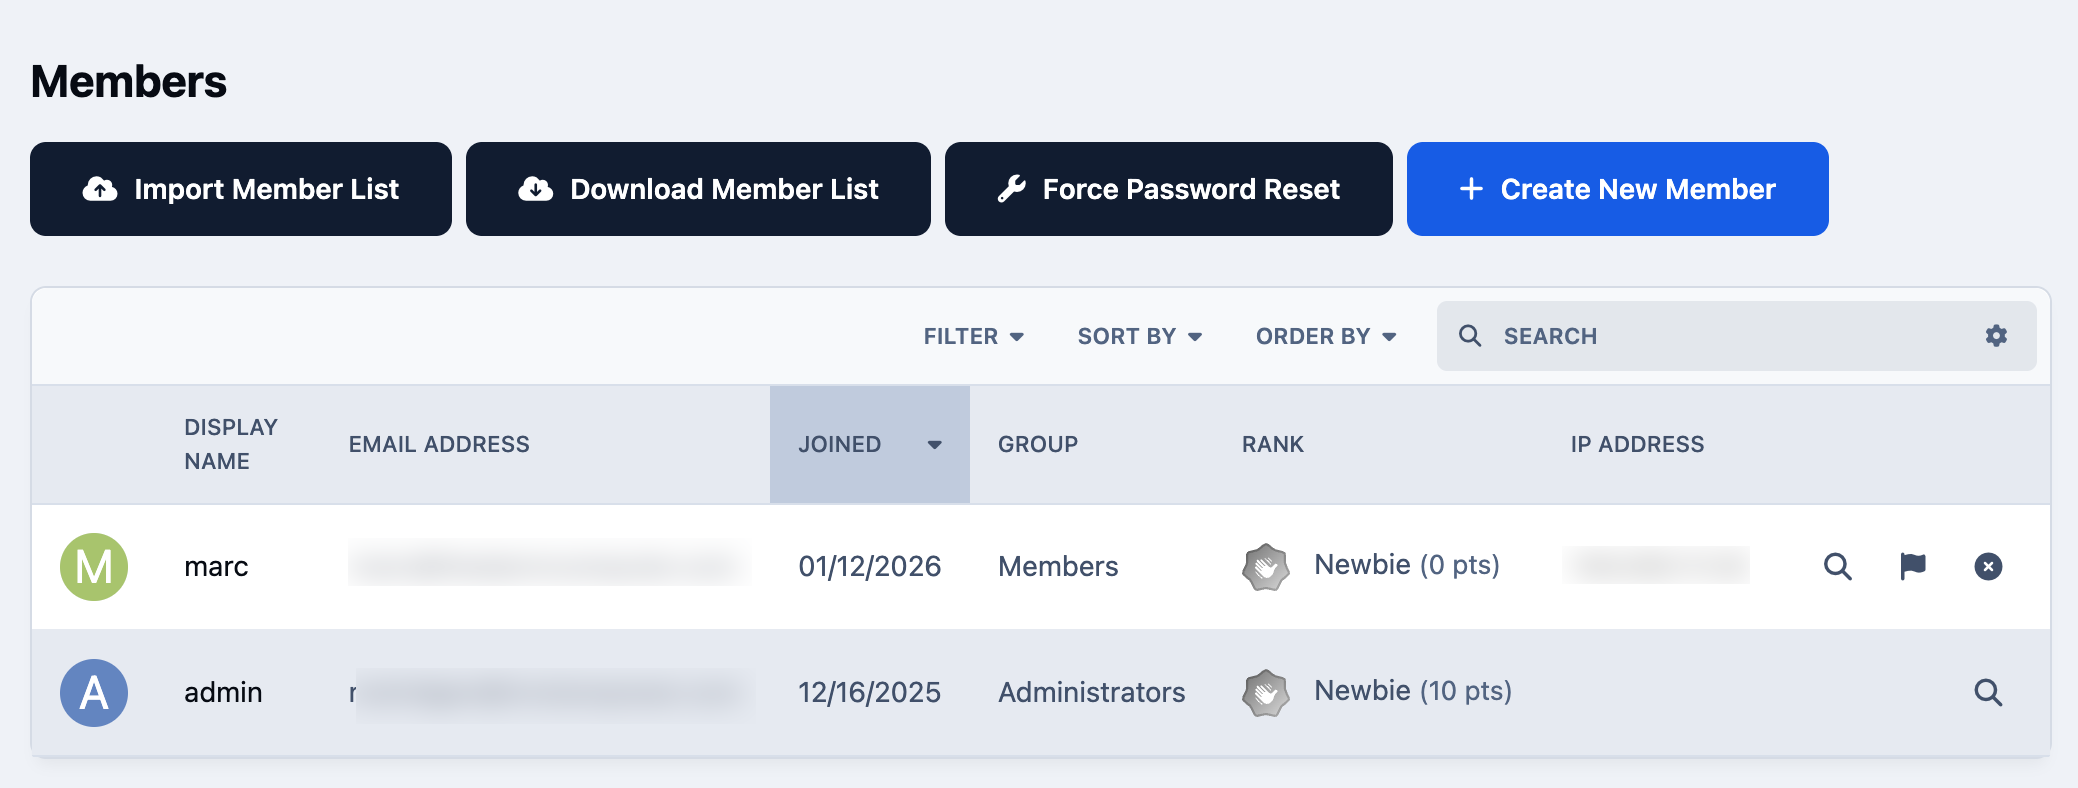
From time to time, you may need to manually add new members or make changes to existing accounts as you manage your community. A full list of your current members is available in the Admin CP, where you can also add or edit member details as needed.
You can find this section at:
Members → Members → Members
Member List
Adding New Members
To add a new member, select the 'Create New Member' button in the top-right corner of the Members section within the Admin CP. This will open the new member creation screen, where you can enter all of the relevant details for the account.
New Member Creation
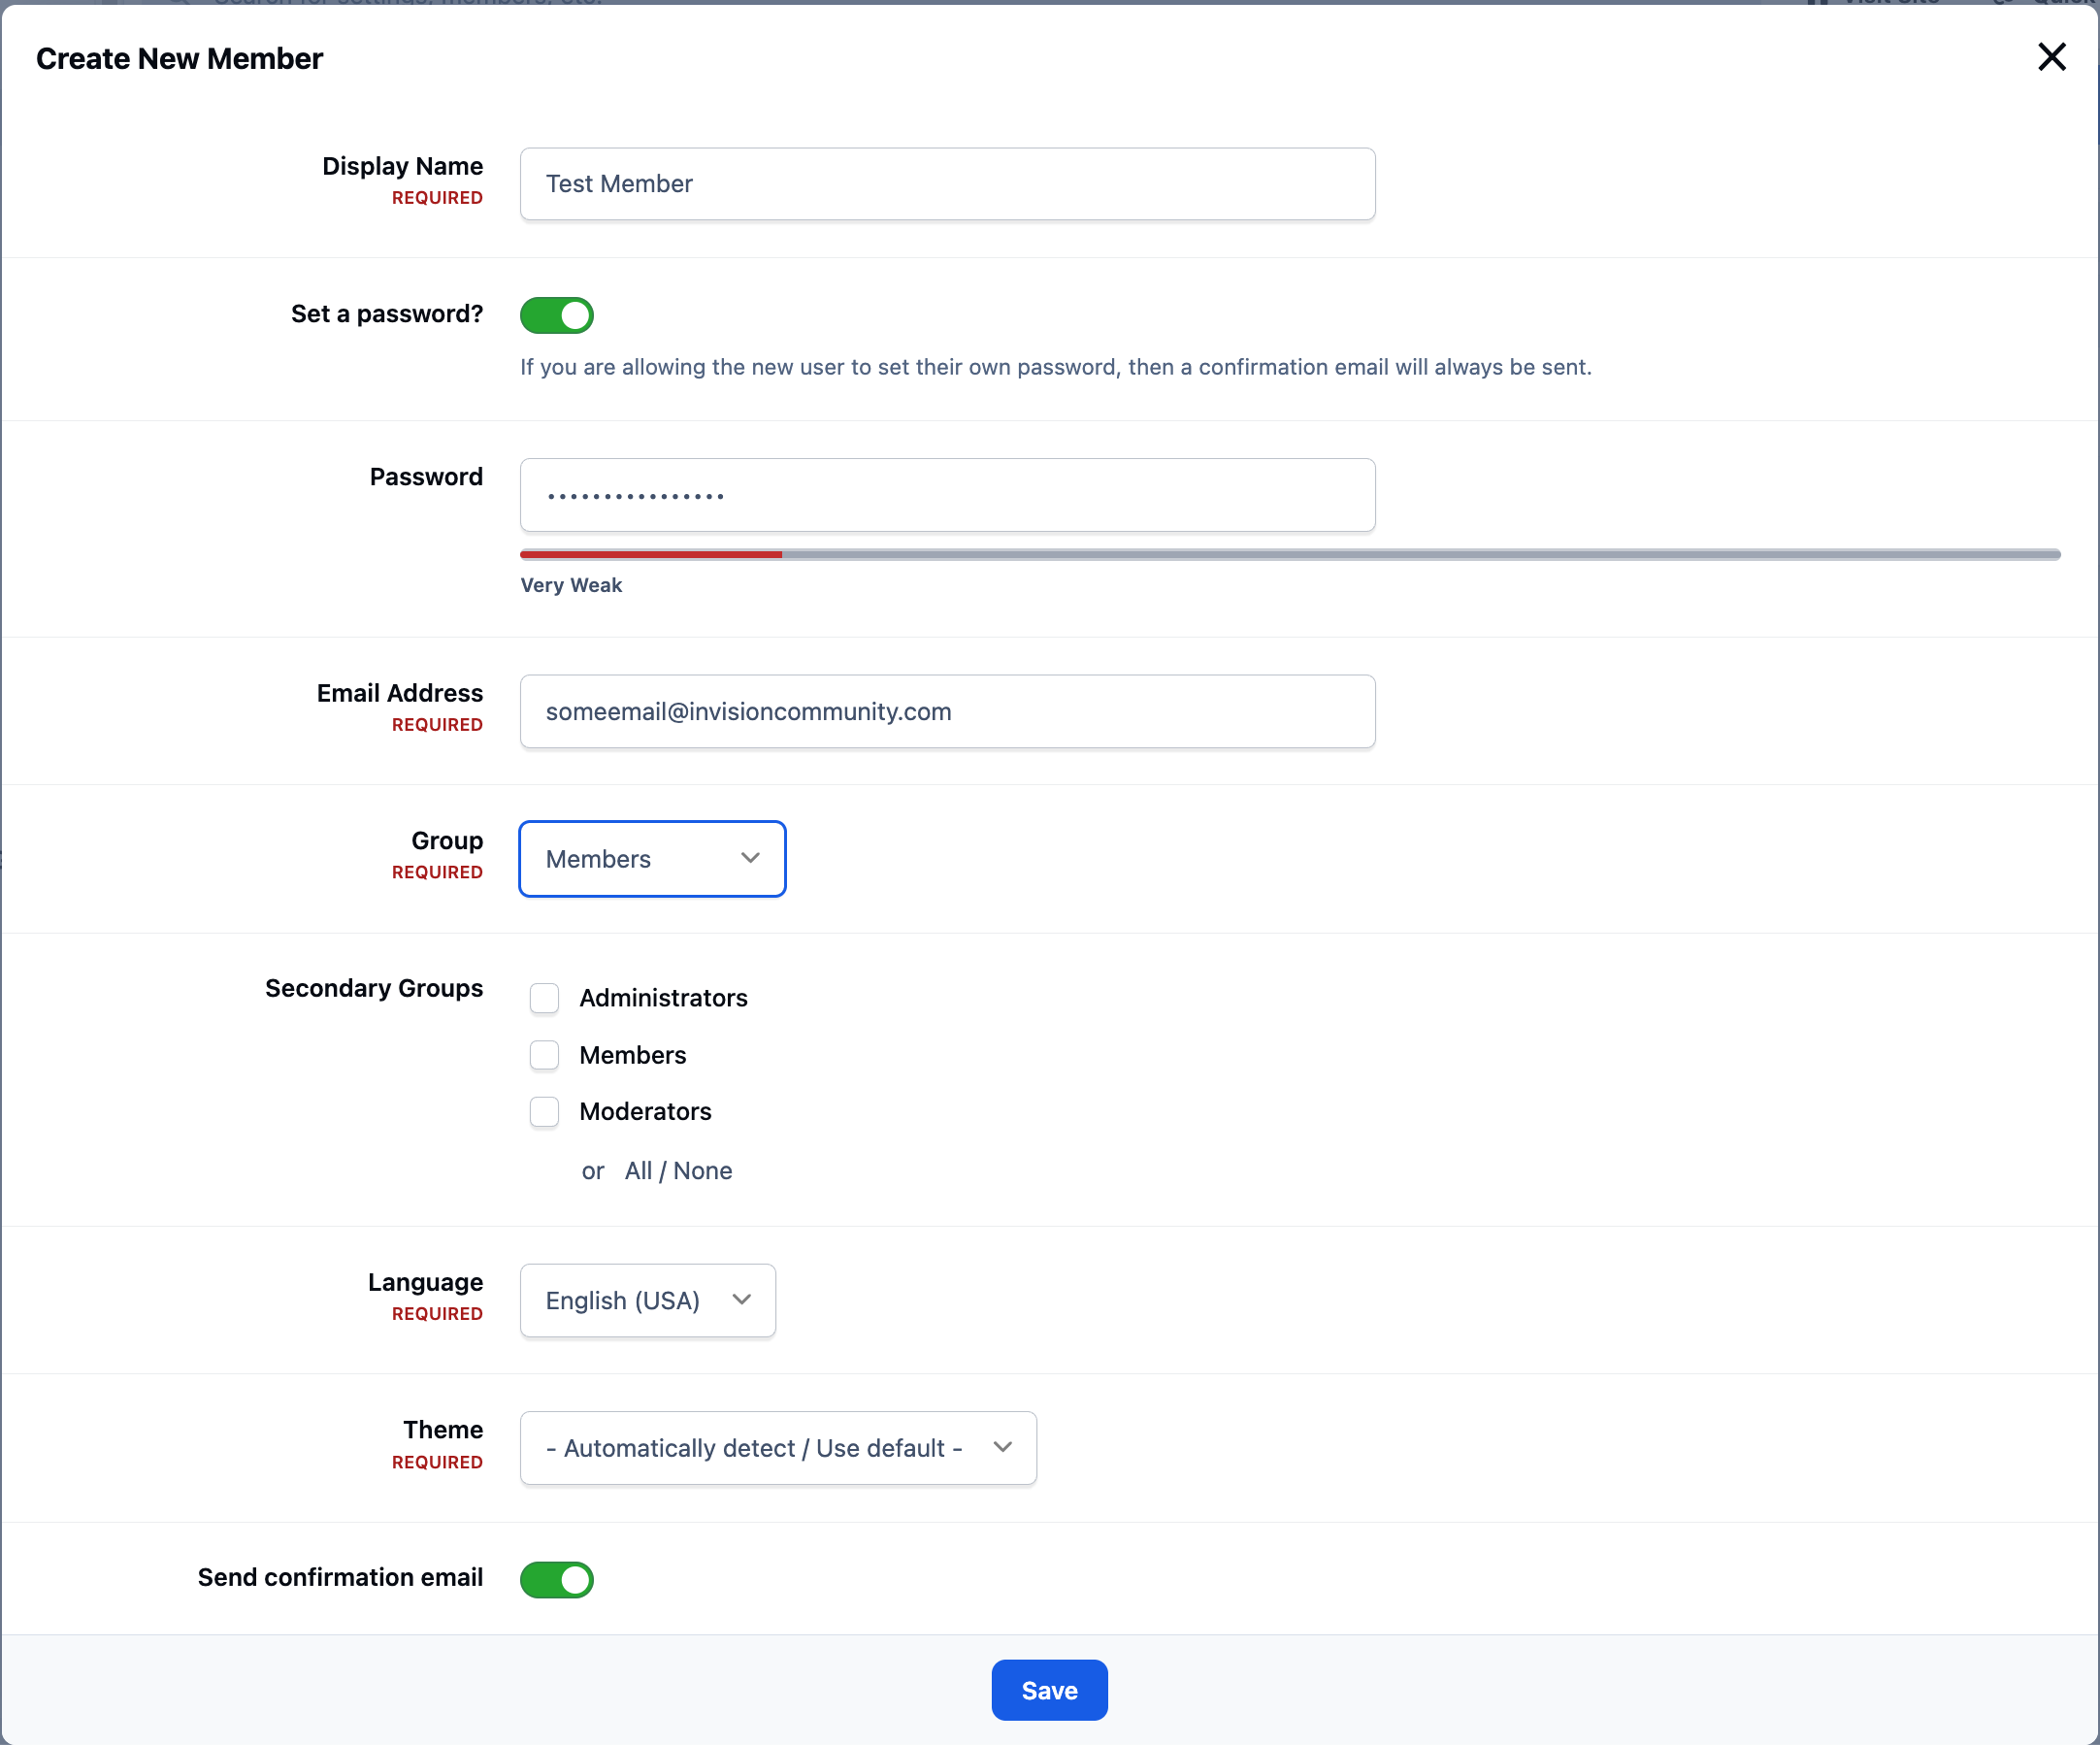
By default, when you create a new member, the system will send them an email containing their login details and a confirmation message. If you do not want this email to be sent, you can uncheck the option during the creation process.
You may also choose to set a password for the member at this stage. If no password is set, an email will always be sent to the member so they can create one themselves.
Editing Existing Members
To edit an existing member, you can either select the pencil icon next to their entry in the member list or click directly on the member’s name. This will take you to the member view page, as shown below.
Customer view tab - Commerce only
In the screenshot below, you’ll also notice a Customers tab. This section displays information related to Commerce items and will only be available if you have the Commerce platform installed.
Editing Members
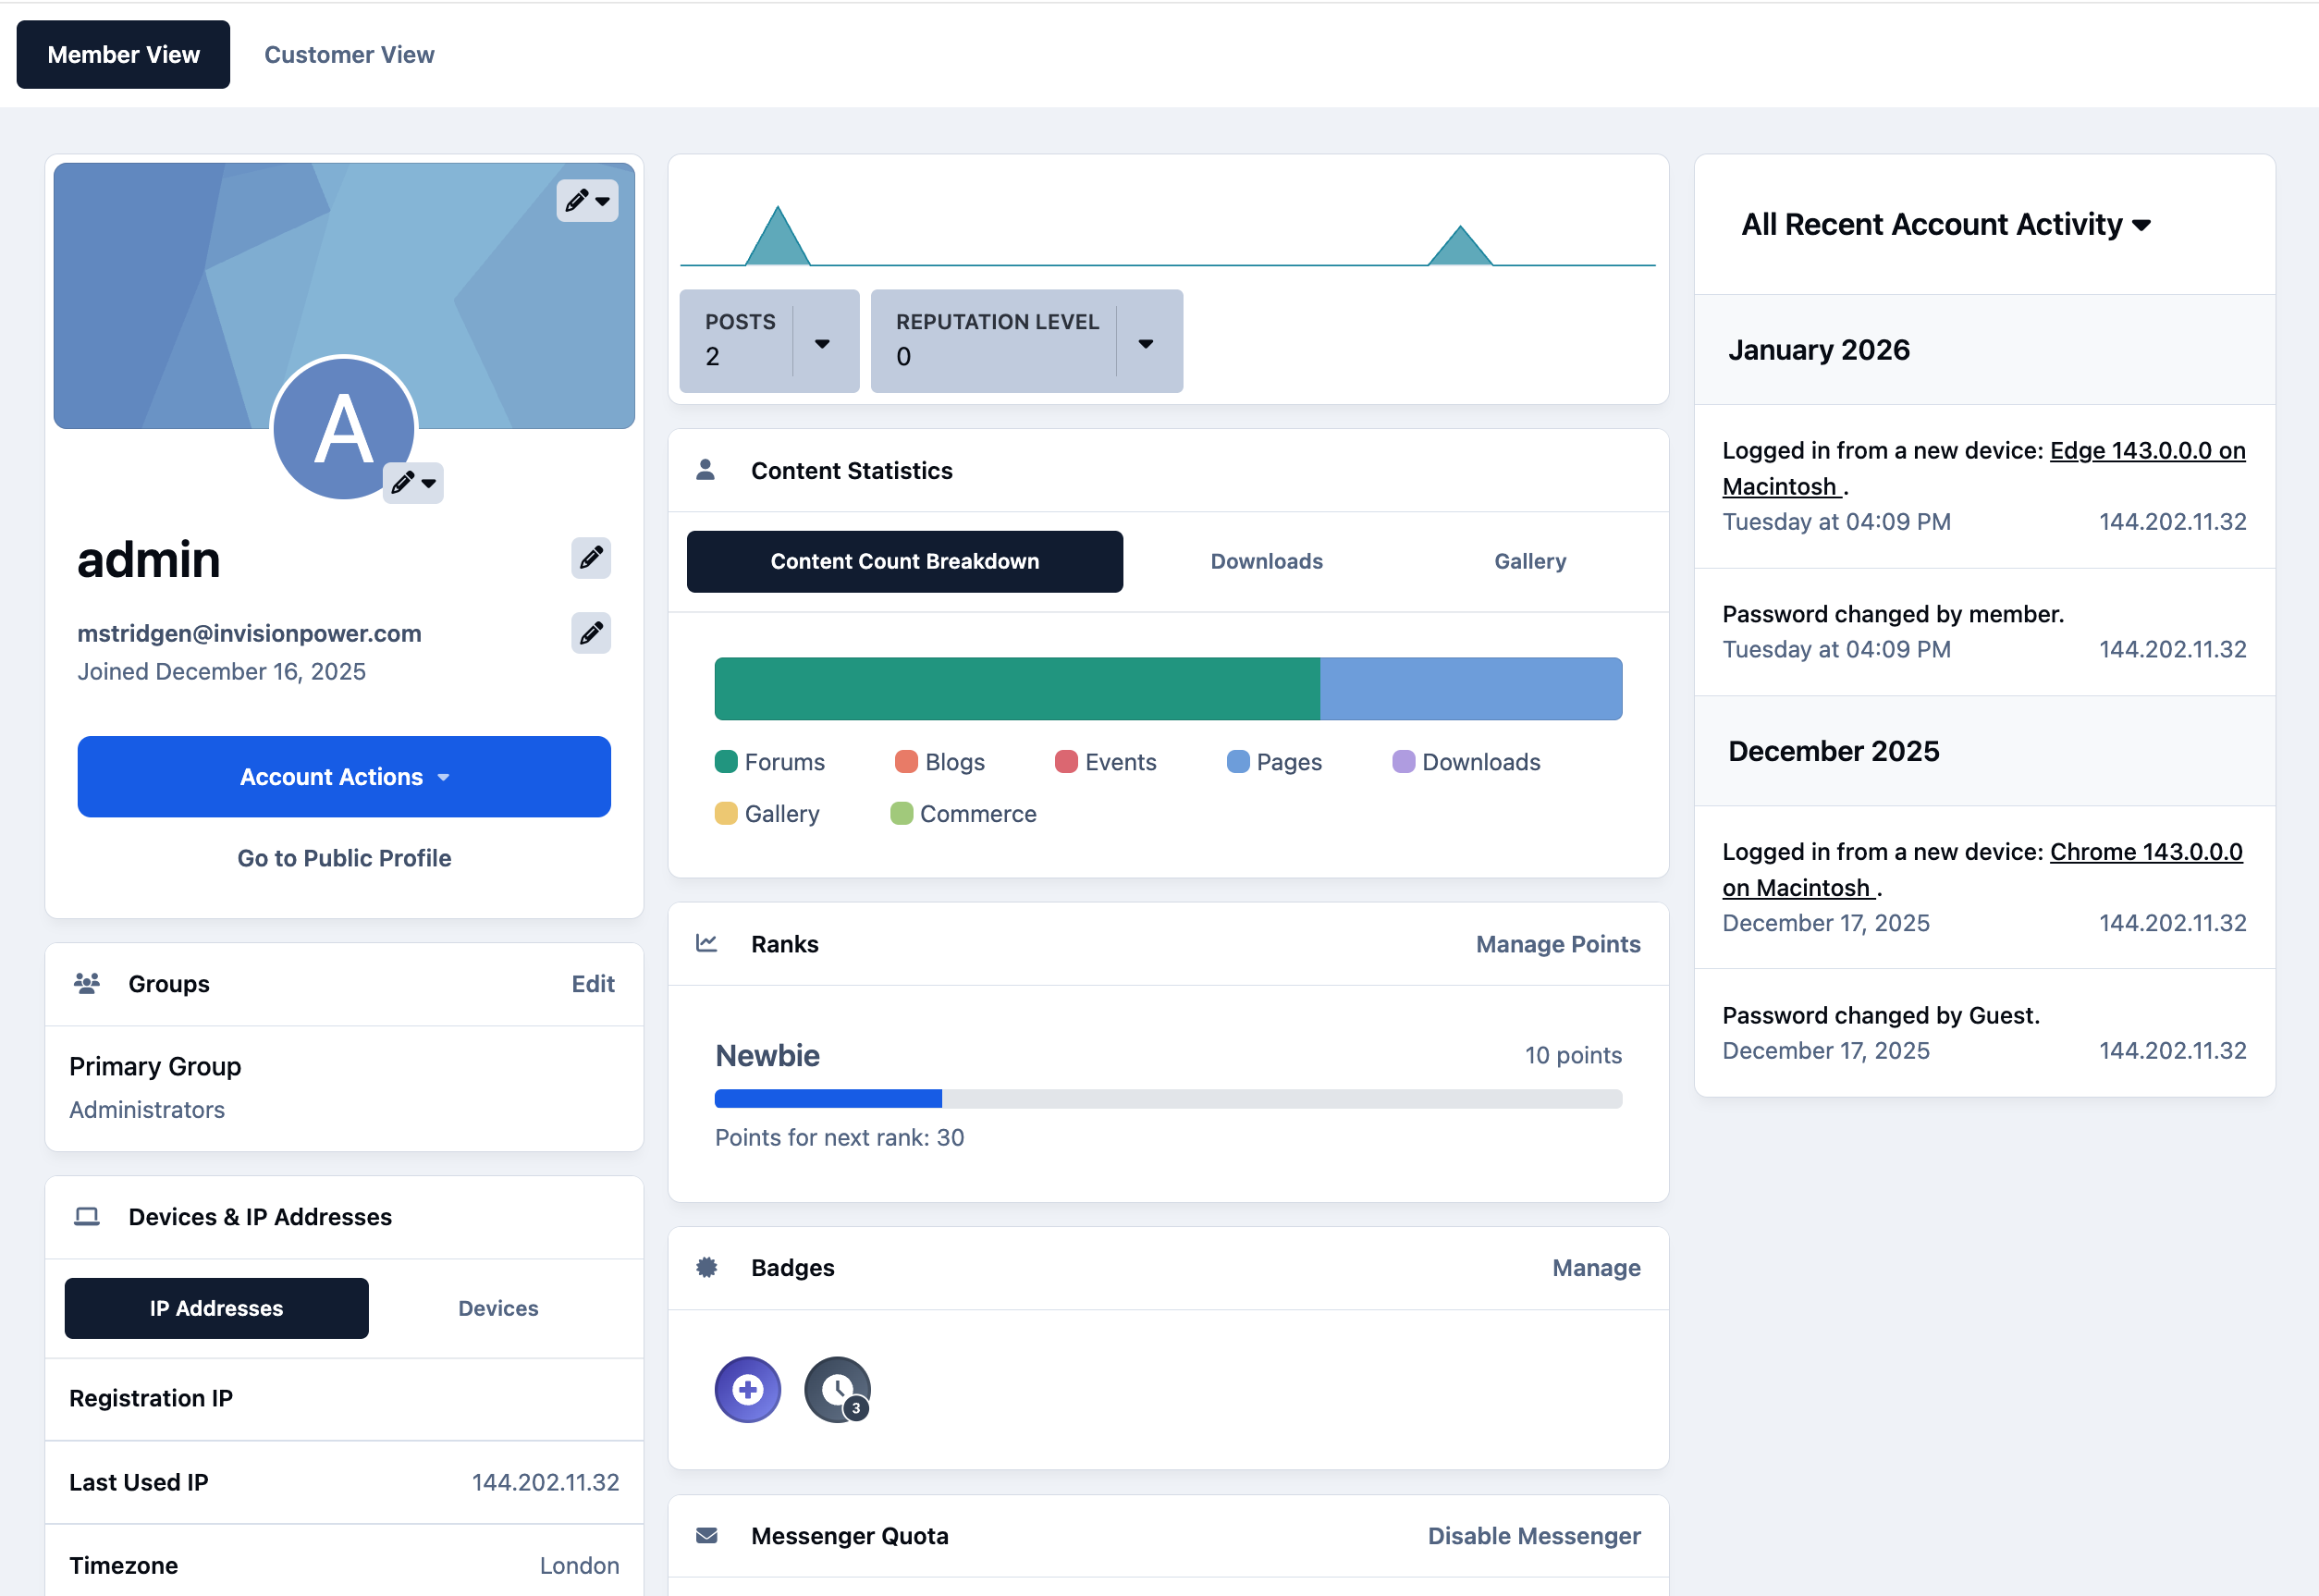
The member view page is divided into several sections, each of which can be edited using either the pencil icon or by selecting Edit. You may also see additional tabs for items such as Gallery or Downloads. These are application-specific and are covered in the guides for those individual applications.
While most options are self-explanatory, a few areas are worth highlighting in more detail:
Account Actions - This section includes options to merge the member’s account with another account or delete it entirely. You can also download a copy of the member’s personal data if requested, as well as use the Log in as… feature. Logging in as the member can be particularly useful when diagnosing issues from the user’s perspective.
Edit Preferences - This is the administrative equivalent of a member’s account settings. From here, you can manage options such as notification preferences, whether signatures are displayed, and other related settings.
Reset Account Activity - On the right-hand side, you’ll see an activity bar that acts as an audit log for the account. This shows changes made to the member’s account and can be helpful when you need to see what was changed, and by whom.
Recommended Comments