


Gamification can be a powerful way to encourage members to participate and contribute content within your community. Invision Community supports this by giving administrators the ability to award points and badges based on conditions and activity rules.
Below is an example from our own community, showing achievements earned by Matt through this system.
Profile View of Achievments and Badges
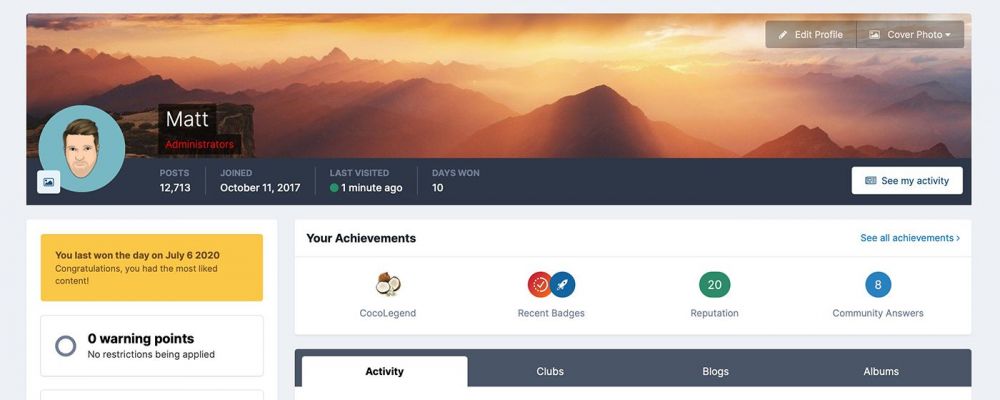
Achievements
Conditions
Achievement rules allow you to award points and/or badges to members when specific conditions are met. These rules can be configured from the following location in the Admin CP
Members → Achievements → Rules
Rules List
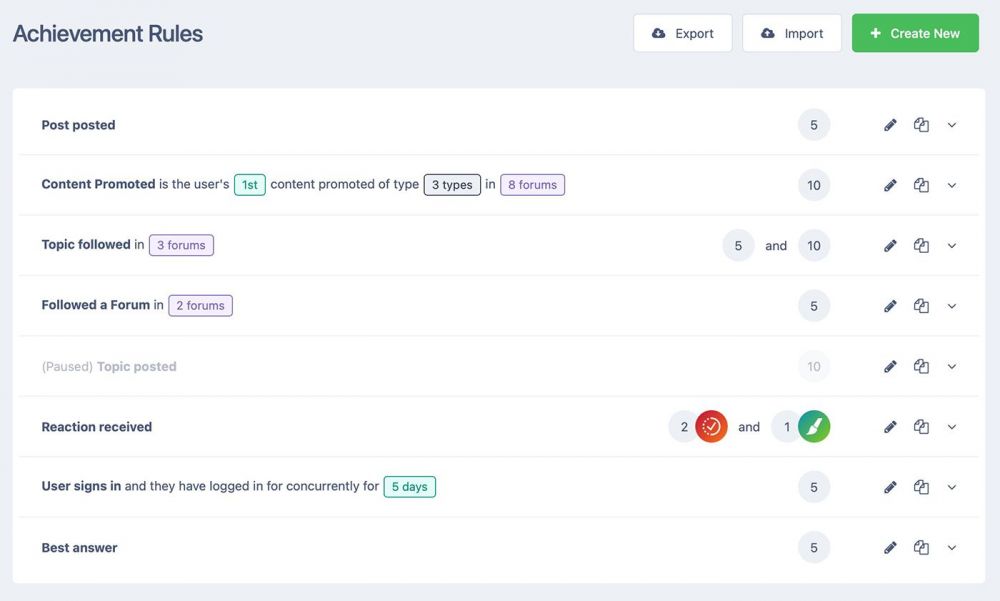
From here, you can define an initial When condition, such as when a reaction is given or when a member posts a piece of content, along with many other available triggers. In addition to this primary condition, you can also apply three types of additional conditions.
Location conditions - These allow you to limit where the action takes place. For example, you might choose 'A comment/reply is posted' and then add a location condition of 'It is a status reply', so the rule only applies to status replies.
Milestone conditions - These let you award achievements when a specific milestone is reached, such as giving a member their 10th reaction or rewarding them for making their first post.
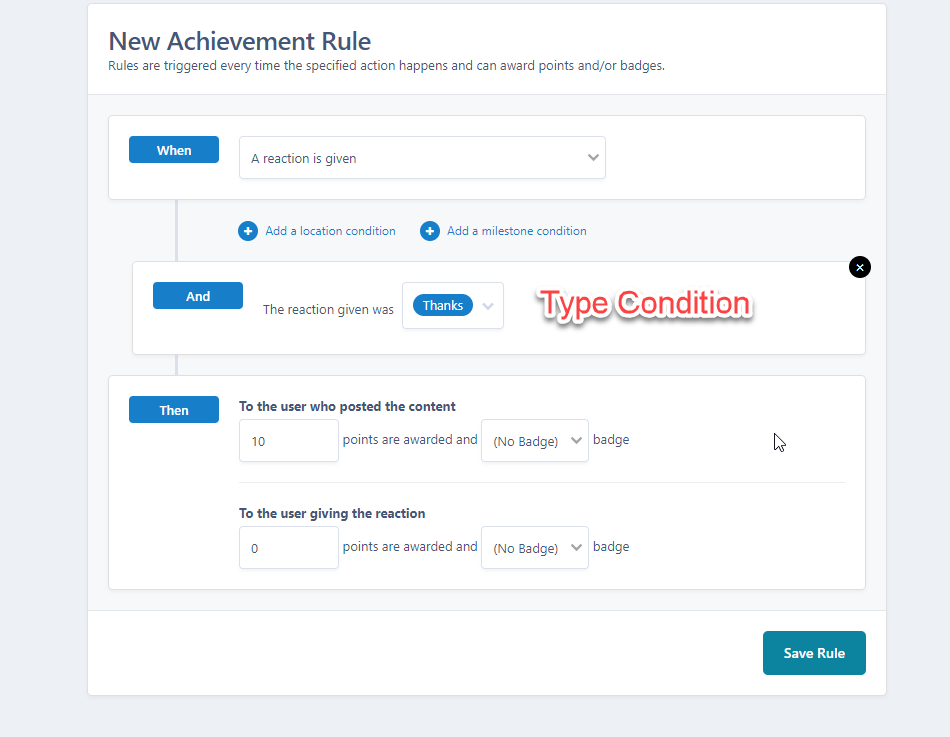
Type conditions - These are used to narrow the rule based on the type of action. For example, you could specify that the reaction given must be a 'Thanks' reaction.
The conditions available to you will vary depending on the initial 'When' option you select.
New Rule Showing Type Conditions
Actions
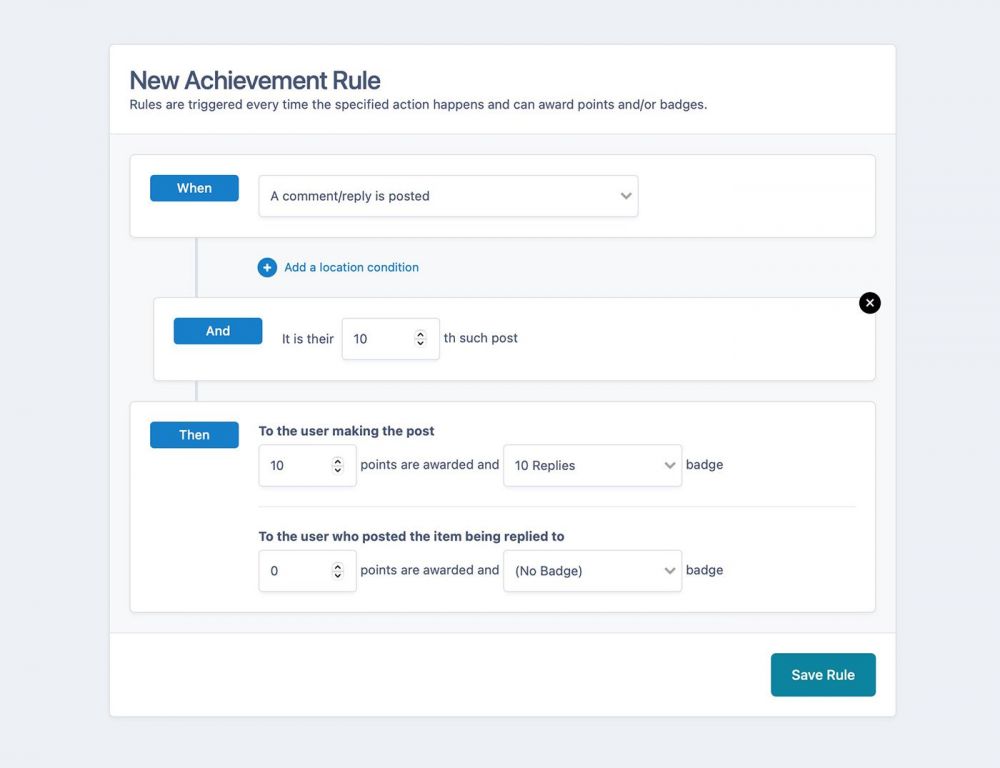
You can then choose the 'Then' action, which determines what happens when the defined conditions are met. In the full example shown, the system is set to award the '10 Replies' badge (discussed later) along with 10 points once a member reaches 10 comments or replies.
New Rule Showing Actions to Take
Ranks
Ranks are titles and images that can be assigned to members once they reach a specific number of points on your site. These are displayed alongside a member’s posts and help highlight their level of participation within the community.
Ranks can be configured from the following area of the Admin CP
Members → Achievements → Ranks
Rank Listing
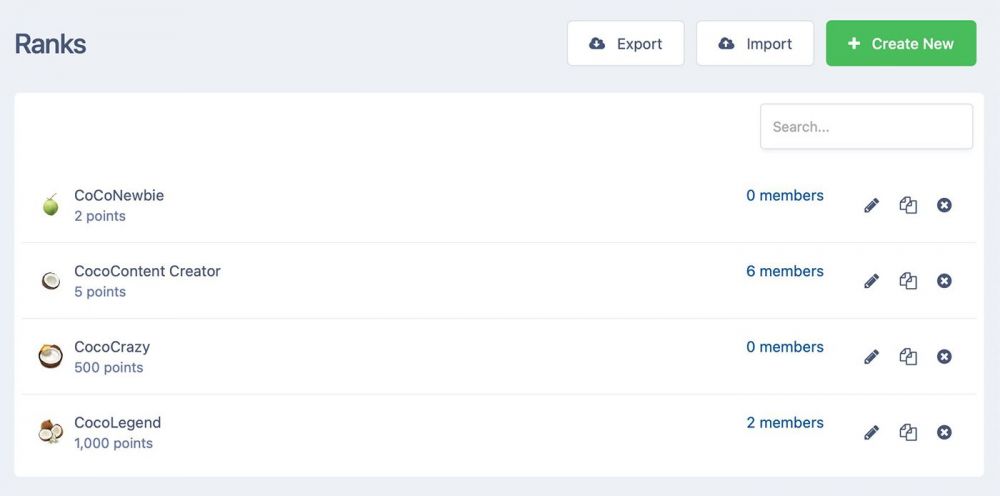
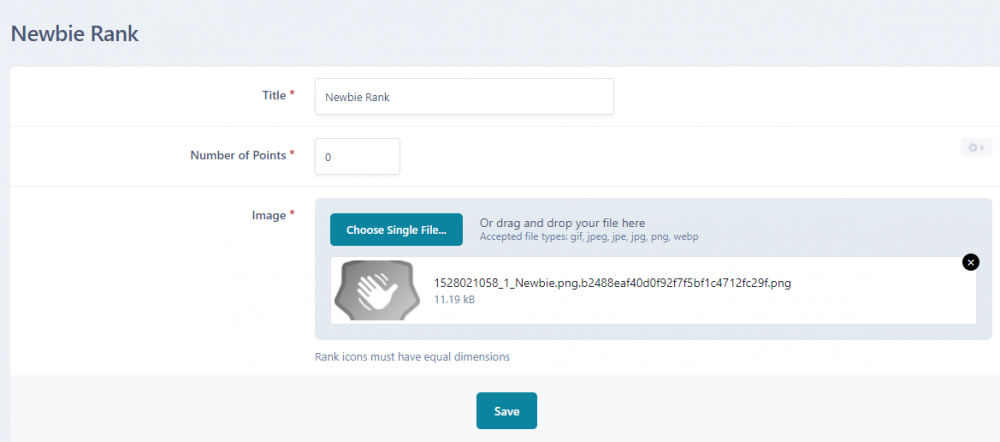
Once you enter this section, you’ll see the default set of ranks, similar to those shown below. You can edit any existing rank using the pencil icon, or create a new one by selecting Add New Rank, and filling in the details requested
Creating a New Rank
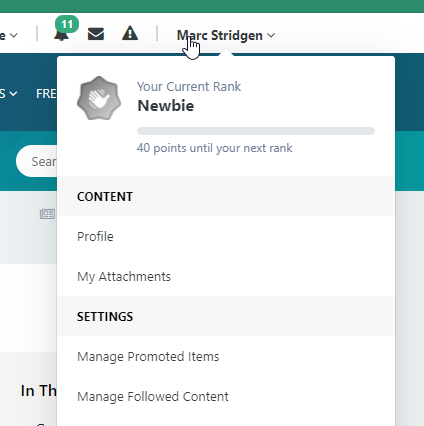
These ranks will also appear in the menu under a member’s name, along with the number of points they need to reach the next rank.
Showing Rank Progress
Badges
Alongside ranks, you also have badges. While ranks are awarded based on the number of points a member has earned, badges are granted based on specific criteria or can even be assigned manually.
For example, you might award a badge to someone who has completed their profile or reached 100 posts. Badges provide a flexible way to recognize achievements that aren’t strictly tied to points.
Below is an example showing both ranks and badges in use.
Badges can be created from the following location in the Admin CP
Members → Achievements → Badges
Badges Listing
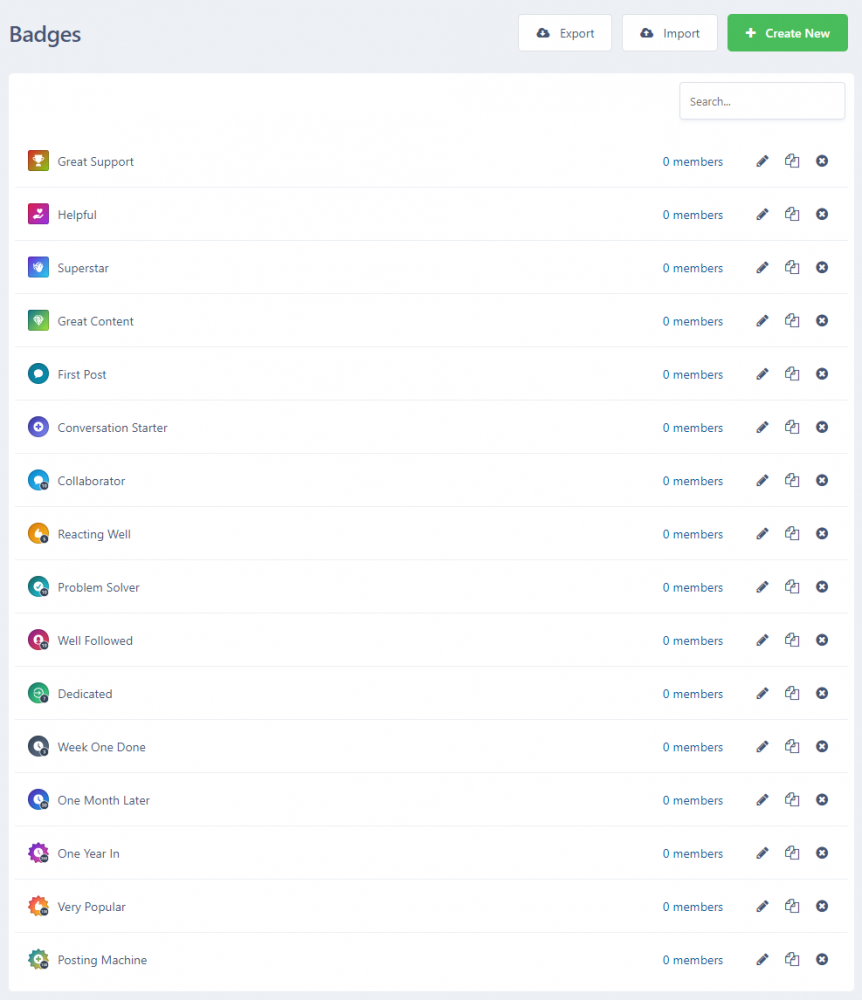
From here, you can view a list of all badges you’ve already created, as well as add new ones as needed.
To create a new badge, select the Create New button at the top of the page. You can also choose to make a badge manually assignable, which is explained in more detail below.
Manually Assigning Badges & Points
Moderators who have been granted the appropriate permissions are able to manually award both badges and points to members. This can be particularly useful for recognizing contributions that fall outside of your automated achievement rules.
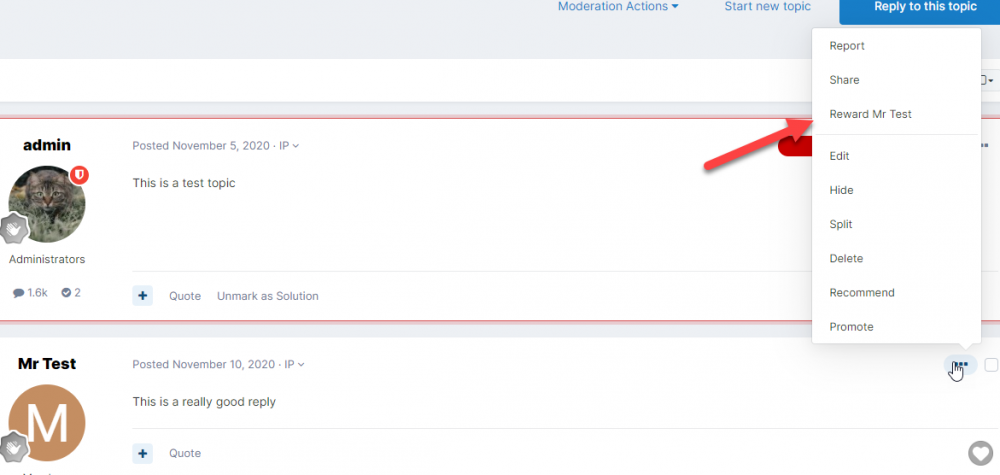
To do this, the moderator can open the menu icon located in the top-right corner of any post and select the option to reward the member. From there, they can choose which badge or number of points to assign, allowing for flexible and meaningful recognition of member contributions.
Rewarding a Member
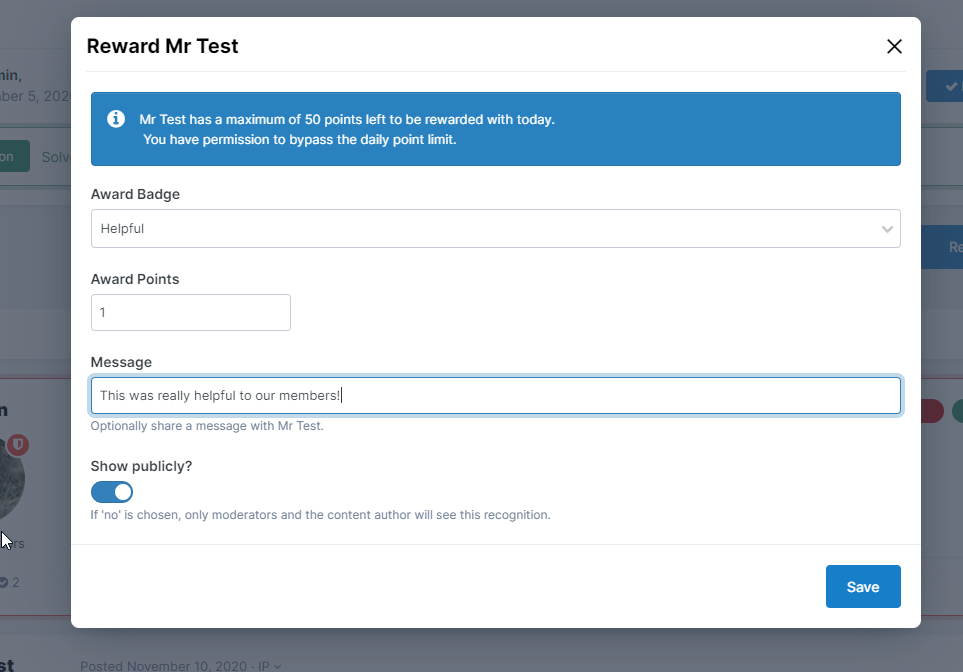
When rewarding a member, you can choose which badge to award and optionally assign a number of points at the same time. You may also include a message for the member explaining why the reward was given.
If desired, this message can be displayed publicly on the post, allowing other members to see the recognition and helping encourage positive engagement within the community.
Giving Points and Badge
If you choose to display the reward publicly, an additional section will be added to the post.
Other Achievement Settings
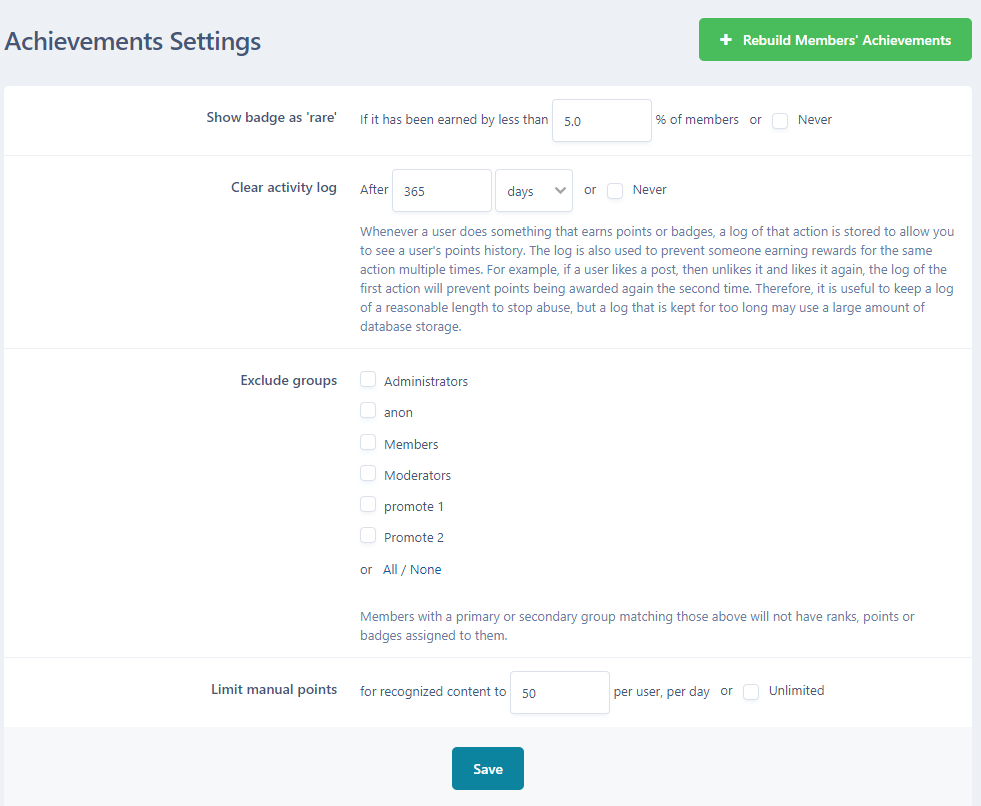
In addition to the options above, there are several other related settings you can adjust to suit your community’s needs. For example, you may choose to prevent moderators from receiving badges, or place limits on how many points or badges can be manually awarded. These controls give you fine-grained flexibility over how achievements are managed and used within your community.
More Achievements Settings
Recommended Comments