


Giving Staff Access
As the primary account holder for your community, you may have staff members or site co-owners who also need access—either to your community itself or to your Invision Community purchases. This guide will walk you through how to give them the right level of access.
There are two main areas where you may want to grant access. You can choose to give access to one or both, depending on your needs.
Alternative Contact - Our Client Area
The Client Area is separate from your community site. It is the Invision Community customer portal, which can be accessed directly at invisioncommunity.com/clientarea, or from the provided link on our main page. This is where you manage purchases from invision, and account-level tasks.
From here you can:
View and manage your purchased products
Access information related to support
Pay invoices and manage payment methods
Alternative contacts can access these areas based on the permissions you assign to them.
To give someone access to the Client Area, there are two steps:
Step 1: Register a Client Area Account
The user must first register an account in the Invision Community Client Area. They do not need to purchase anything—this simply creates an account you can assign access to.
You can share this registration link with them:
https://invisioncommunity.com/clientarea/register/
Step 2: Head to your own Client Area
Once the user has registered, log in to the Client Area:
https://invisioncommunity.com/clientarea
From the menu, go to My Details → Alternative Contacts.
Here you’ll see a list of any contacts you’ve already added.
Current Alternative Contact List
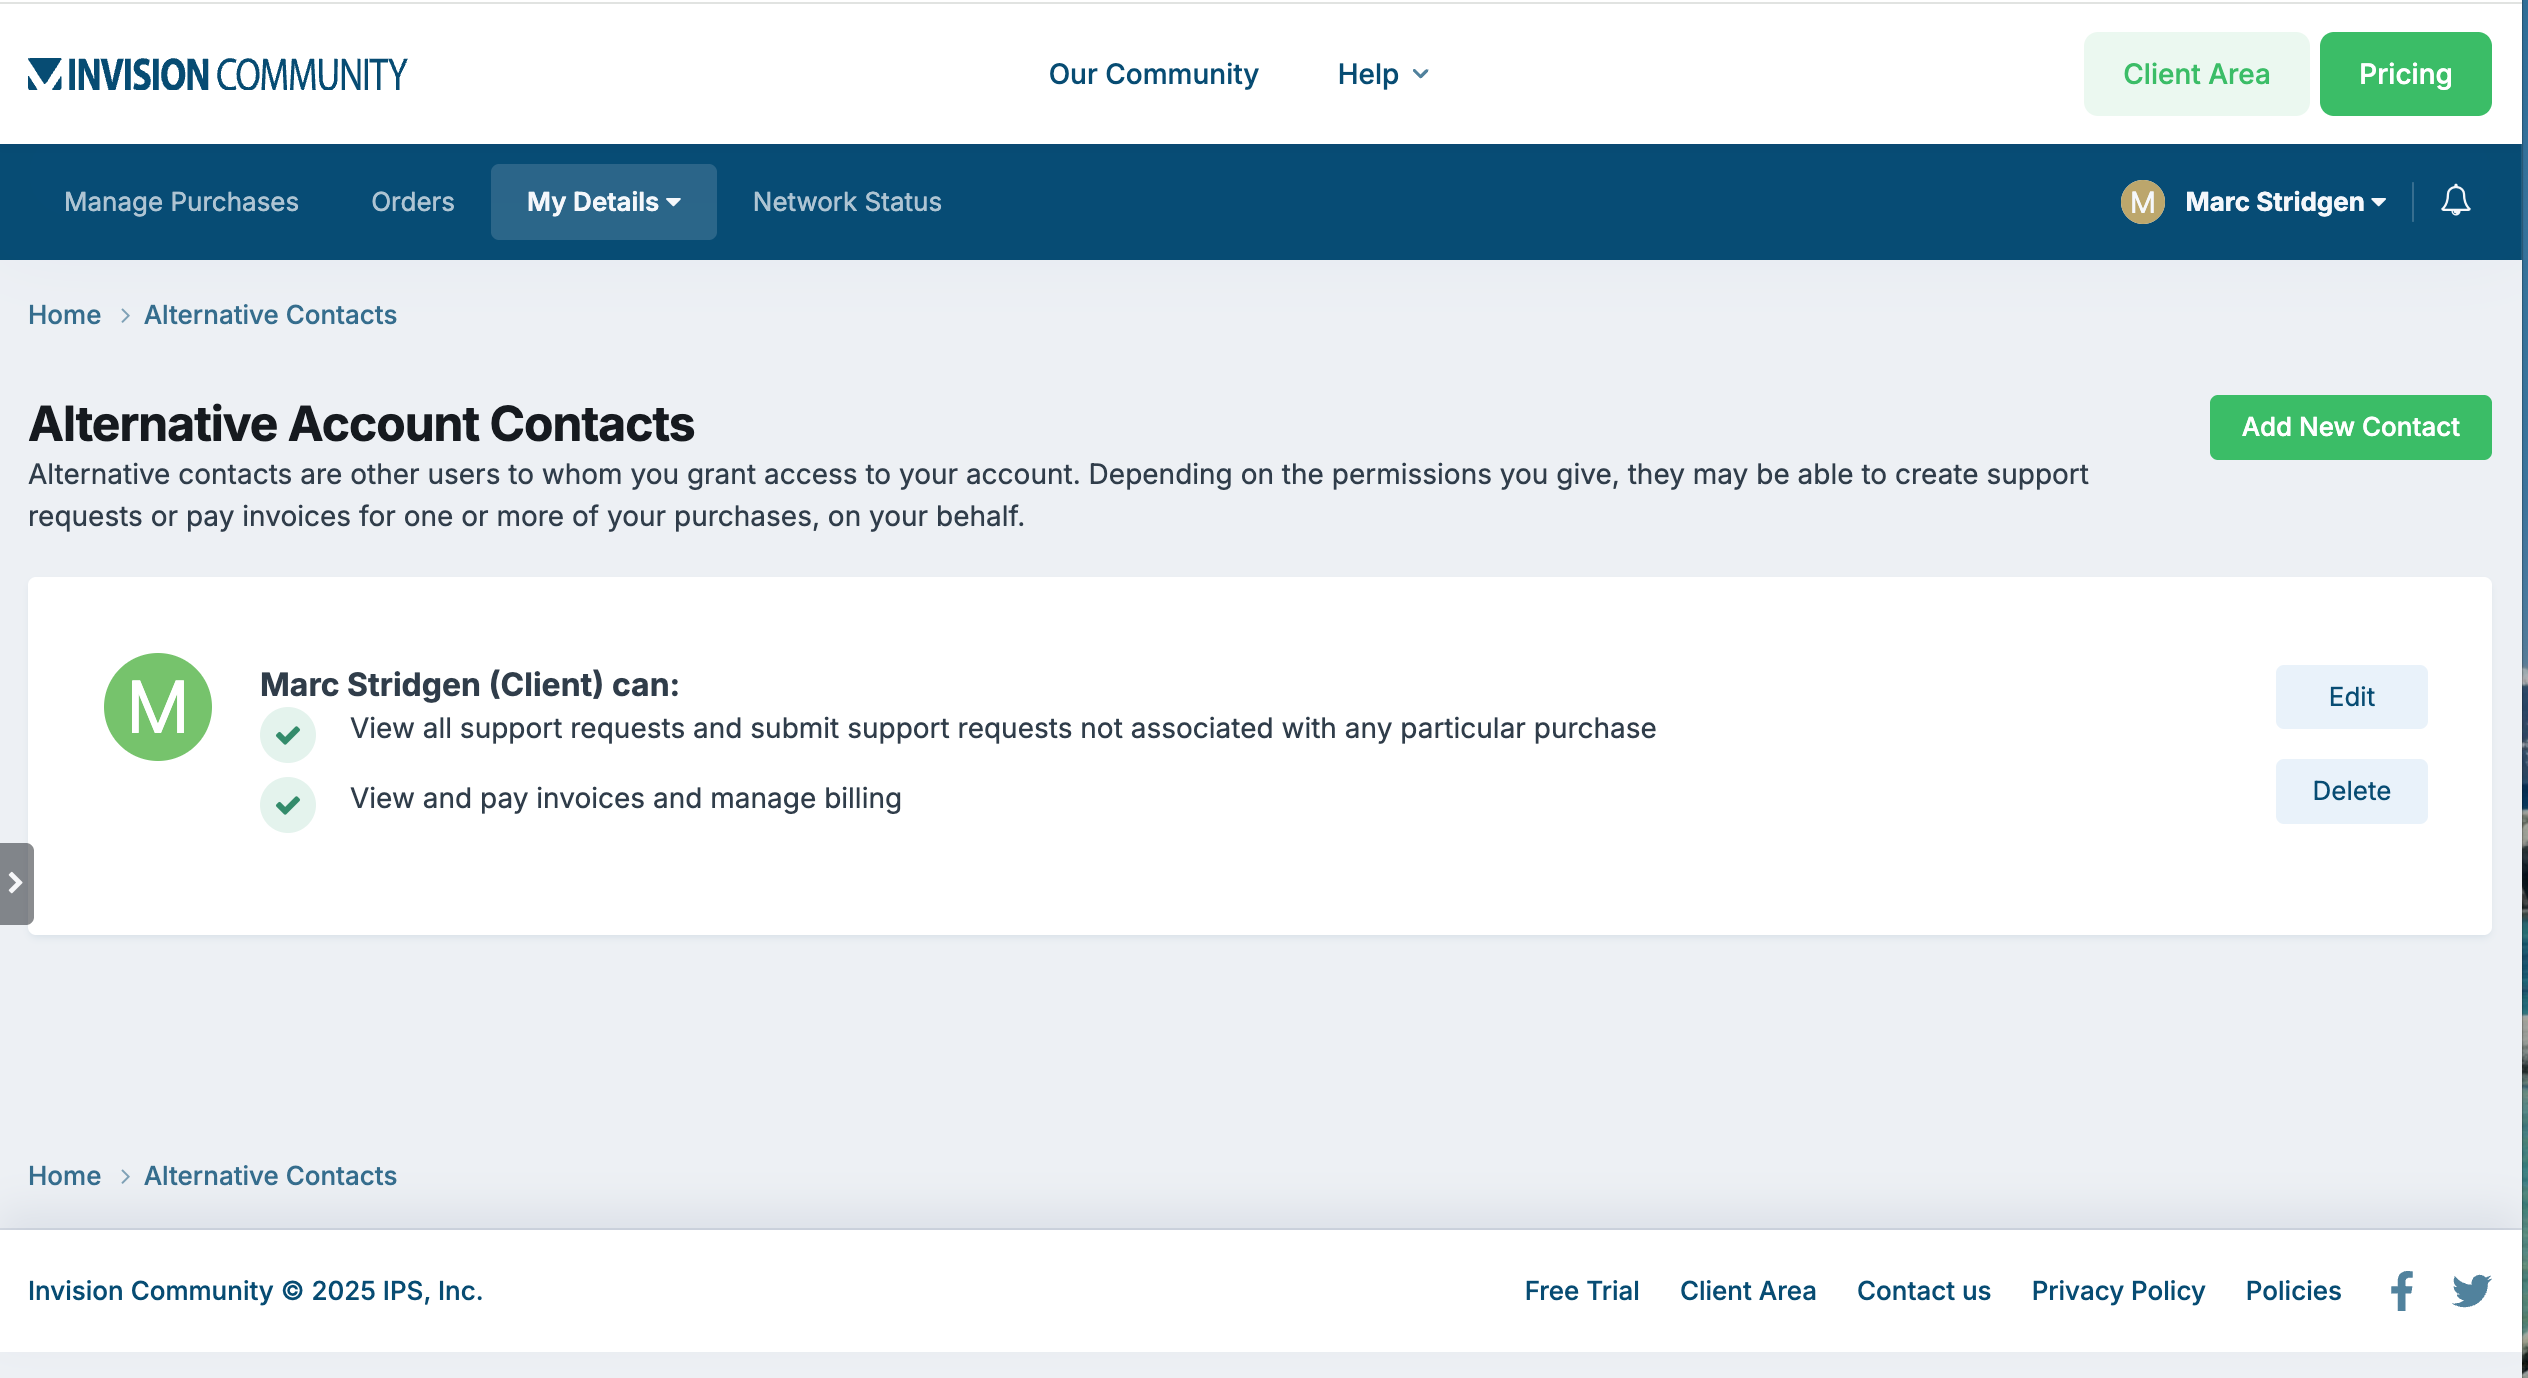
To add a new contact, click Add New Contact in the top-right corner.
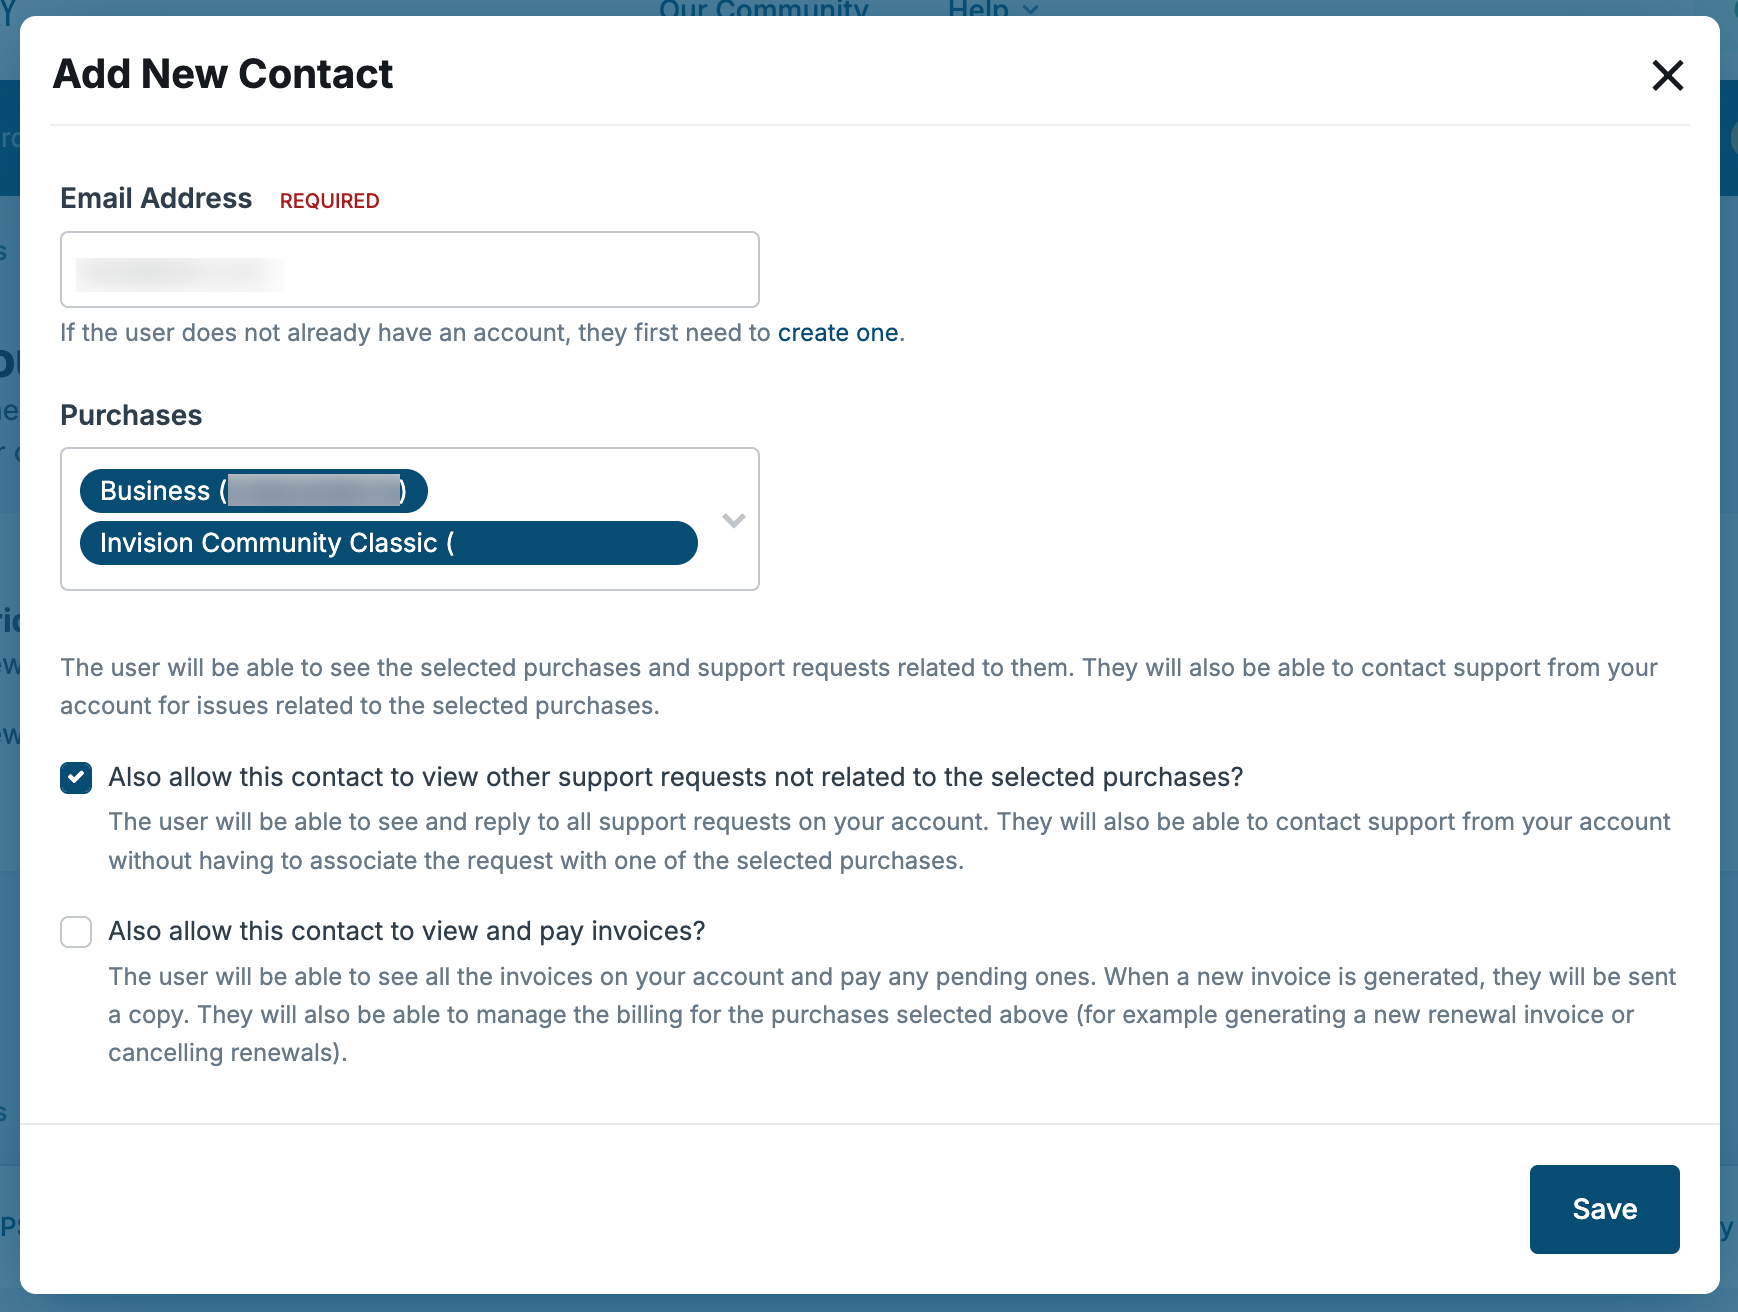
Step 3: Choose Permissions
To add a new contact with permissions, simply add their email address, and select whether this contact has access to deal with support and/or billing, as shown below
Adding a New Contact
Admin CP Access - Your Community
Admin access allows users to log into the Admin CP of your community and manage the site itself. You can grant full access or limit permissions to specific areas, depending on their role.
For step-by-step instructions on setting this up, please refer to the dedicated Admin Access guide.
TODO: LINK TO THE ADMIN/MOD GUIDE HERE
Recommended Comments