


When launching a new community, one of the first things people ask is how to make the site look exactly the way they want. Below, we’ll take a look at the tools available to help you customise the appearance of your community.
This guide is intended as a high-level overview. Where appropriate, we’ve included links to more detailed guides, and you can also explore more in-depth topics in the Visual Design section of the left-hand menu.
Themes
First, let’s take a moment to understand what a theme is. A theme controls the overall look and feel of your site, including colors, logos, layouts, and more. You can change your theme by uploading one created by a third party, or by creating your own using our advanced theme editor.
Theme Editor
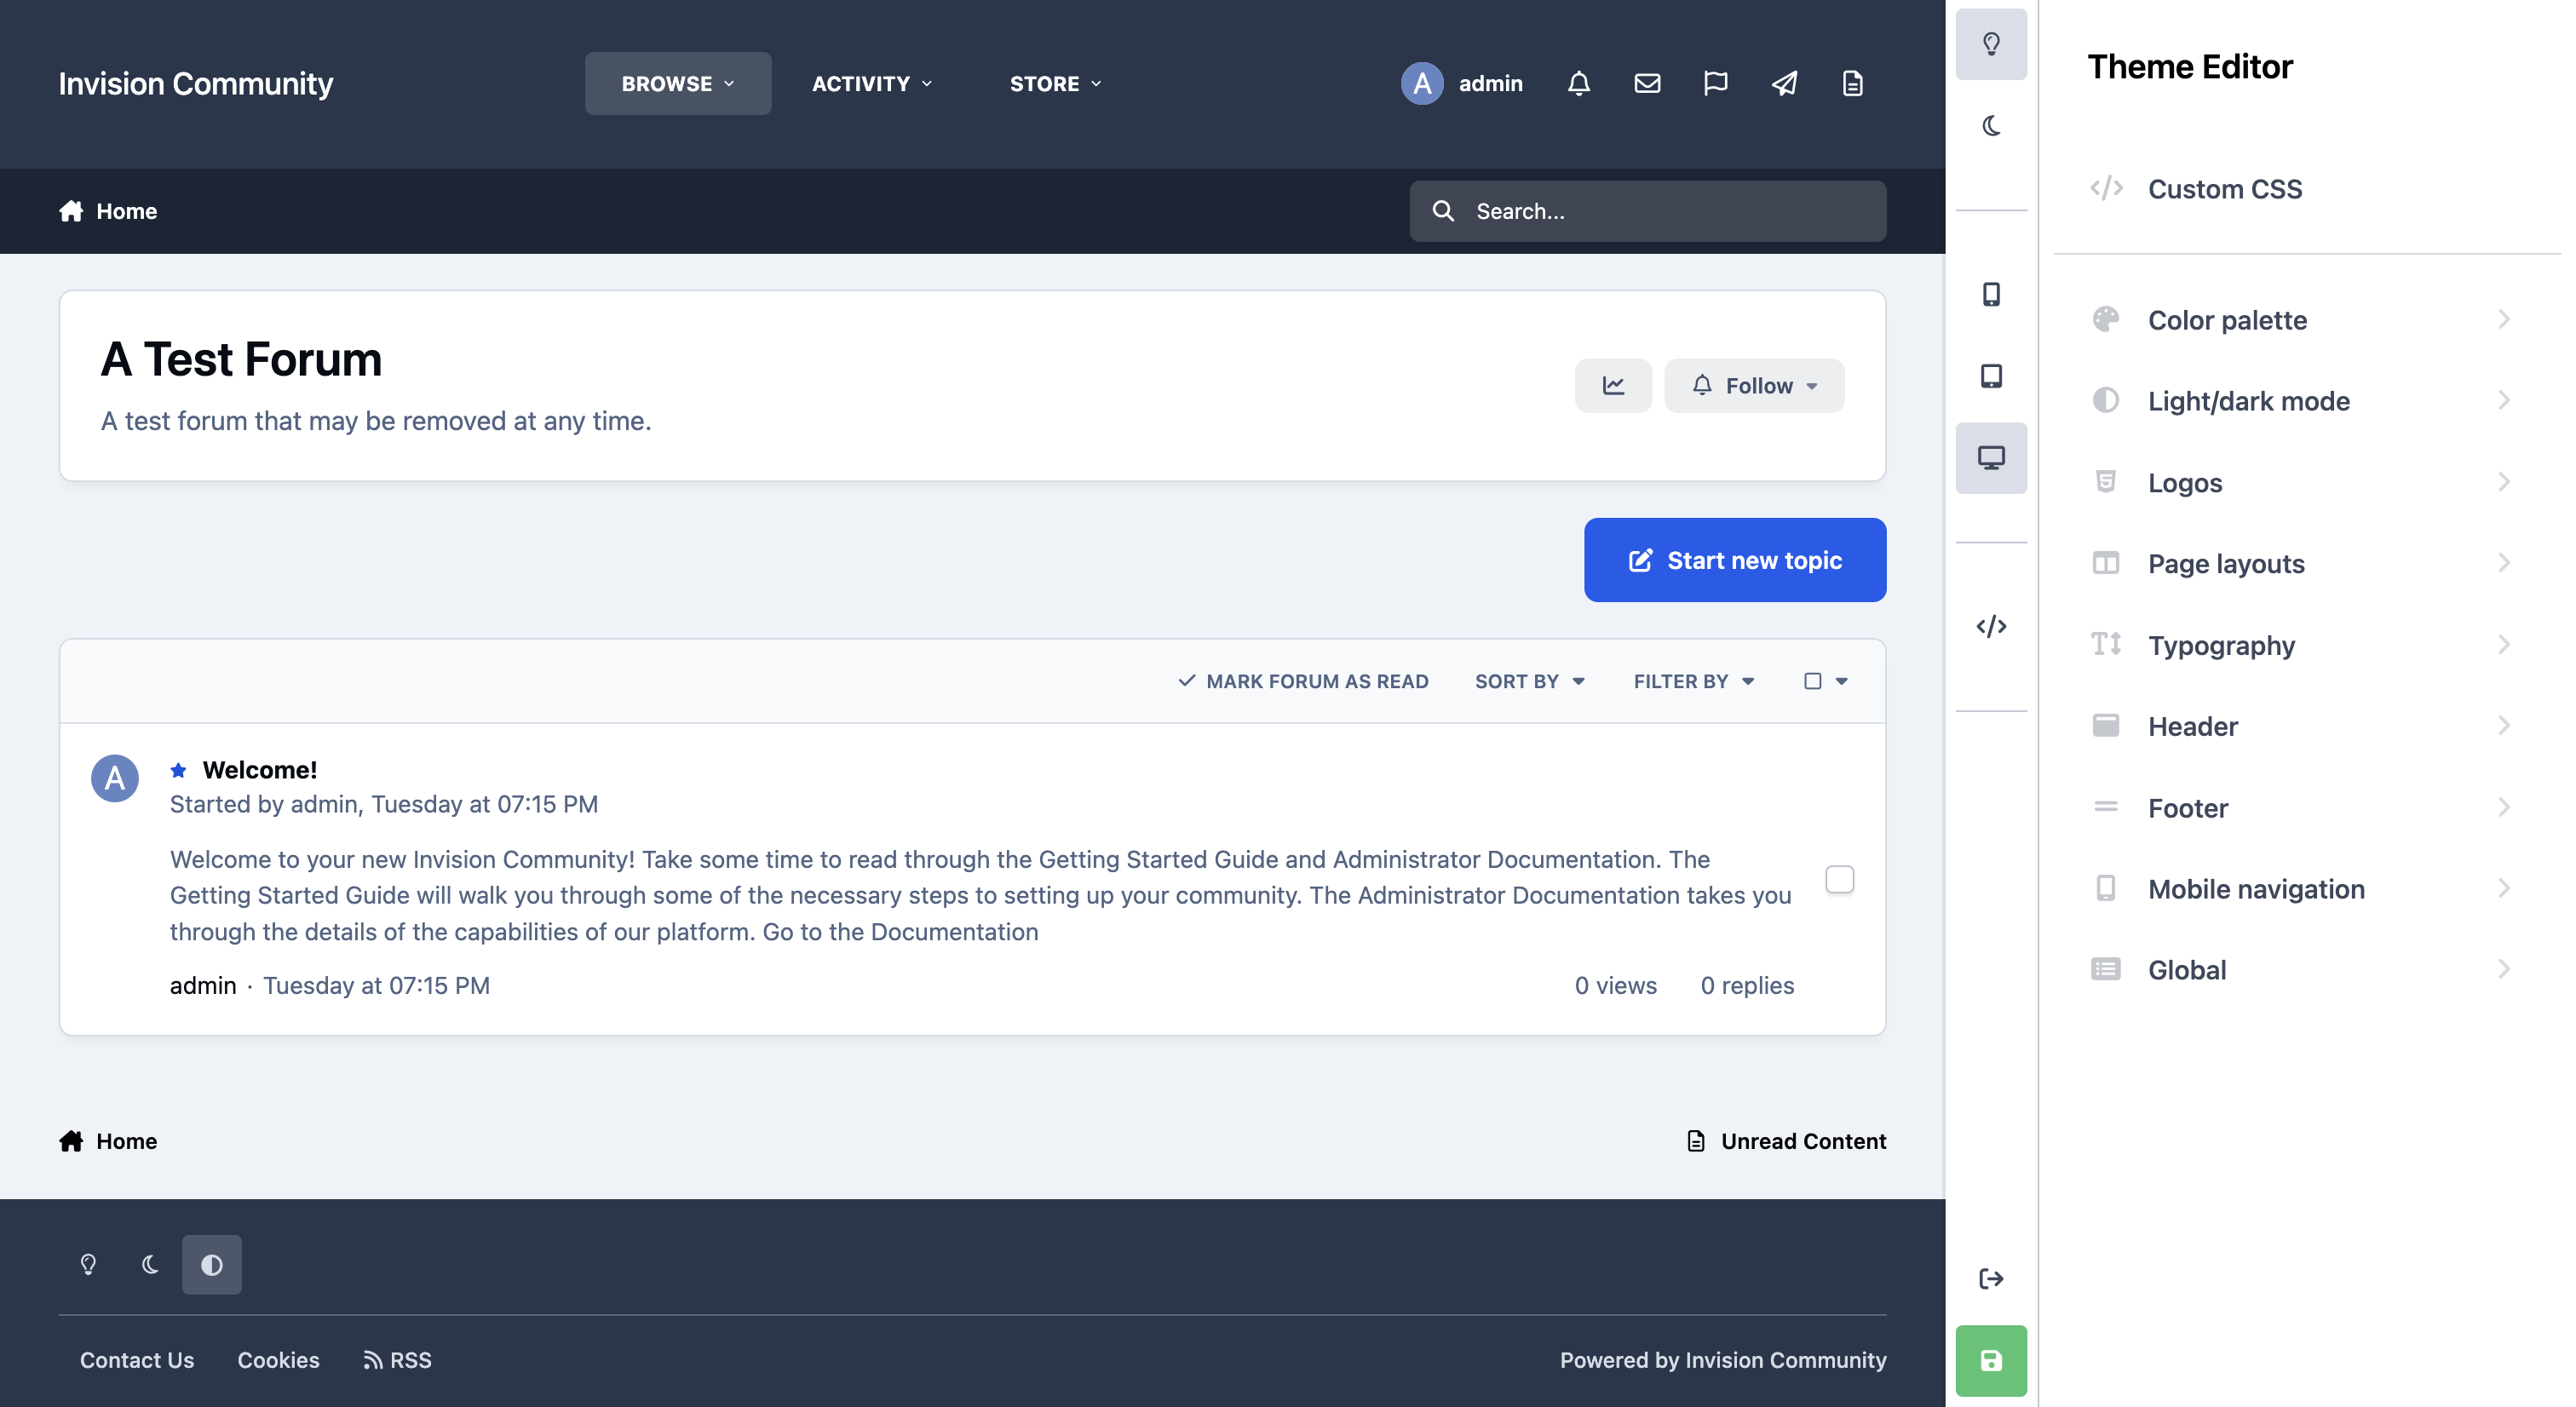
The theme editor allows to to change the color and layout of your site, providing an instant, live preview of your theme, as soon as you modify a setting. It's a zero-code approach to creating themes, and has been designed to ensure your theme adheres to your color scheme and looks great on every device, with very little effort.
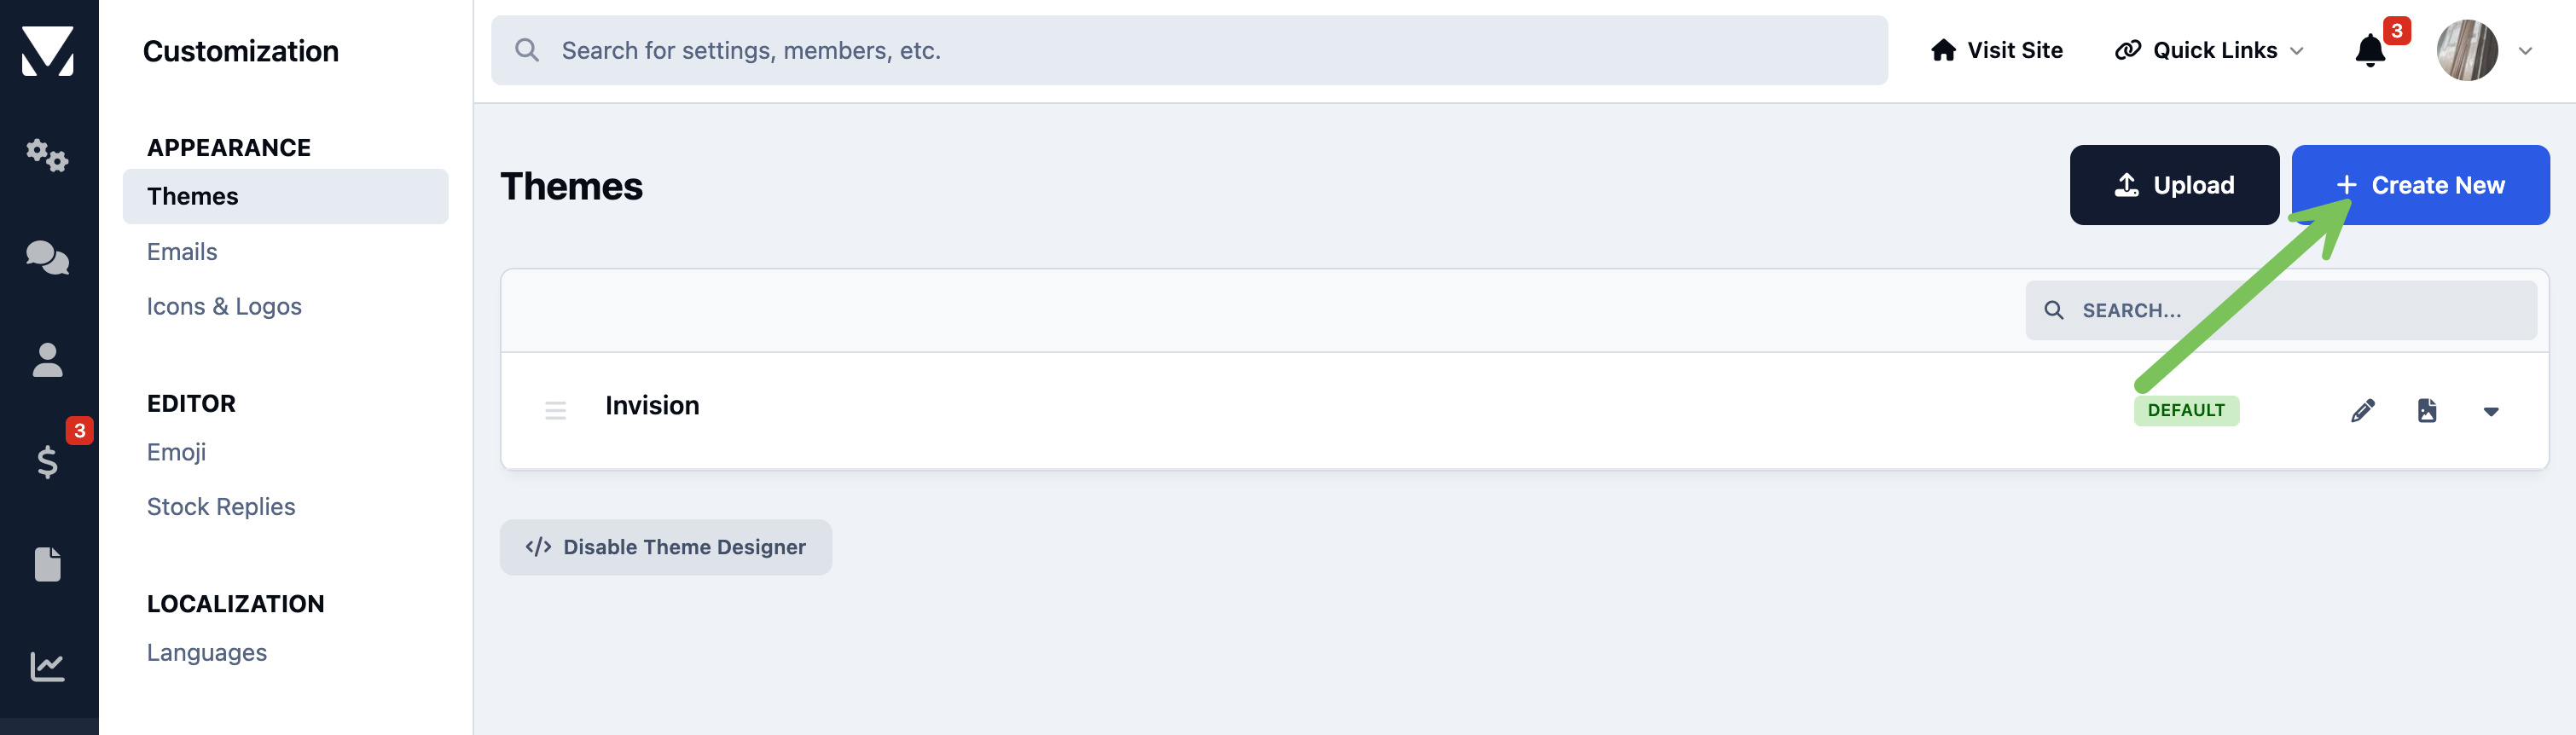
You would first create a new theme within your Admin CP, from the following location. You can set this as your default theme in the process, or leave it as a non-default, depending on your preference.
Customization → Appearance → Themes
Create New Theme
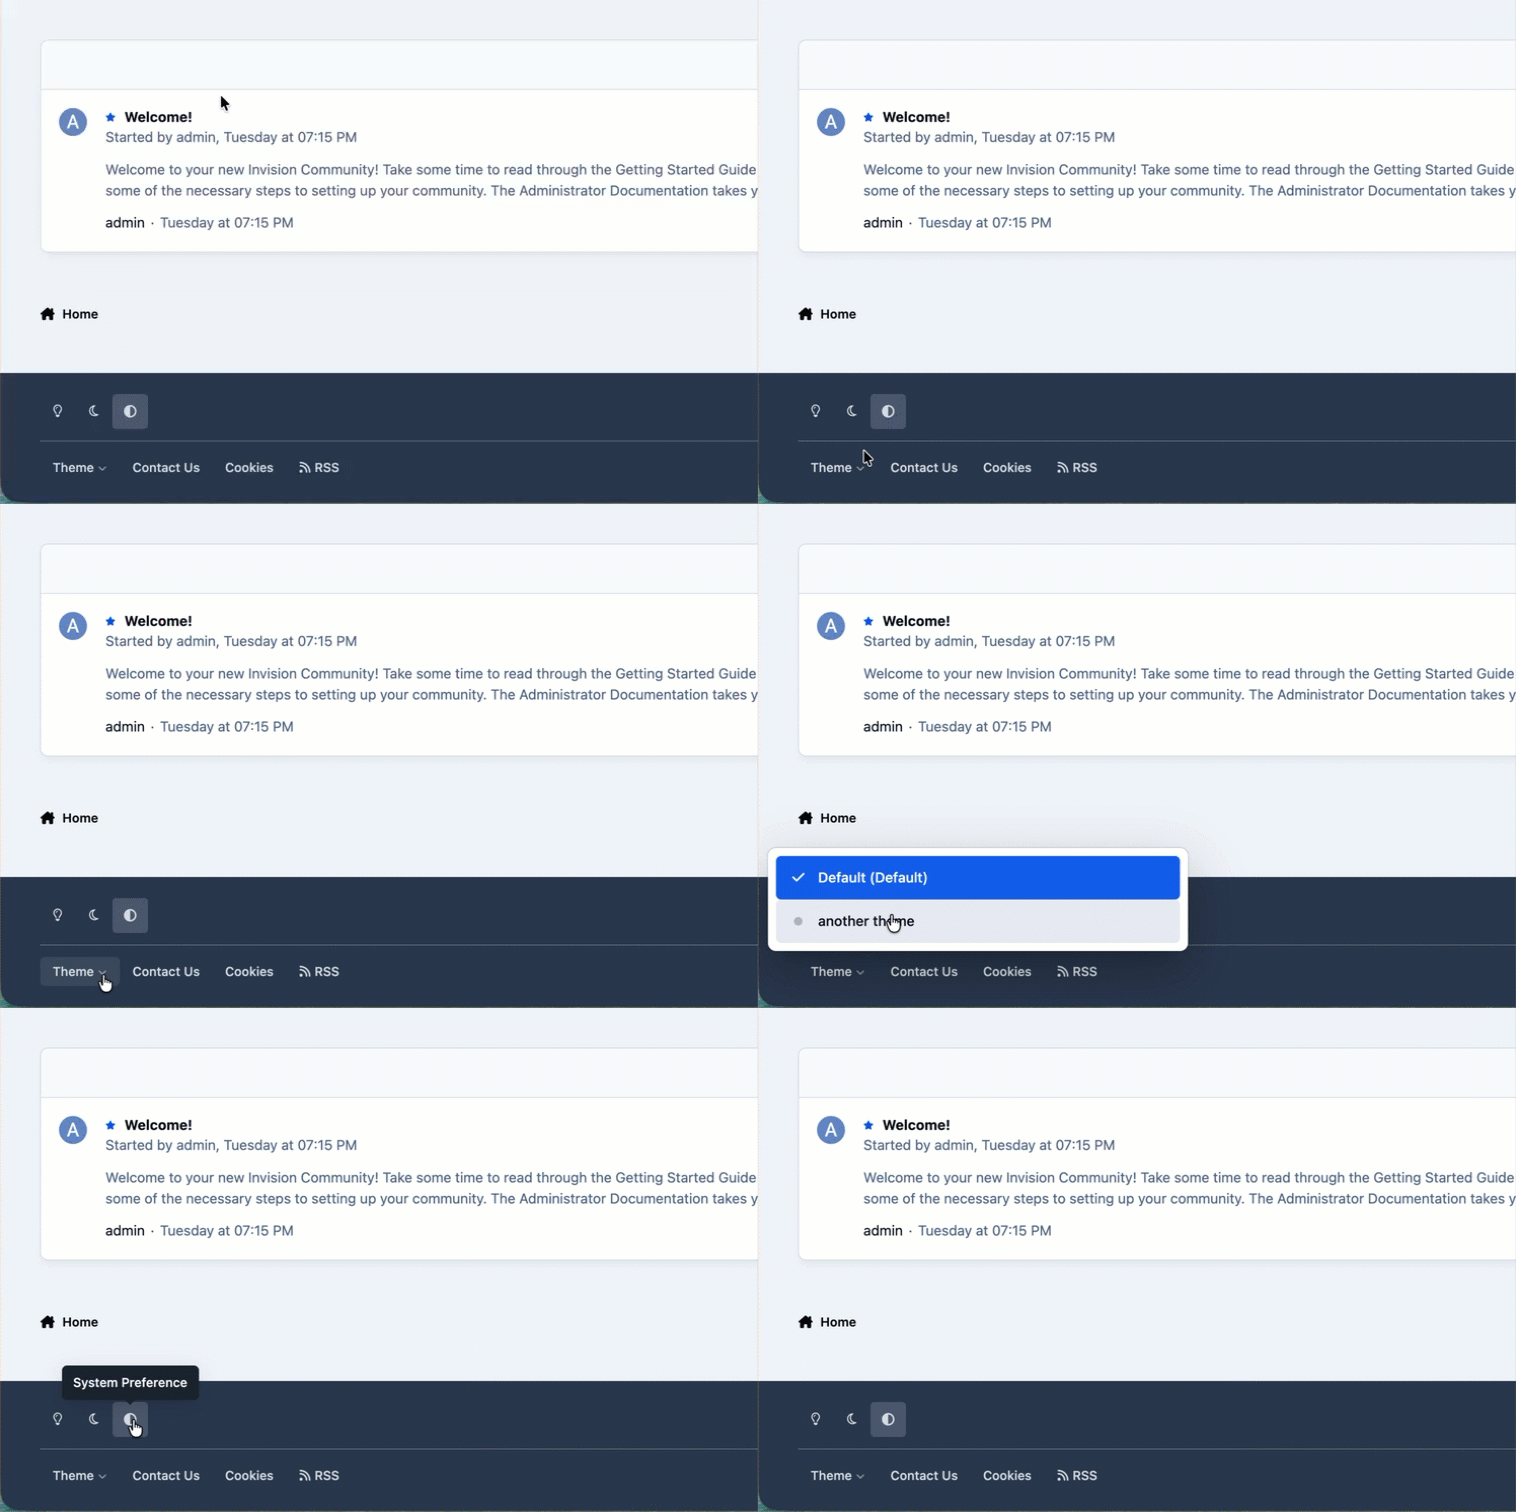
Once you have created a new theme, head to the front end of your site. First of all, from the bottom of the page, click the theme menu, and select the new theme.
Select Your New Theme
From here, click on your name and select "Theme Editor". This will open the Theme Editor, where you can start customising your site’s colours, logos, layouts, and more.
Theme Editor
Further Reading
For more information about using the theme editor, and more advanced functions such as adding your own CSS, Javascript, and hooking in your own snippets of HTML, please refer to the "Visual Design" section of our guides in the menu on your left.
Third-Party Party Themes
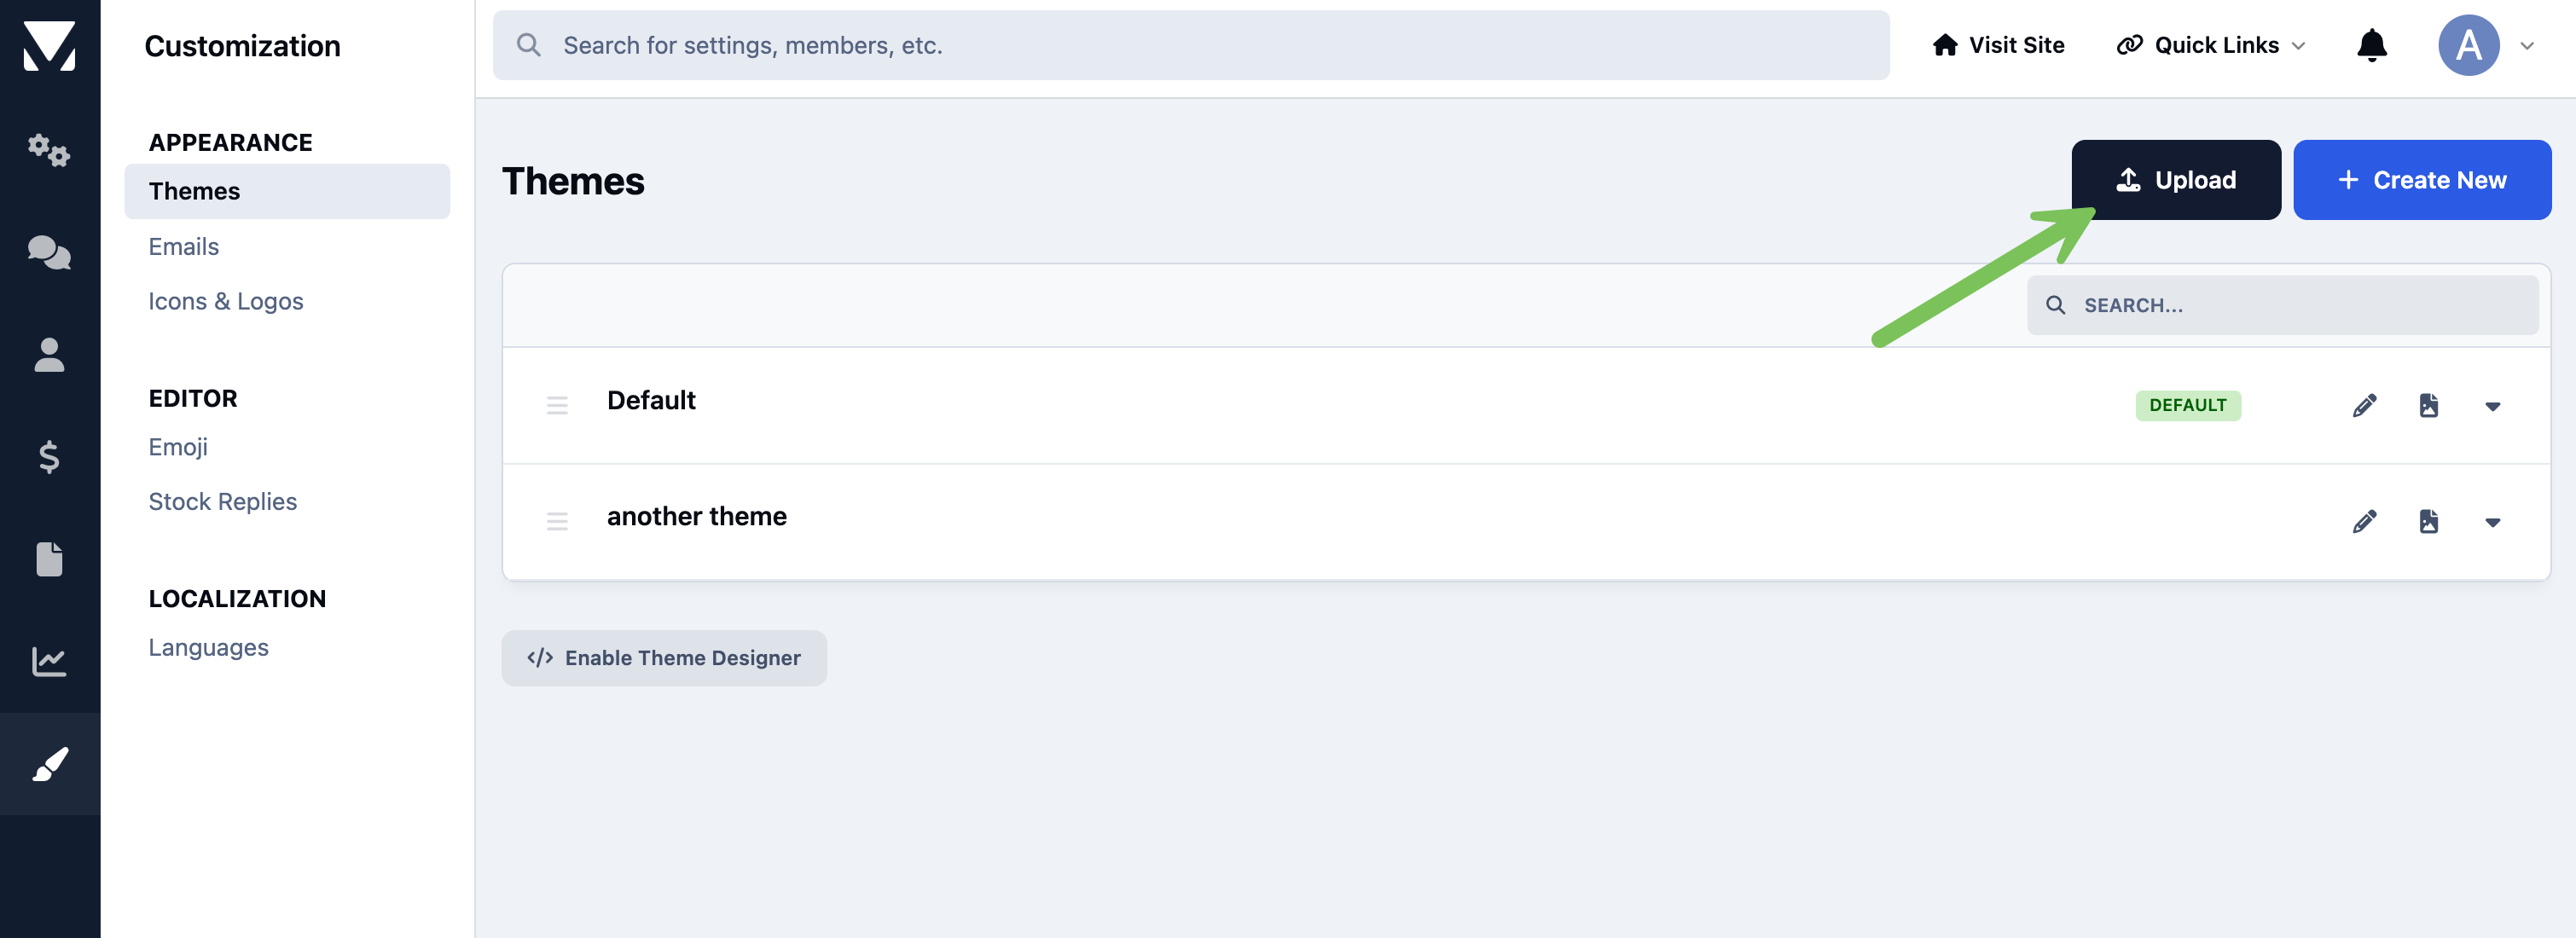
For some, uploading of a theme which has been created by a third-party, may be your preferred option. To do this, head to the following location in your Admin CP
Customization → Appearance → Themes
Once there, use the upload button provided to upload the theme from your provider
Uploading a 3rd Party Theme
Widgets
Within the Invision Community platform, you can add content to your pages in the form of widgets, using the Page Editor. This drag-and-drop tool allows you to place widgets into various drop zones around your site, making it easy to customise layouts and add functionality exactly where you want it.
This same system can also be used to create full customised pages on your site, enabling the simple creation of some quite complex pages without any technical knowledge. You can see more about the pages feature of our platform within the "Features" section of our guides, on the left menu.
Adding Widgets
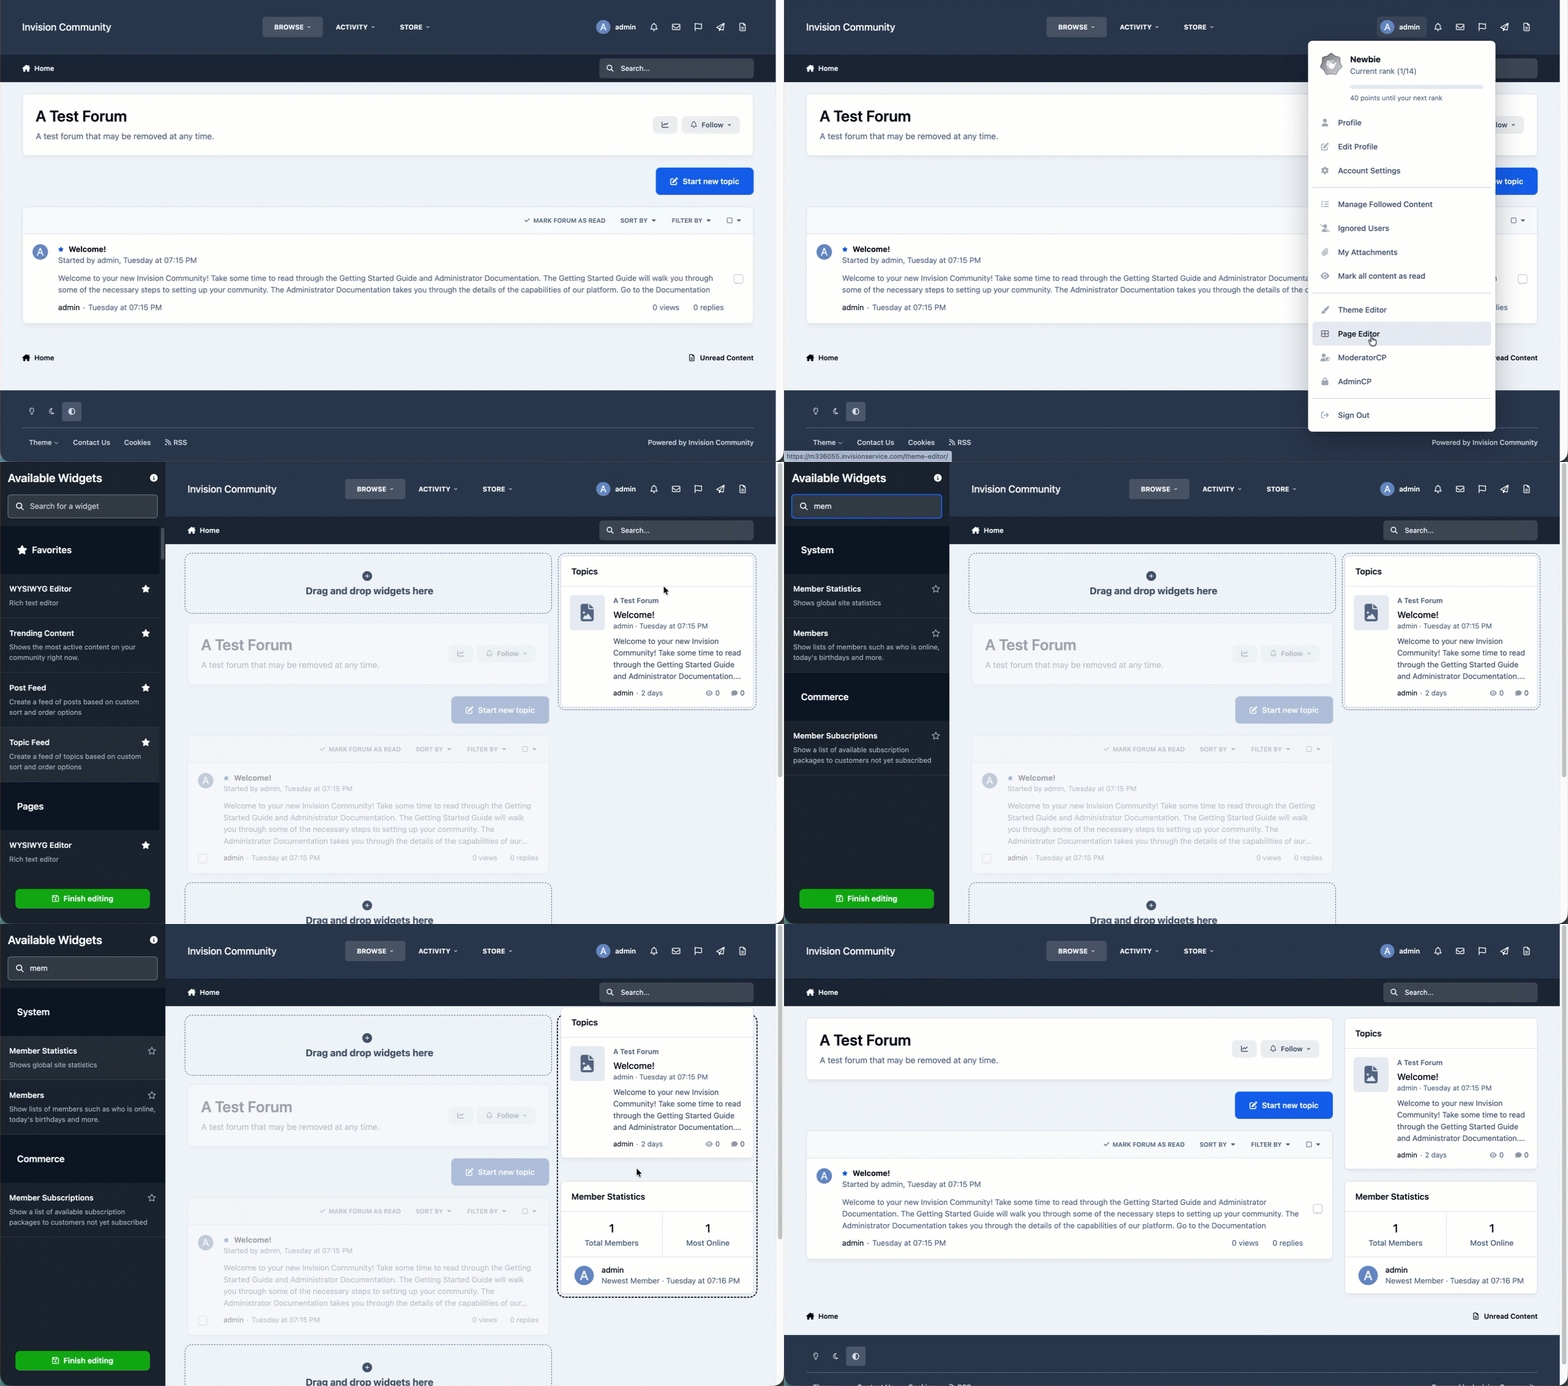
Adding widgets to your pages is straightforward. When you are logged in as a staff member with the moderator permission "Can use Page Editor", you’ll see a "Page Editor" link in your user menu, by clicking your profile image on the front end. Selecting this opens the Widget Manager and highlights the various drop zones where widgets can be placed.
Adding Some New Widgets
Editing Widgets
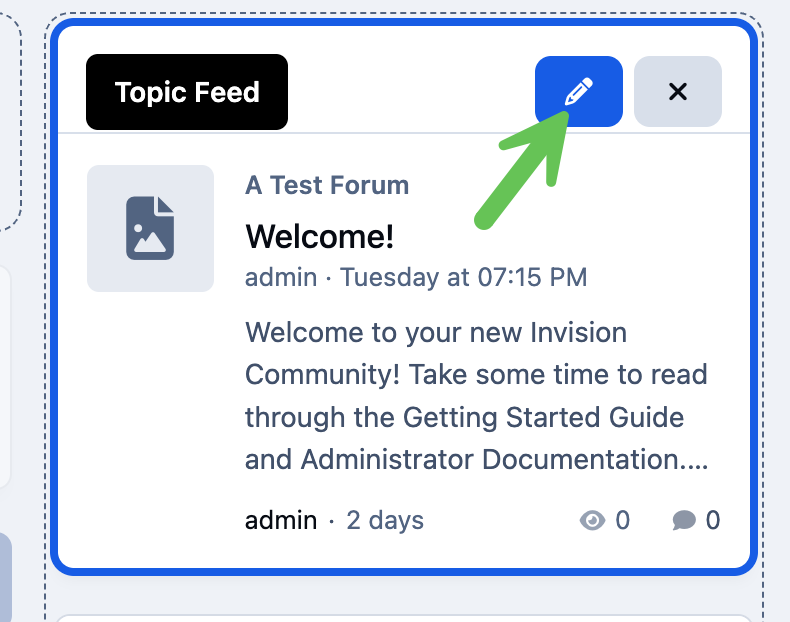
Widgets come with their own configuration and layout options. Clicking edit will allow you to customise how that widget behaves. For example, you may have a a pages database feed showing articles, but want to edit it to only show a specific category.
Editing Your Widget
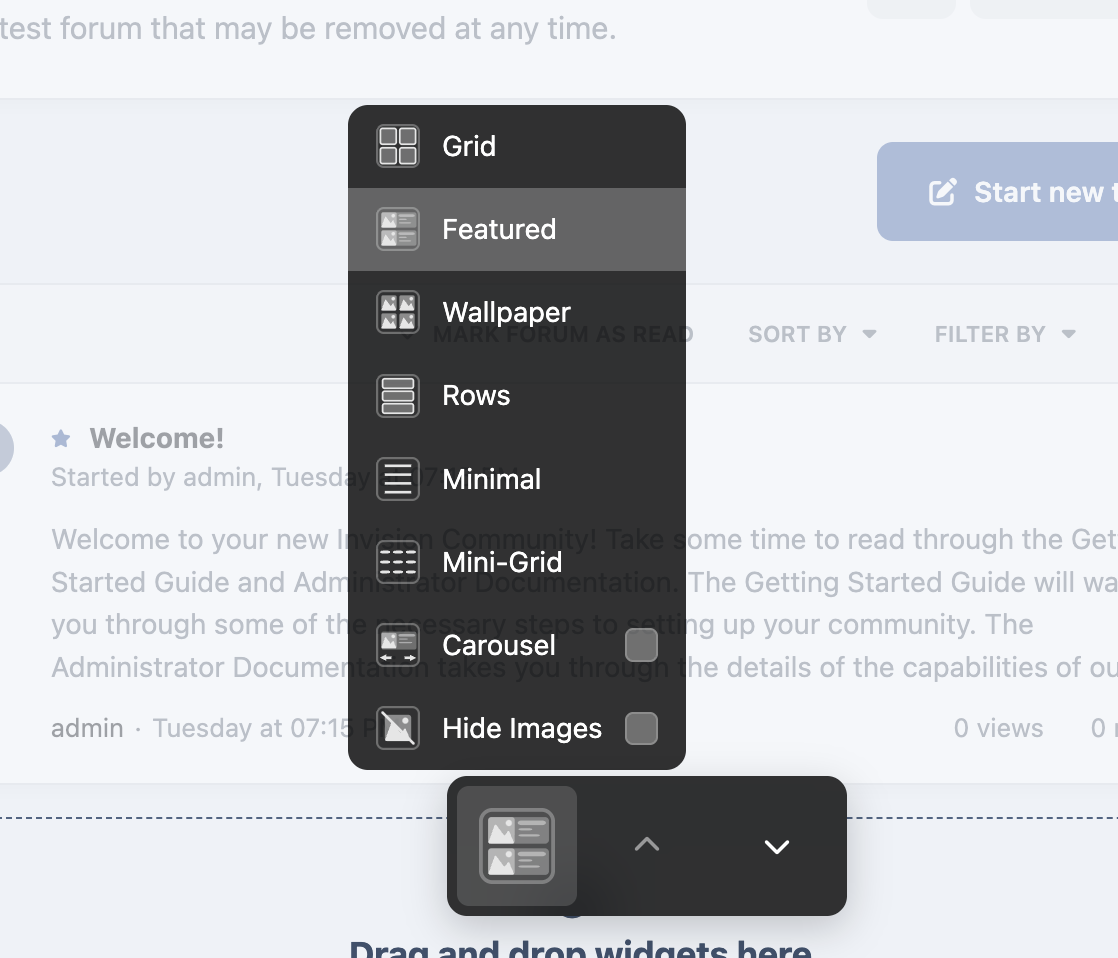
Layout options allow you to set how the widget is displayed on the page. These vary depending on the widget you are using
Changing the Widgets Layout
Further Reading
Further information on widgets can be found within the "Visual Design" section of our guides, in the left hand menu.
Languages
For many communities that need a language pack other than the default, the simplest option is to use a third-party language pack. These are packs created and maintained by independent authors and are widely available online.
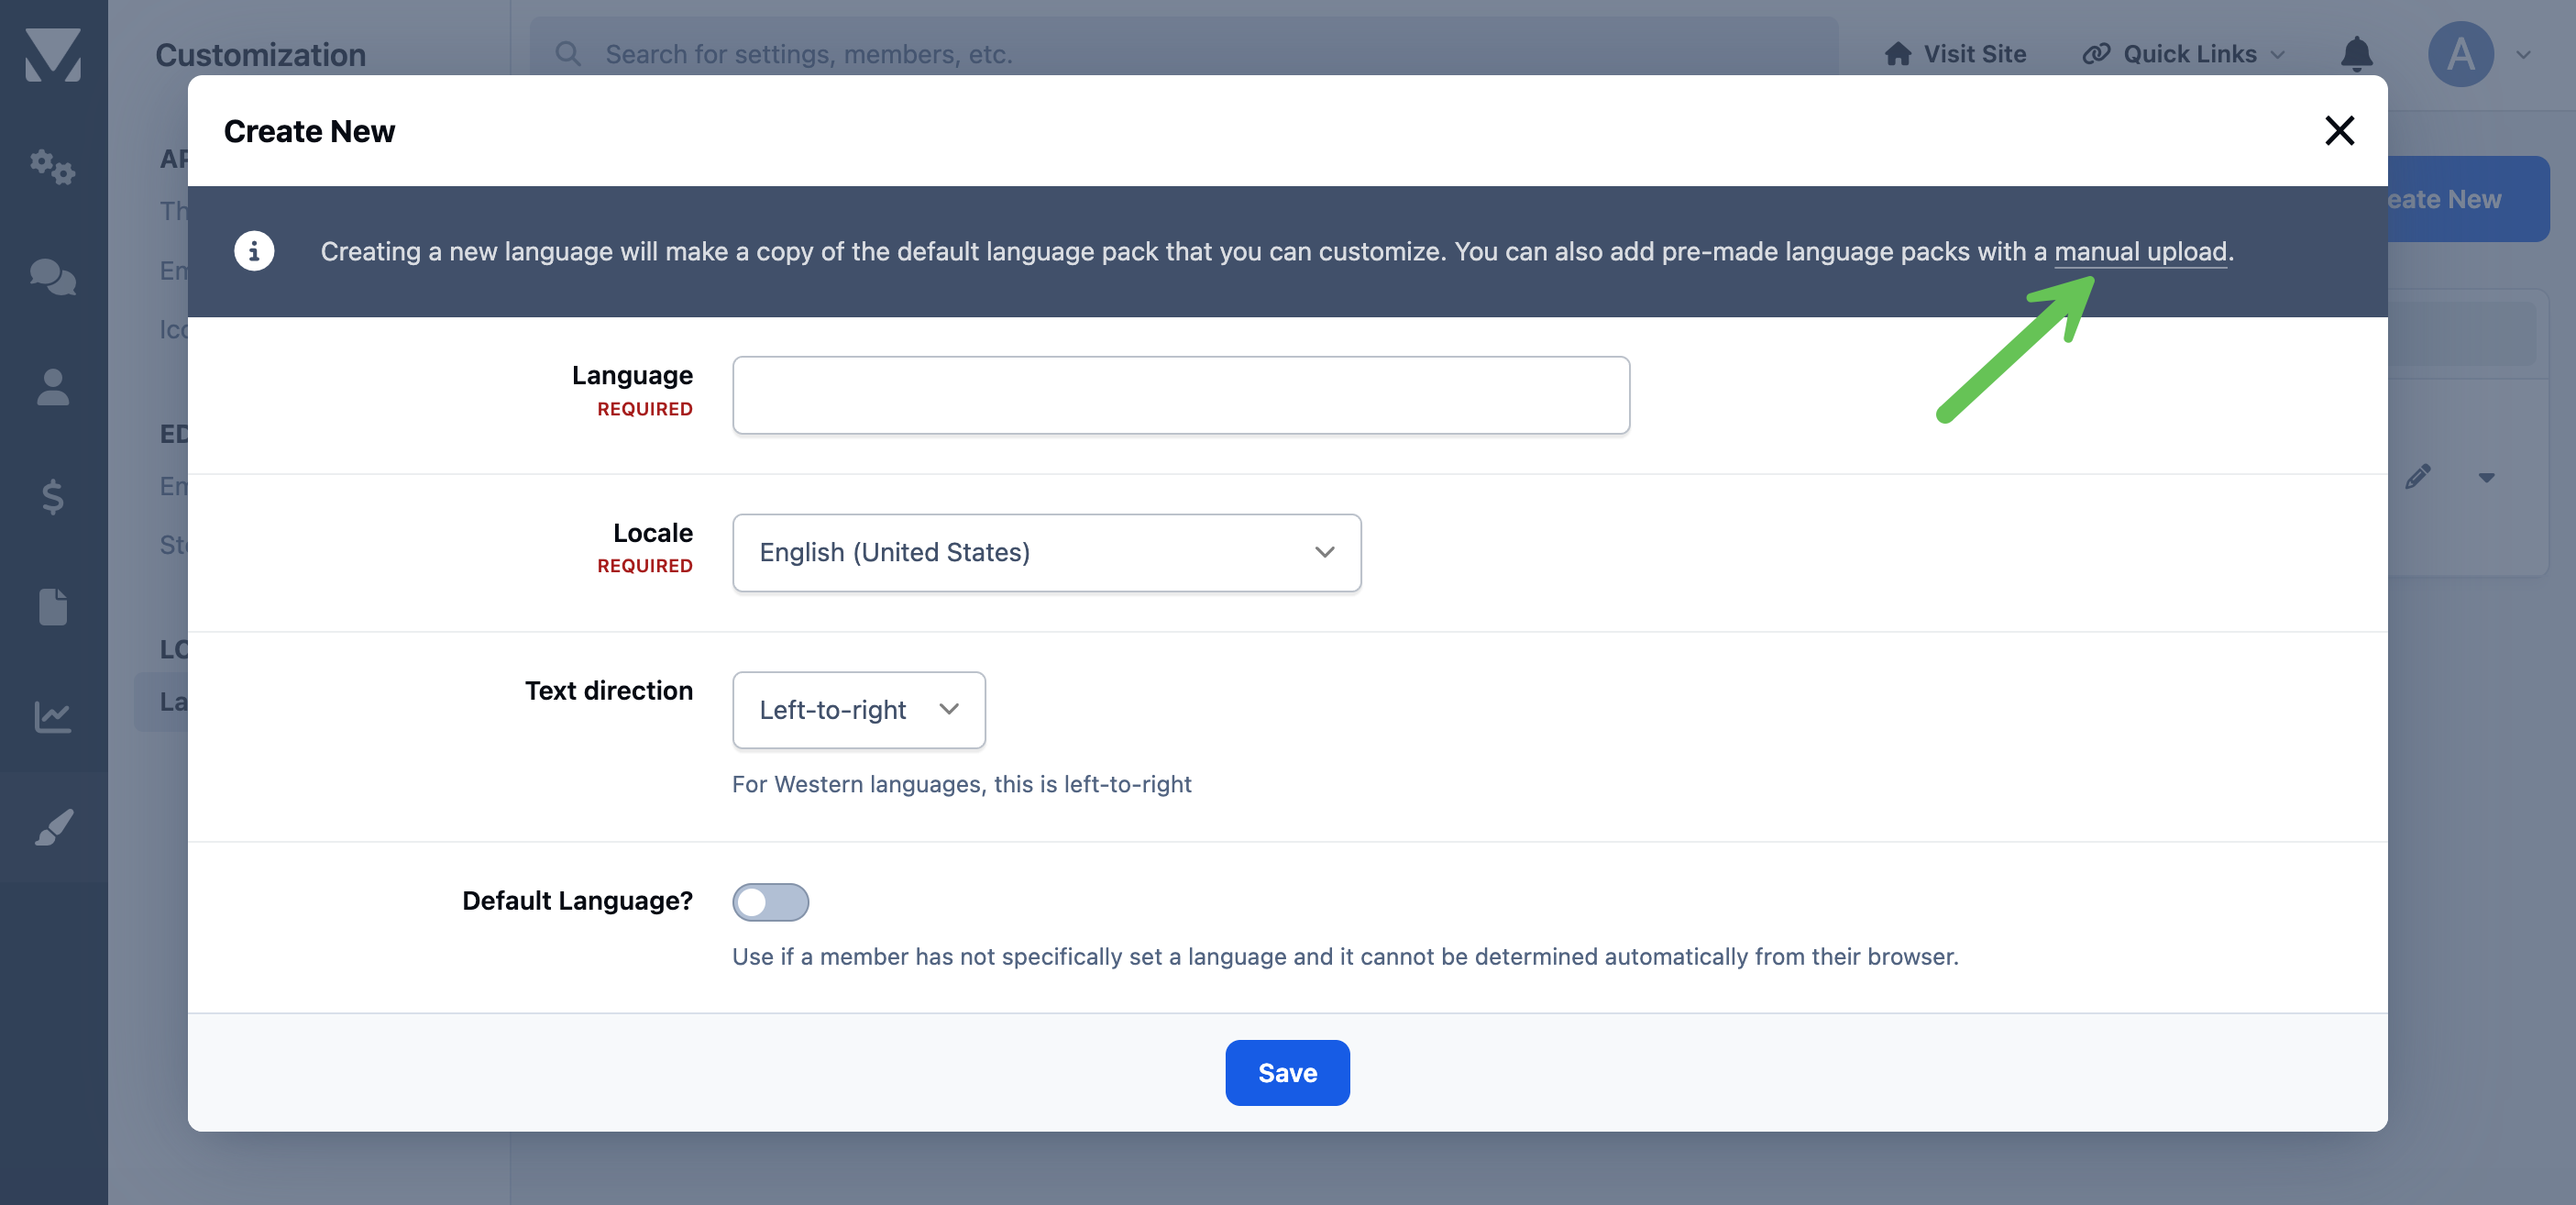
Once you have obtained a language pack, you can upload it by navigating to the following location and selecting Create New → Manual Upload:
Customization → Localization → Languages
Uploading a Third-Party Language Pack
Visual vs Full Translation
Invision Community offers two approaches to translating your site.
Visual translation lets you make quick changes directly on the front end, allowing you to see and edit phrases in context—ideal for small tweaks or locating specific wording.
Full translation, on the other hand, involves manually translating the entire language pack, which is better suited for creating a complete new language or making extensive customisations.
Further Reading
See more about how to use these tools in our "Localisation" section in the left menu
Recommended Comments