
Introduction
If you’re here, chances are you want to know how to build your own forums—and you’ve come to the right place!
In this guide, we’ll jump straight in and get you started. We’ll walk through the basics of creating a fully working forum and show just how easy it is to set one up (yes, really!). By the end, you’ll have everything you need to start building forums that fit your community’s needs.
First View
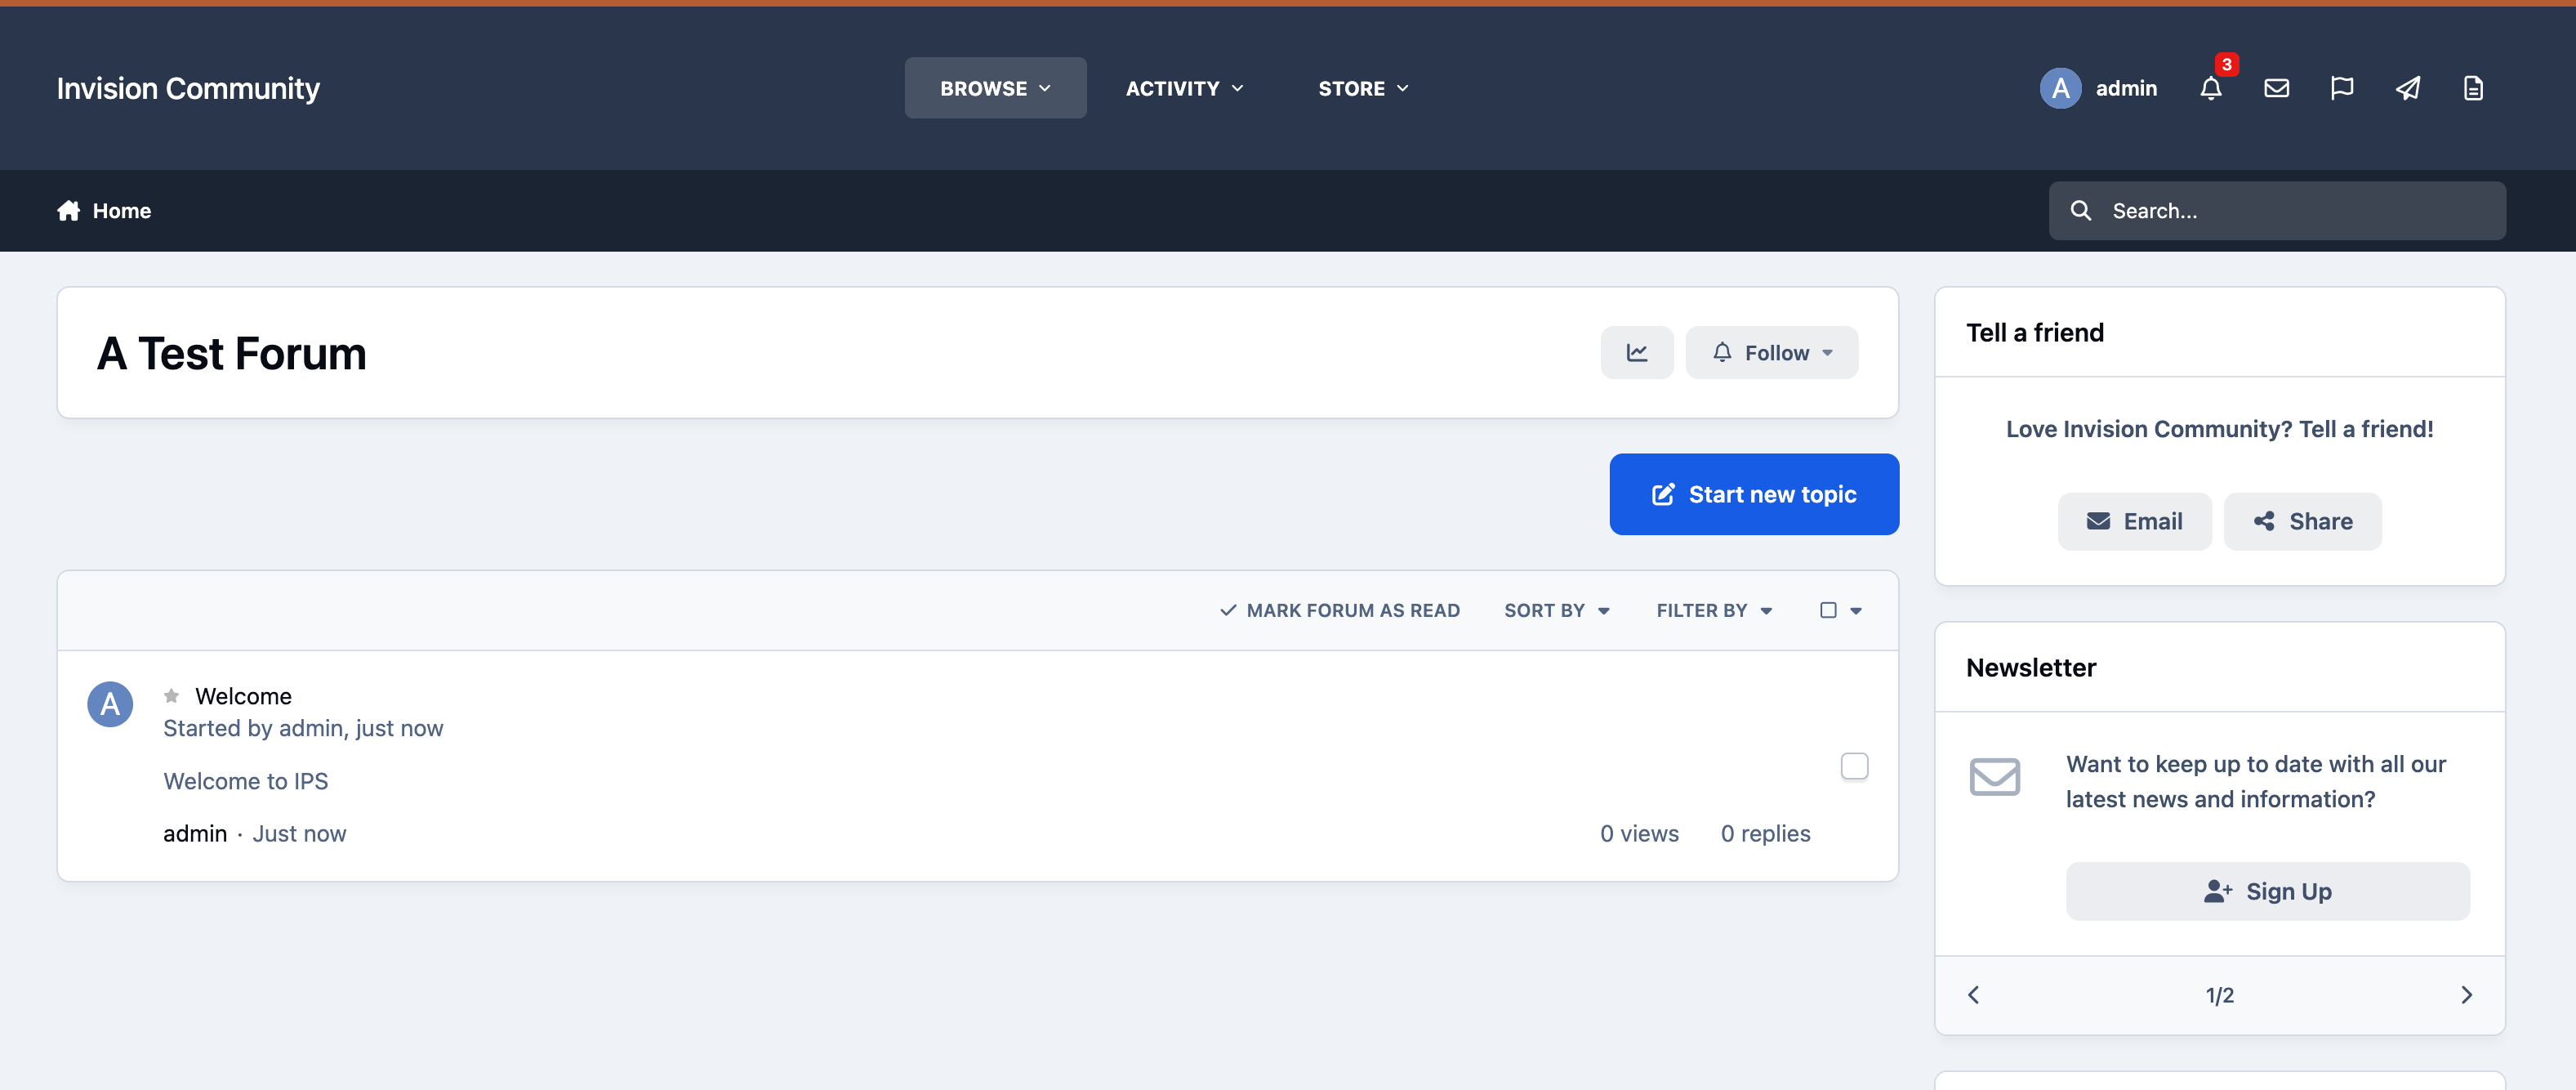
When you first open the software, you’ll be greeted with a page similar to the image below. By default, the system includes a forum called “A Test Forum”, along with a welcome topic.
Don’t worry—you’re not required to keep these. They’re simply included to give you an example of how a forum and topic look, rather than presenting you with a completely blank page.
Default Forum Setup
Deleting Content/Forums
First, let’s remove the default content that comes with the forum. To do this, we’ll need to log into the Admin CP, where all site management takes place.
Start by signing in on the front end of the site. In the top-right corner, click on your name and select the link to the Admin CP. You’ll then be prompted to log in.
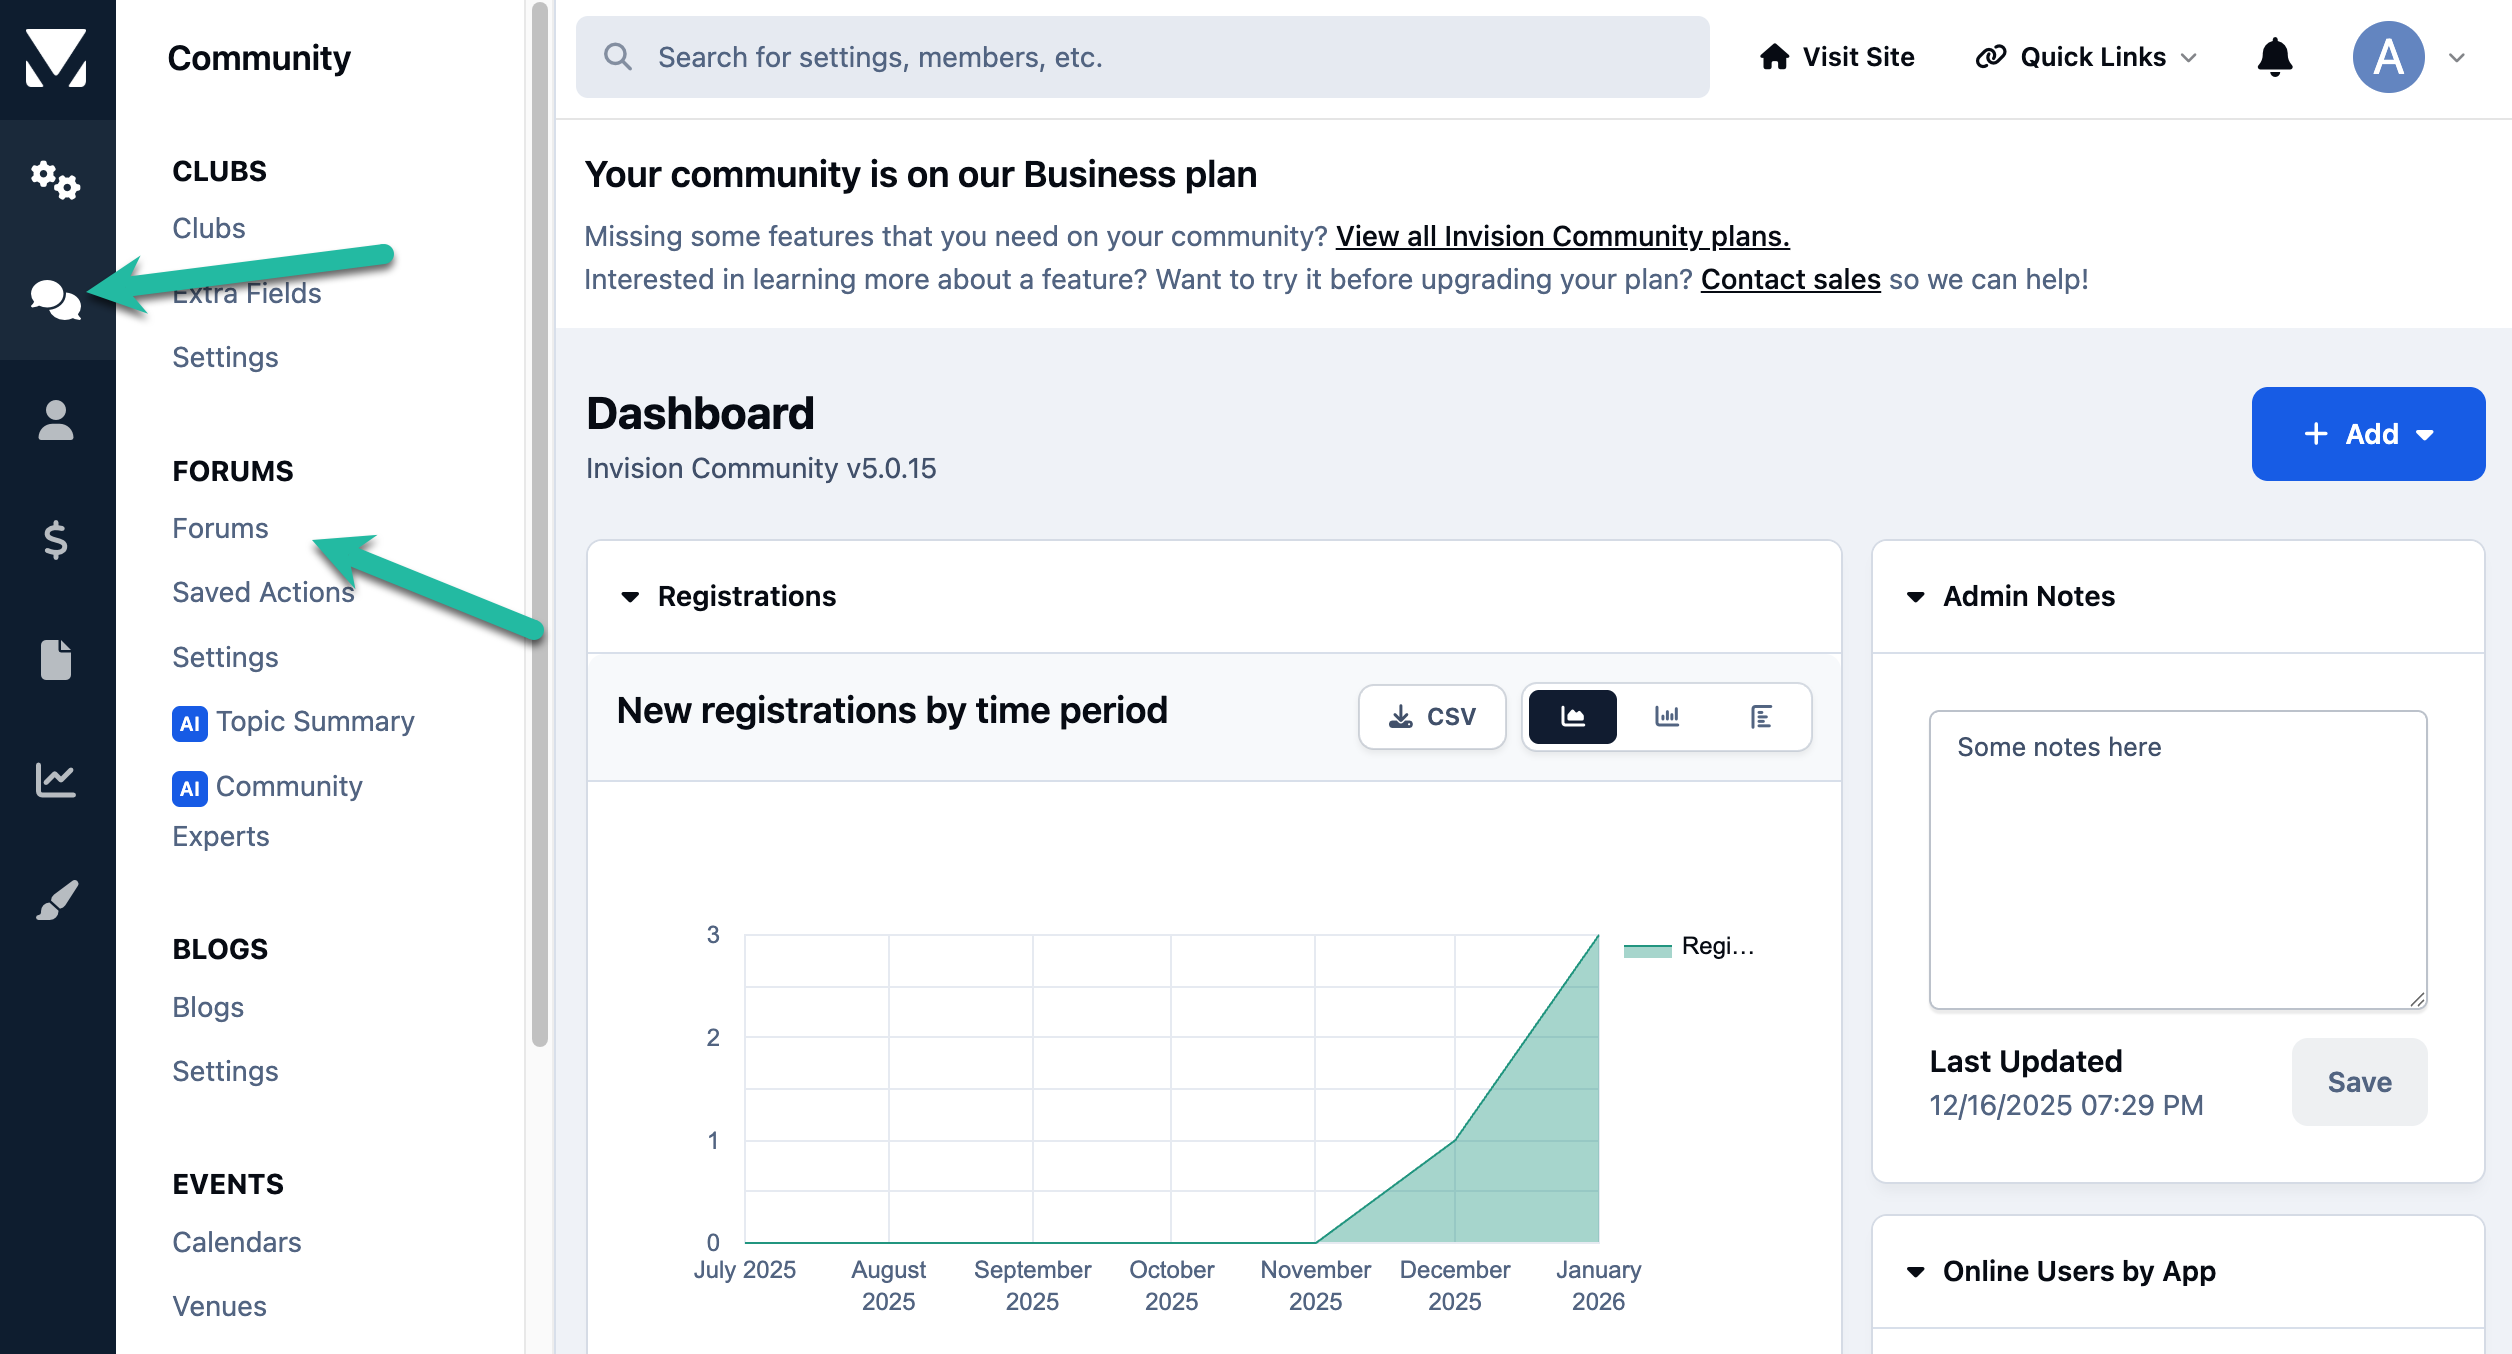
Once inside the Admin CP, navigate to the forums section. On the left-hand side, hover over the 'Community' section (represented by the chat bubble icon), then select Forums, as shown.
Location of Forums - Admin CP
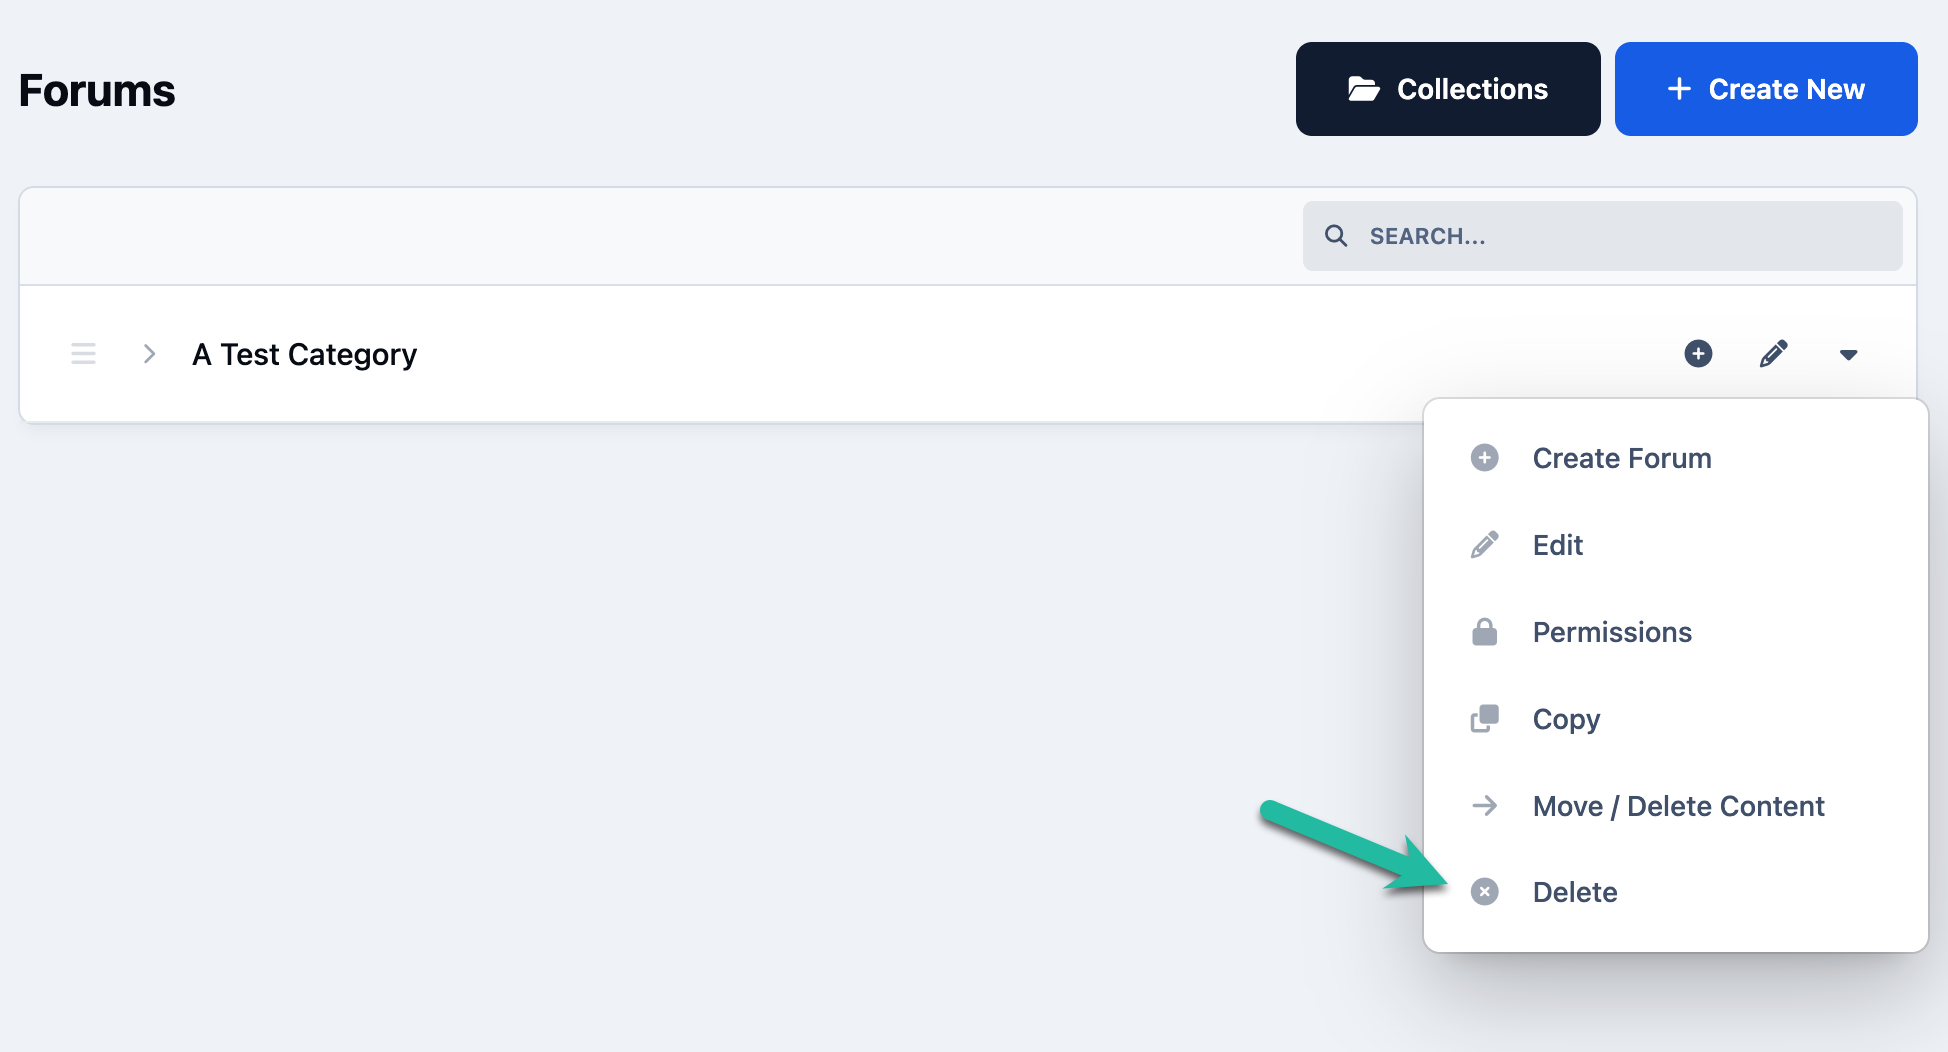
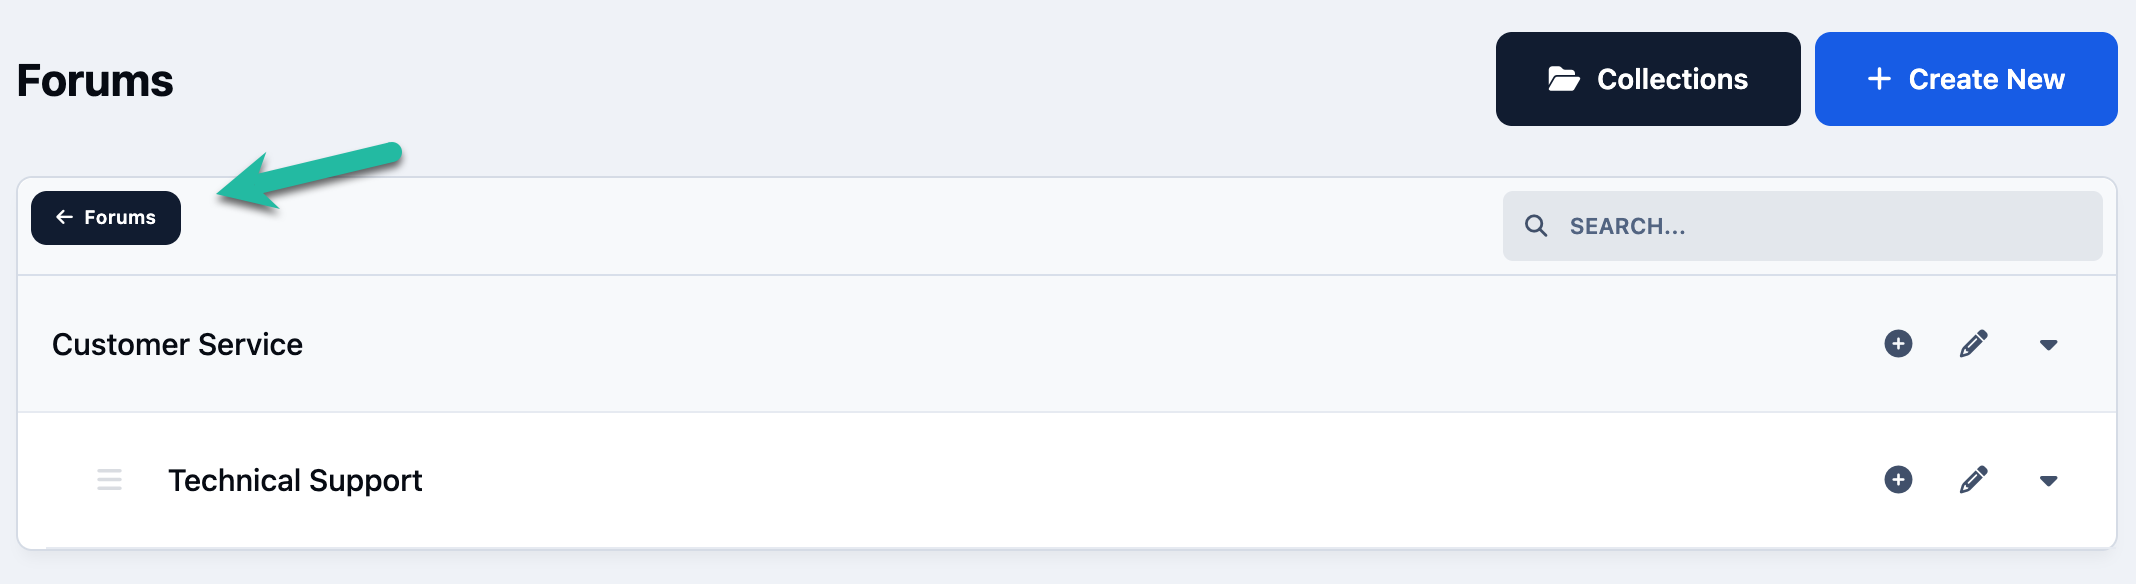
Now that you’re in the forums area, you’ll see the Test Category that’s included with a default installation. Click the menu icon on the right-hand side of the category and select 'Move / Delete Content'.
Deleting Forums
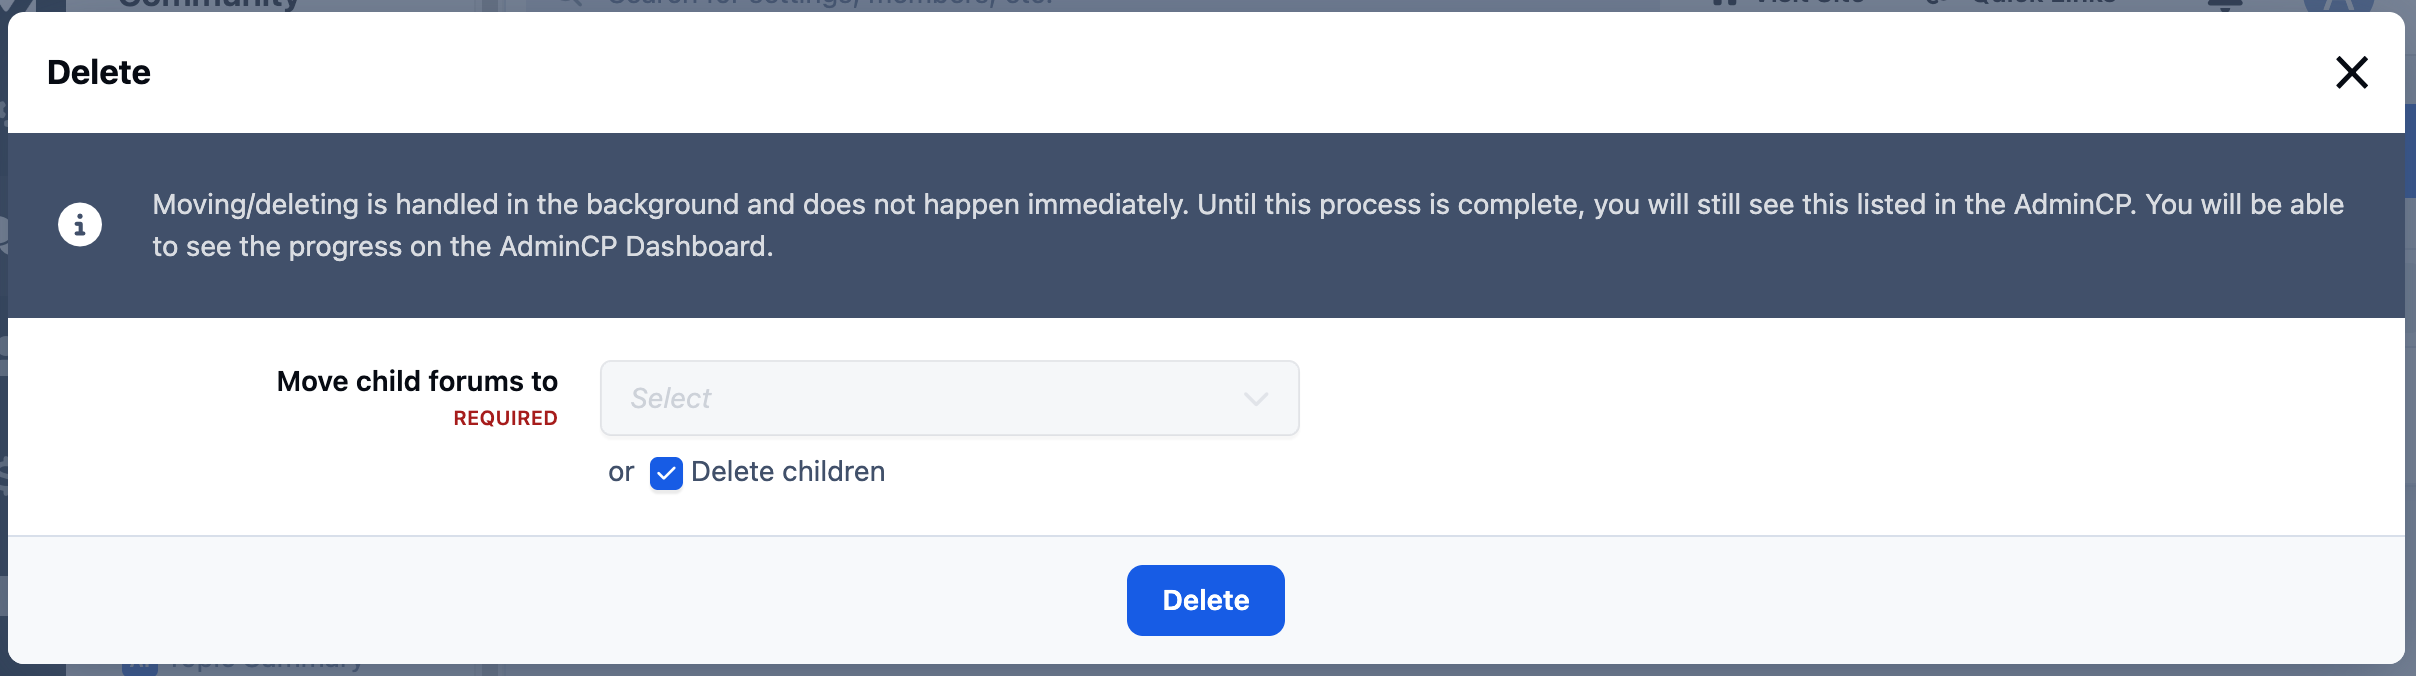
It’s important to note that this action does not delete the forum or category itself—it only removes the content within it, such as topics and posts.
When you select this option, a popup will appear allowing you to choose what to do with the existing content. You can either move the topics to another forum or delete them entirely. By default, the Delete option is selected.
Delete Options
The Business Support Hub
Our Aims
Many of our customers use Invision Community as a support platform for their clients. For the purposes of this walkthrough, we’ll be creating a sample setup called 'The Business Support Hub' (feel free to use this idea or adapt it to suit your own needs).
Before creating anything, it’s a good idea to plan out the structure of your forums. At a high level:
Category - These act as a container for related forums
Forums - This is where members create topics for discussion
Below is the structure we’ll be using for this example. Categories are shown in purple, with the forums listed beneath them in red.
With that plan in place, let’s jump right in and start building!
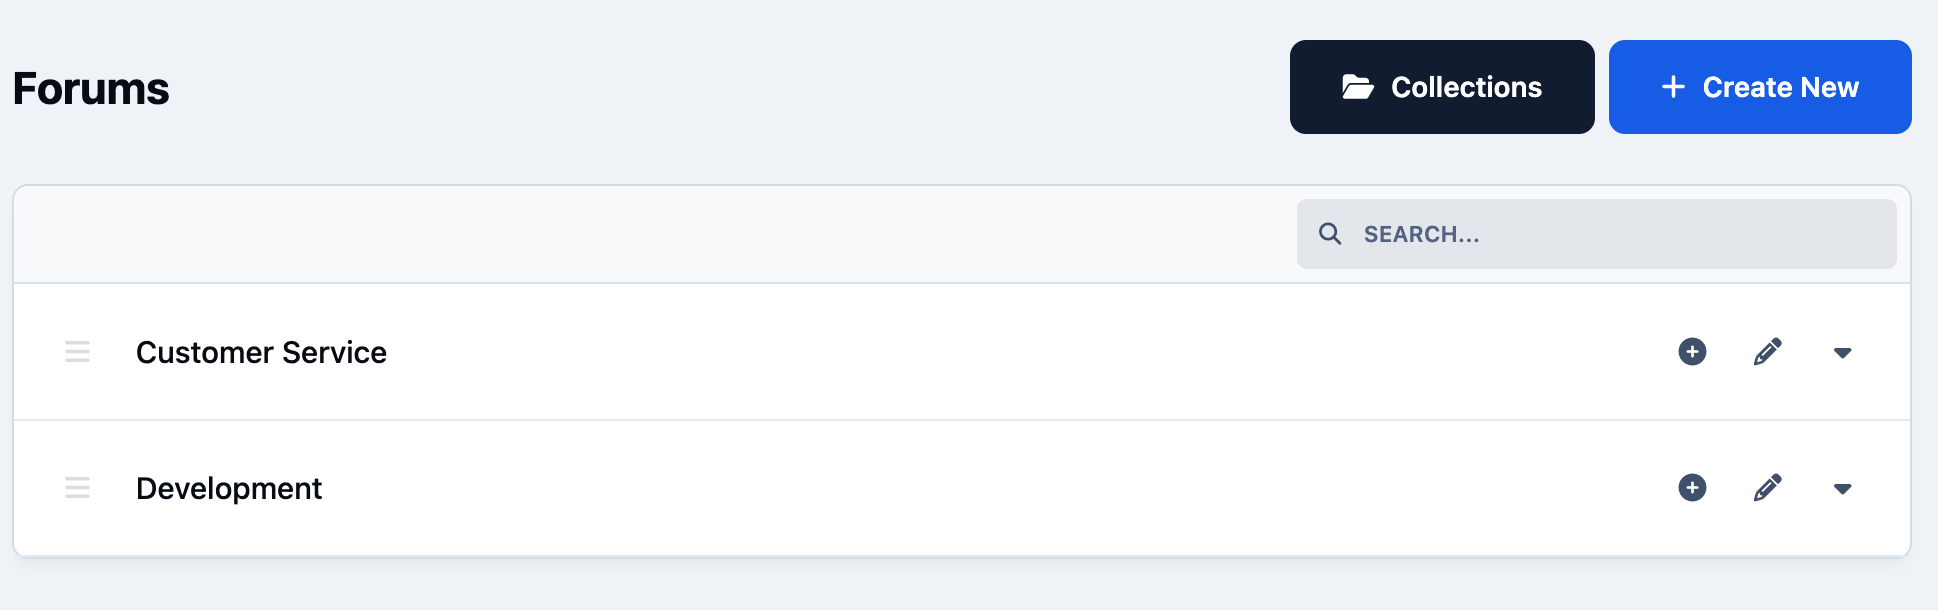
Customer Service
- Technical Support
- Account Services
Development
-API Assistance
- Designers Corner
Creating Categories
Now that we know what structure we want, we can go ahead and create our two main categories: Customer Service, and Development.
To get started, click the 'Create New' button in the top-right corner of the page.
Create a New Category
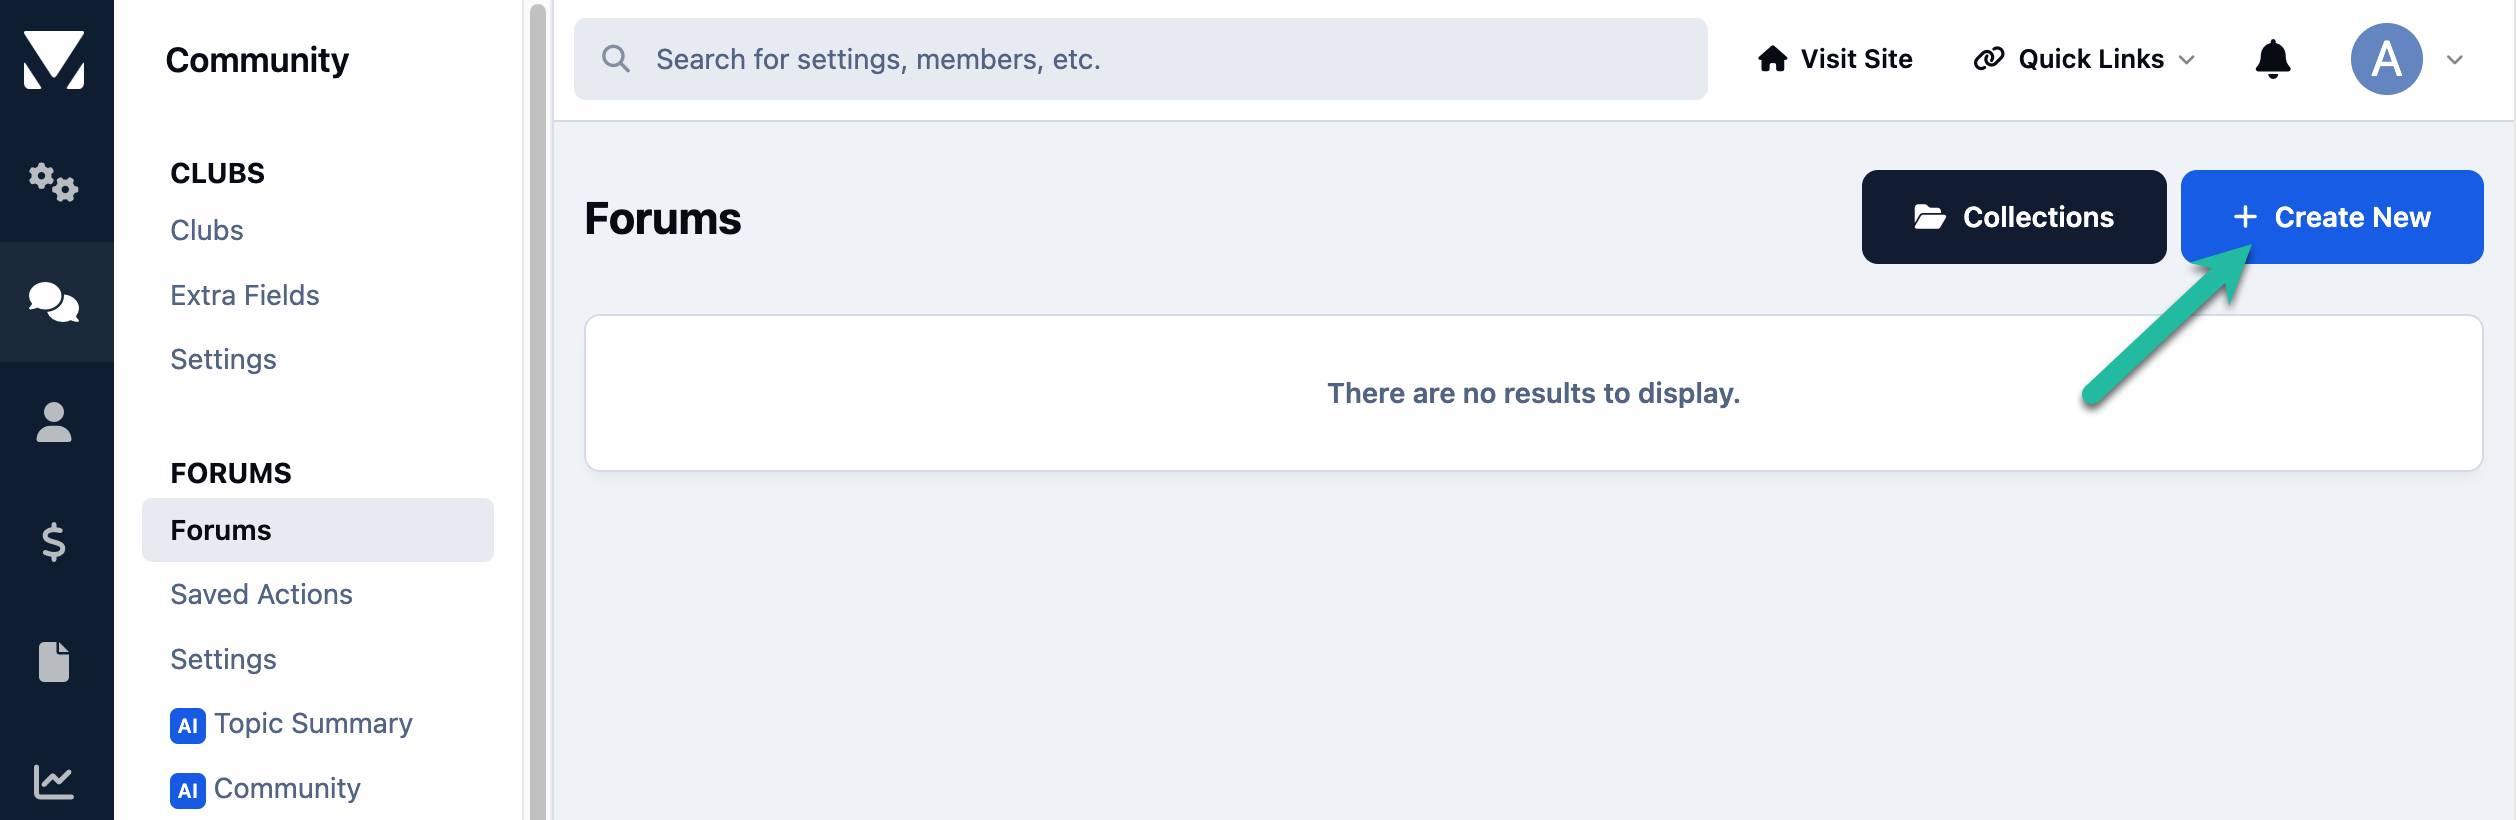
By default, selecting 'Create New' will create a new category, which is exactly what we want at this stage. Enter the name of your first category, then scroll to the bottom of the page and select Save.
Basic Category Setup
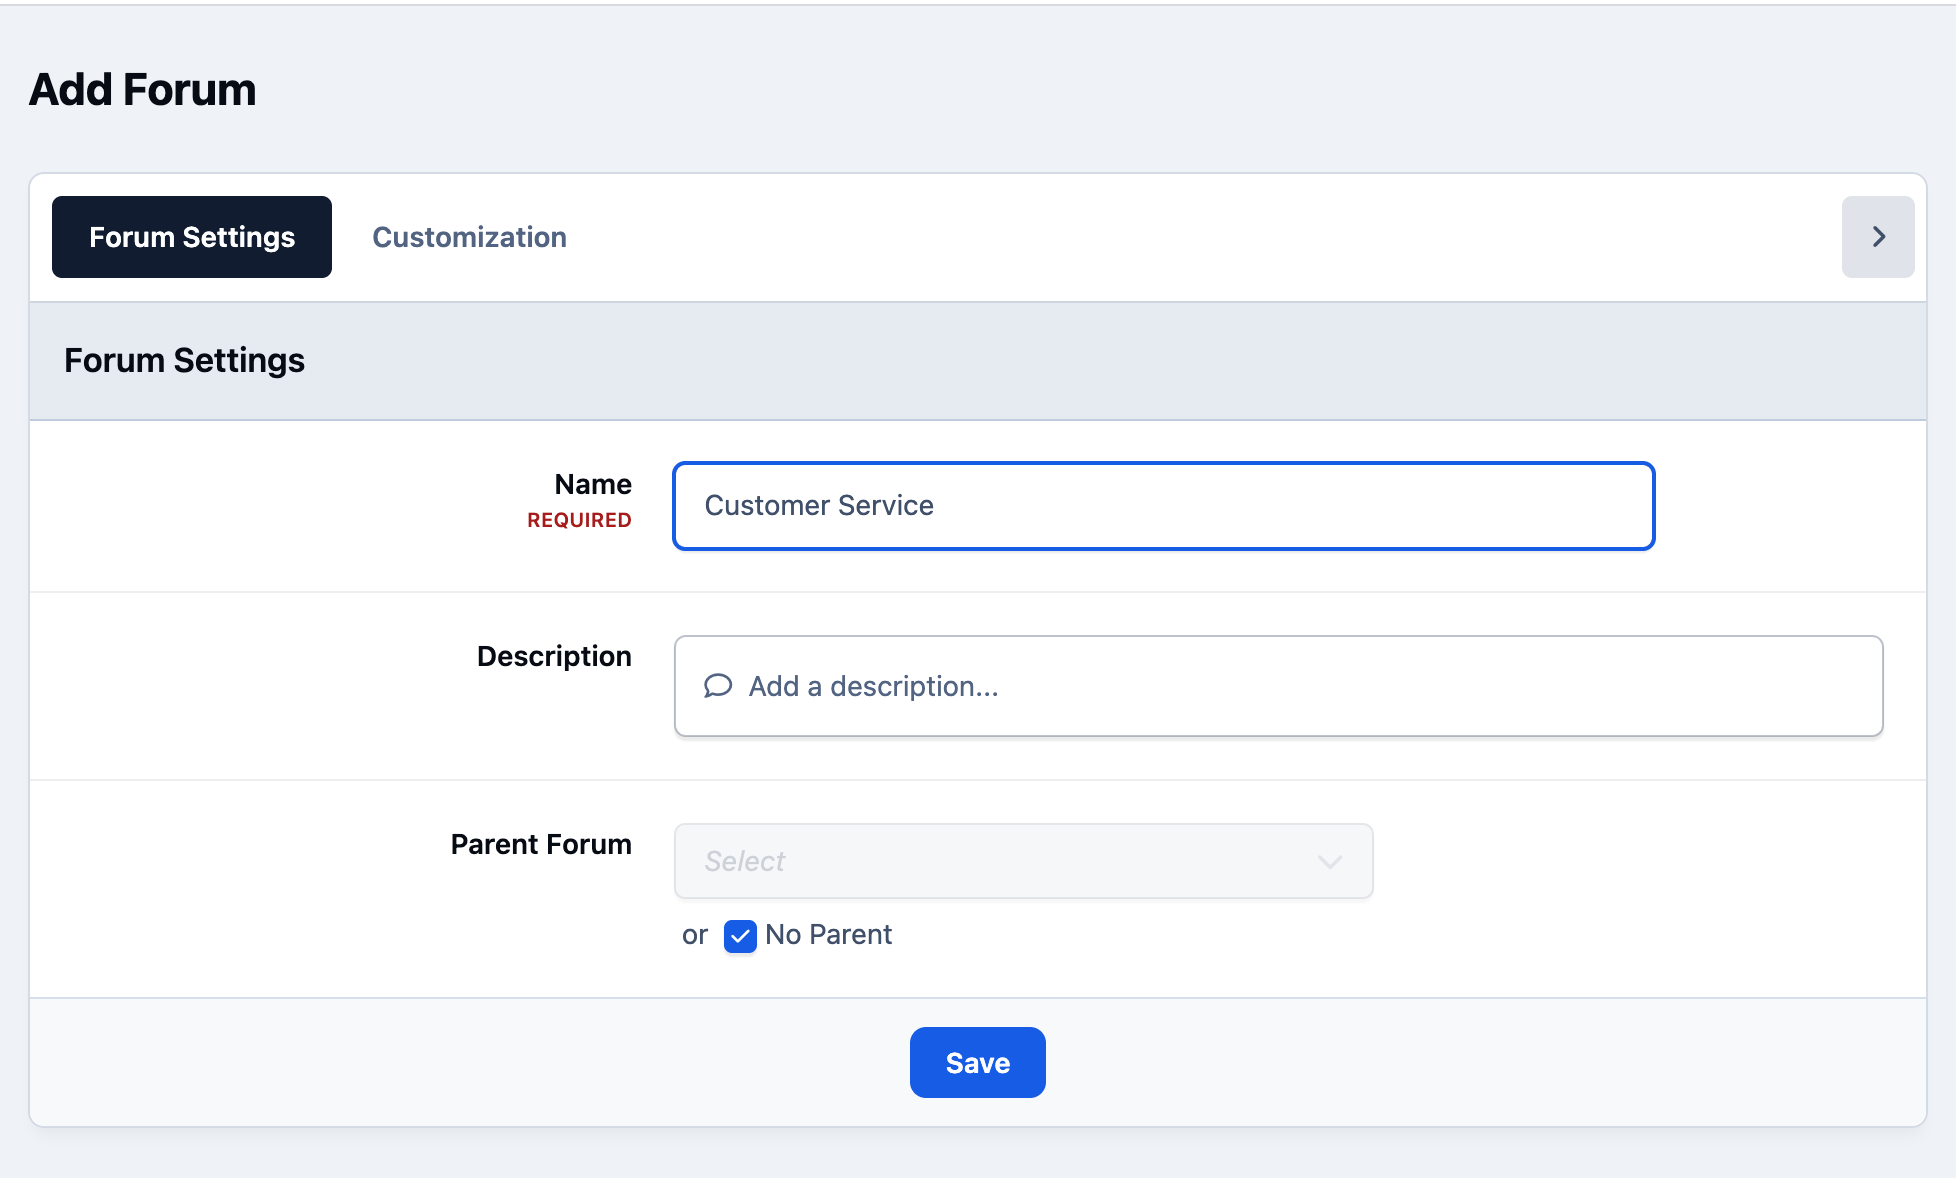
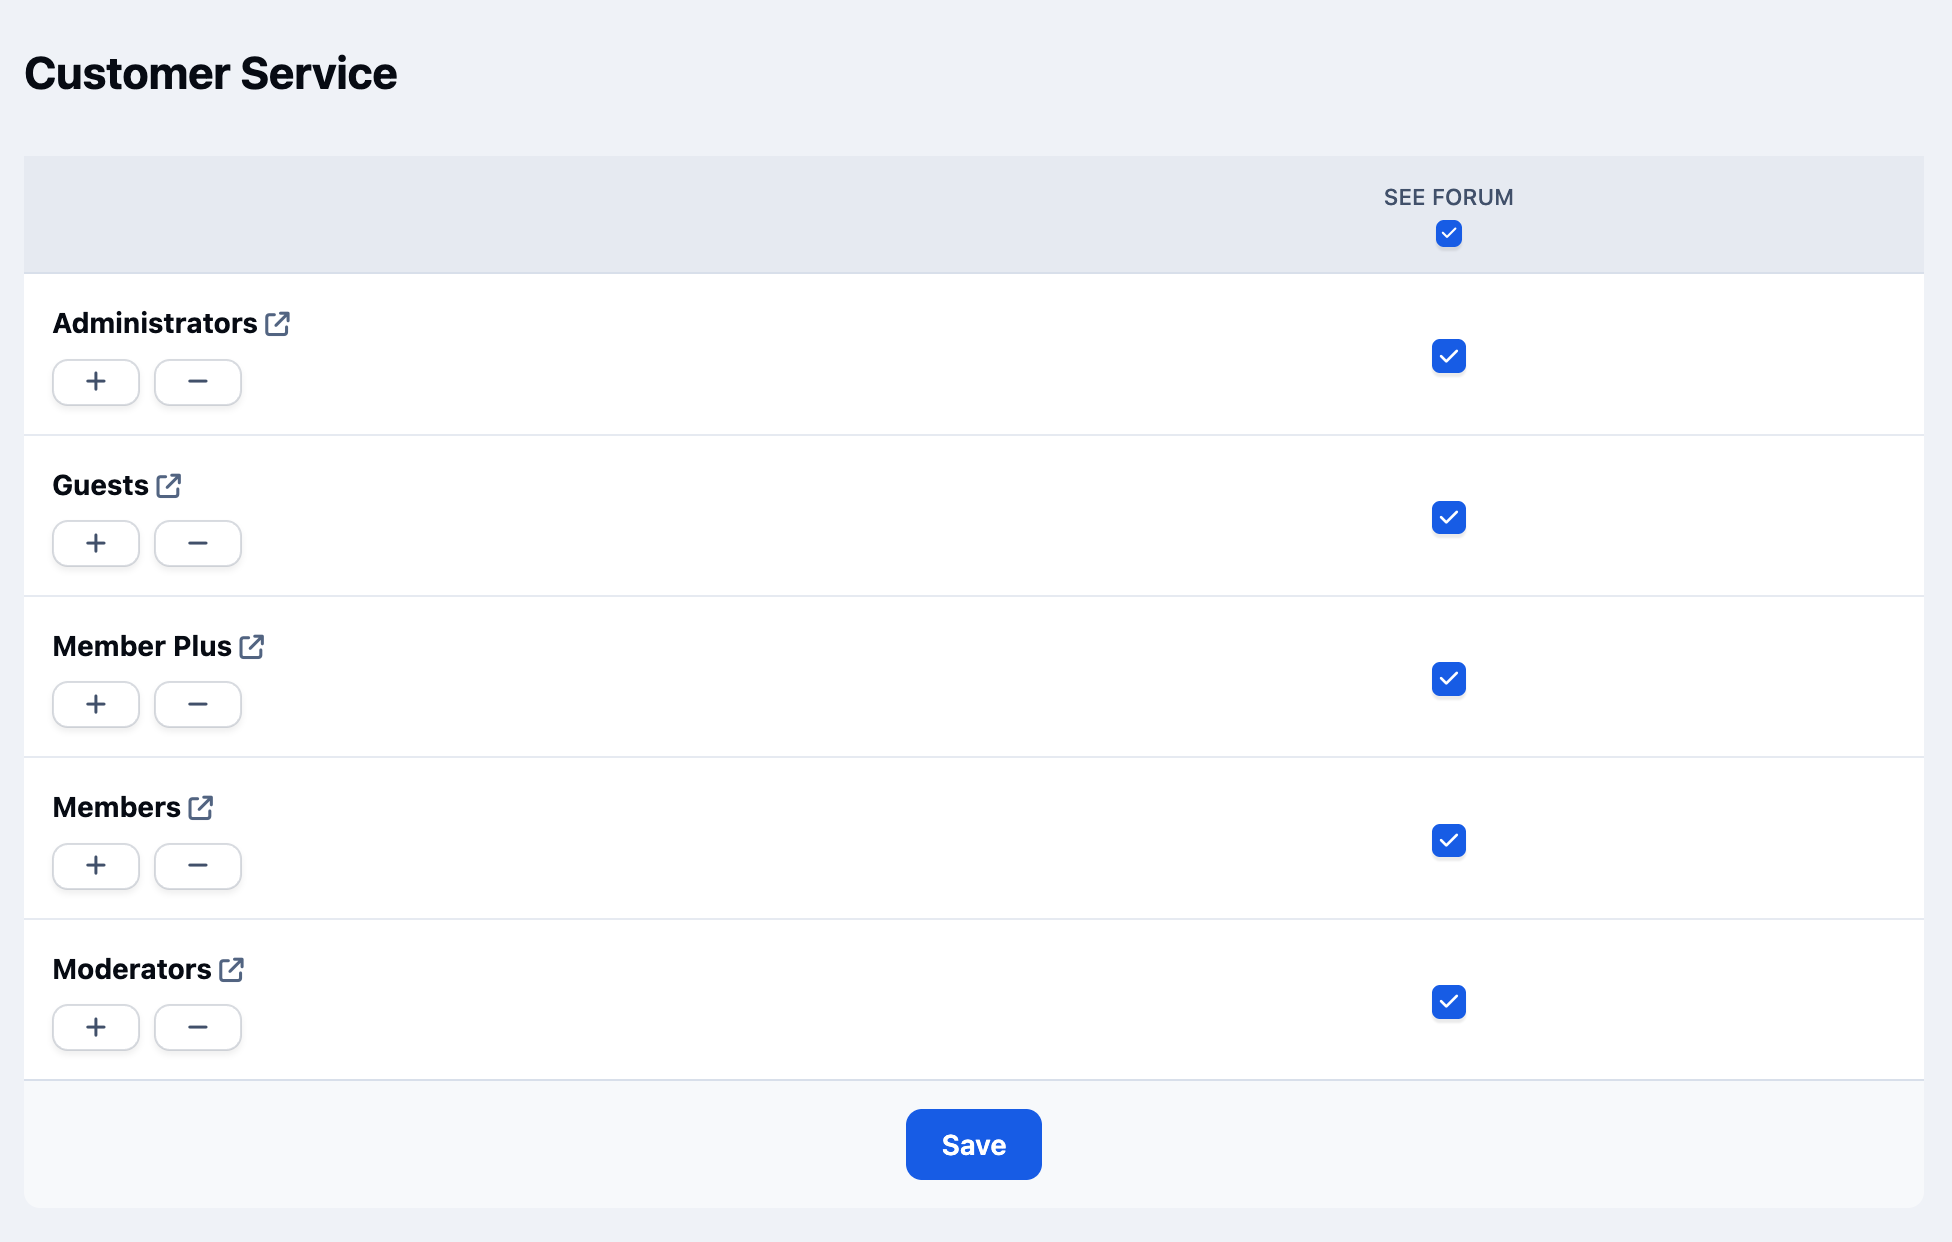
When you click Save, you’ll be prompted to set permissions for the category. On the left, you’ll see a list of all member groups.
For each group that should be able to view this category, select the 'See forum' checkbox. In our case, we want this category to be visible to everyone, so we’ll enable this option for all groups.
Category Permissions
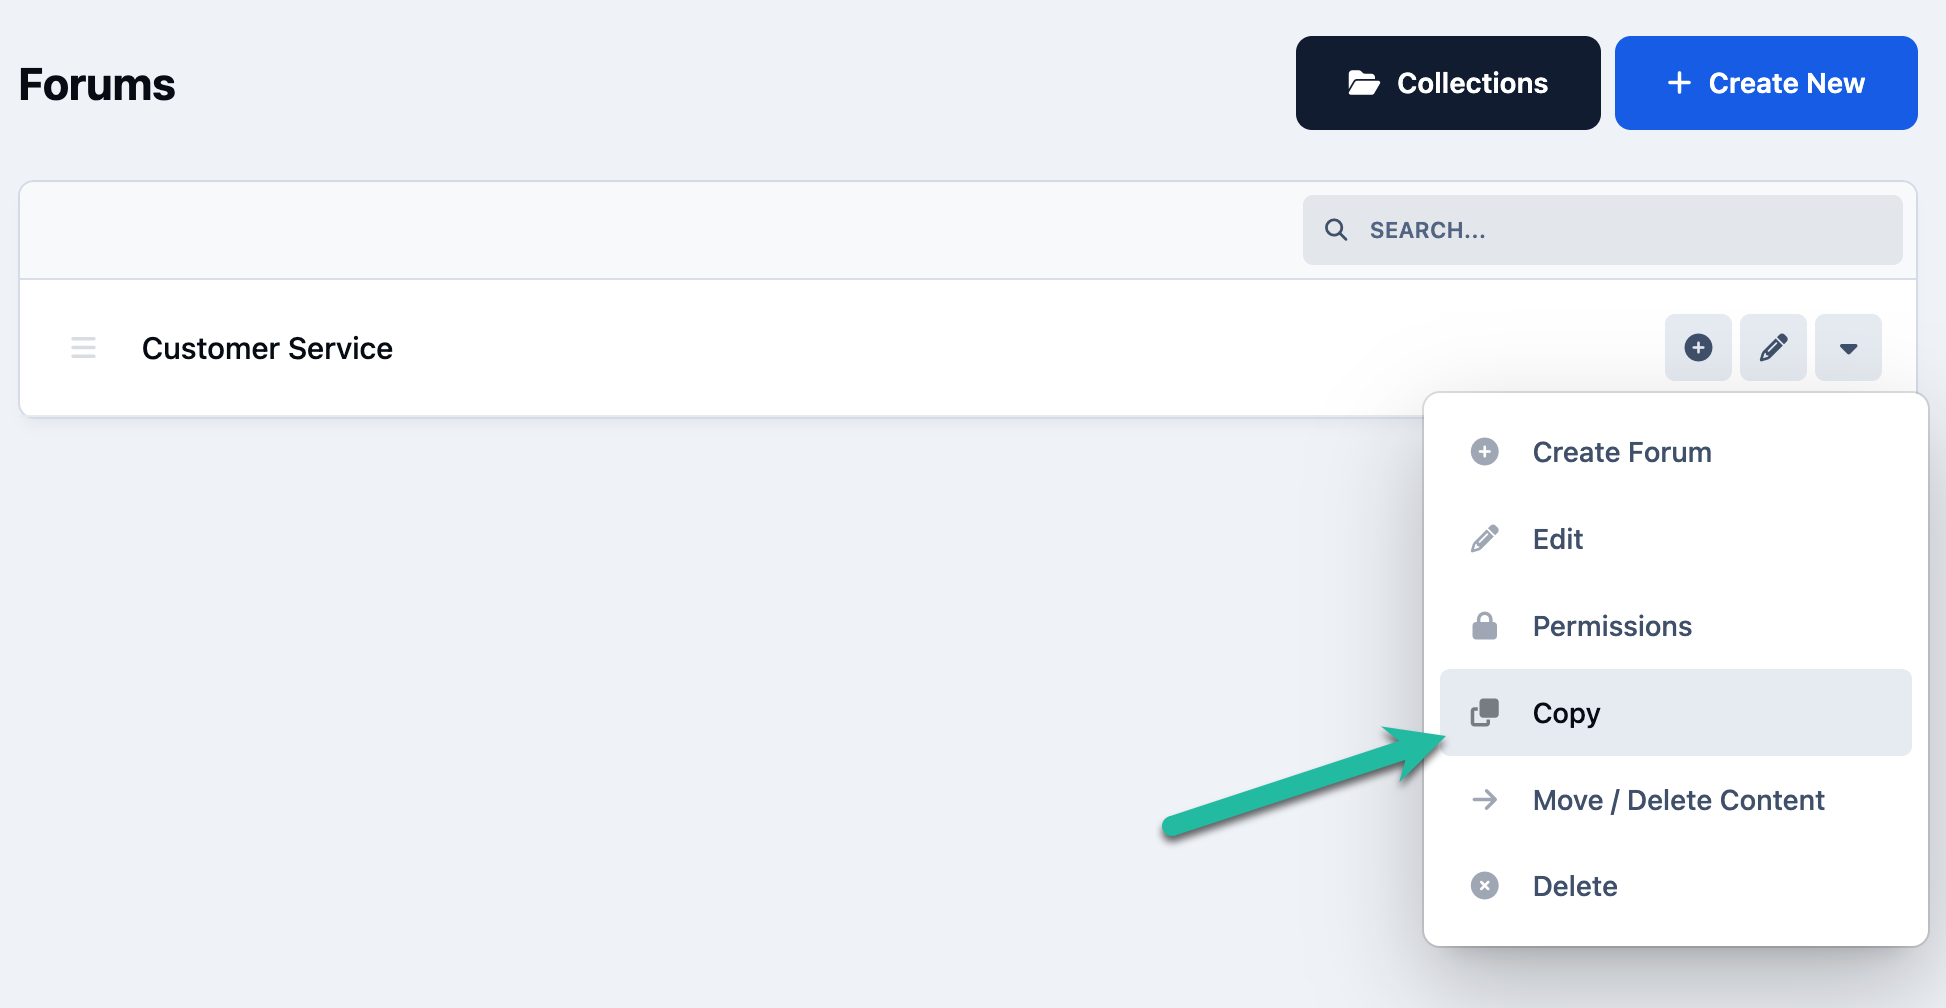
Now that we’ve created our first category, we can create the remaining two. Instead of clicking Create New again, we’ll use the 'Copy' option. This is especially useful if you’ve already configured settings or permissions that you want to reuse.
Click the dropdown menu next to the Customer Service category you just created and select Copy. Enter the name of the next category and save.
Copying a Category
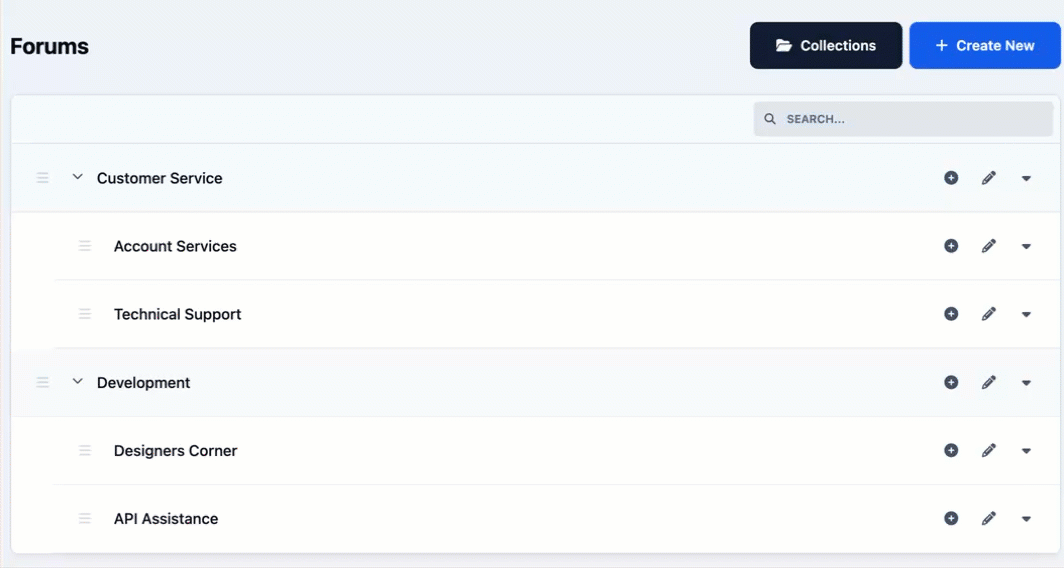
You should now have both categories created and ready to begin adding forums beneath them.
Both Categories We Have Created
Adding Forums
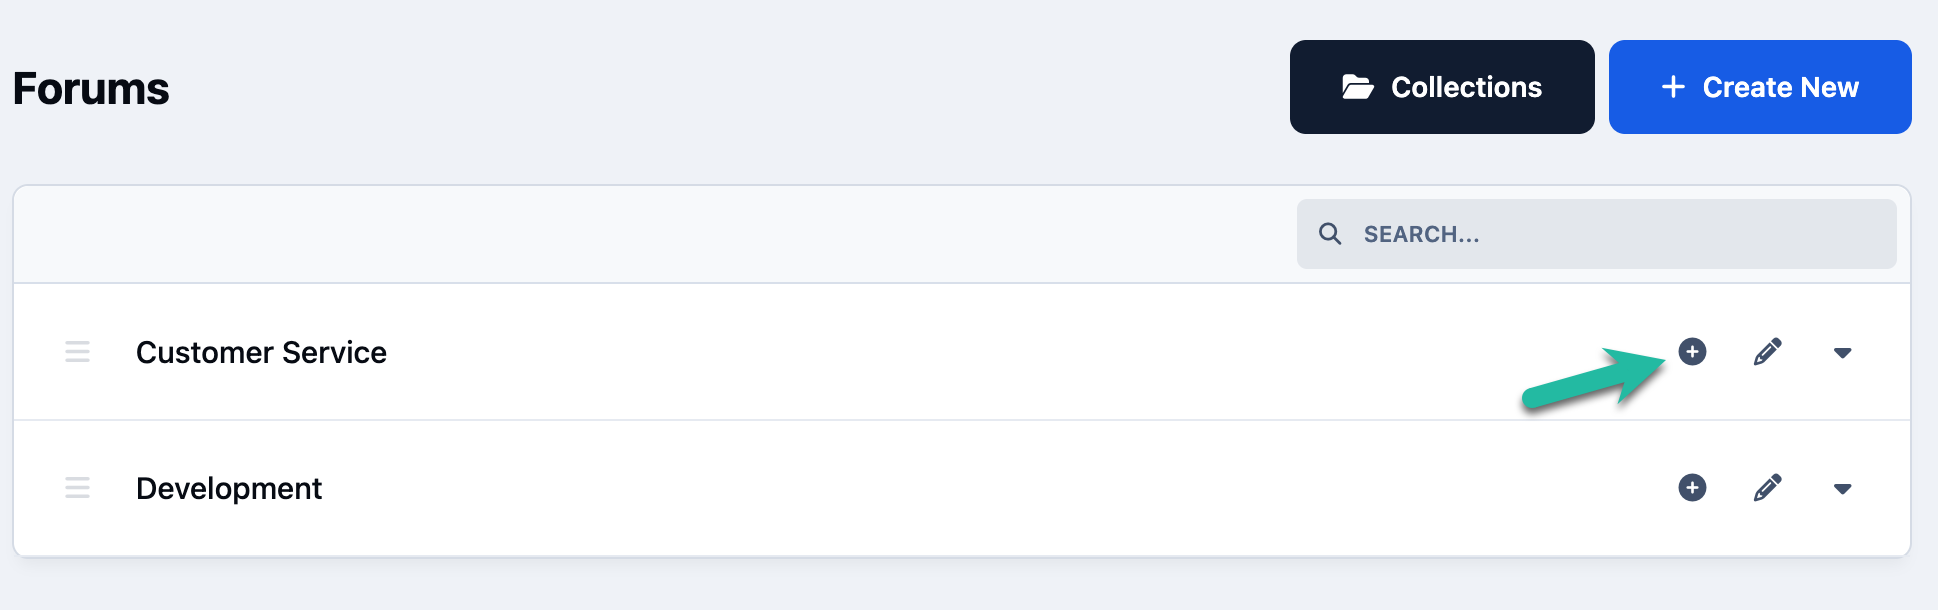
Now that our categories are in place, let’s go ahead and start adding forums. To do this, click the + button next to the 'Customer Service' category to create a new forum.
Where to Add a New Forum
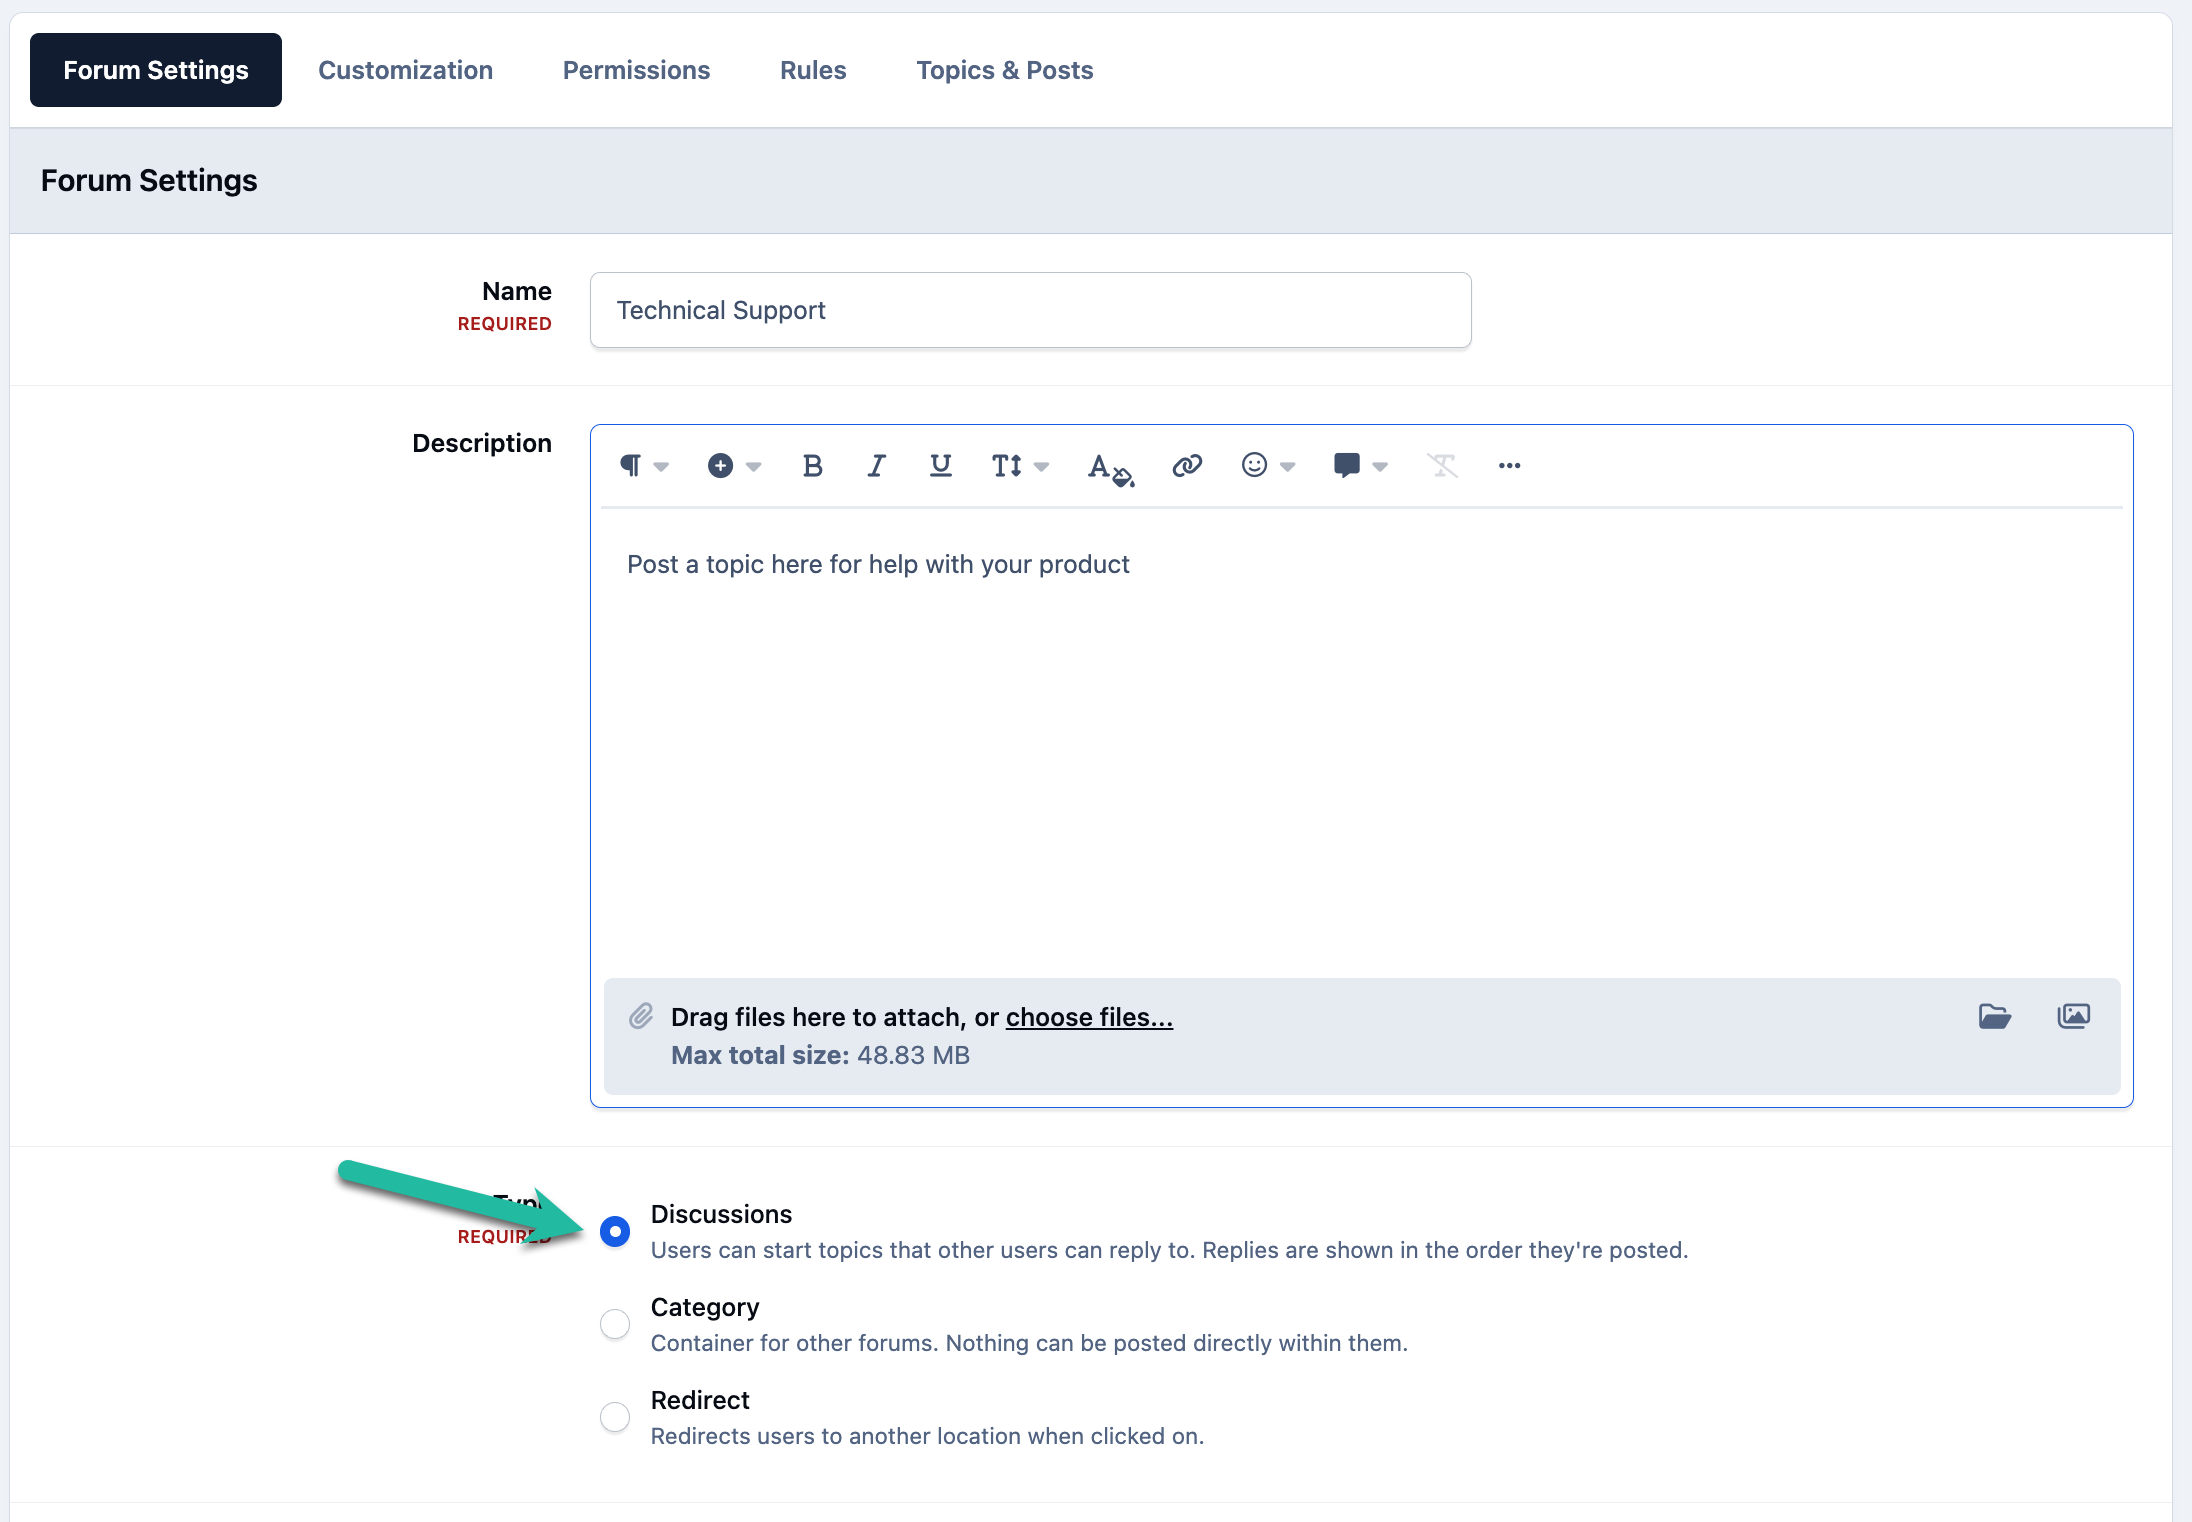
You’ll notice that this is the same screen used when creating categories. The difference this time is that 'Discussions' is selected as the Type.
Enter the name of the 'Technical Support' forum and add a brief description. Once you’re done, leave all other settings at their default values and click Save.
A New Discussion Forum
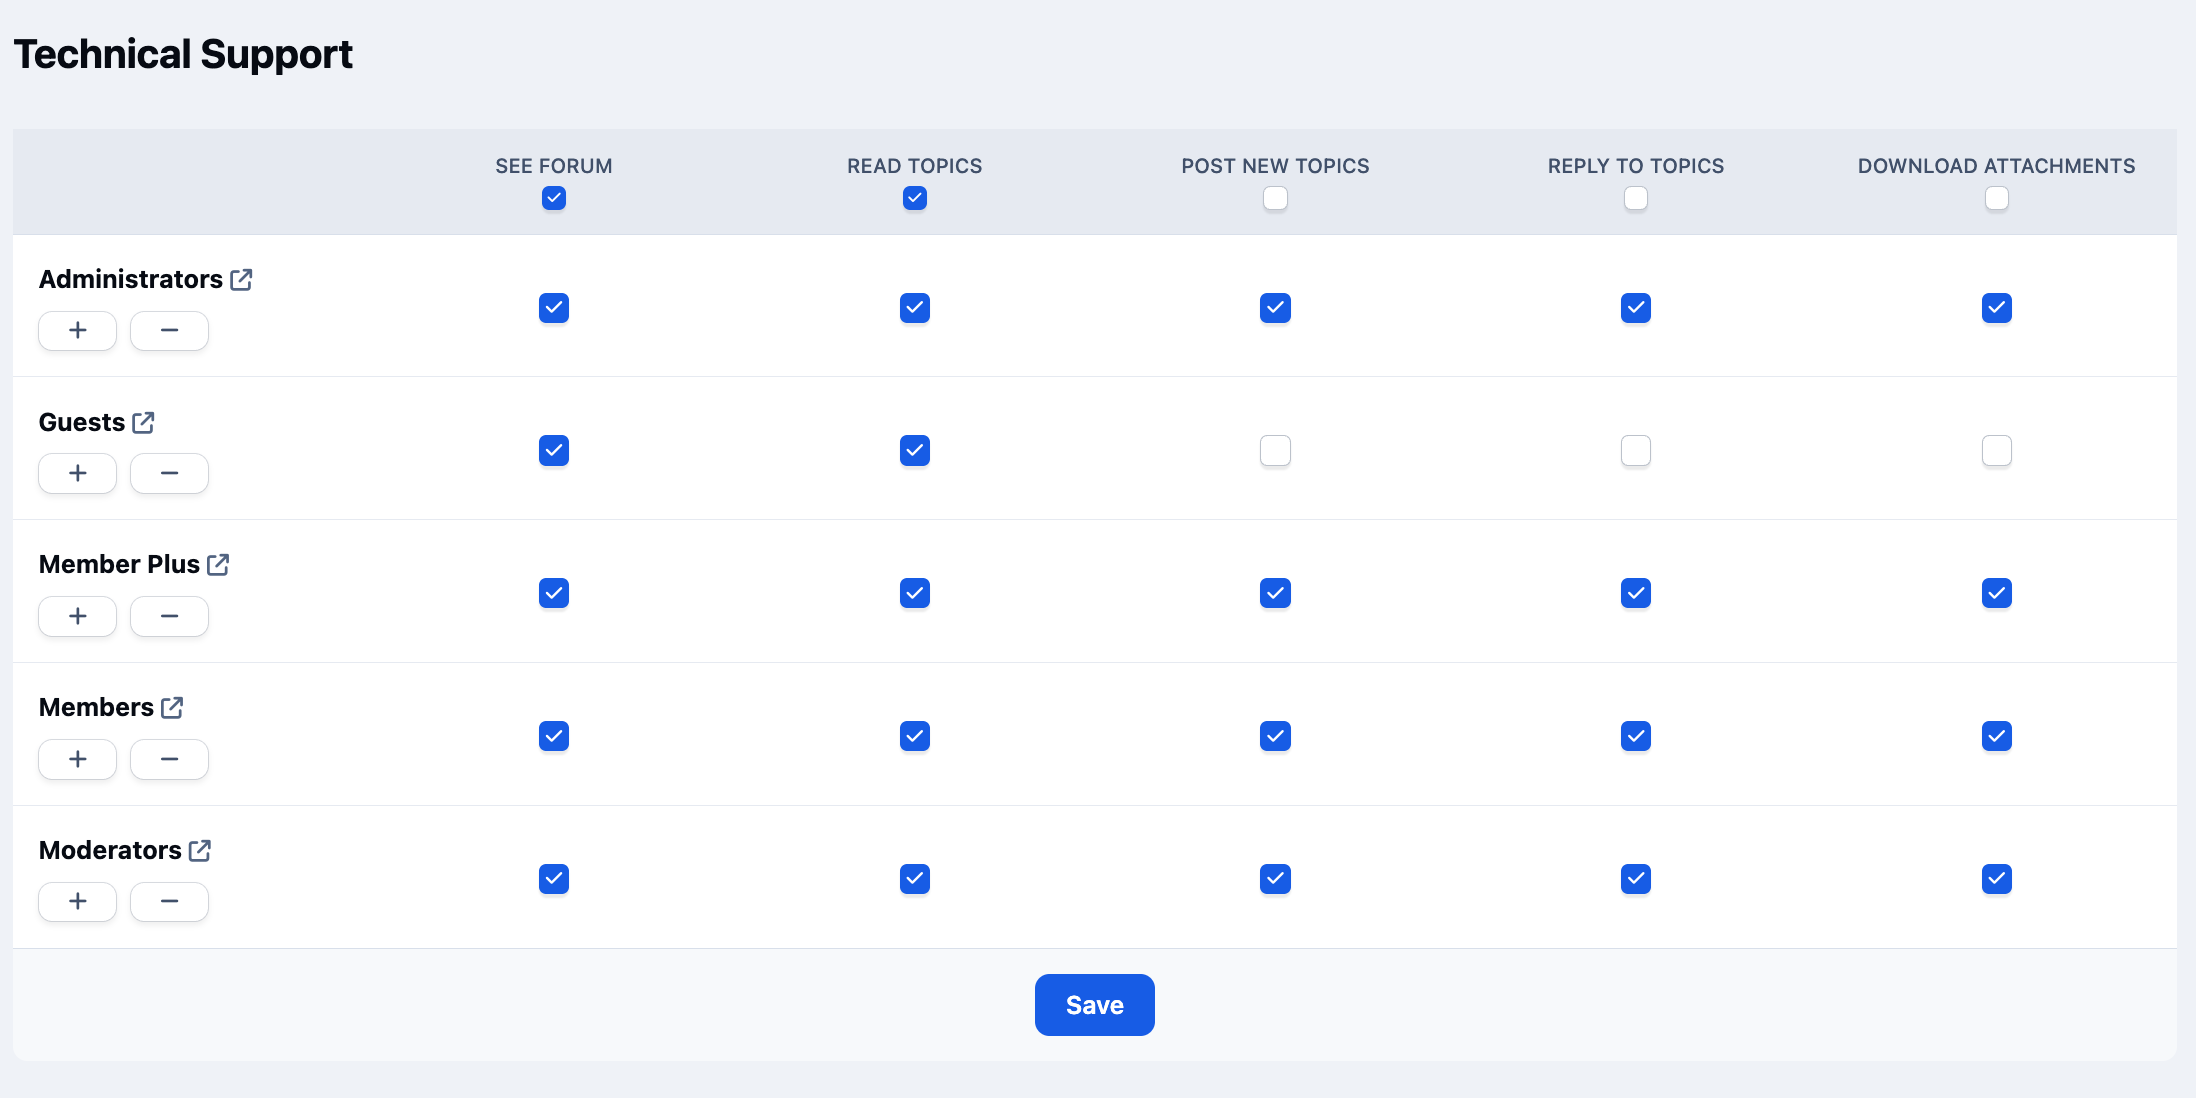
Just as with categories, saving a discussion forum will prompt you to configure permissions. These include options such as which groups can create new topics, reply to existing discussions, or download attachments.
It’s important to keep these permissions in mind when creating restricted areas such as moderator or admin areas, where access and interaction should be limited to specific groups.
Forum Permissions
Use the Copy feature, or click the + icon next to each category, to create all of the forums outlined in the 'Our Aims' section.
Click to Get Back
Rearranging Items
Once everything has been created, you may want to rearrange categories or forums to better suit your needs. This can be done easily by clicking and holding the drag handles on the left-hand side of each item, then dragging them into your preferred position.
Drag & Drop to Rearrange Forums
Summary
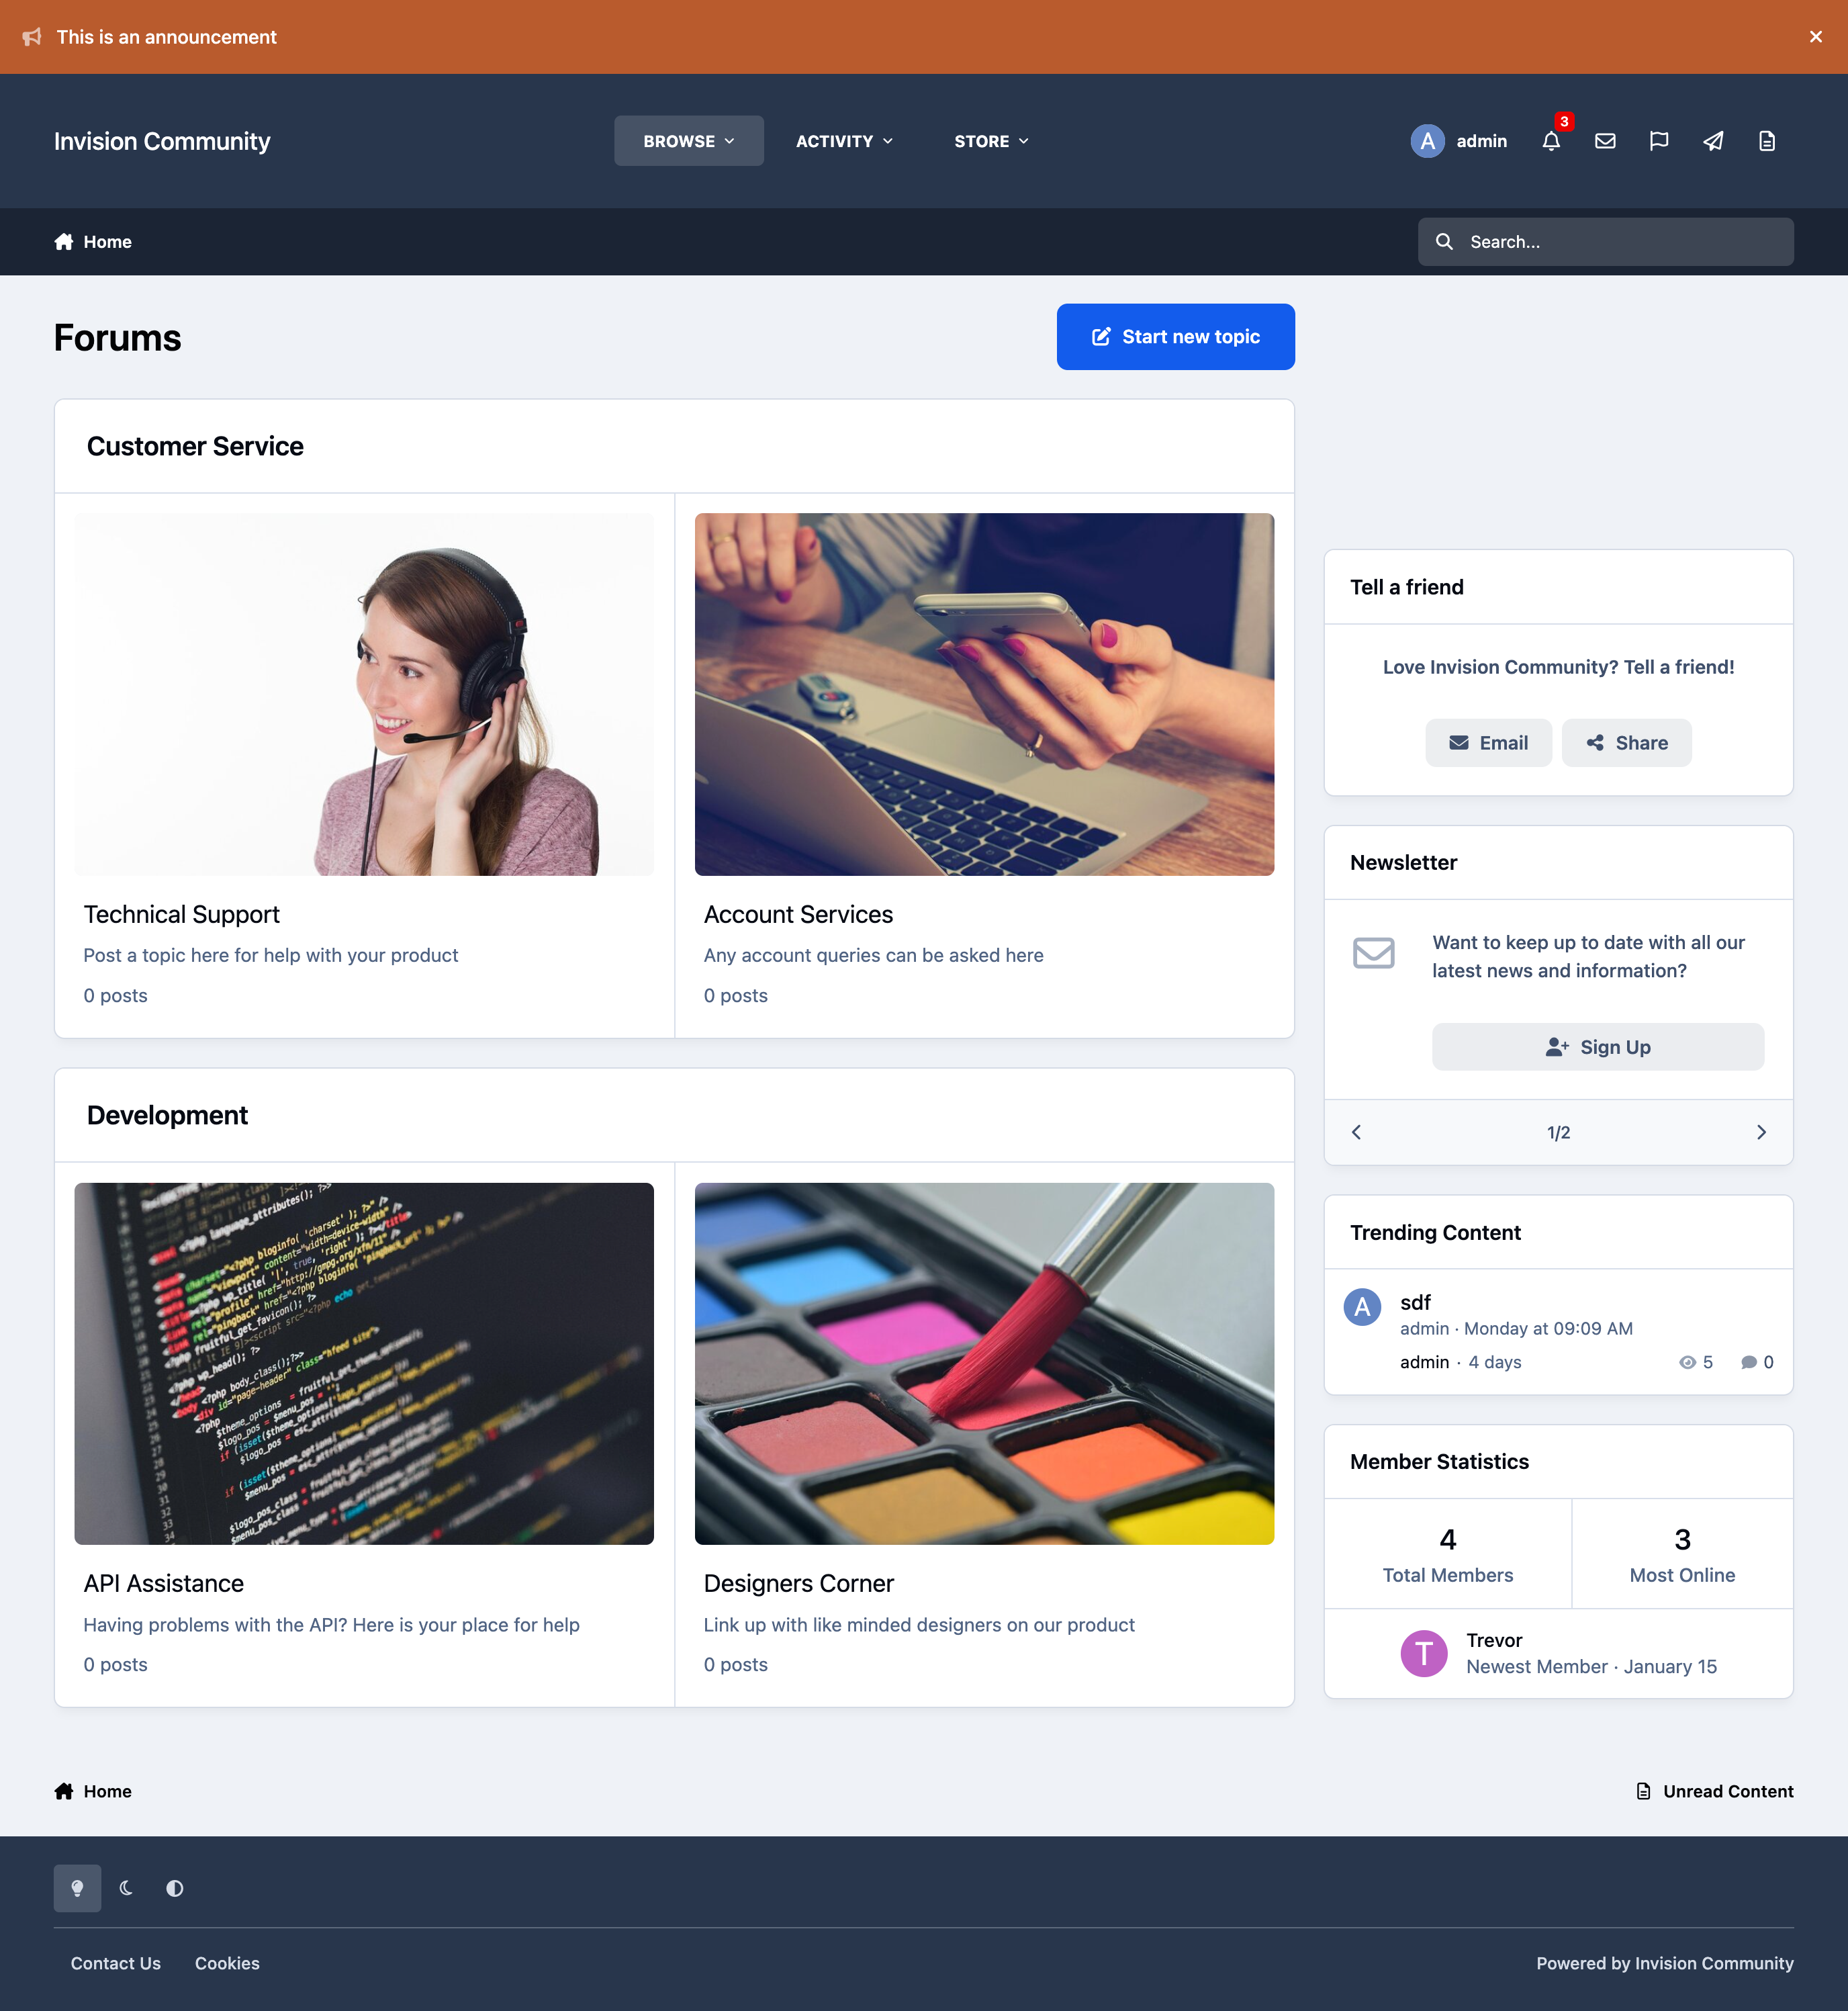
If you now return to the front end of the site, you’ll see the forum structure we set out to create fully in place and ready to use.
You’ll find additional guides for this application under Forums in the navigation on the left. These include more detailed walkthroughs of specific settings, such as adding image cards as you can see below, along with site-specific examples and helpful tips.
As with all areas of the suite, if you’re ever unsure where to find a feature or can’t locate the information you need in our guides, please feel free to submit a ticket to our support team. We’re always happy to help you get the most out of your
Example Forum Setup

Recommended Comments