


Live Topics allow you to host real-time chat and question-and-answer events directly within your community. Once the session ends, the live discussion is automatically converted into a regular forum topic.
This combines the energy and interaction of a live event with the long-term value of a permanent discussion, enabling conversations to continue well after the event has finished.
This guide walks you through how to set up and use Live Topics on your community.
Permissions
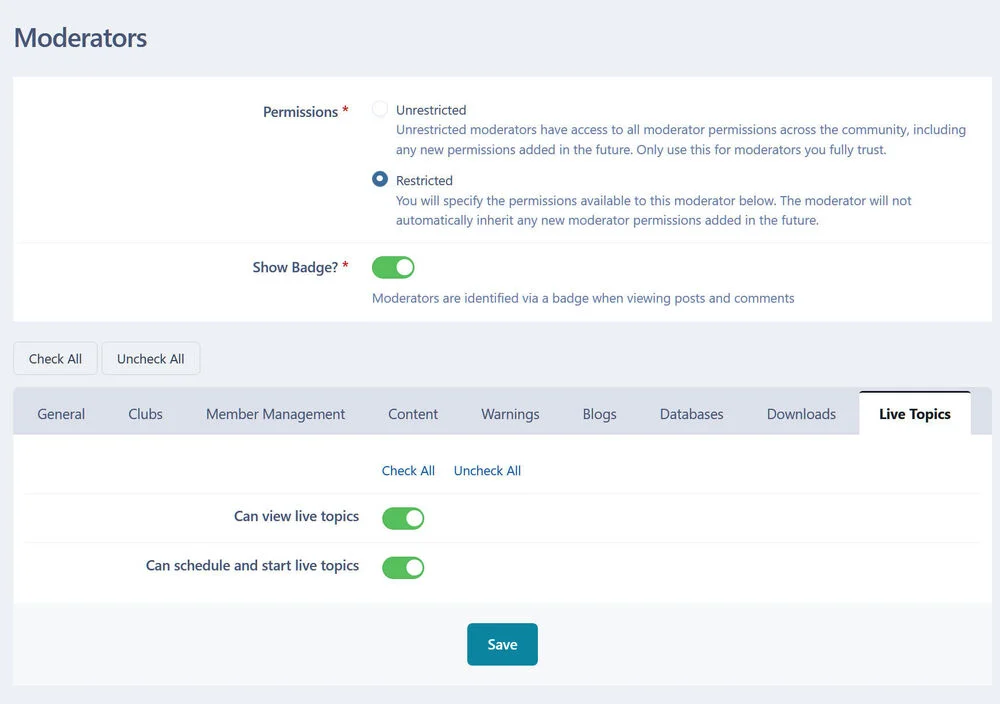
Live Topics can be used by any moderator who has the appropriate moderator permissions enabled. These permissions can be configured from the following location in the Admin CP:
Members → Staff → Moderators
Edit the moderator in question, navigate to the Live Topics tab, and enable the relevant option.
Quick Tip
If a moderator is set to Unrestricted, they will already have permission to use Live Topics.
Moderation Permission
Creating Live Topics
Creating a Live Topic is simple. Just visit your Moderator CP and navigate to the Live Topics section, as shown in the image below.
Moderator CP - Live Topics
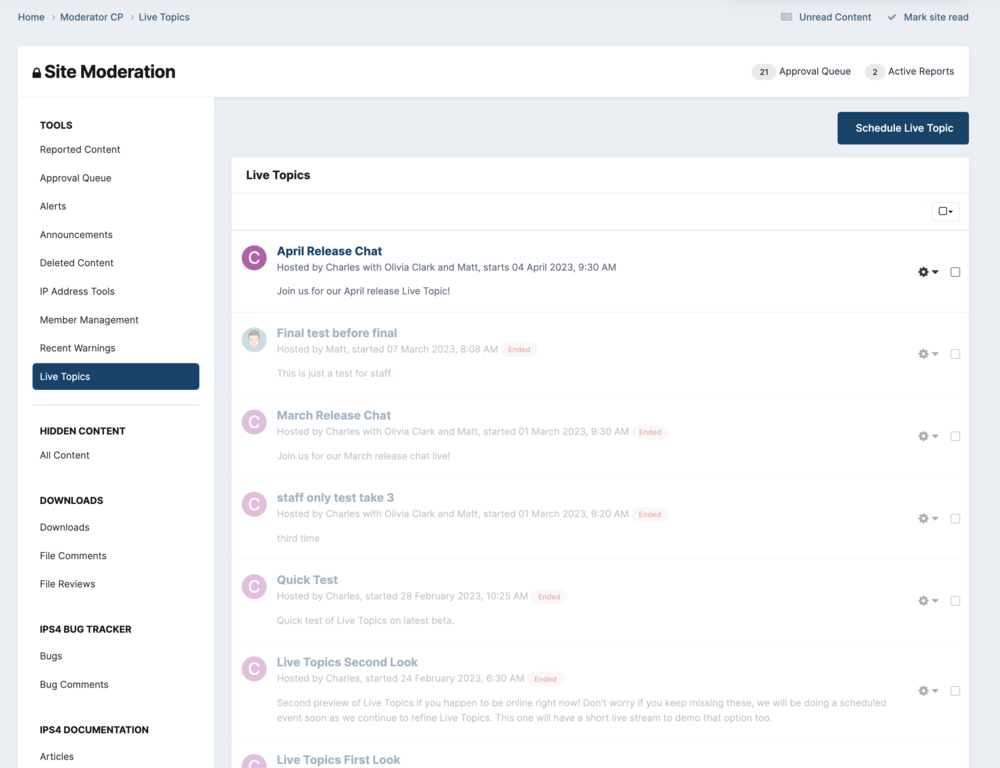
Once you select Schedule New Live Topic, you’ll be able to configure the following options:
Duration – This sets the planned length of the event as displayed to attendees. It helps manage expectations around how long the live session will run.
Add To Events – Creates a corresponding Calendar Event within your community. This allows the Live Topic to be discoverable, viewable, and promoted just like other events.
Live Video URL – Enter the URL of a YouTube embed to display video alongside the session. This can also be added after the live event has started if needed.
Attendees – Determines who can participate in the Live Topic. Leaving this set to Recommended allows any registered member to attend.
Staff – Staff members moderate incoming user-generated content during the session. By default, all groups with Live Topic moderation permissions are included. This can be adjusted in the Admin CP via moderator permissions.
Additional Hosts – Hosts have the highest level of control during the event. They can create and manage questions, update the video URL, and guide the discussion. When you schedule the Live Topic, you are automatically assigned as a host, but you can add others to assist. All hosts receive reminder notifications shortly before the event begins.
Require Approval for question replies/chat messages – Allows you to moderate incoming content before it appears publicly. This can help manage high activity levels, particularly for questions. Chat message creation can also be locked during the session if necessary.
Hosting a Live Topic
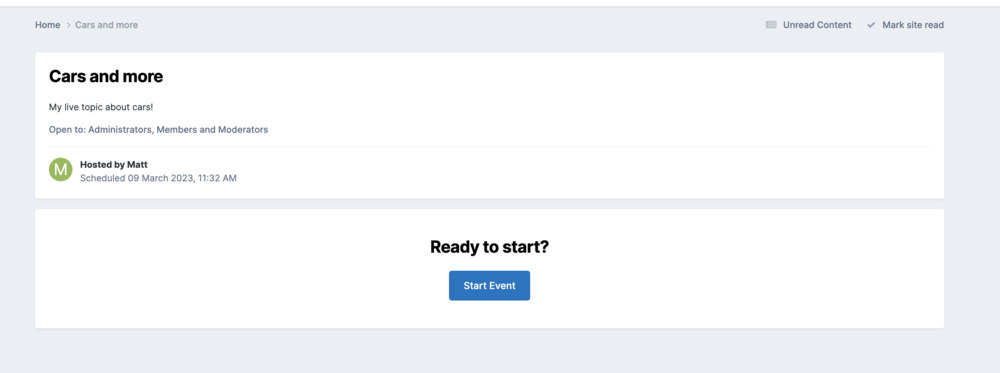
To start a Live Topic, open it from your Moderator CP. If the session was added to the Calendar as an event, you can also access it directly from there.
Once inside, simply click Start. It’s that easy. Attendees will see a waiting screen with a countdown until the session begins.
Start a Live Topic
It’s important to note that a Live Topic has the following limitations:
Cannot run without a host present – If all hosts leave the session, it will automatically end within a few minutes.
Cannot run longer than 6 hours – Live Topics are designed to support short-term live events rather than ongoing discussions. If the session reaches the 6-hour limit, it will automatically end.
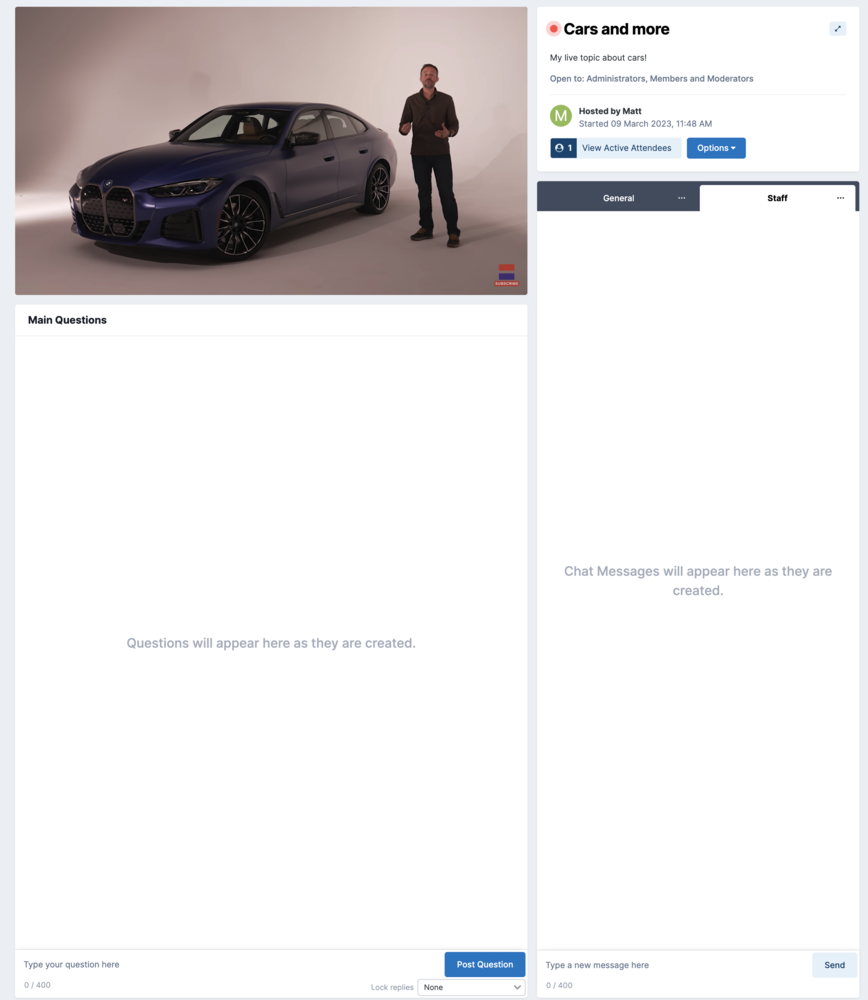
Once a Live Topic has started, the screen is divided into two main areas: 'Main Questions' and 'Chat'. Any embedded video stream appears in the top-right corner and begins playing automatically.
Live Session
Main Questions/Replies
On the left-hand side, you’ll see the Main Questions area. These are questions either created directly by staff or moved into this section from the chat channel.
Things to Note
Main Questions and their replies are preserved when the Live Topic is converted into a regular forum topic at the end of the session.
For each question, you can control whether replies are unlocked, locked to all members, or locked to non-staff only. When a question is locked, no new replies can be added.
Chat Channels
Each Live Topic includes two chat channels: General Chat and Staff Chat. Non-staff members will only see the Chat area, while staff members can switch between both channels using the channel selector tabs.
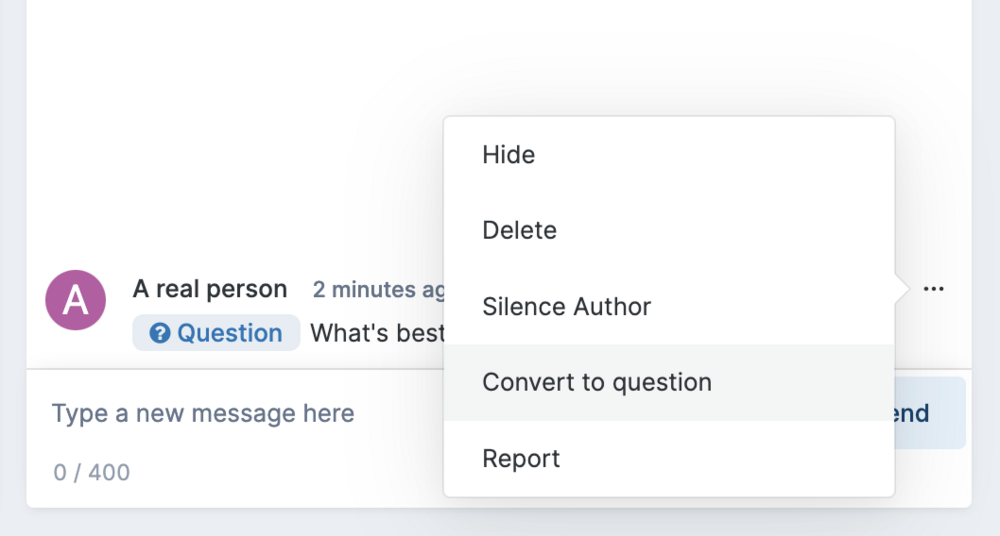
When a non-staff attendee posts a chat message, they can mark it as a question. This signals to the host that the message is intended for a response rather than general discussion. If needed, a host can convert that chat message into a Main Question, moving it into the Main Questions area so it will be preserved when the Live Topic is converted into a regular forum topic.
Converting a Message to a Question
Live Stream Tools
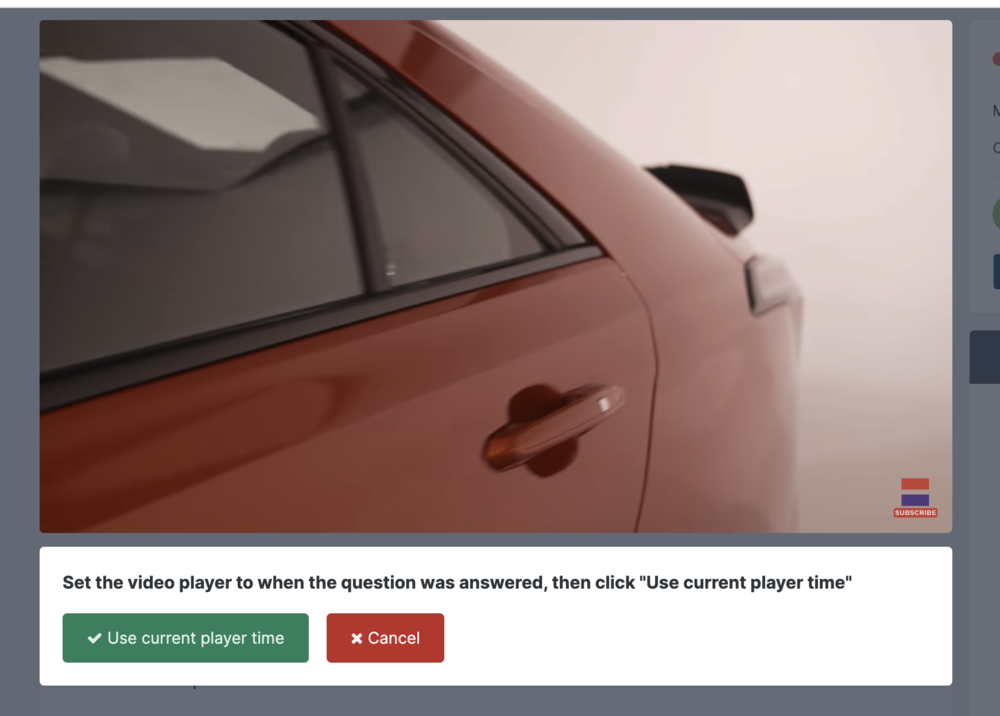
Hosts can mark the exact moment a Main Question was answered by selecting the appropriate time on the video and clicking the Use current player time button. This adds a timestamp to the question, allowing viewers to jump directly to that point in the video playback.
Creating a Timestamp
You can change the video embed at any time mid-session if required.
Moderation Tools
Staff members can hide or delete questions, chat messages, and replies as needed. Additionally, both the reply and chat feeds can be configured to automatically hide new items upon creation, allowing moderators to review content before it becomes visible.
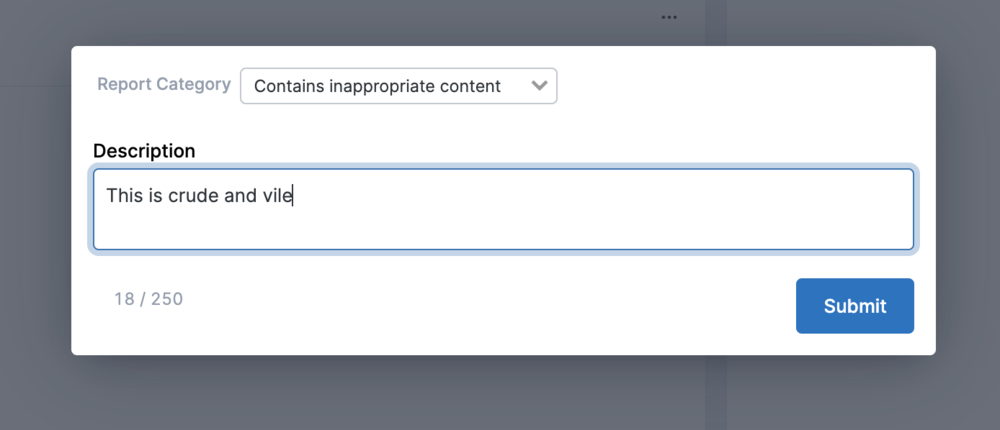
Non-staff attendees can report content just as they would elsewhere in the community, ensuring consistent moderation tools across the platform.
Reporting Content
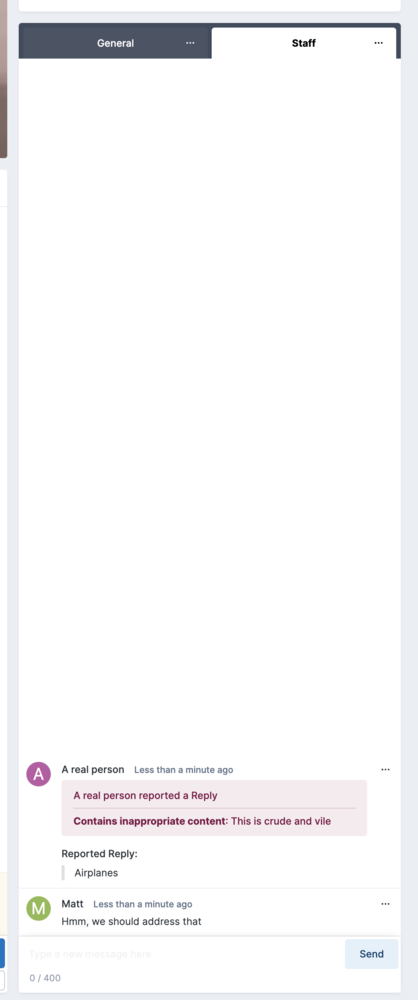
Reports submitted during a Live Topic appear within the Staff Chat area instead of the main Reports section. This ensures they can be reviewed and addressed quickly while the live session is still in progress.
Live Chat View
Recommended Comments