


Managing invoices is an important part of any e-commerce platform. In IPS4, you are provided with the tools to manage these directly within your Admin CP.
Invoices and Settings
You can manage invoices from the following area in your Admin CP:
Commerce → Payments → Invoices.
When entering this screen, you will see the following screen. It is important to note the statuses and what these represent on the system.
Pending - This is the initial invoice status. By selecting the tick icon, you can mark these items as paid which will move these to the paid status.
Paid - These invoices are paid.
Expired - These are invoices which have expired based on your invoice settings (discussed further down)
Cancelled - These are invoiced which have been cancelled by the user, or set as cancelled by an administrator
Invoice Listing
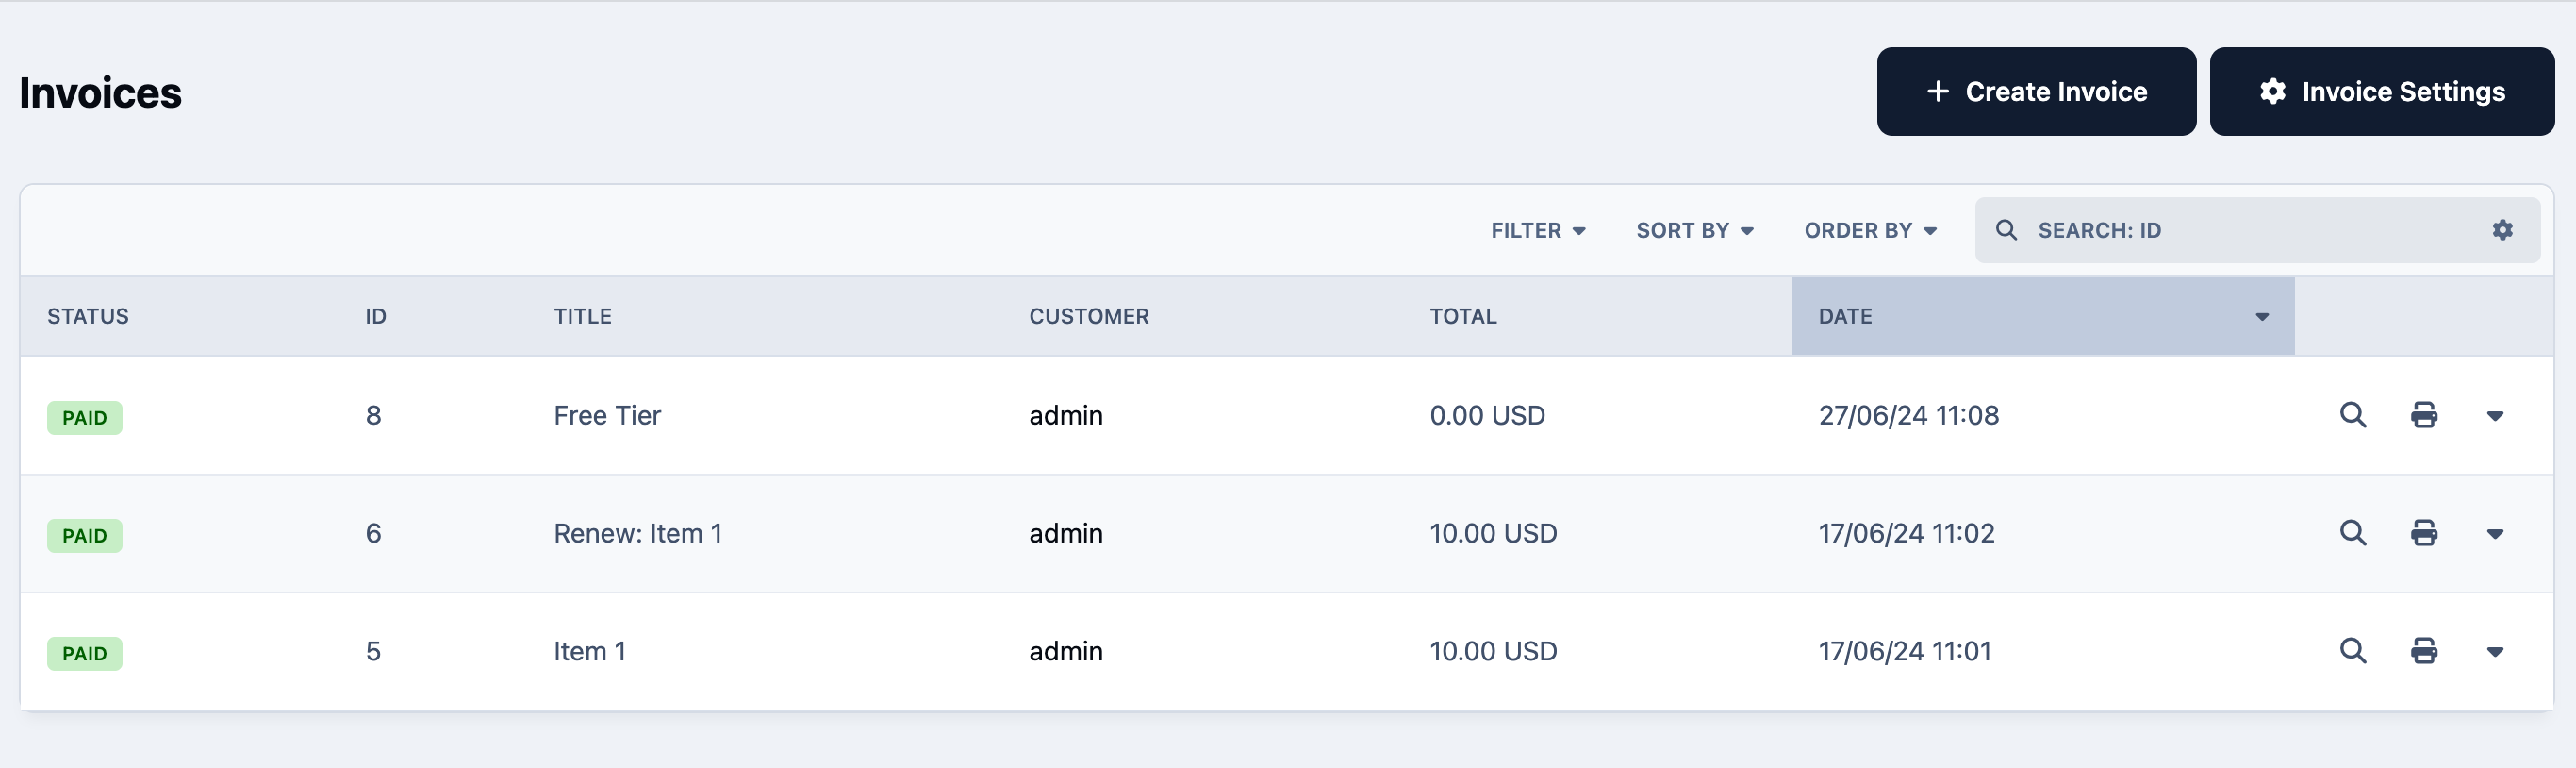
You can view or print any of these invoices using the icons provided. If an invoice is expired or cancelled, you can reissue it using the refresh icon or by selecting the option from the dropdown menu.
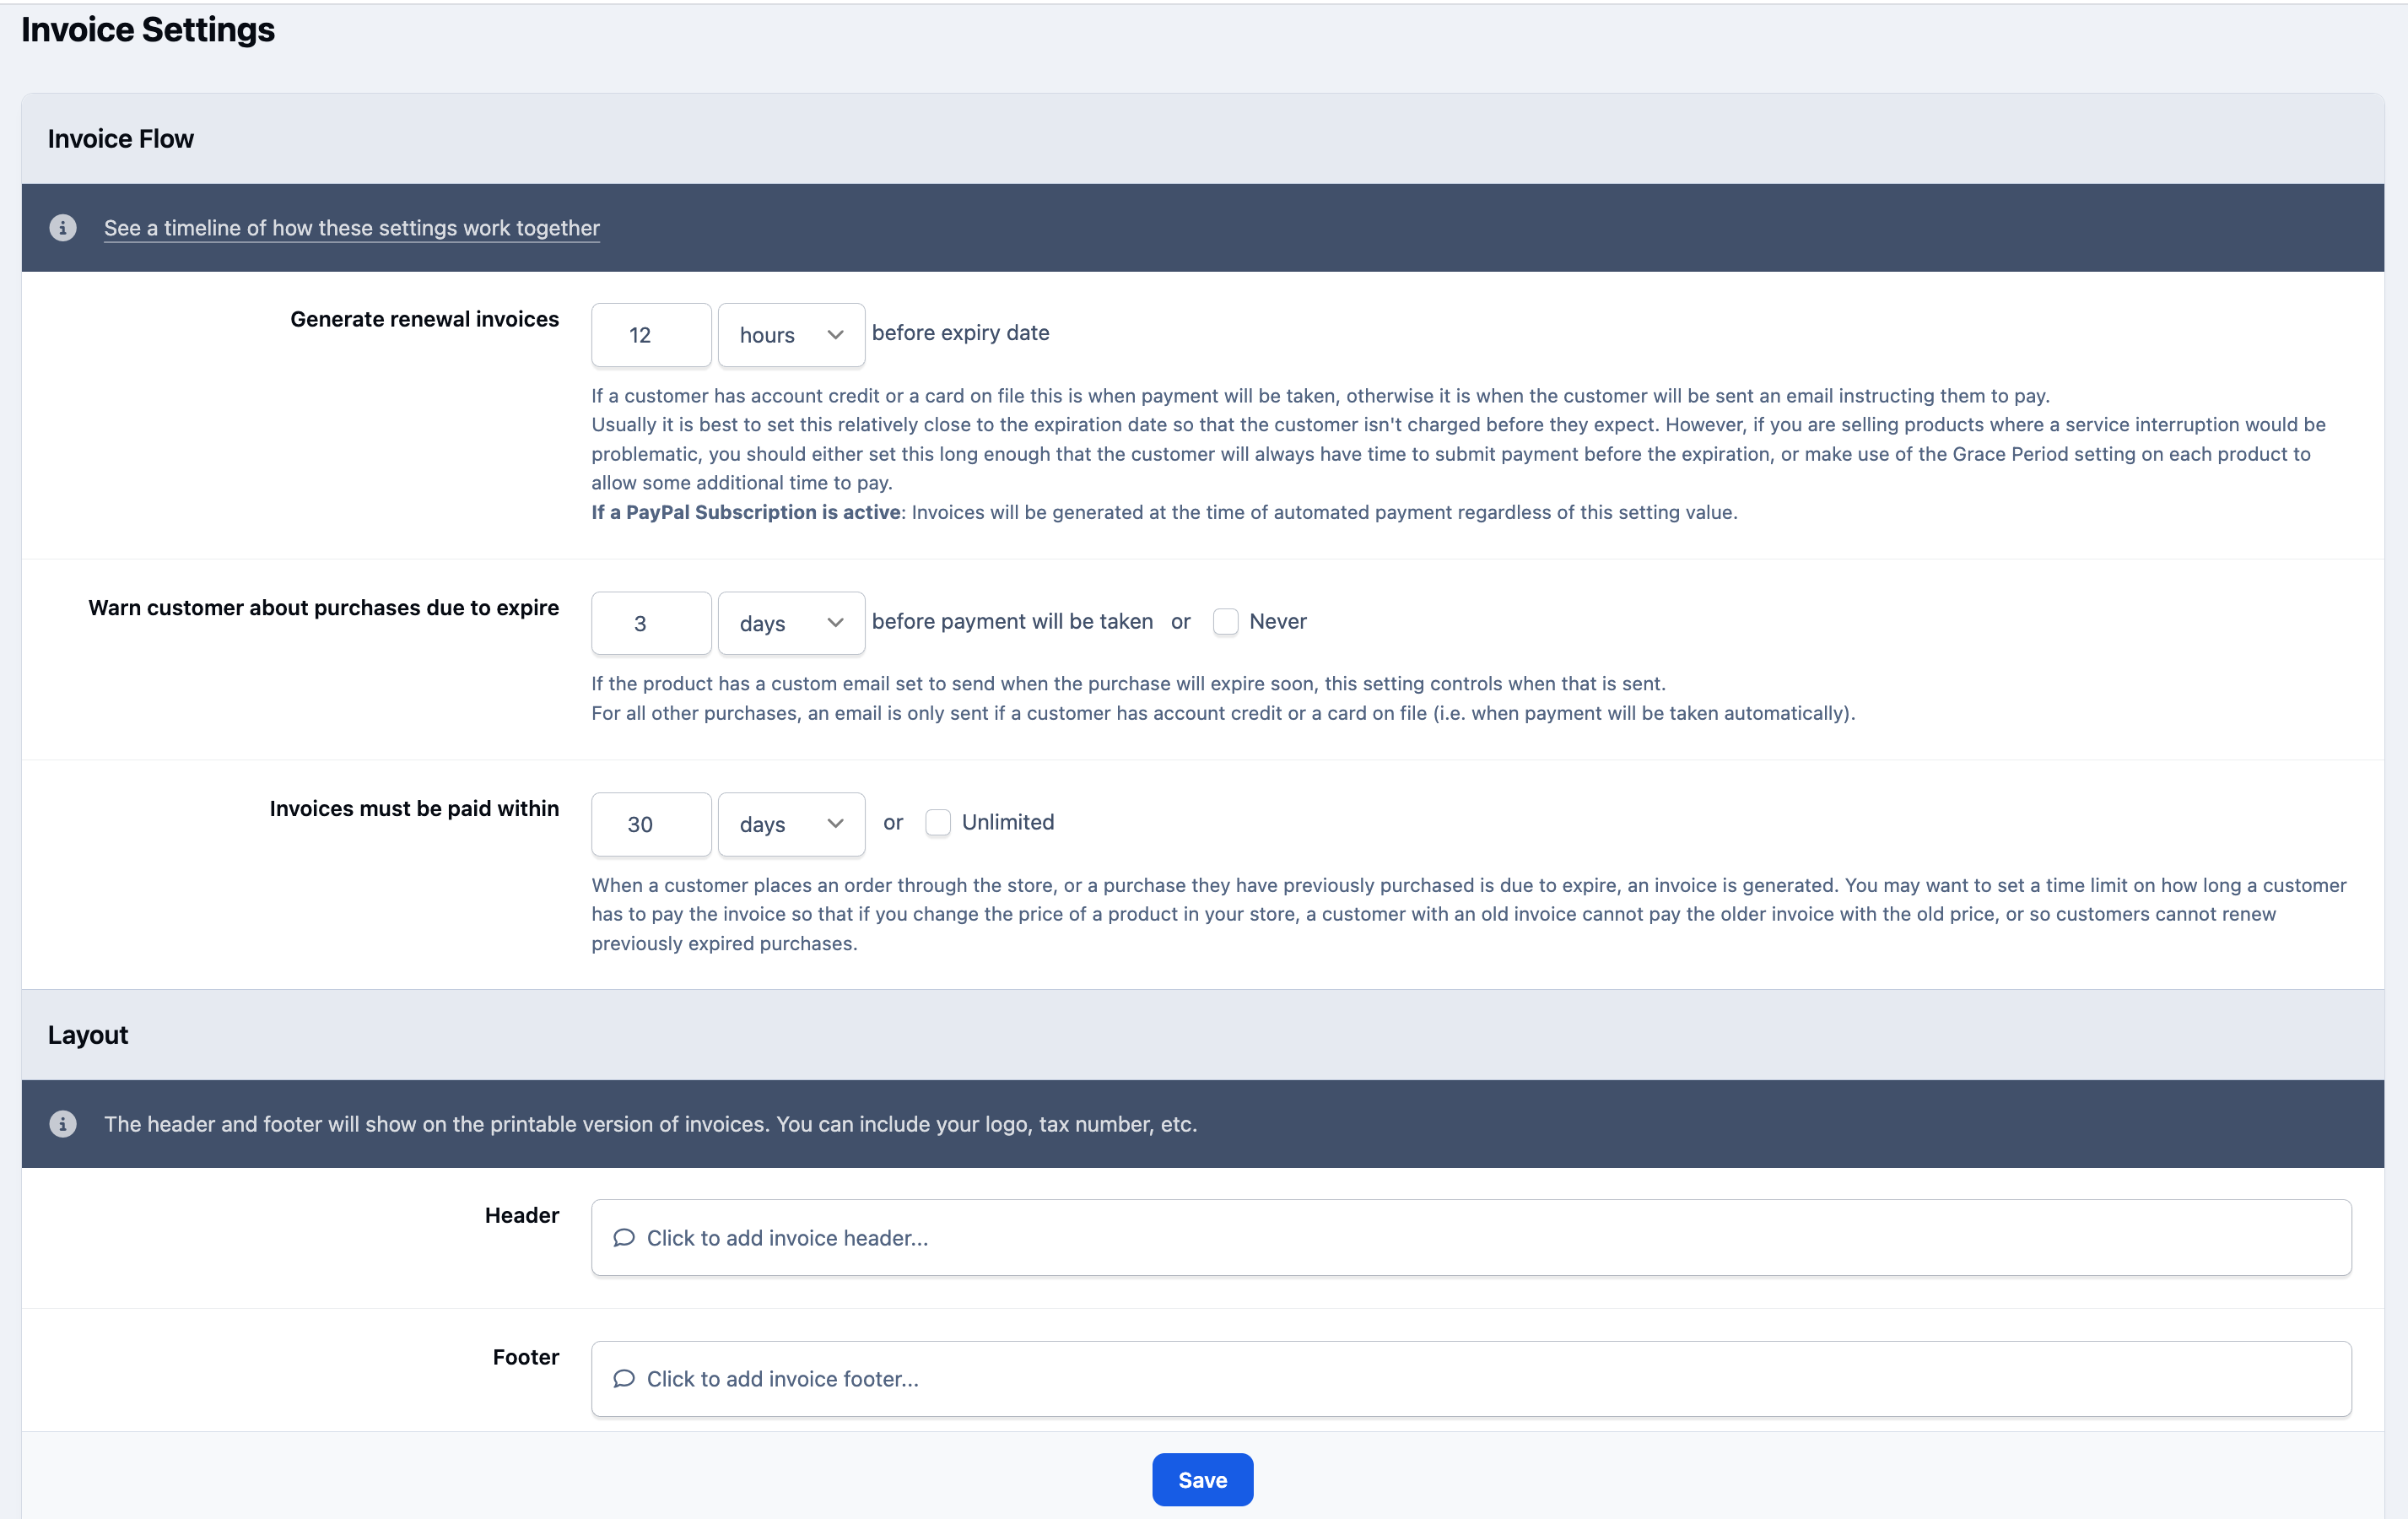
Selecting Invoice Settings at the top of the page allows you to configure headers and footers for your invoices, as well as set key periods such as renewal expiry dates and payment terms. You can see an example of this page in the image below.
Invoice Settings Page
Transactions
It is important to note that a transaction is not the same as an invoice. A transaction simply represents an action that affects the value of an invoice, such as a credit or a payment from services like PayPal or 2Checkout. An invoice can therefore have multiple transactions associated with it, and each transaction may be successful or unsuccessful.
You can access the transactions screen from the following area within your Admin CP:
Commerce → Payments → Transactions.
An example of this can be seen in the screenshot below.
Transaction List
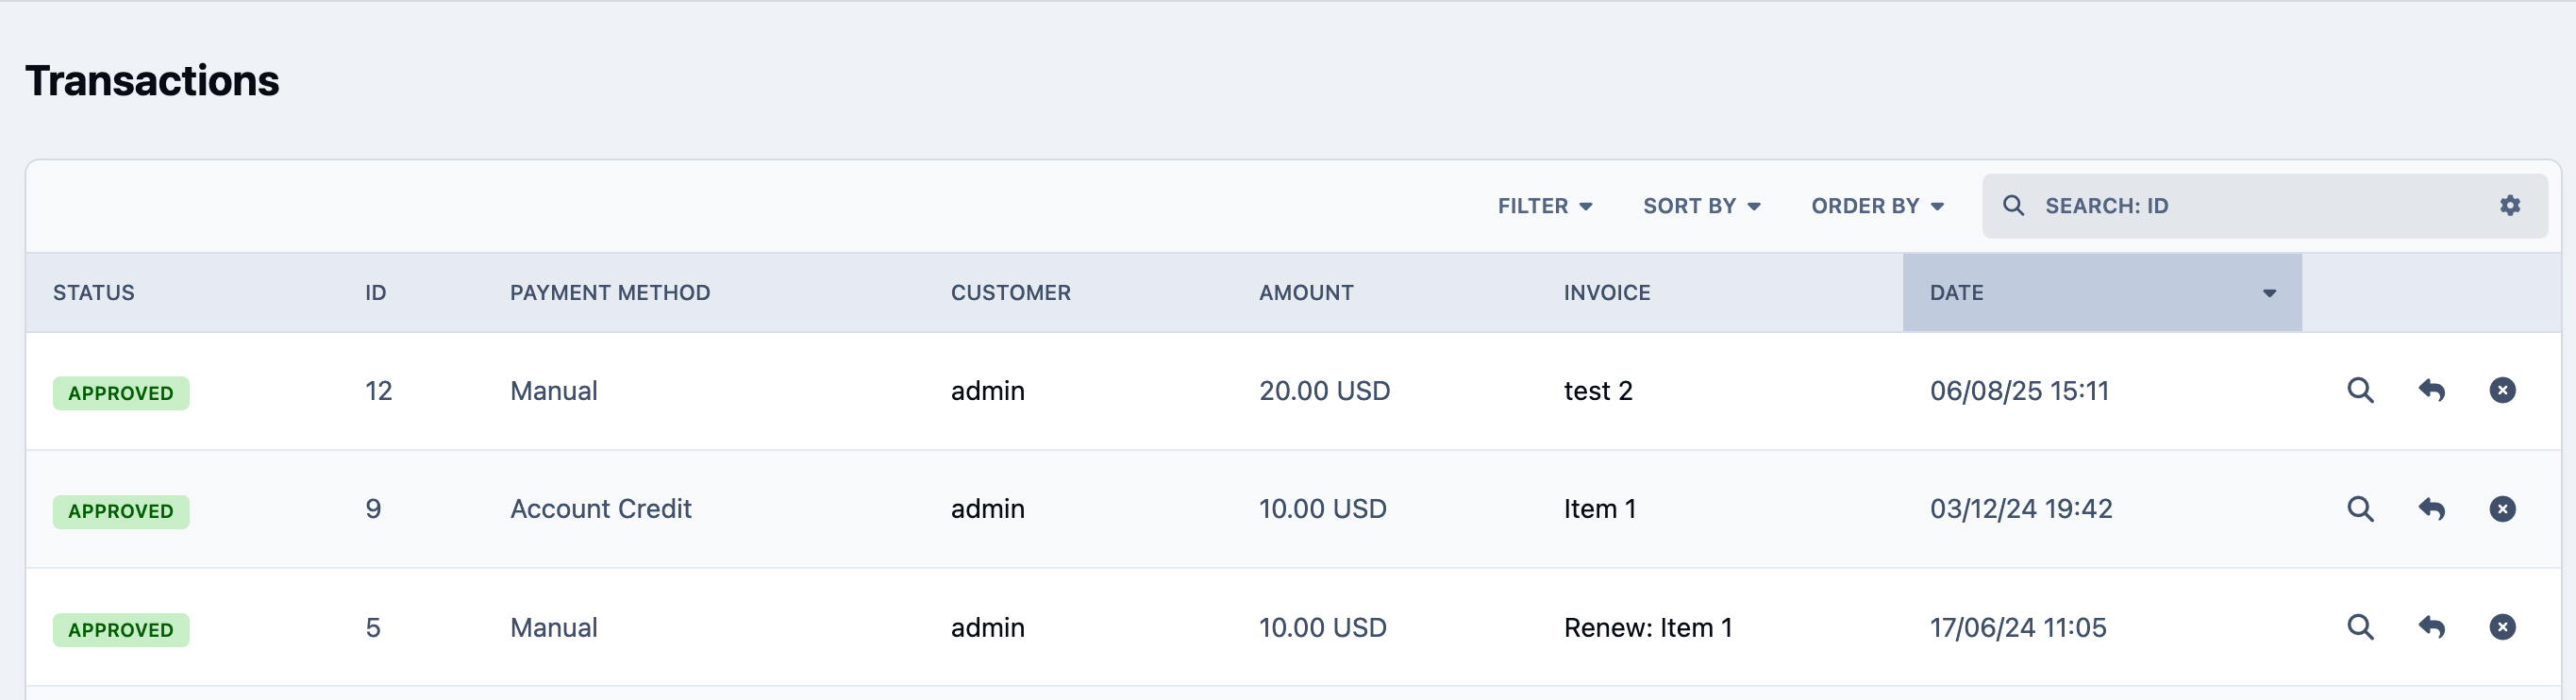
You can see from the screenshot above there are various statuses that a transaction can be in. So you could have any of the following:
Approved - These are transaction which have come through and are also approved. You would see these as that payment has been recieved.
Failed - These are failed transactions, so the payment/credit has not gone through for this transaction
Held for approval - These require approval. You can approve these via the tick icon in the list
Refunded - These are items which you have refunded on the system.
Within this area you can also view the transaction using the magnifying glass icon or delete them. You will also see there is a "left arrow" icon which can be used to refund an individual transaction.
Creating Invoices Manually
Customers will be automatically invoiced when making a purchase on the system. However, there may be times when you need to manually create an invoice for a product or an ad-hoc charge. You can create a new invoice from Commerce → Payments → Invoices by selecting the Create Invoice button.
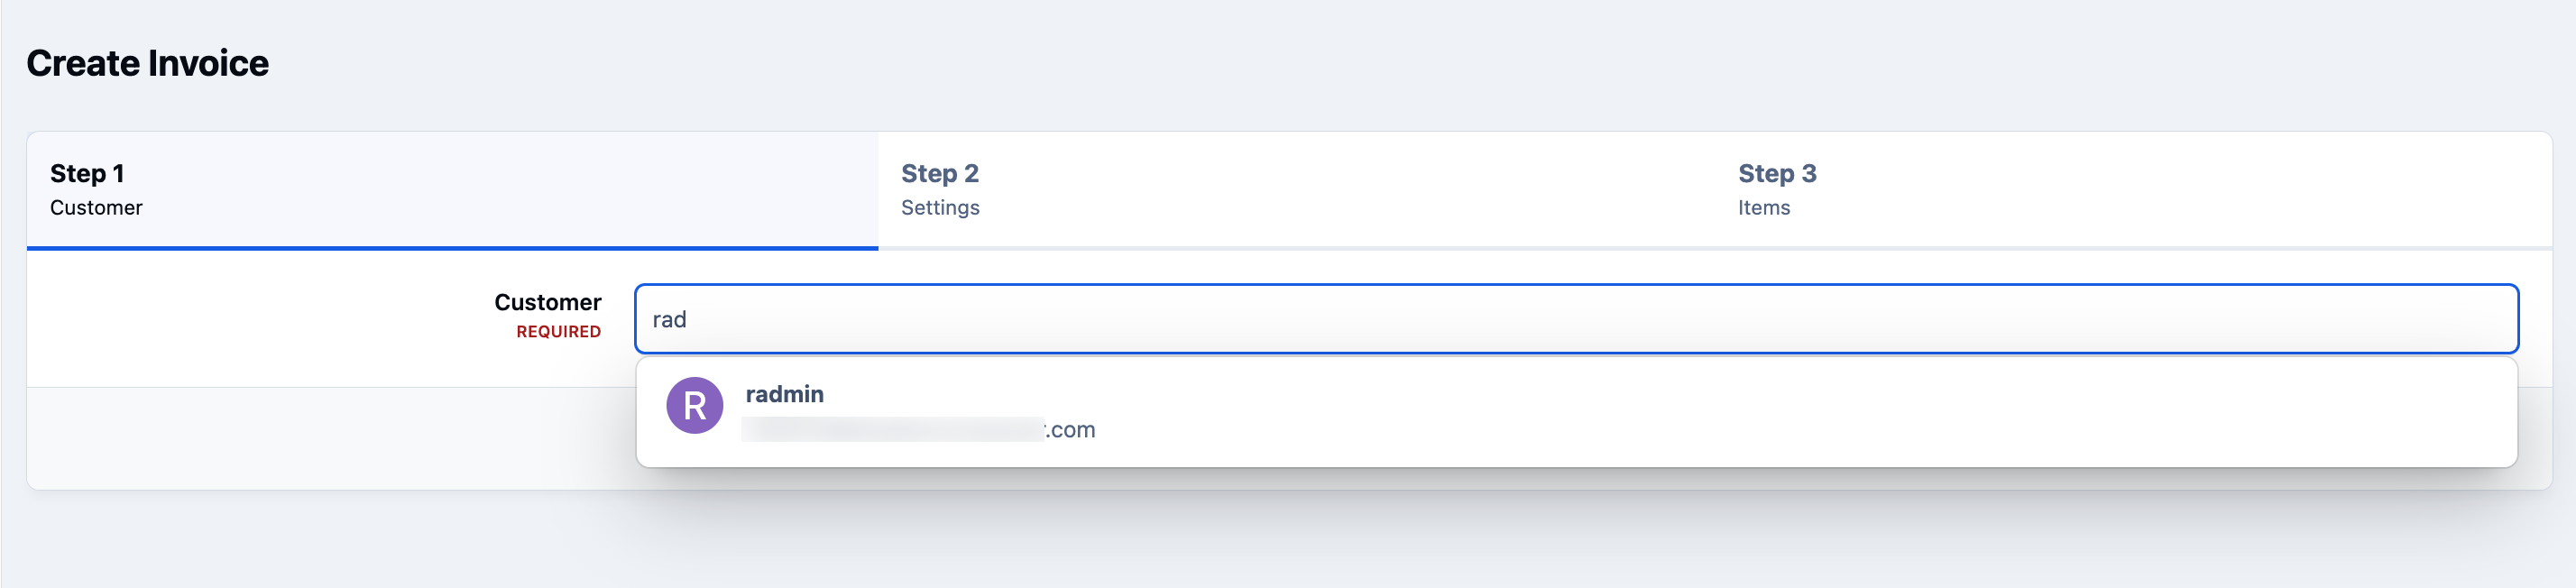
Once selected, you will be prompted to choose a customer. Start typing into the box to see suggested matches from your customer list.
Selecting a Customer
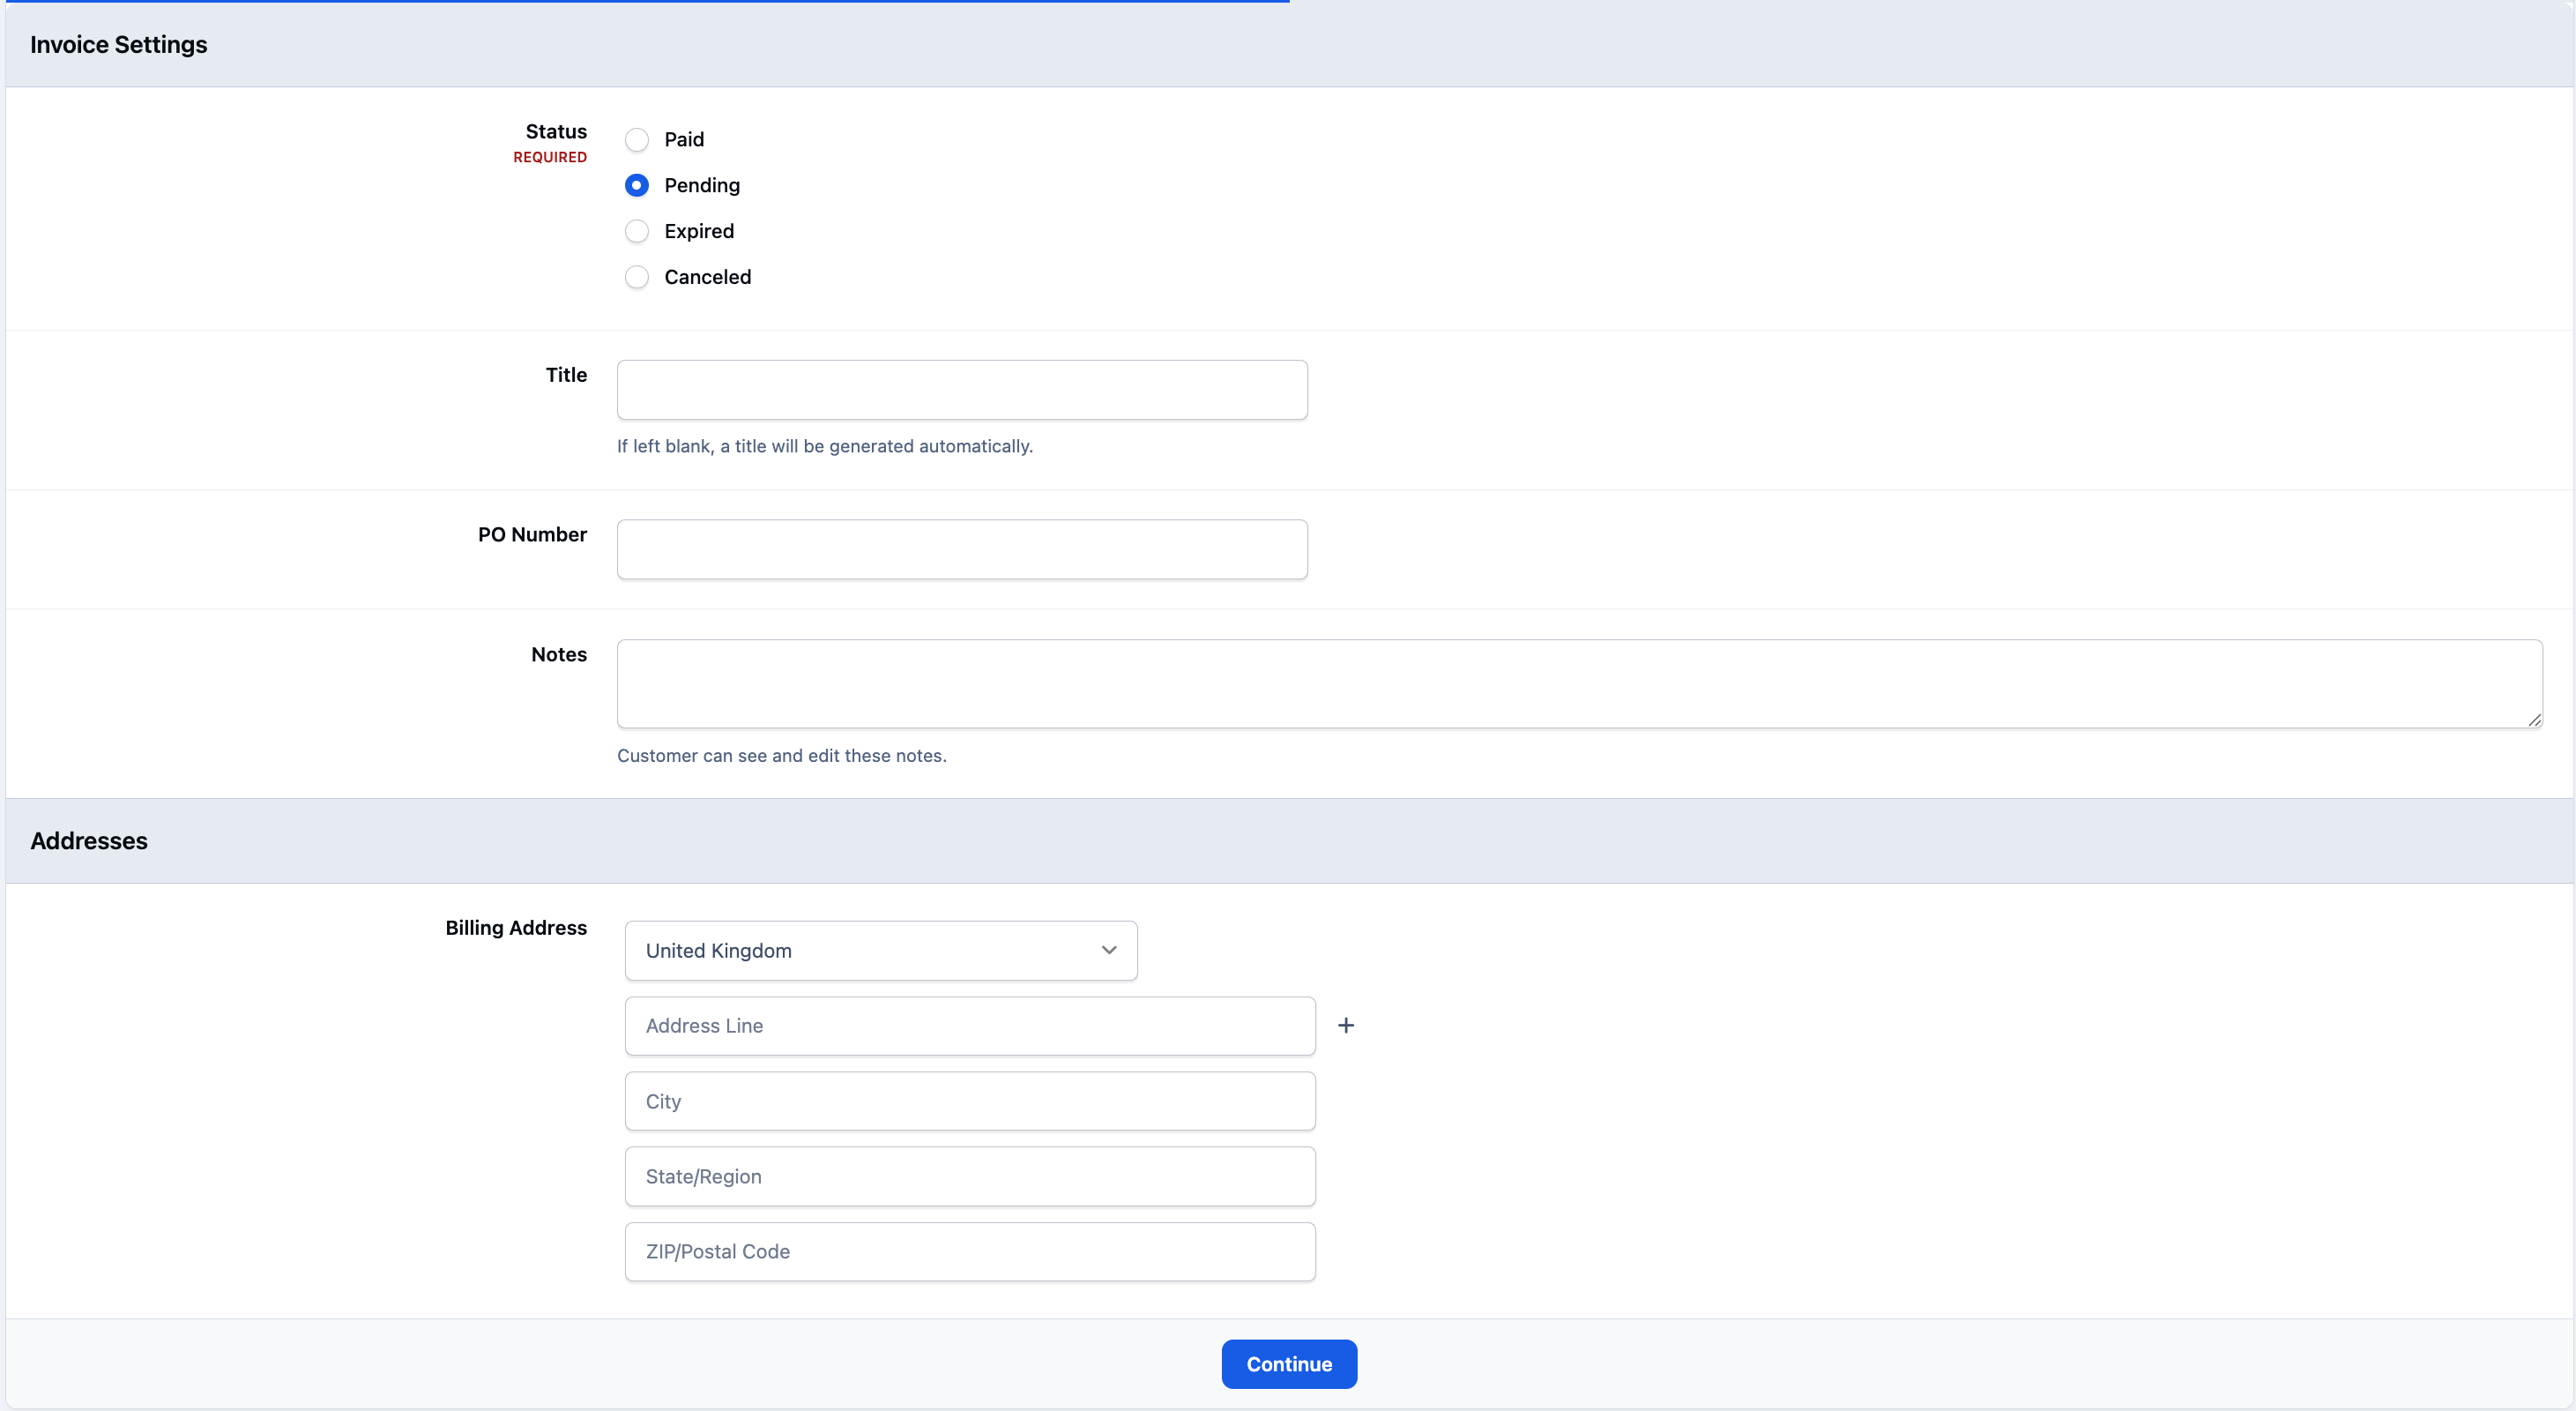
Next, you will be asked to enter the basic details of the invoice. You can add a title if you wish, but this is optional—if left blank, one will be generated automatically. You can also set the invoice to the desired status at this stage, which is useful if, for example, the customer has already paid.
Adding Invoice Details
You will then be shown the invoice detail screen itself. You will need to add items to this using the 'Add' button in the top right as shown in the image below.
Select Items from the List
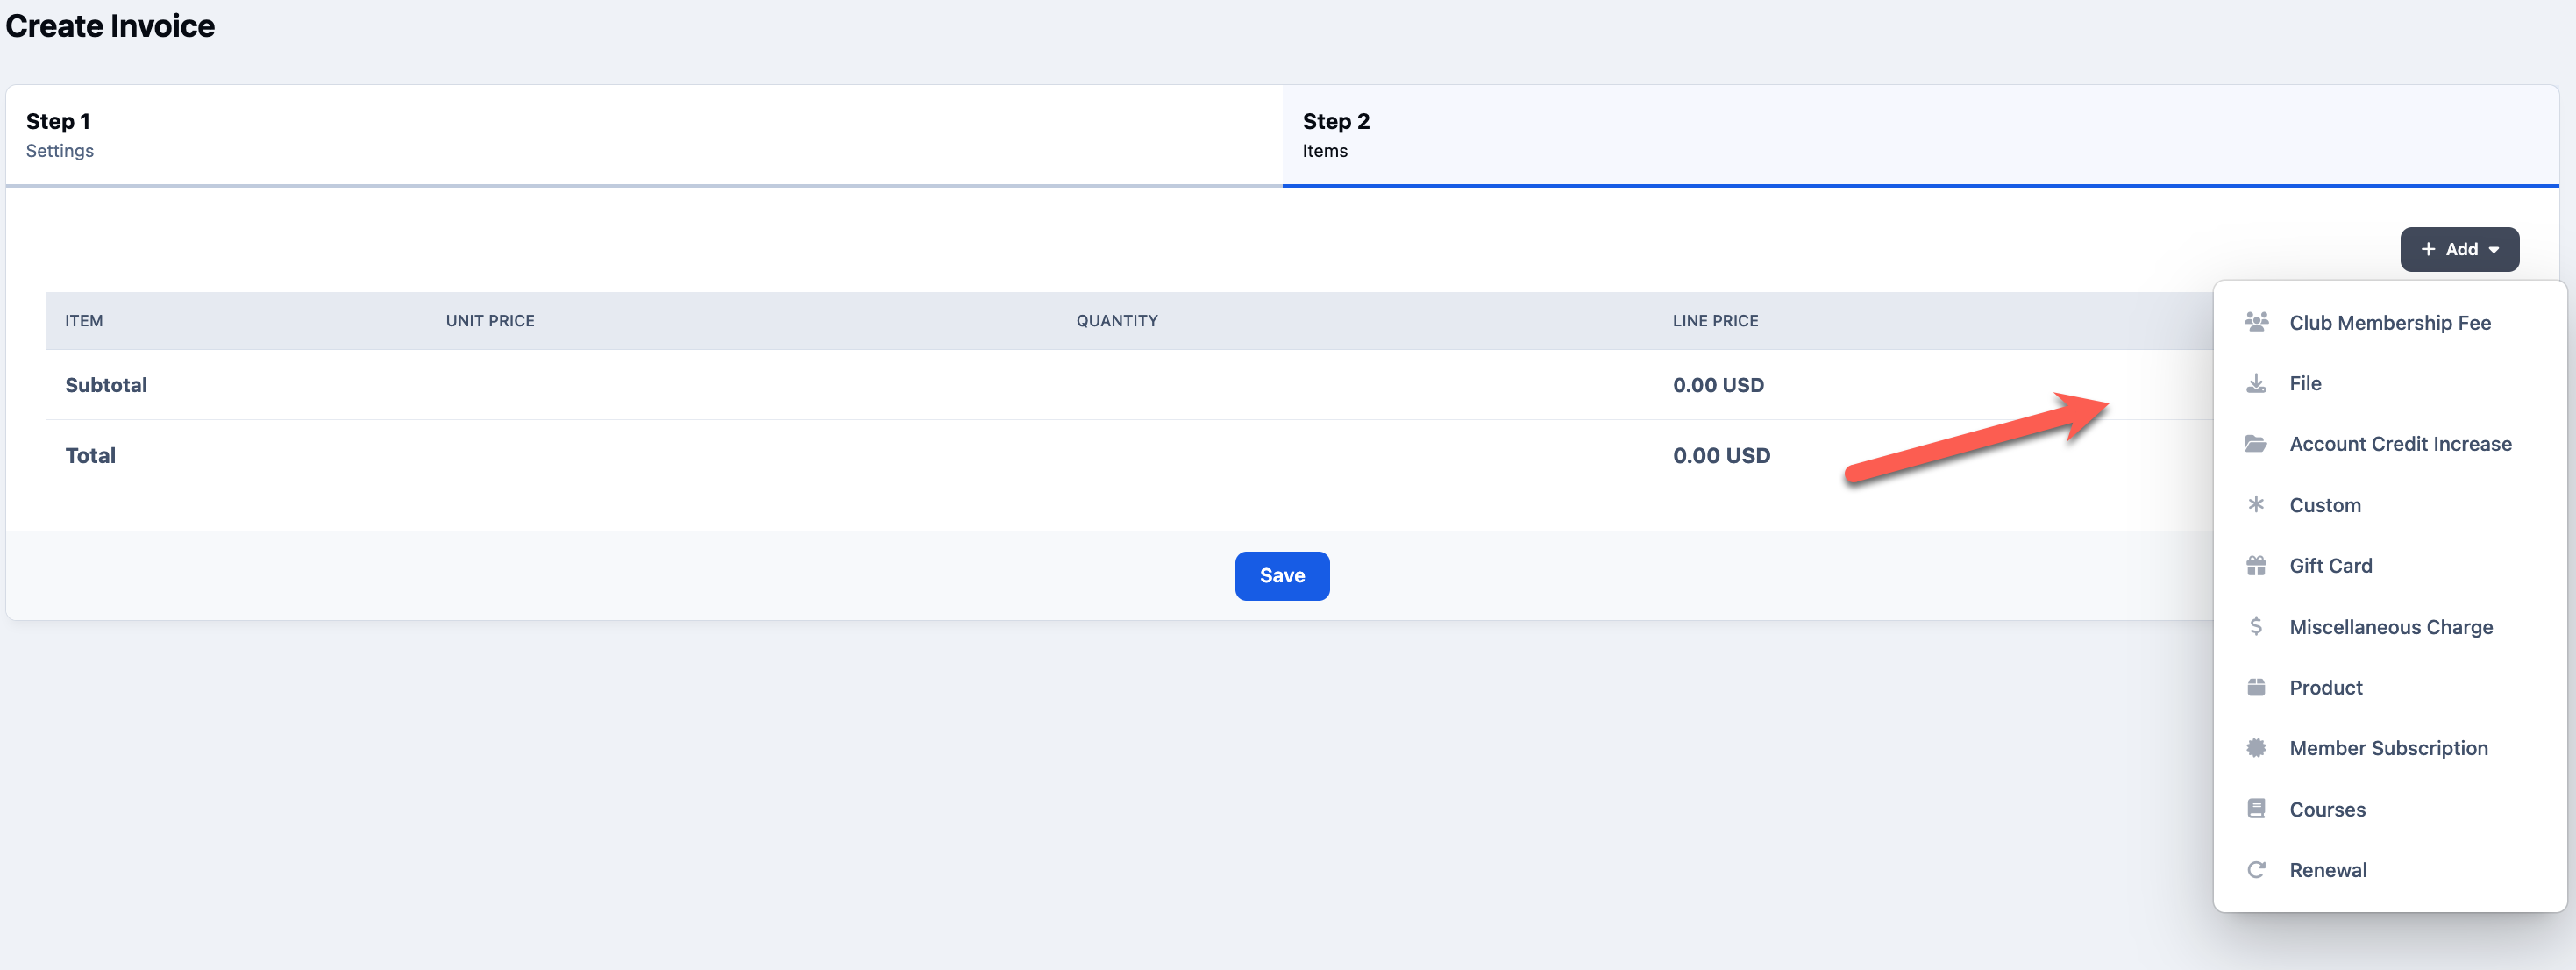
From this menu, you can select the different types of items to add to the invoice. You can include as many line items as needed on a single invoice. Descriptions of each option are provided below.
Club Membership Fee - Purchase entry to a club
Courses - Charge for enrolment in a course
File - Purchase of a file in the downloads system
Account Credit Increment - This is a charge for increasing a members credit balance.
Custom - This will allow you to build a custom item using the product creation menus
Gift Card - Charges for gift cards on the system which allows you to enter the gift card details
Miscellaneous Charge - Allows you to set up a charge for anything you like not covered in other areas.
Product - A charge for a product which is already set up on the system
Member Subscription - Adding an invoice for purchase of a subscription item
Renewal - A renewal charge for an item on the system. useful if someone would like to pay for more than one renewal at a time
Note
Which items are available will depend on what features you have active within the platform. For example, 'File' will only appear if paid files are enabled within Downloads.
Recommended Comments