


Within Commerce, you can create two different types of products. In this section, we’ll walk through how to add a “Normal” product.
A Normal product is typically used for digital goods, such as downloadable files or other non-physical items that customers can access immediately after purchase.
Product Settings
To add a new product, navigate to the following area of your Admin CP
Commerce → Store → Products
From here, click the + icon next to an existing product group to add a new item. (If needed, you can create a new group by selecting the 'Create New Group' button.)
When creating a product, you’ll first need to choose from the available options under the Type section, as shown in the screenshot below. For this example, we’ll select 'Normal Product'.
Main Product Settings
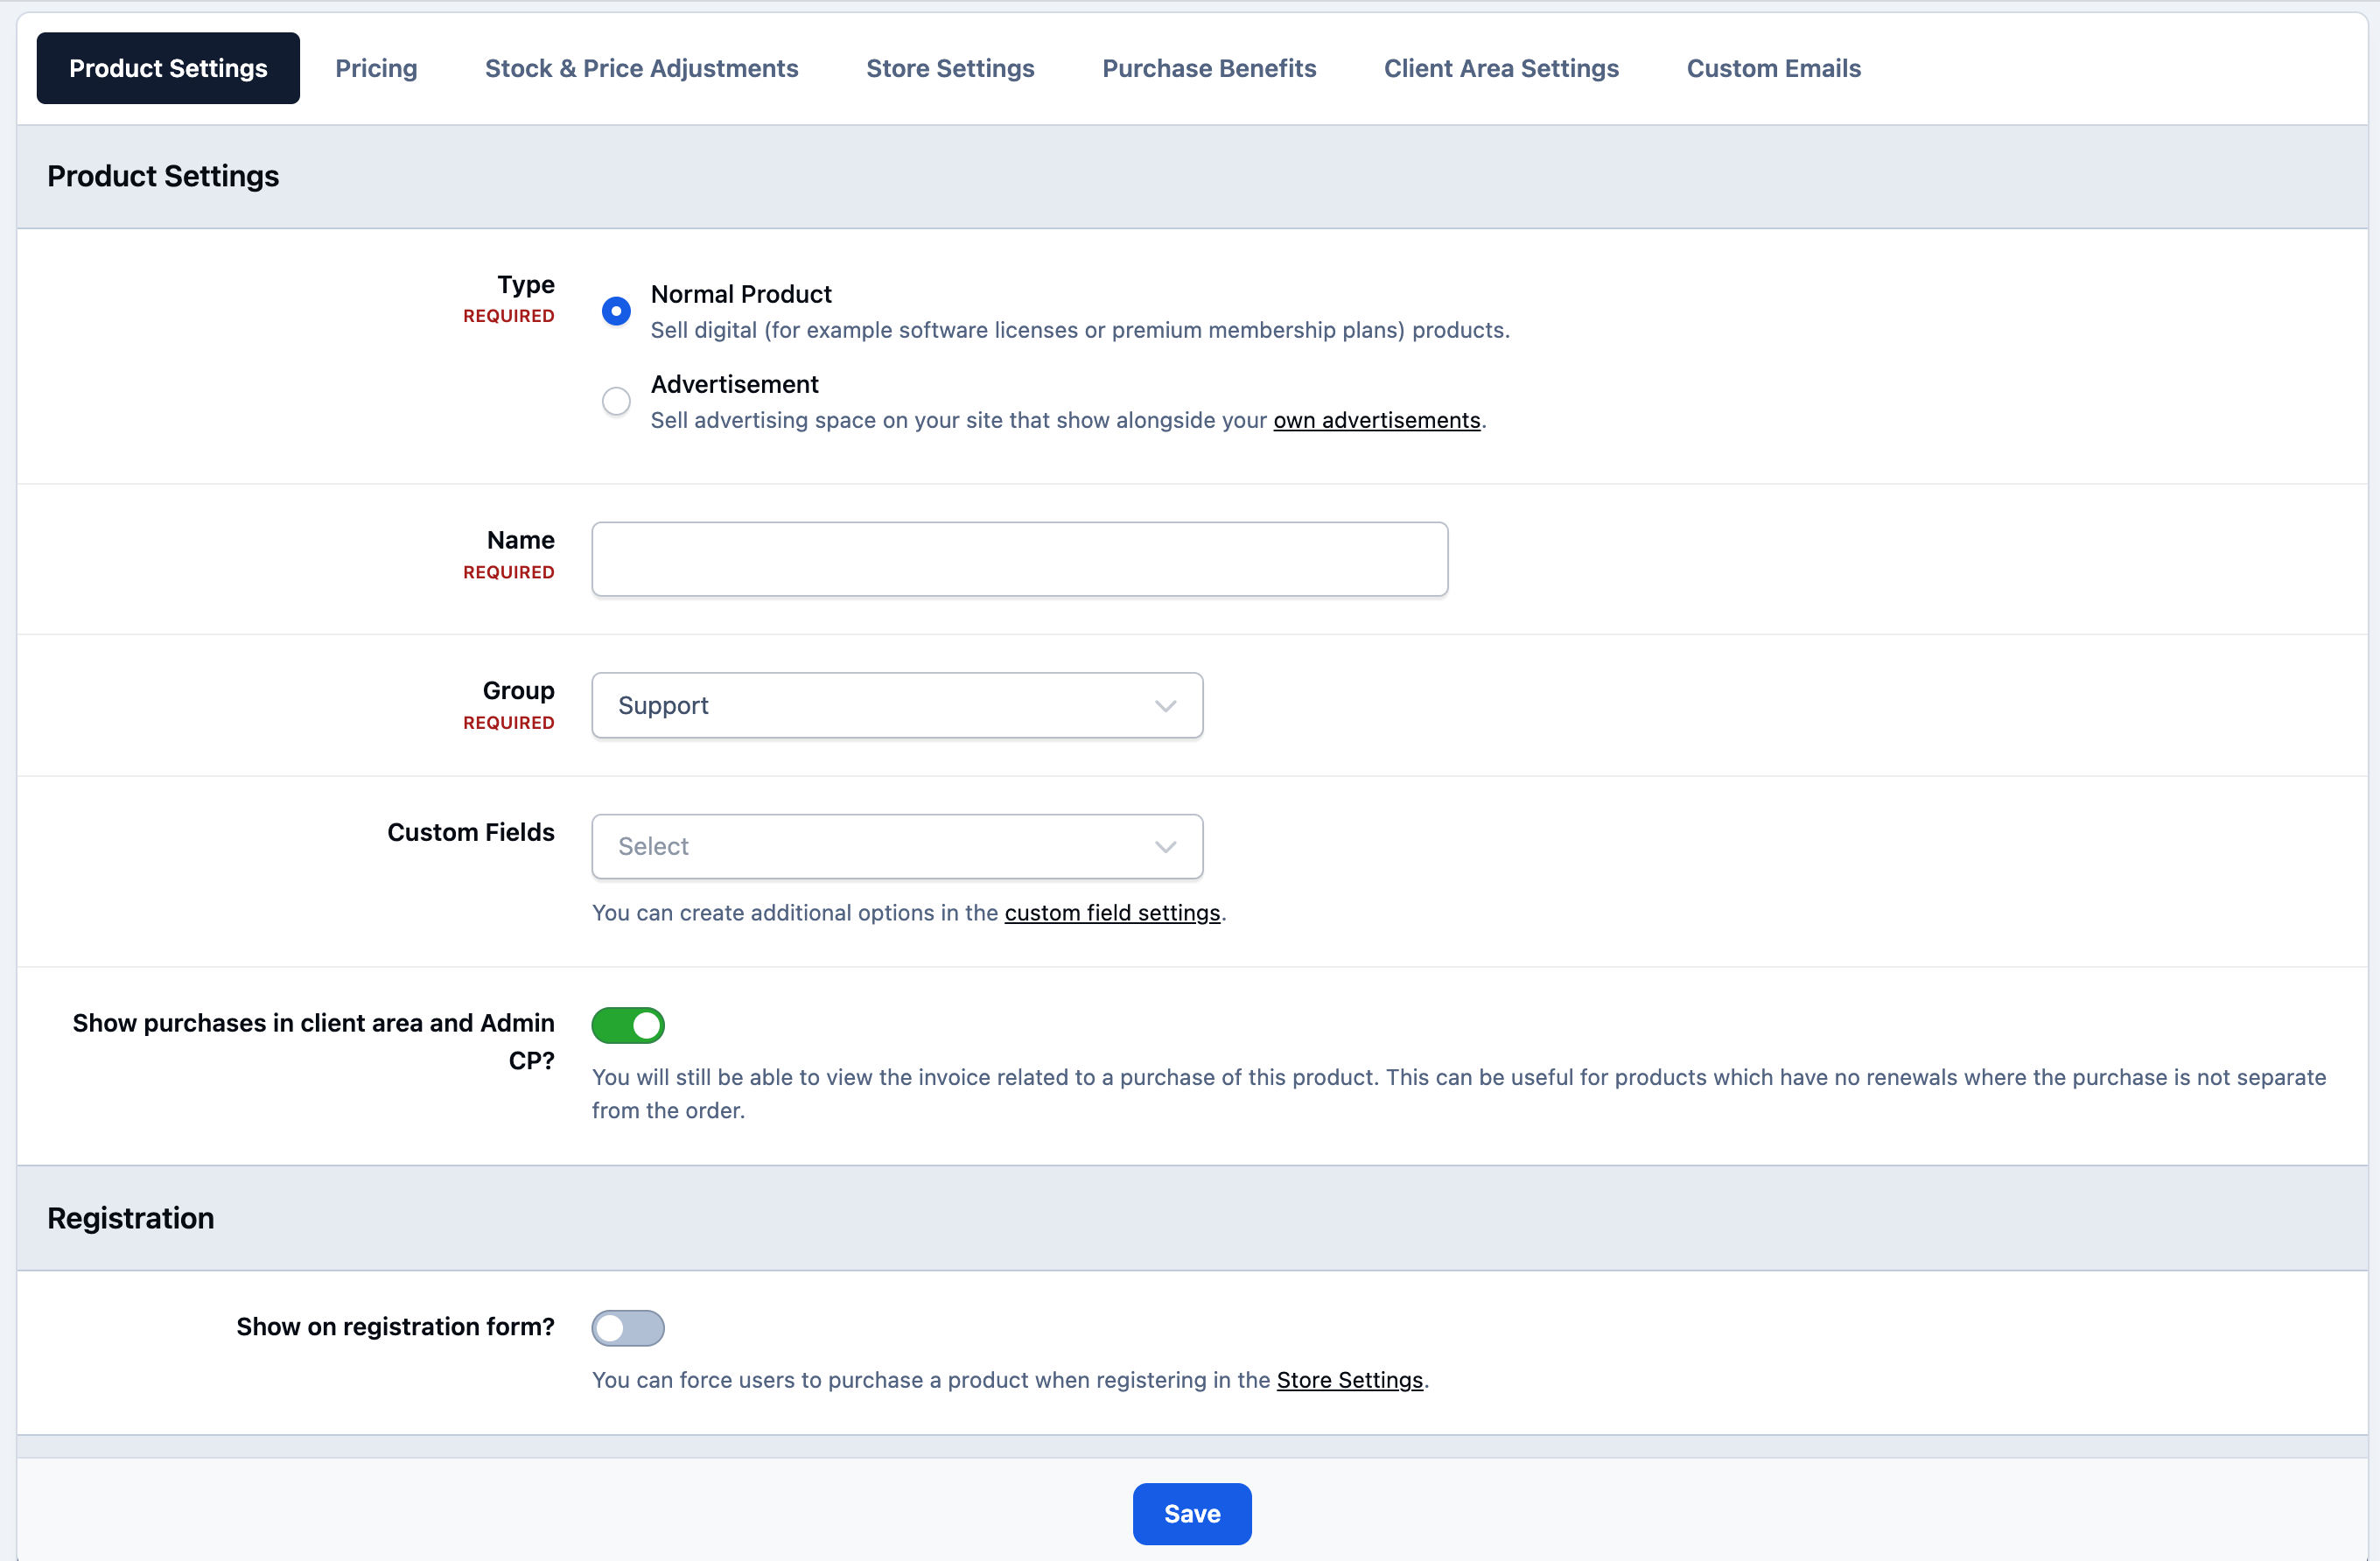
On this same page, you’ll also see additional configuration options, such as selecting the product group it belongs to, applying any custom fields you have created for this product type, and choosing whether the product should be displayed on the registration form.
Association With Other Products
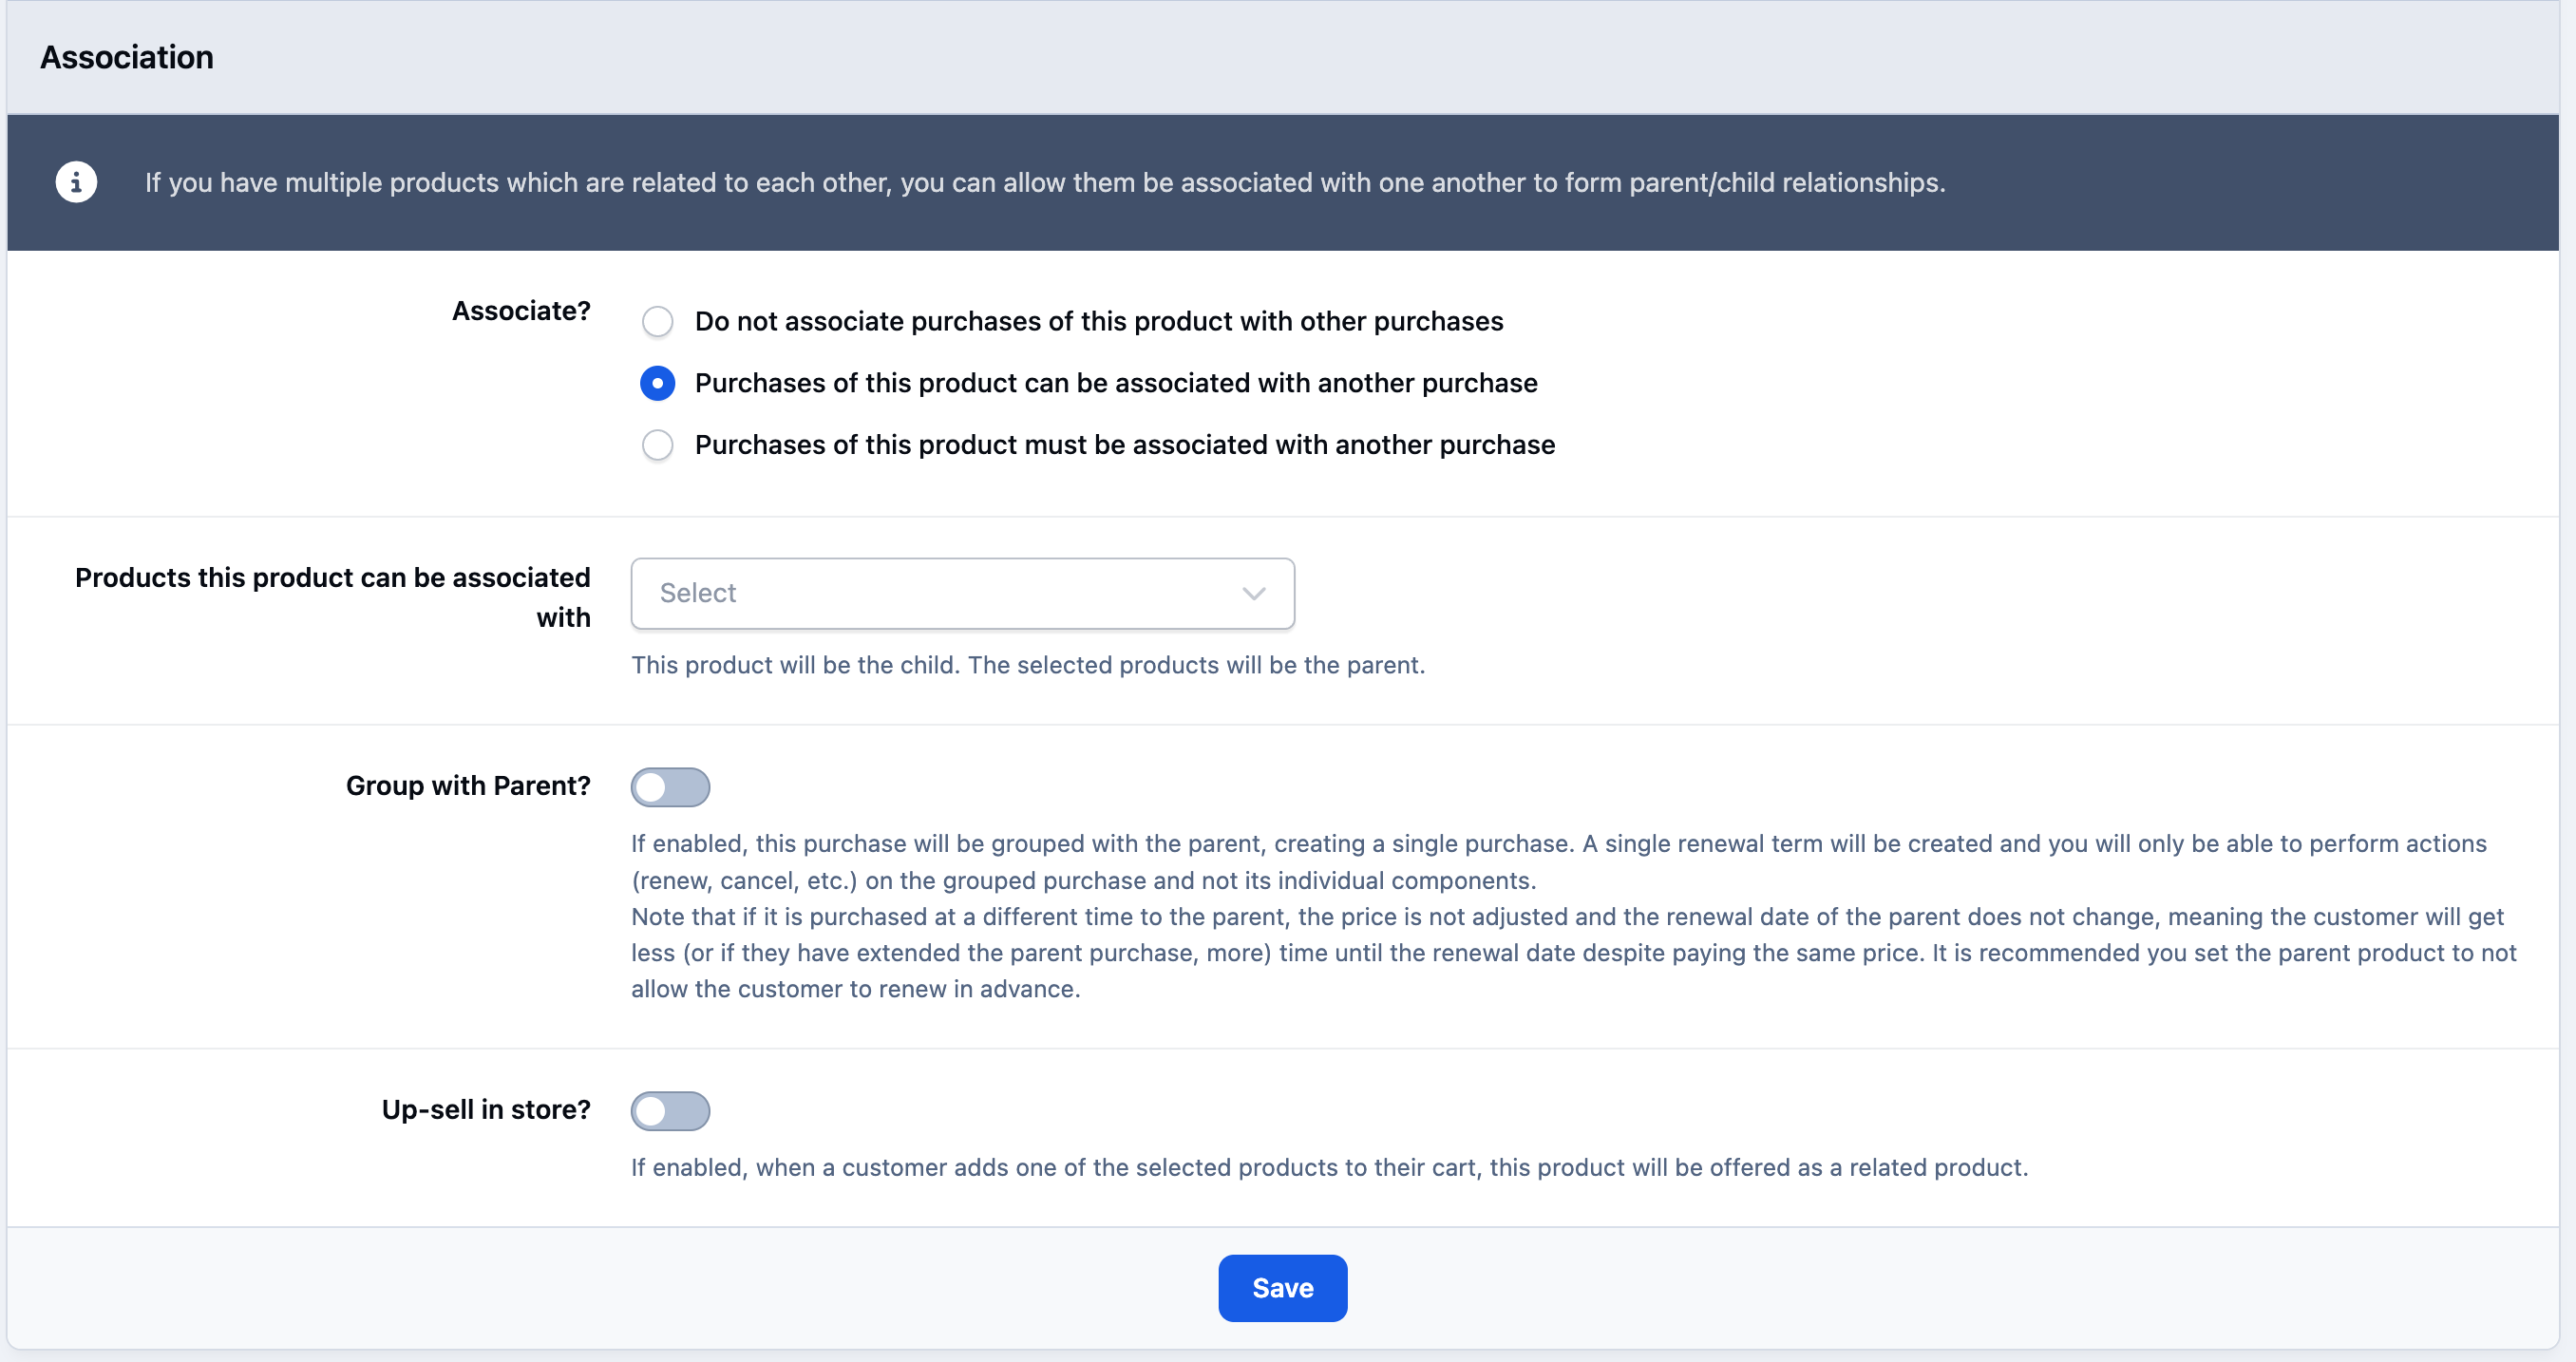
At the bottom of the page, you’ll see a section similar to the screenshot below for product associations. This allows you to link one product to another.
For example, if you may sell different types of add-on for some software, you may want those items to be associated with another product (the main software item). You can easily do this by selecting the relevant products from the list provided.
If a product must be purchased alongside another item, you can require the association. Alternatively, you can mark it as “can be associated”, which allows it to be linked to another product but does not make it mandatory.
Associating With Another Product
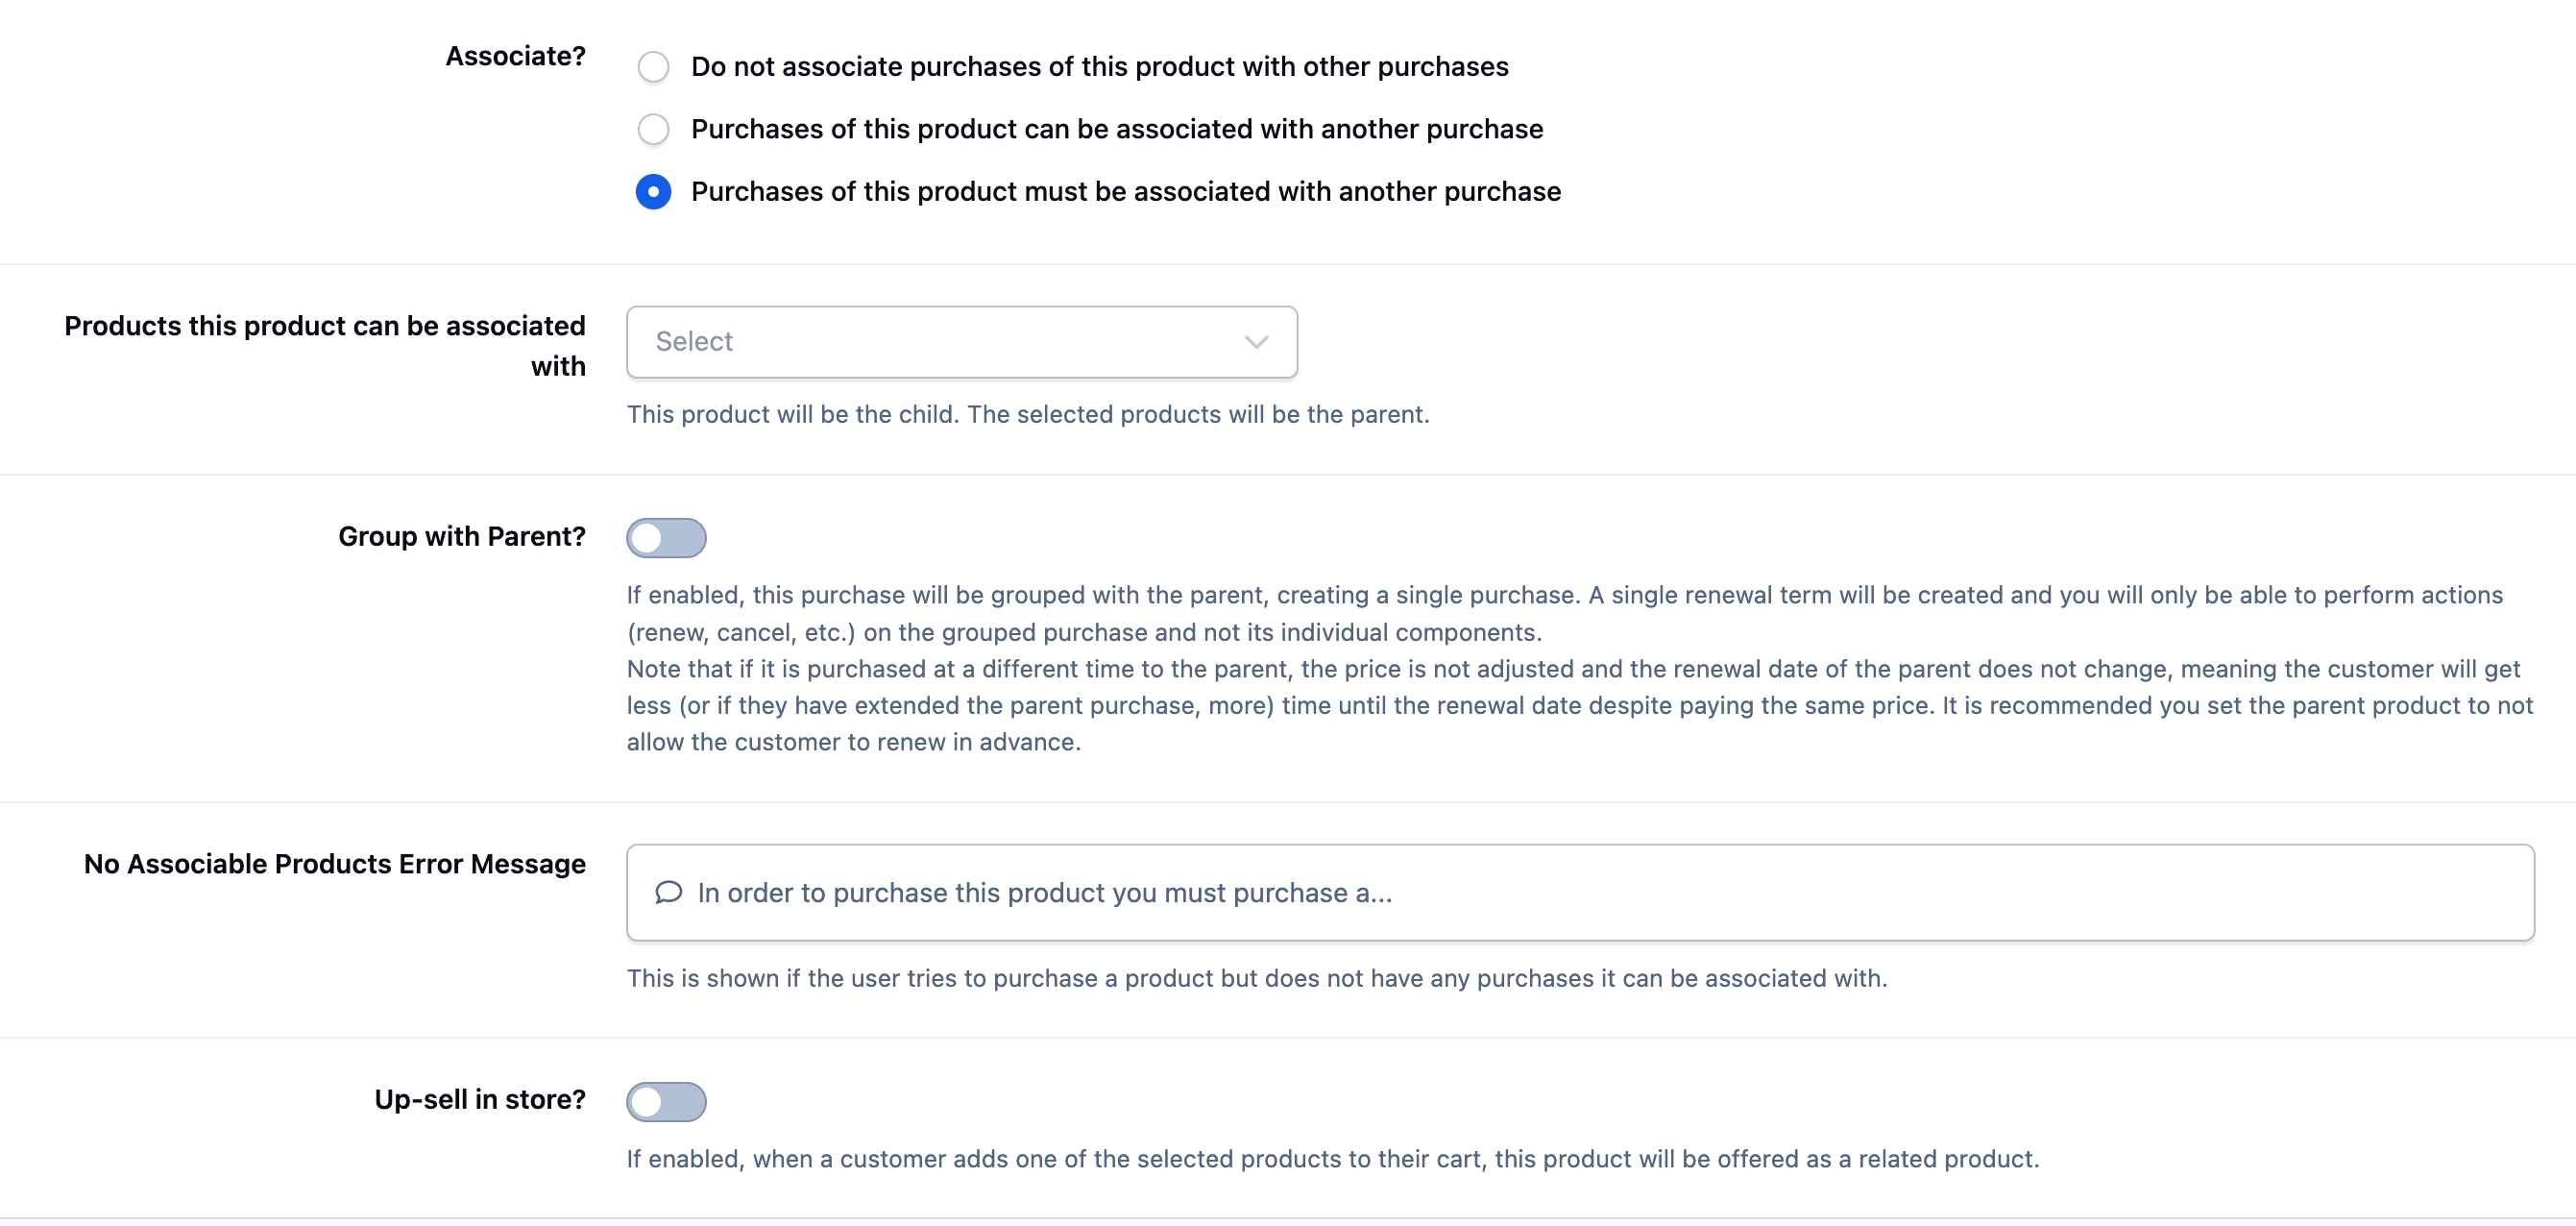
Alternatively, you may wish to make an association mandatory. For example, if someone purchases an add-on application, it must be associated with a Core license. This ensures that dependent products cannot be purchased on their own.
You’ll also notice the 'Group with Parent' option. This allows renewable products to be grouped together and treated as a single renewal. For example, instead of generating separate renewal invoices for each application, you can combine them into one consolidated renewal — just as IPS does for its own licensing structure.
Finally, within this section, you’ll see the 'Up-sell in Store' option. This allows you to promote this product as an additional purchase when a customer buys another related item, helping increase average order value.
Forcing Product Association
Pricing
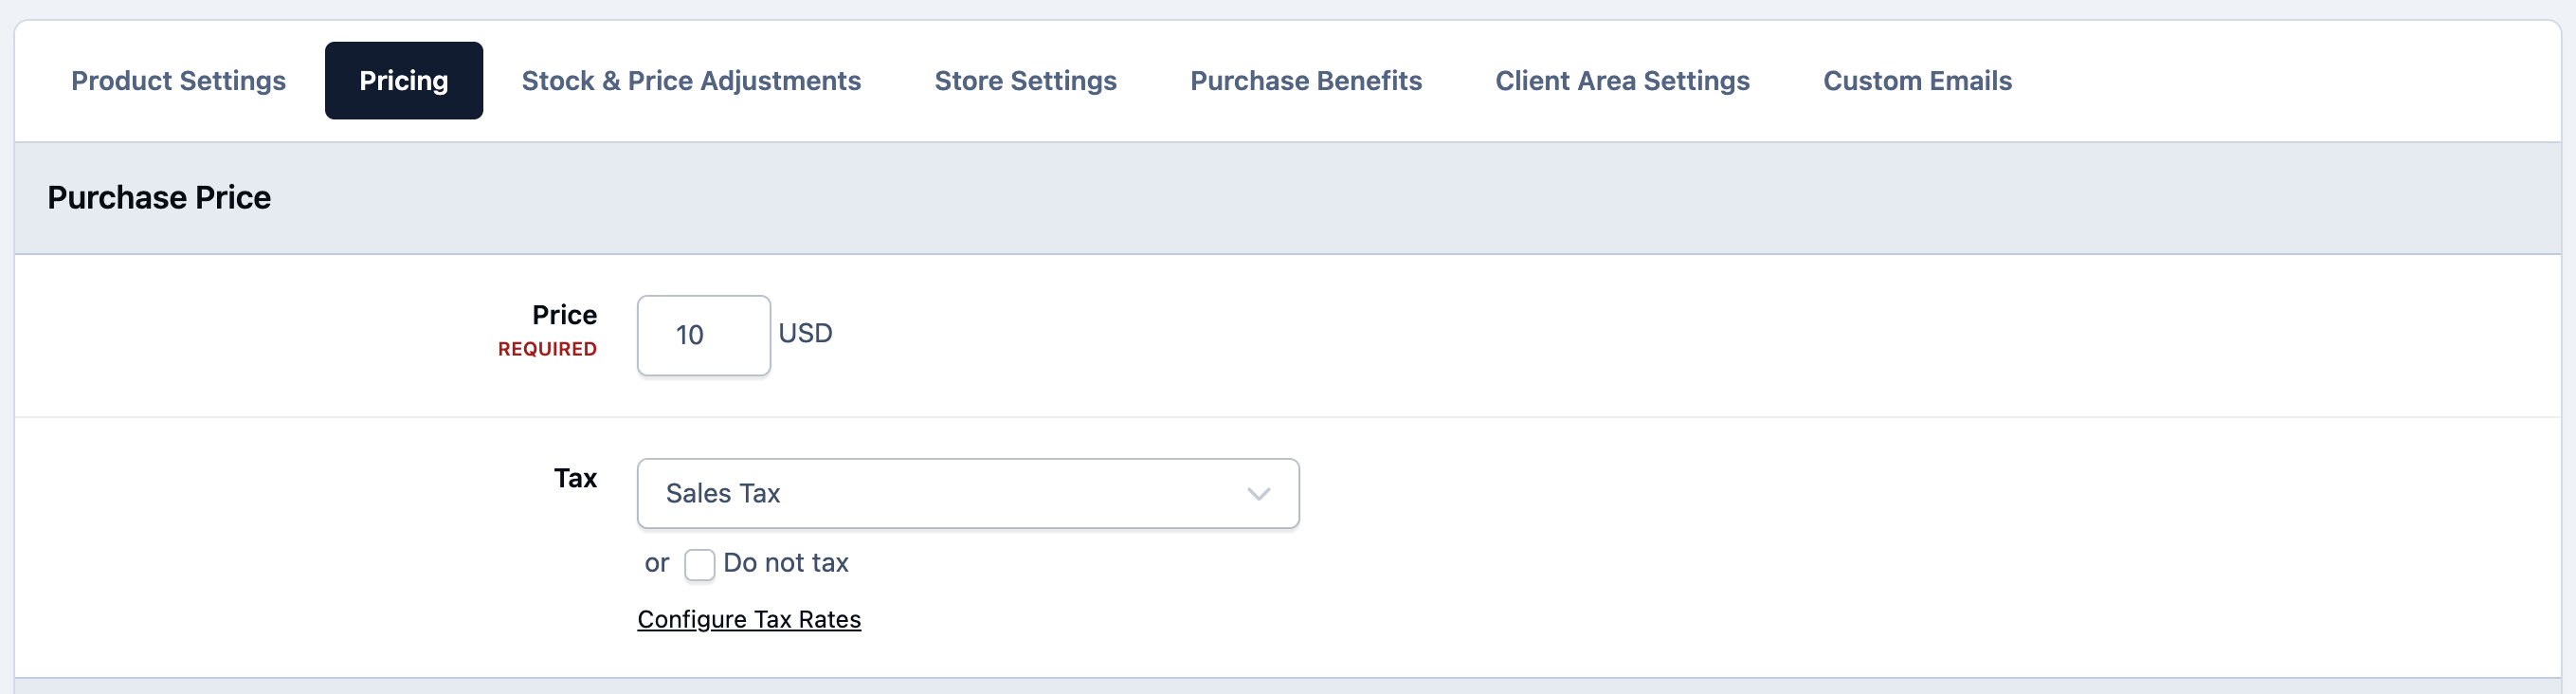
Within the 'Pricing' tab, the first step is to enter the product’s price.
After setting the price, you can choose an applicable tax rate from the options you’ve previously configured. This ensures the correct tax is applied during checkout, based on your Commerce tax settings.
Pricing a Product
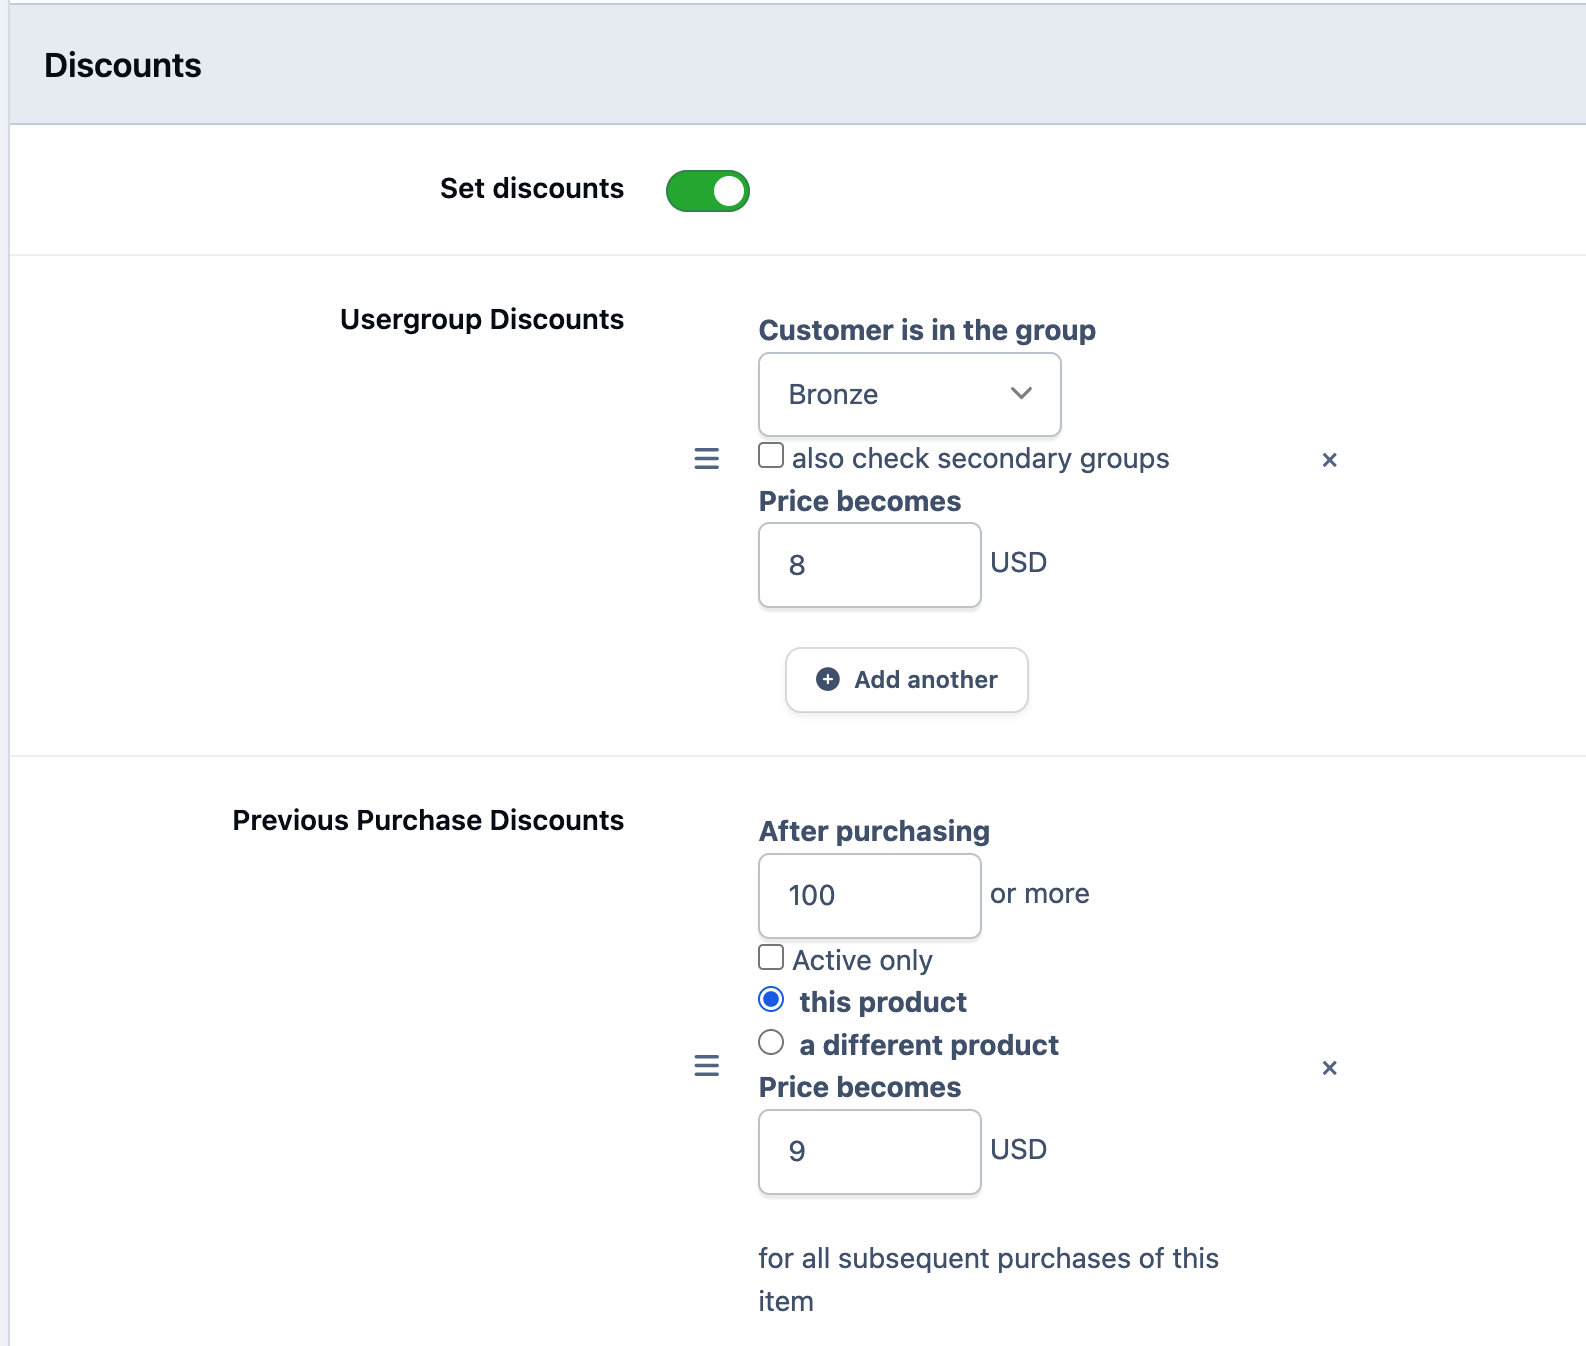
In this section, you can also configure discounts by completing the relevant fields for user group discounts, previous purchase discounts, or sale discounts.
You can add multiple tiers or variations for each discount type by selecting the 'Add Another' button beneath the relevant section. In the example shown here, a discount has been created specifically for members of the Bronze group.
Product Discount Setup
Renewable Items
When creating products, you may want to configure some as renewable items. You’ll commonly see this model used for marketplace purchases or support renewals.
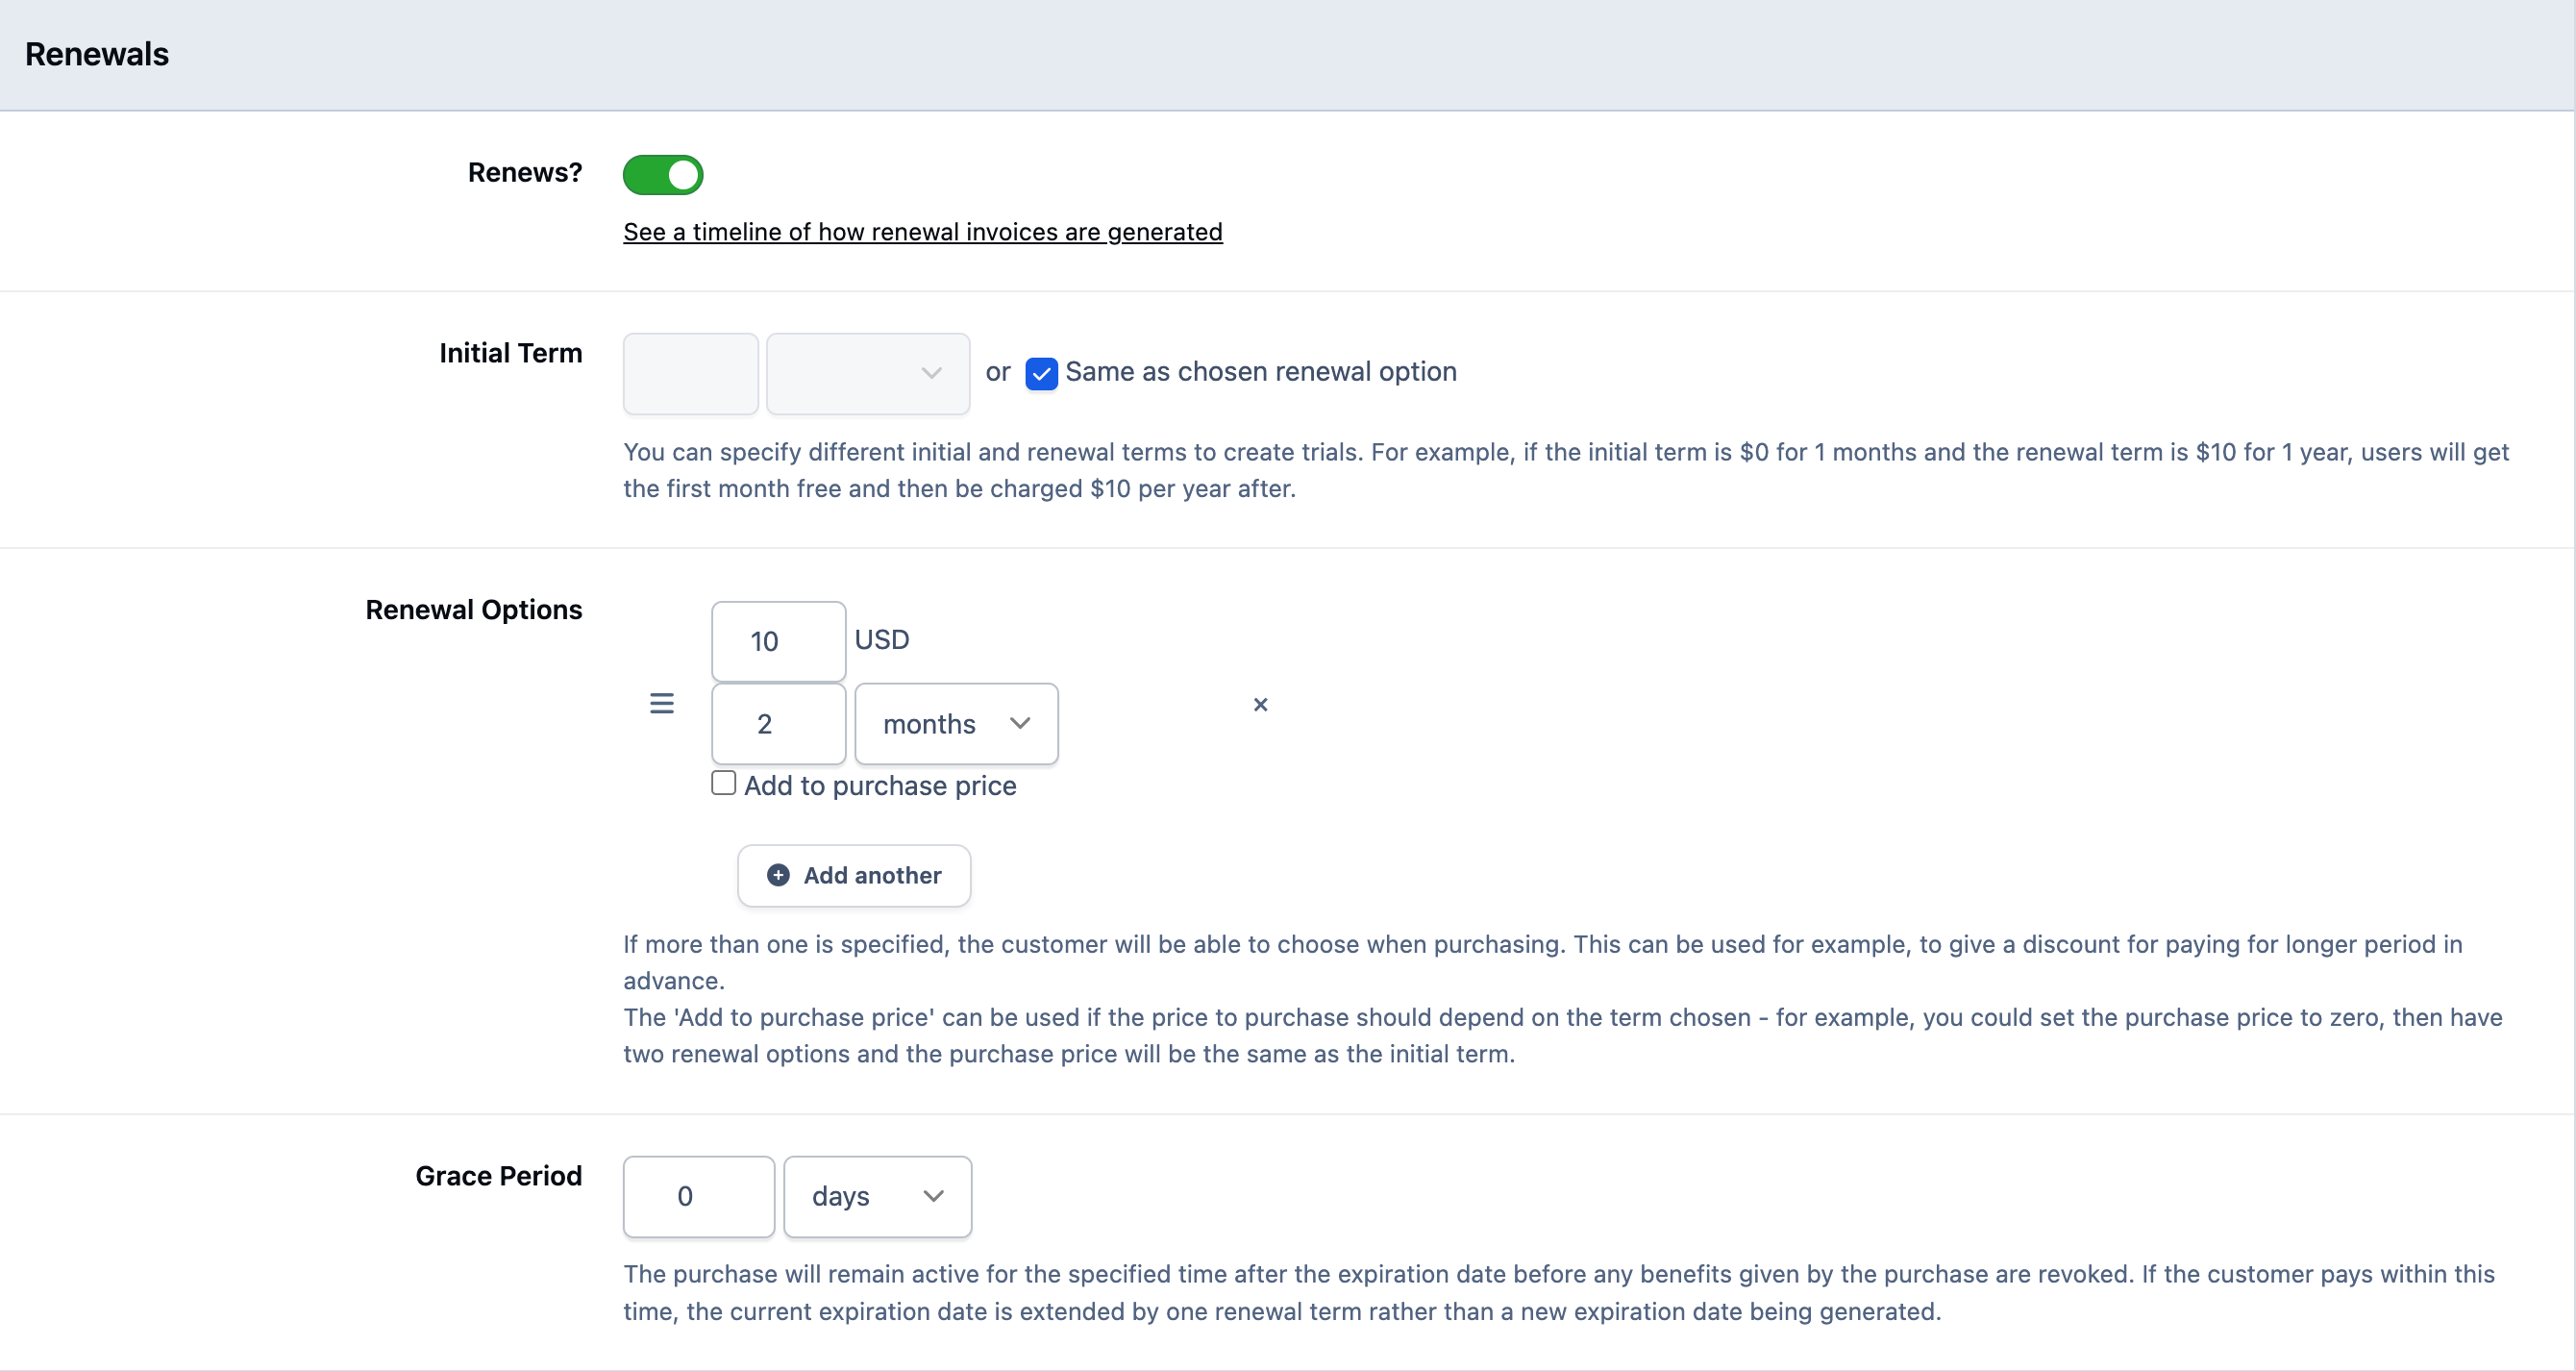
To set up a renewable product, enable the 'Renews?' option and define the renewal amount and billing period. The system will then automatically generate invoices for the specified amount at the chosen interval.
You’ll also see an 'Initial Term option'. This is particularly useful for offering discounted introductory pricing or free trial periods. For example, you could set the initial purchase price to 0 and the initial term to 1 week. This would allow the customer to access the product free for one week, after which the regular renewal charge would begin.
Creating a Renewable Item
Quick Tip
If you are setting up a year for a renewal period, you need to set it to 1 year rather than 365 days (as 365 may not be a year on leap years). You should also use weeks rather than 7 days.
Stock & Price Adjustments
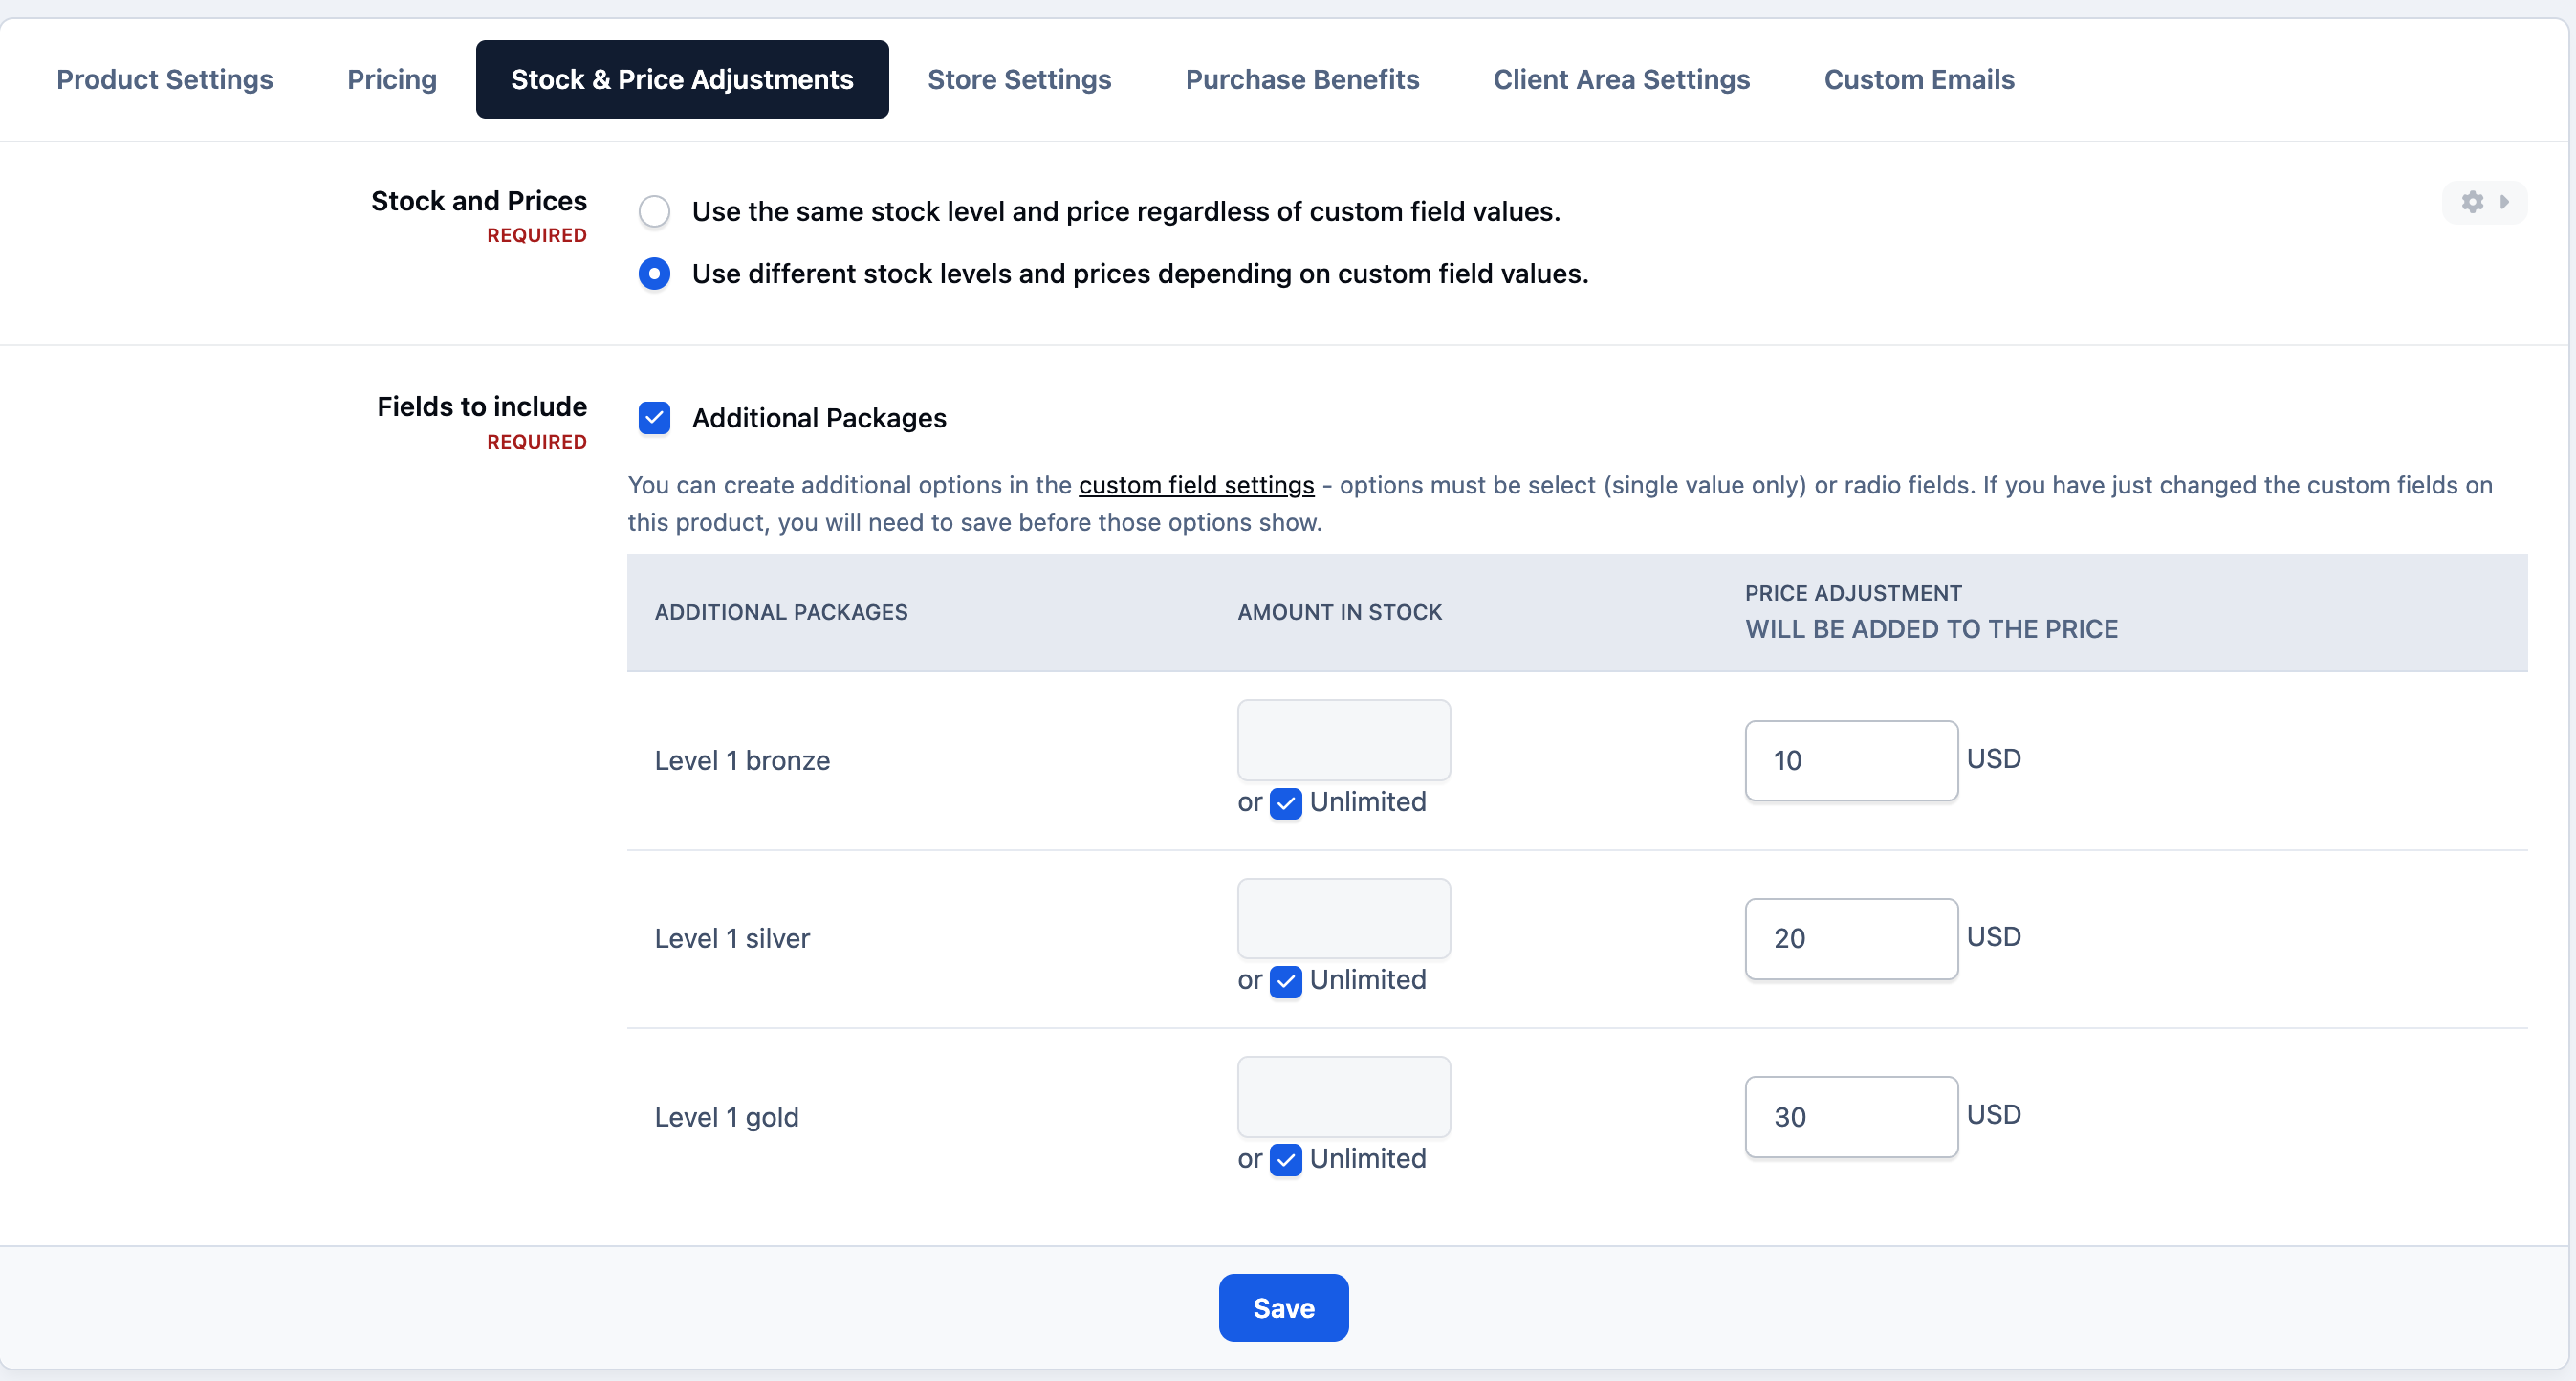
Within the 'Stock and Price Adjustments' tab, you can configure price adjustments based on selections made in custom fields.
For example, in the screenshot below, an 'additional packages' field has been added for a product selling support levels. This allows the price to increase based on the selected additional packaged, without needing to create a separate product for each variation. It’s an efficient way to manage product options while keeping your store streamlined.
Adjustment Based on Fields
Store Settings
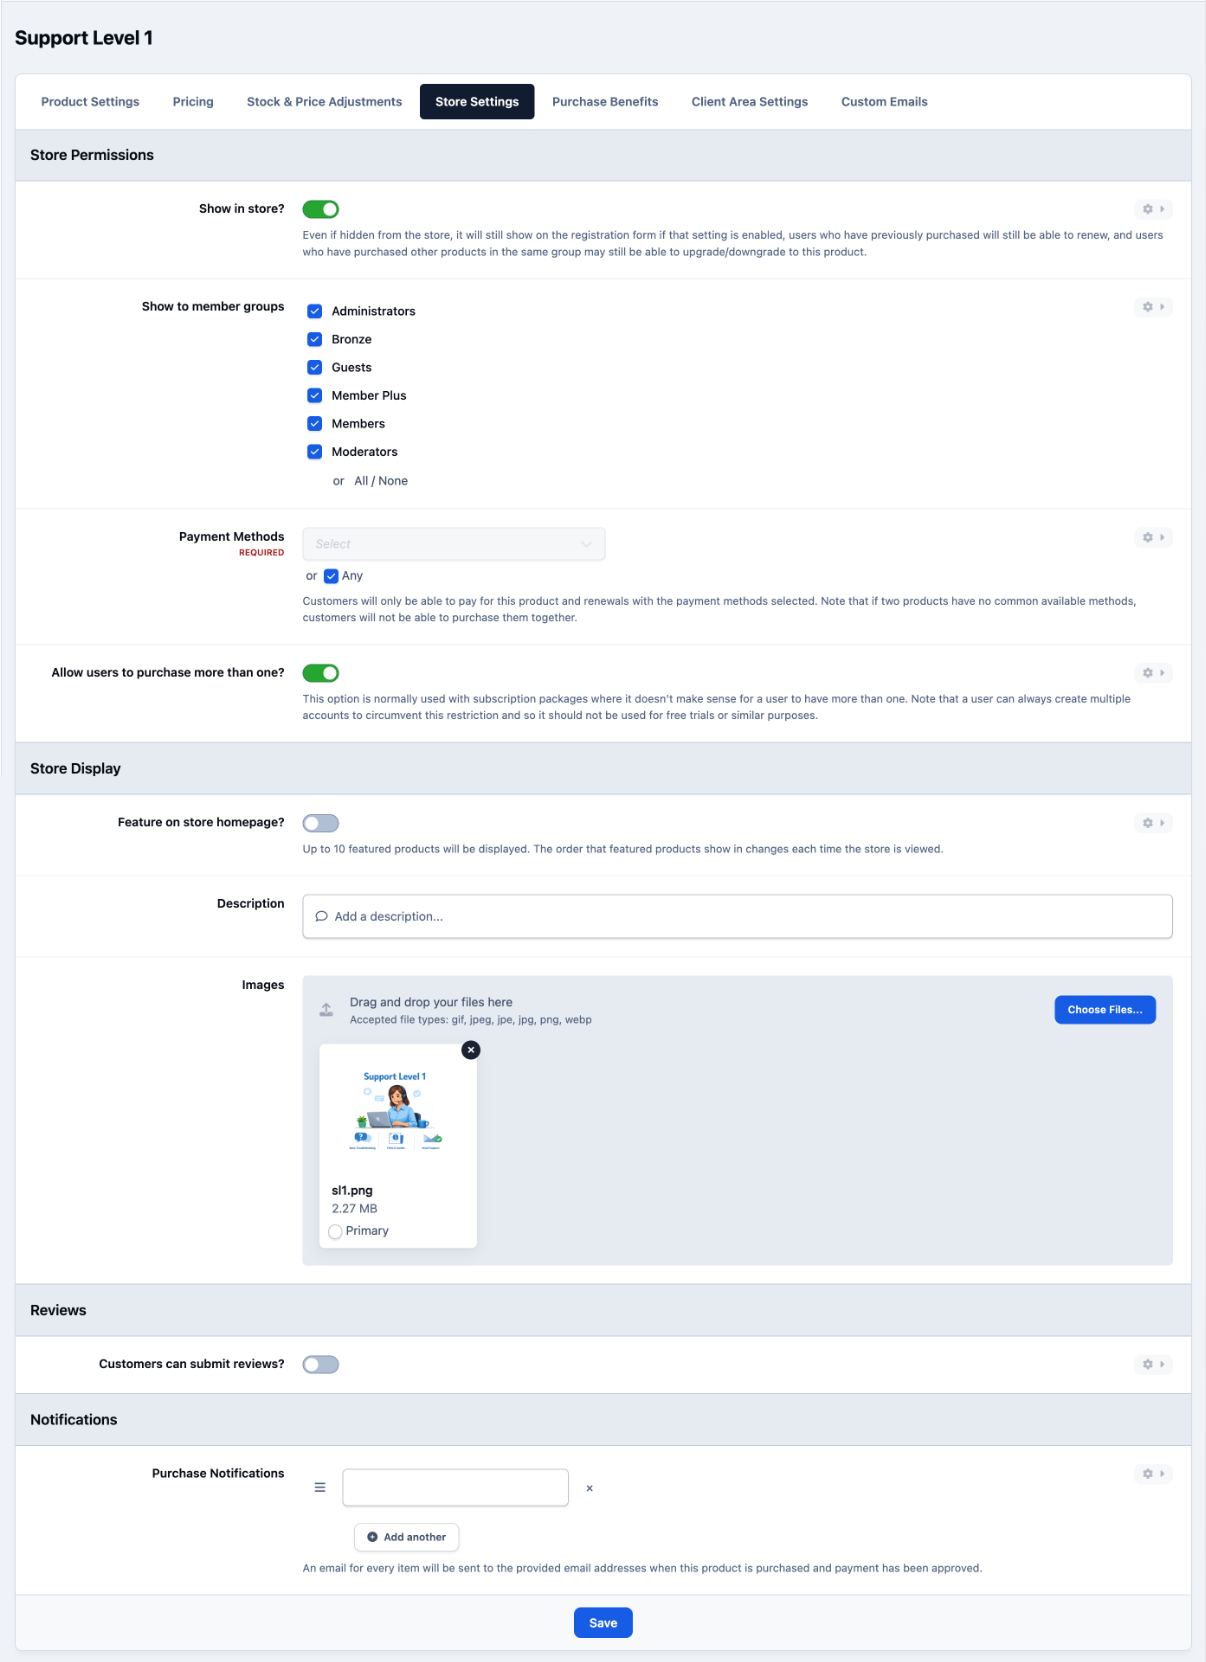
In this tab, you’ll find a range of settings that can be applied to the product you’ve created. These include options such as which payment methods are accepted, who can view the product, as well as the product description, images, and other related configuration options.
Other Store Settings
Purchase benefits
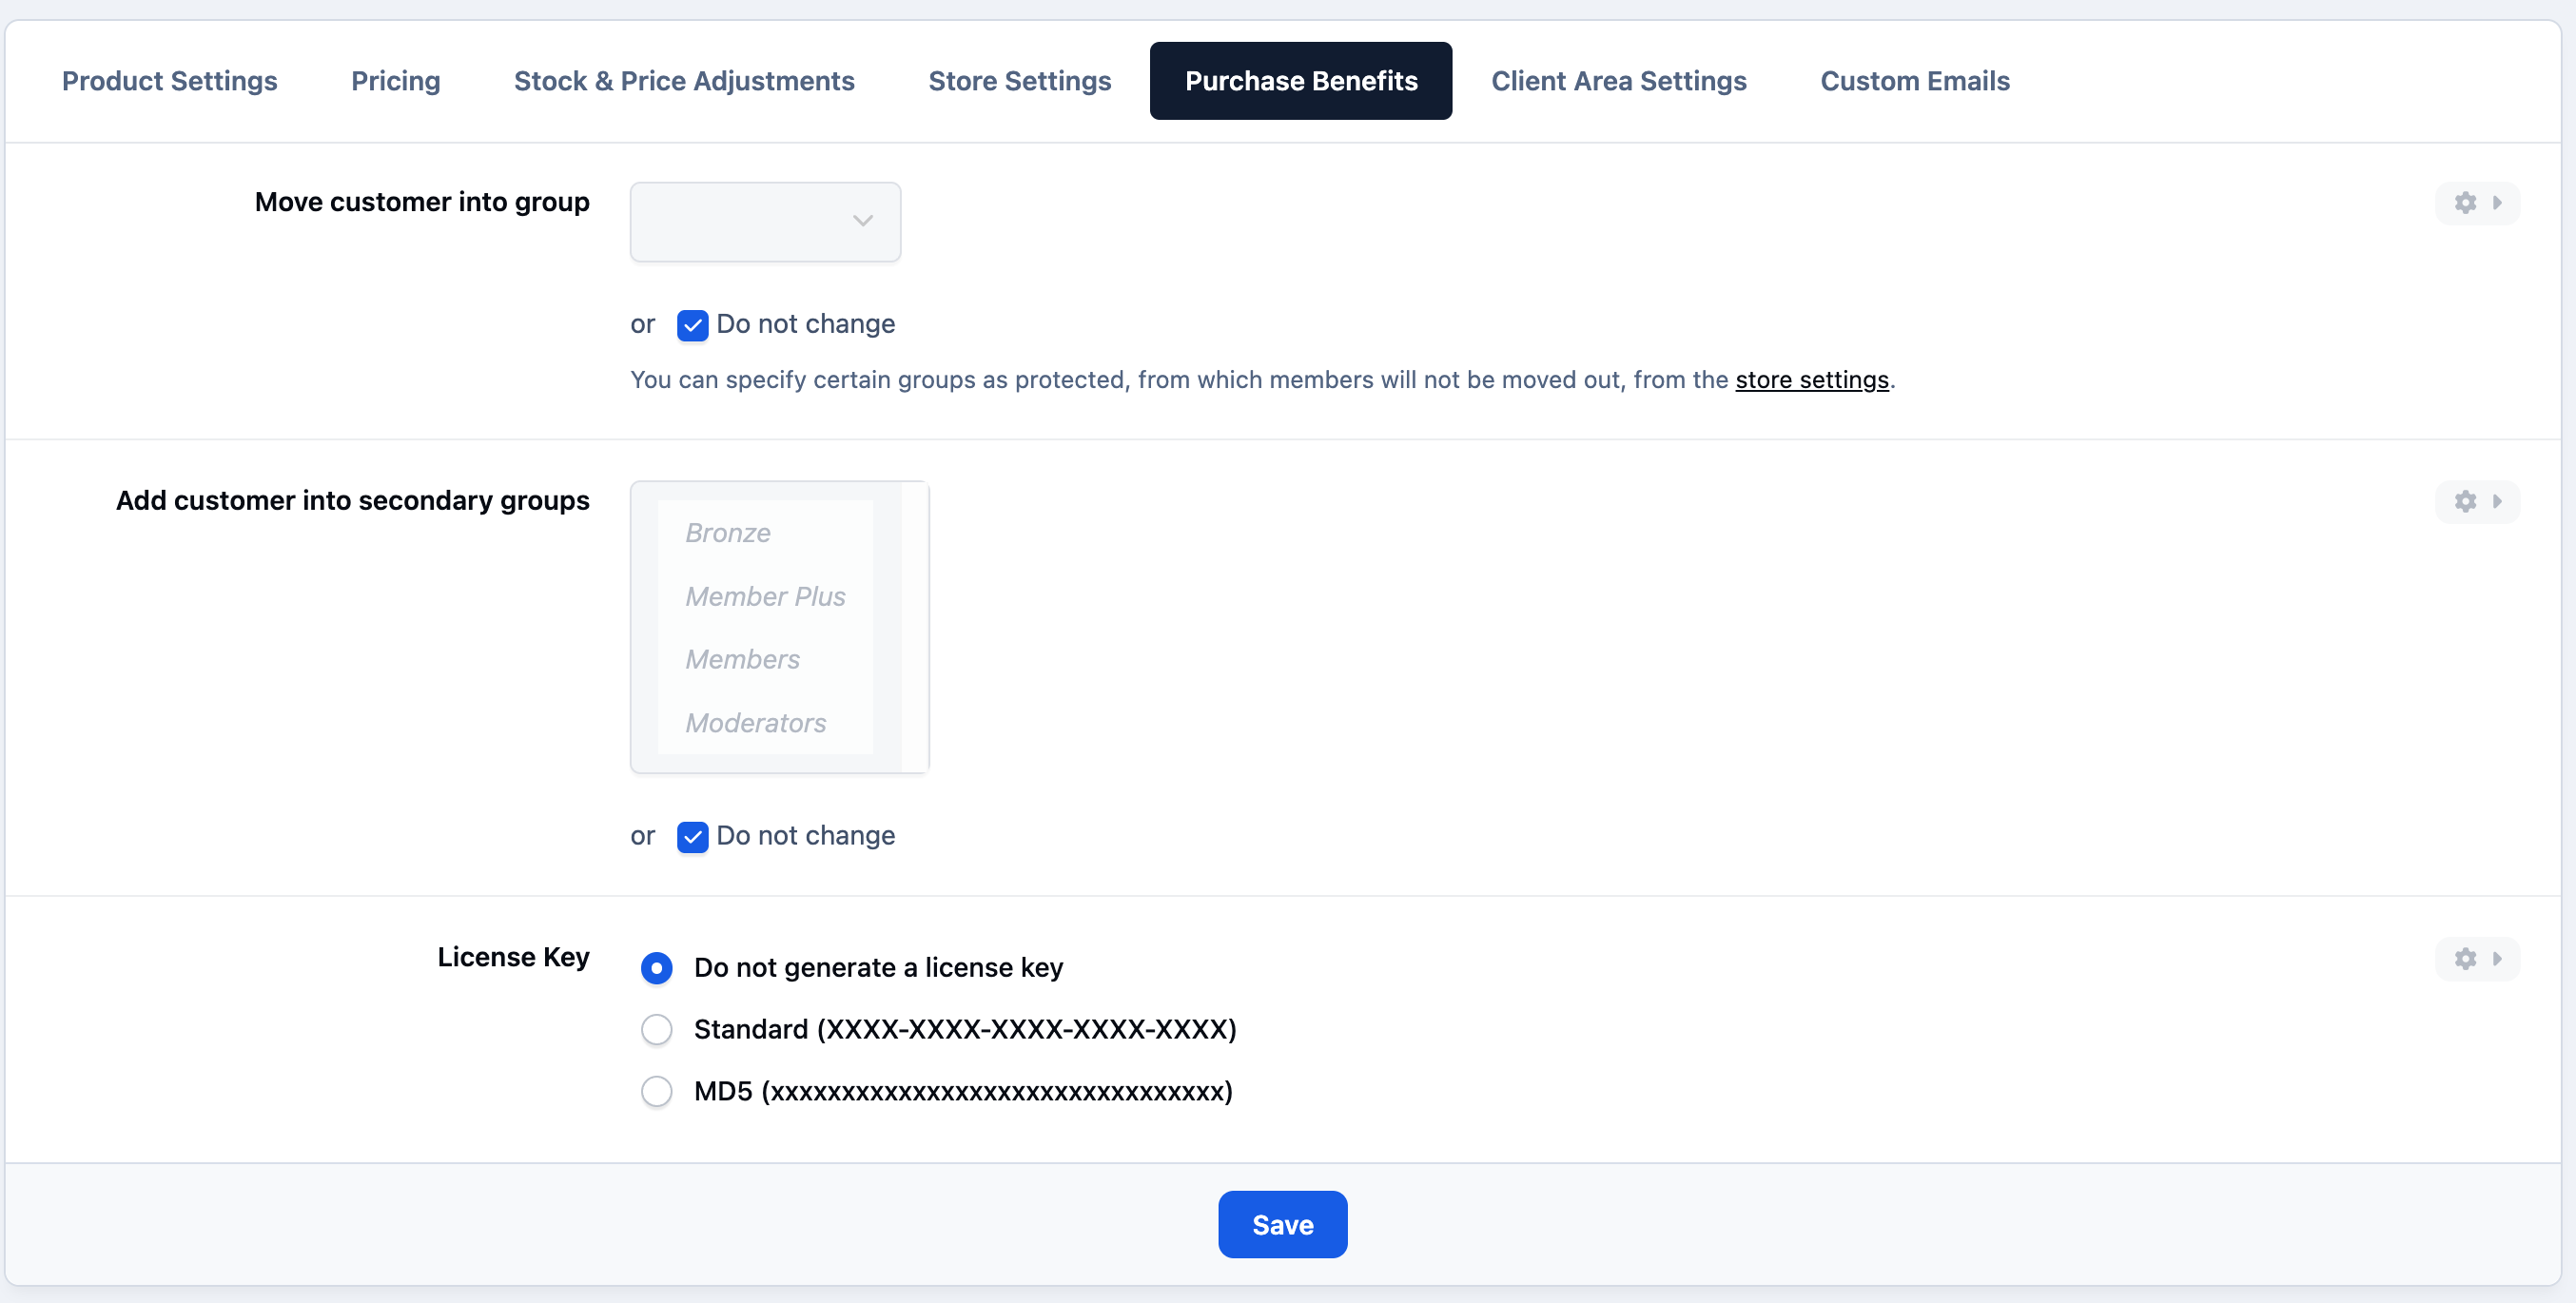
In the Purchase Benefits section, you can configure what happens after someone buys the product. For digital items, this can include automatically generating license keys. You can also move customers into specific member groups.
For example, if you have a premium group that requires payment to access, you can create a purchasable product and configure it so that members are automatically moved into the premium group upon purchase. Once their purchase expires, the system will automatically remove them from that group again.
Adding Purchase Benefits
Client area
This tab controls what your customers can see within their Client Area after purchasing the product.
Here, you can configure upgrade and downgrade paths between products, allowing customers to switch plans if needed. You can also add any relevant information using the Client Area Content editor.
Client area - Showing Example
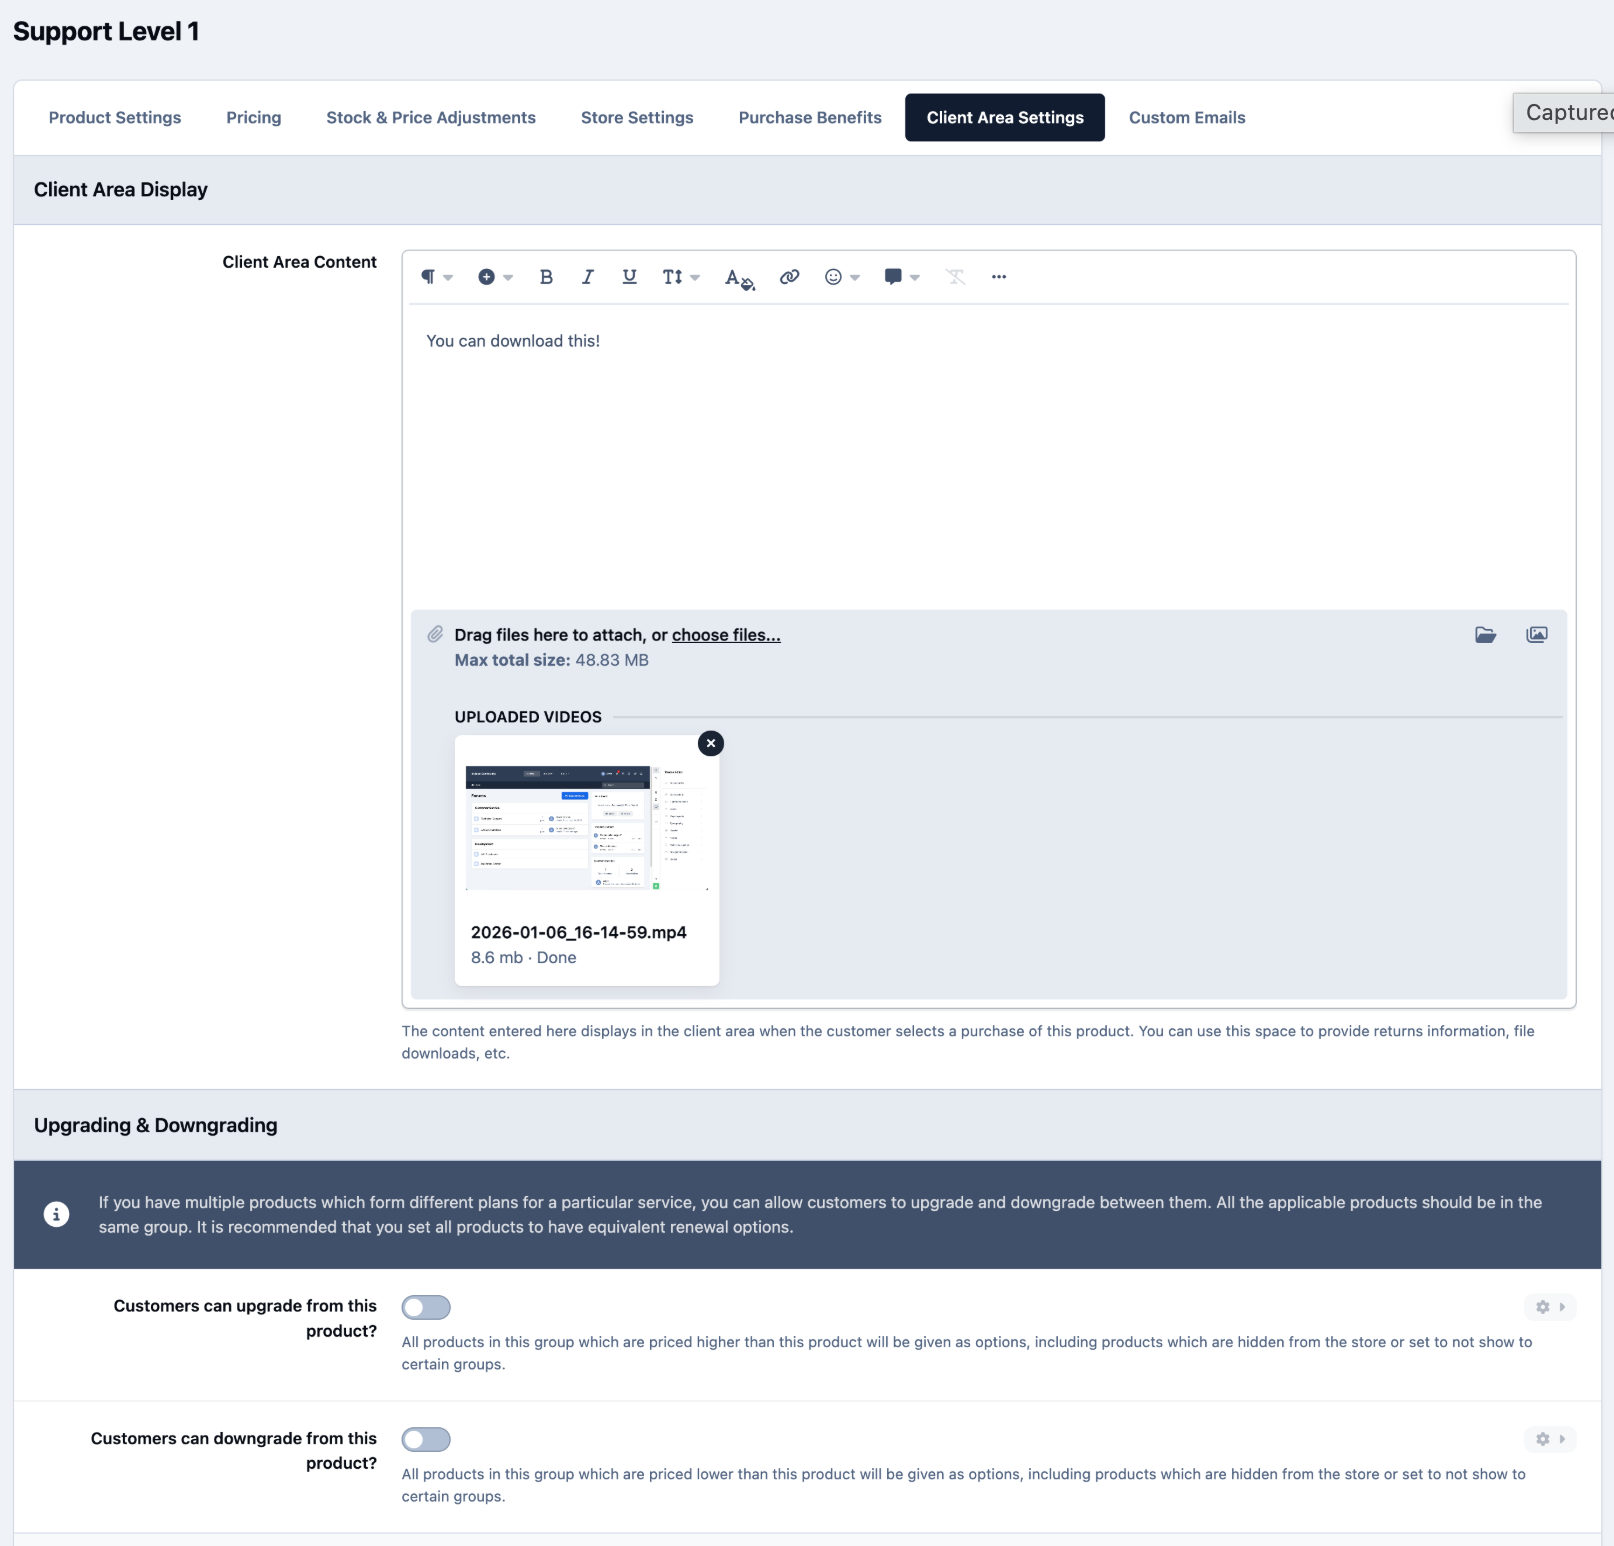
If your product includes a download, you can simply attach the file directly within the editor—just as you would when creating a post. Once purchased, customers will be able to access and download the file from their Client Area.
Custom Emails
Lastly, we have the custom emails tab. Here you can create an email to send out to customers
Recommended Comments