
Introduction
Invision Community includes an AI-powered Image Scanner designed to help keep your community safe by automatically reviewing uploaded images and identifying content that may require attention.
As your community grows, the number of images uploaded by members can increase significantly. Manually checking every image becomes difficult and time consuming. The Image Scanner helps by using AI to detect potentially inappropriate content and bringing it to the attention of your moderation team.
The Image Scanner reviews images uploaded to your community and checks them against categories of content that may not be suitable for your members.
This helps your team by:
Reducing the amount of manual image moderation required
Detecting potentially unsuitable content quickly
Providing an additional layer of protection for members
Allowing moderators to focus on content that needs human review
The scanner is designed to support your moderation team rather than replace it. Moderators remain in control of the final decisions made about content within your community.
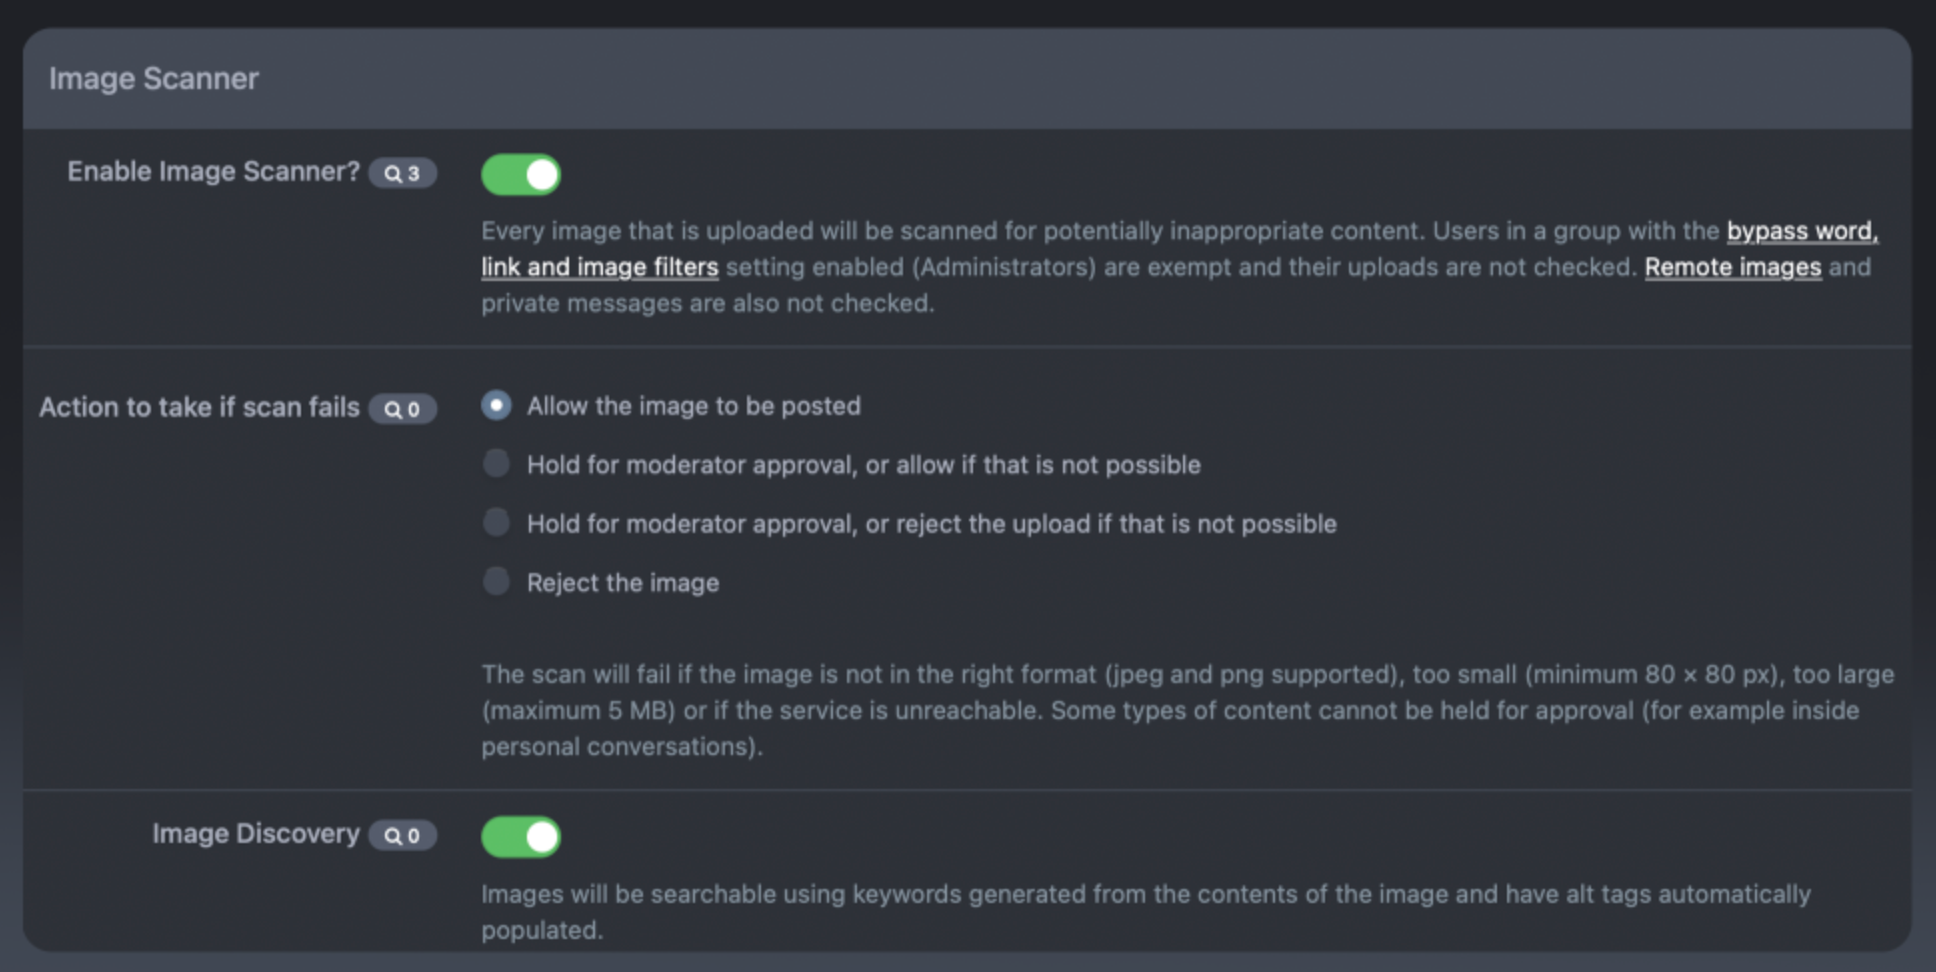
Enabling the Image Scanner
To enable and configure Image Scanner:
Open your AdminCP
Navigate to:
Community → Site Features → Image Scanner
From here, you can configure how image scanning operates across your community.
Scanner Set up
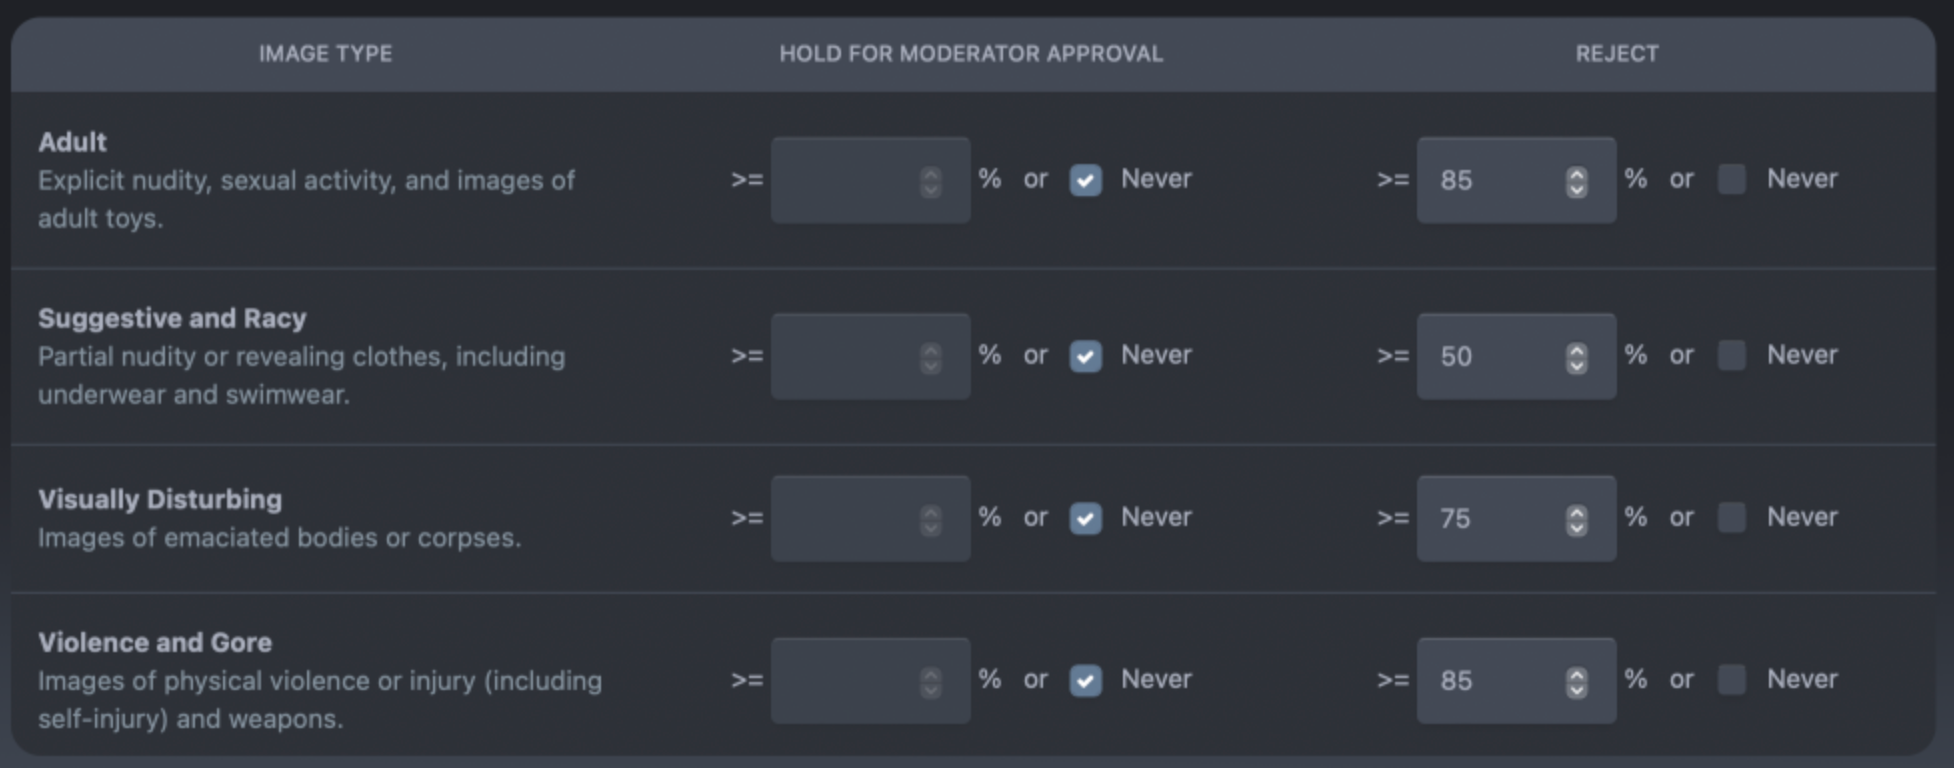
Choosing What Content To Detect
Every community has different requirements when deciding what content is acceptable.
A professional support community may require strict controls, while a more casual community may allow a broader range of images.
The Image Scanner allows you to decide which types of content should be detected and reviewed.
Examples of content you may wish to identify include:
Adult or explicit imagery
Graphic content
Images that may not meet your community guidelines
Once the Image Scanner identifies an image that matches your configured settings, Invision Community can determine what happens next.
This allows you to build a moderation workflow that works for your team.
Depending on your requirements, detected images can be handled automatically or brought to your moderators for review.
This helps ensure questionable uploads receive attention without slowing down normal community activity.
Scanner Settings
When an image requires review, your moderation team can inspect the content and decide whether further action is required.
Using AI detection alongside human review provides a balanced approach:
AI helps locate possible problems quickly
Moderators make the final decision based on context
This combination helps maintain a safer community while reducing unnecessary workload.
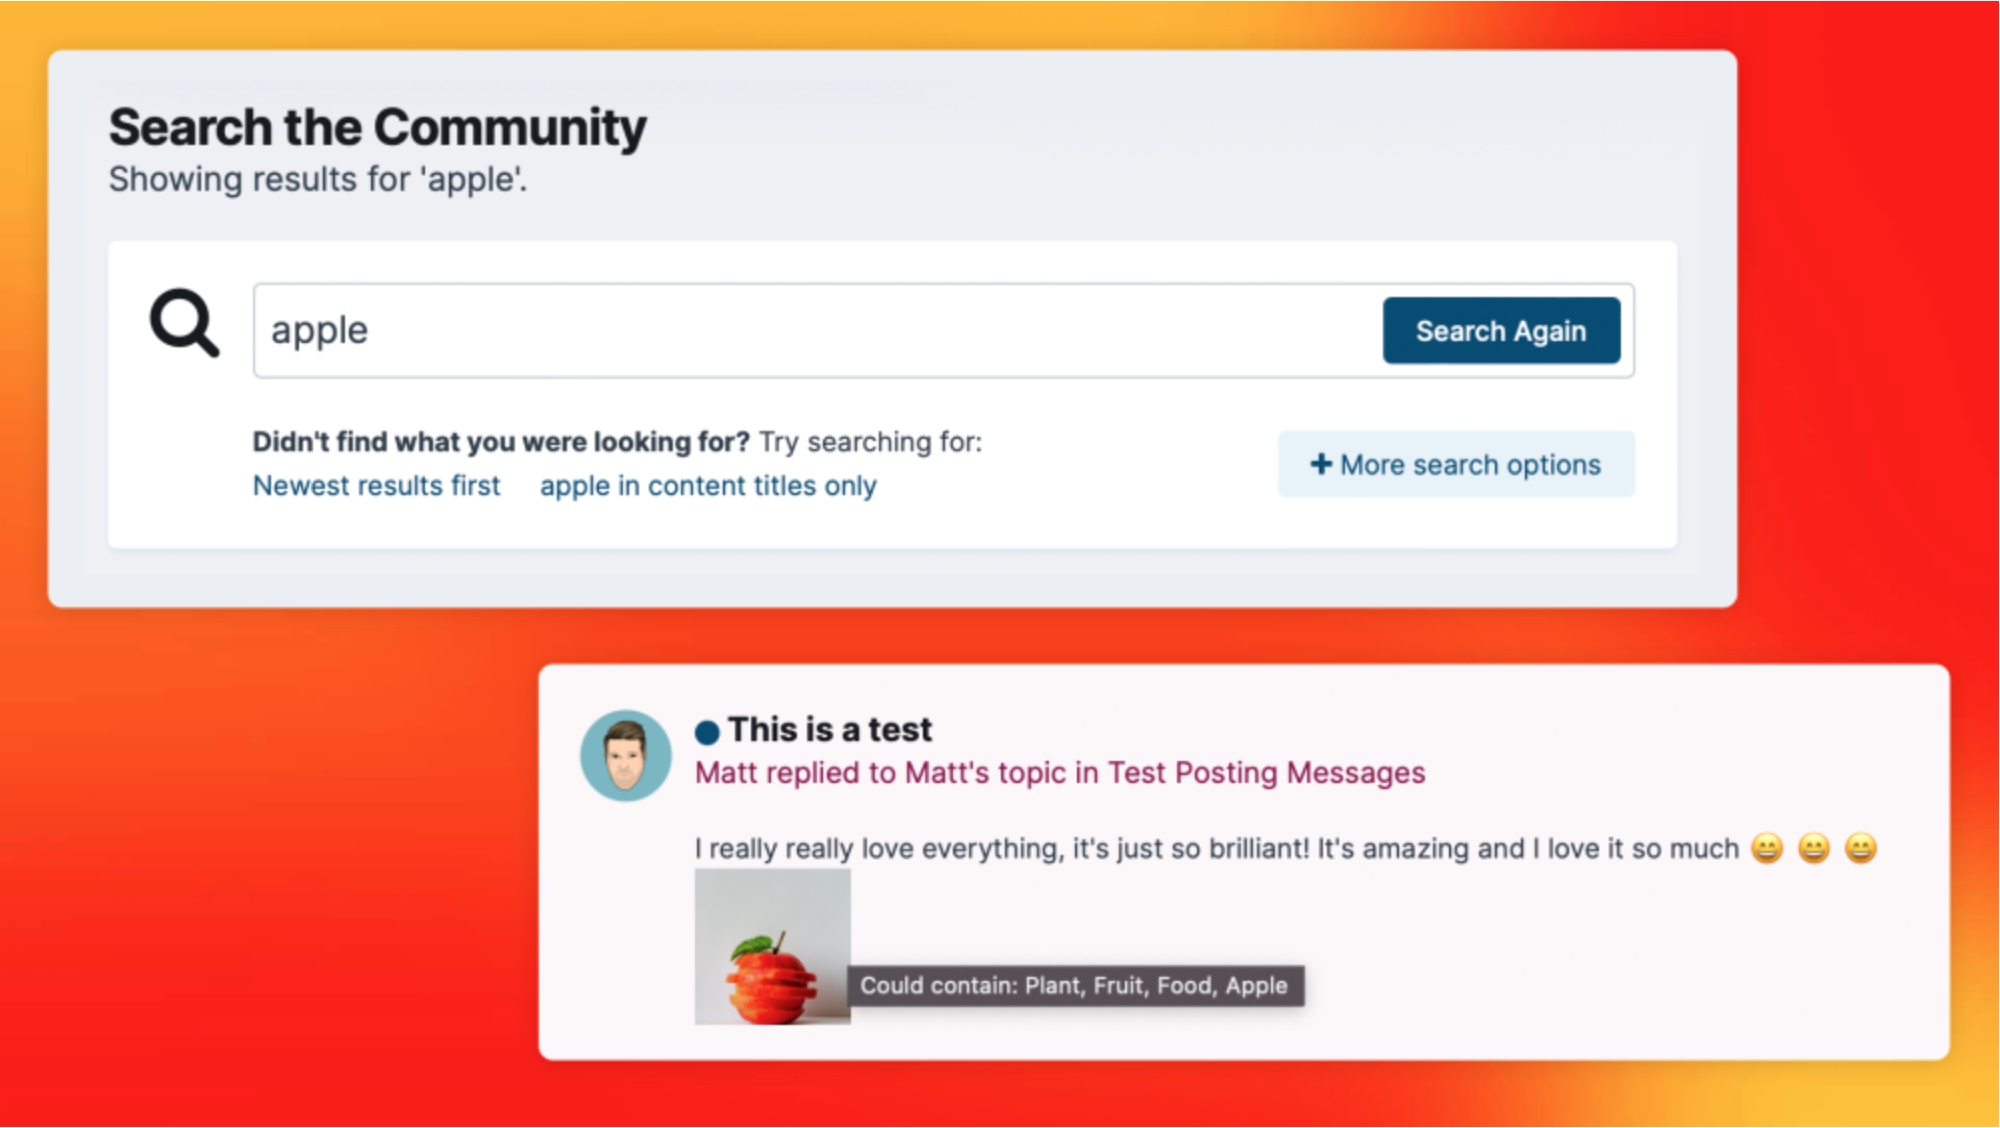
Search Additions
Approved images can be labelled with terms describing what the image may contain. These labels can help the image appear in relevant search results, making uploaded images more discoverable across the community. For example, if an image is recognised as containing an apple, a member searching for “apple” may be able to find that image even if the word was not manually added by the poster.
Image Tagging
Recommended Comments