


The search functionality within your community enables members to quickly locate specific content across your site using keywords and other defined criteria.
How To Use
A basic search can be performed by clicking the search bar in the top-right corner of your site.
When you select the search box, additional options will appear, allowing you to refine the criteria being used for your search.
Basic Search Options
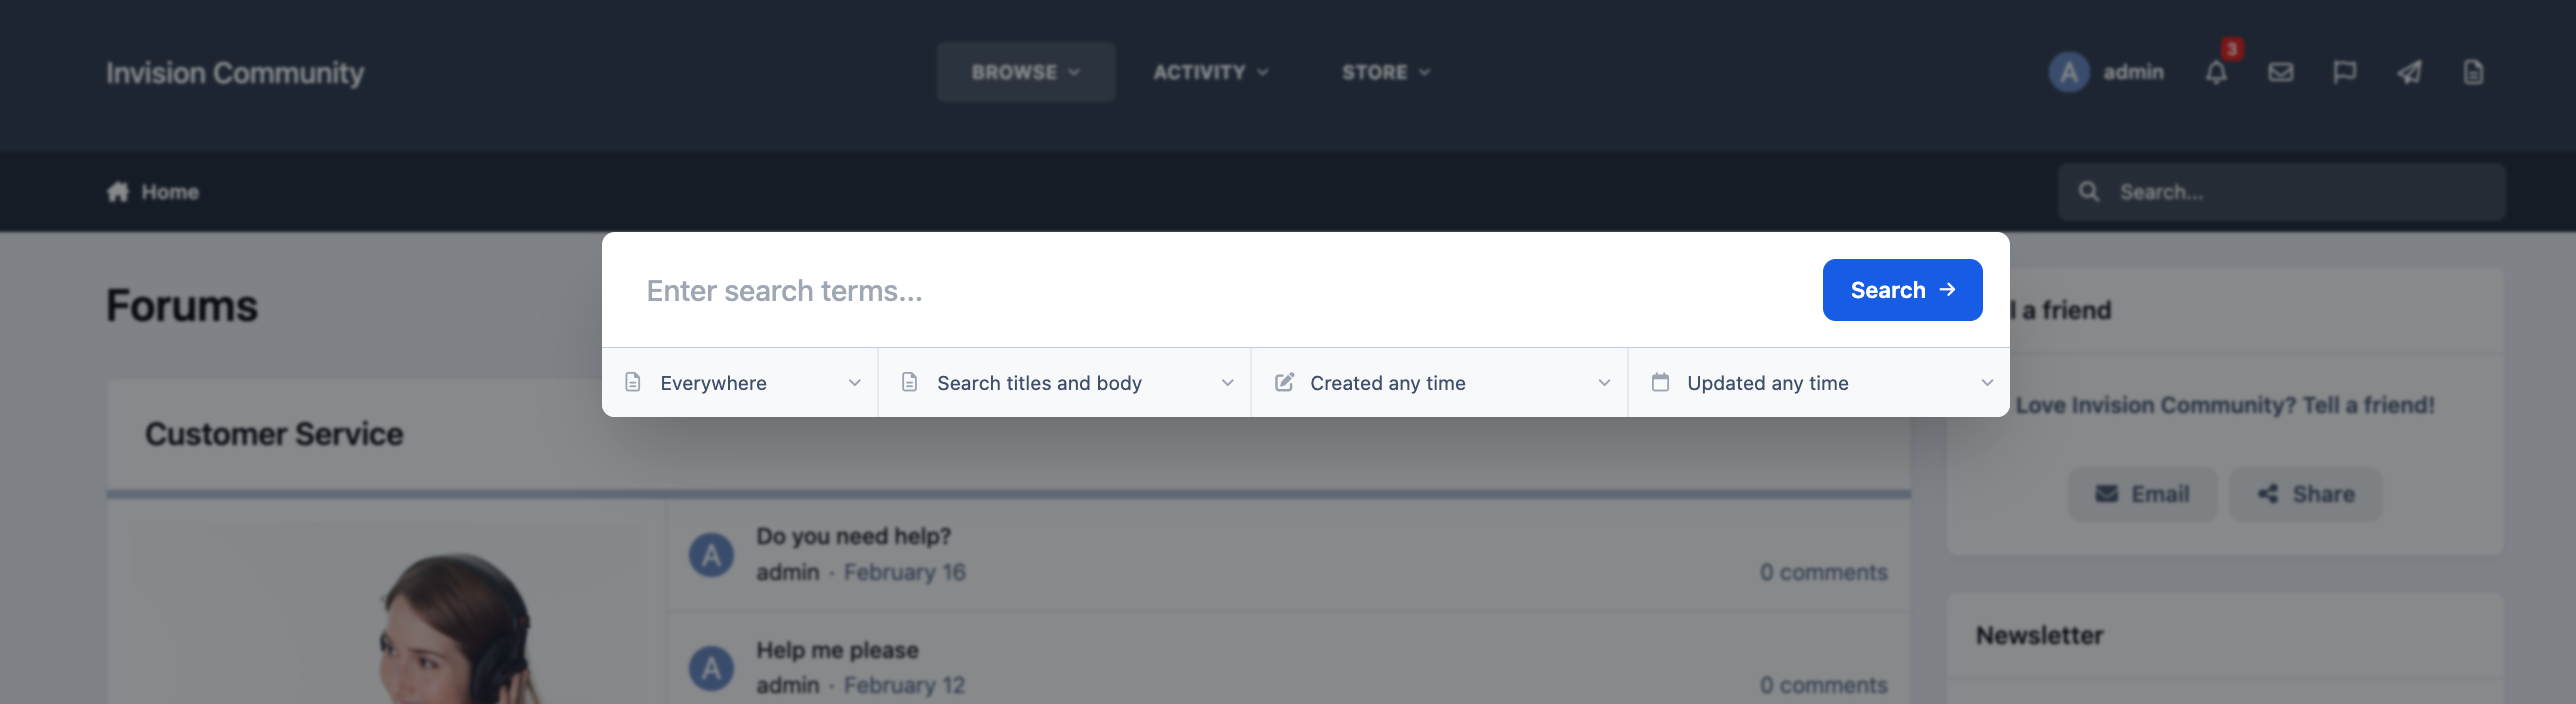
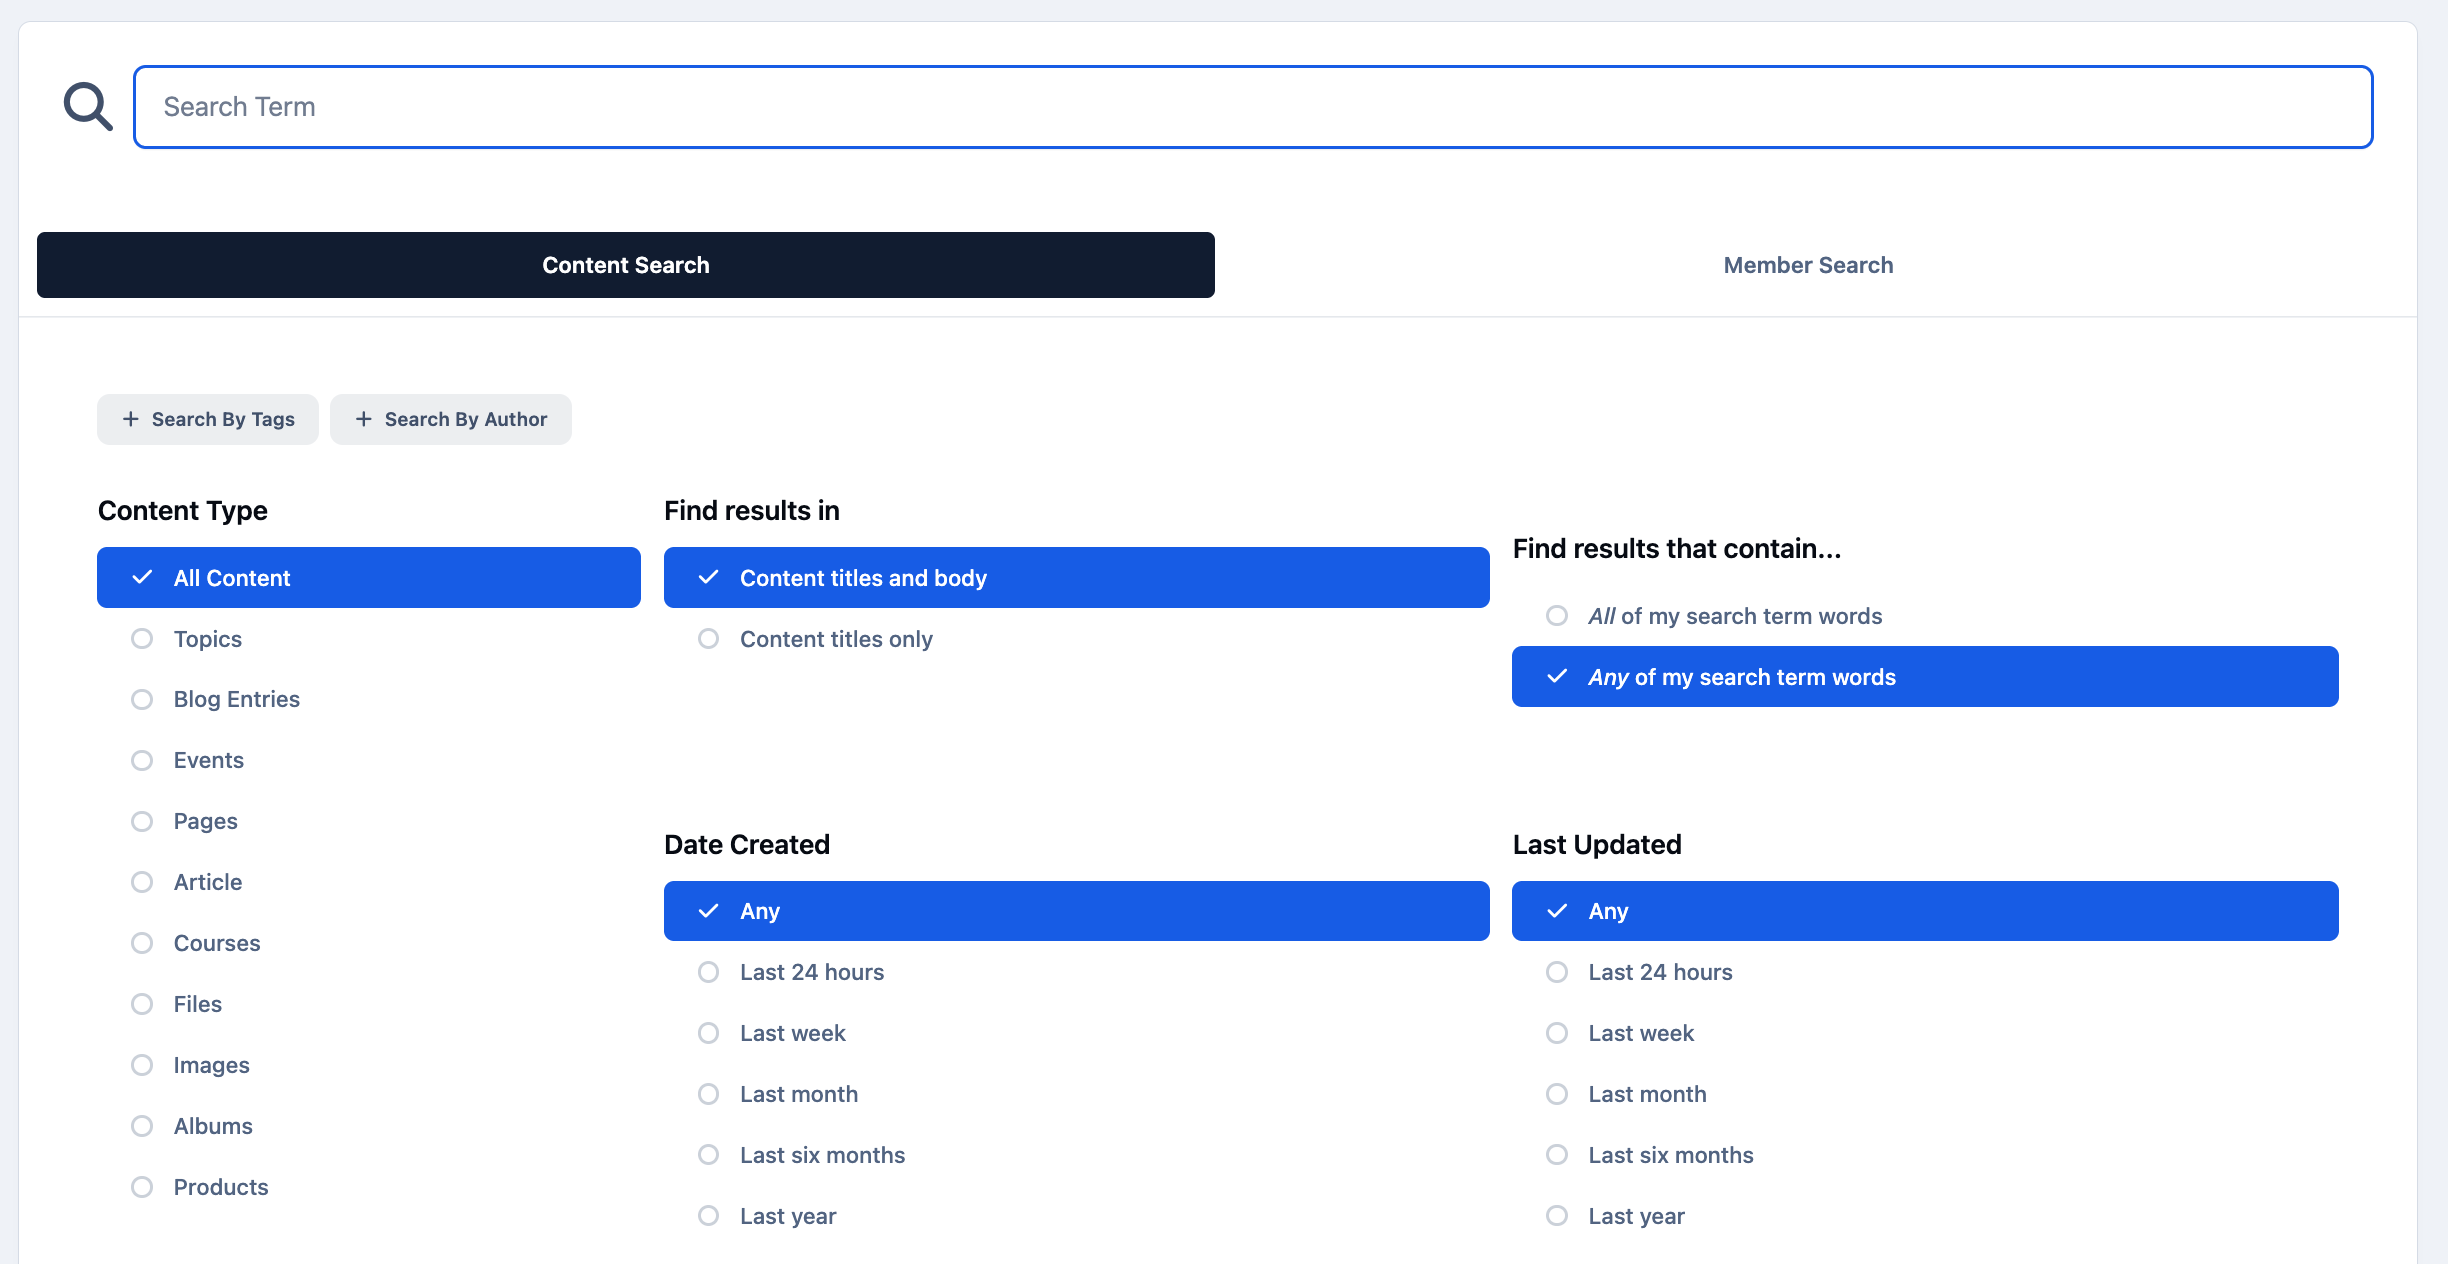
If you click Search without entering any keywords, you’ll be taken directly to the Advanced Search page.
From there, you can refine your search using a wide range of filters — including searching by author, filtering by tags, and applying other criteria such as custom fields configured within your applications.
Advanced Search Options
Administrator Options
All administrator settings related to search can be found in the AdminCP at:
System → Content Discovery → Search
From this area, you can configure the search method used by your community and adjust how searches are processed by the system.
By default, search is set to MySQL. This setting is suitable for most sites, and should remain in place unless you are experienced with configuring advanced server-side search solutions. For the vast majority of communities, the default MySQL search option will be more than sufficient.
MySQL Search Options - Admin CP
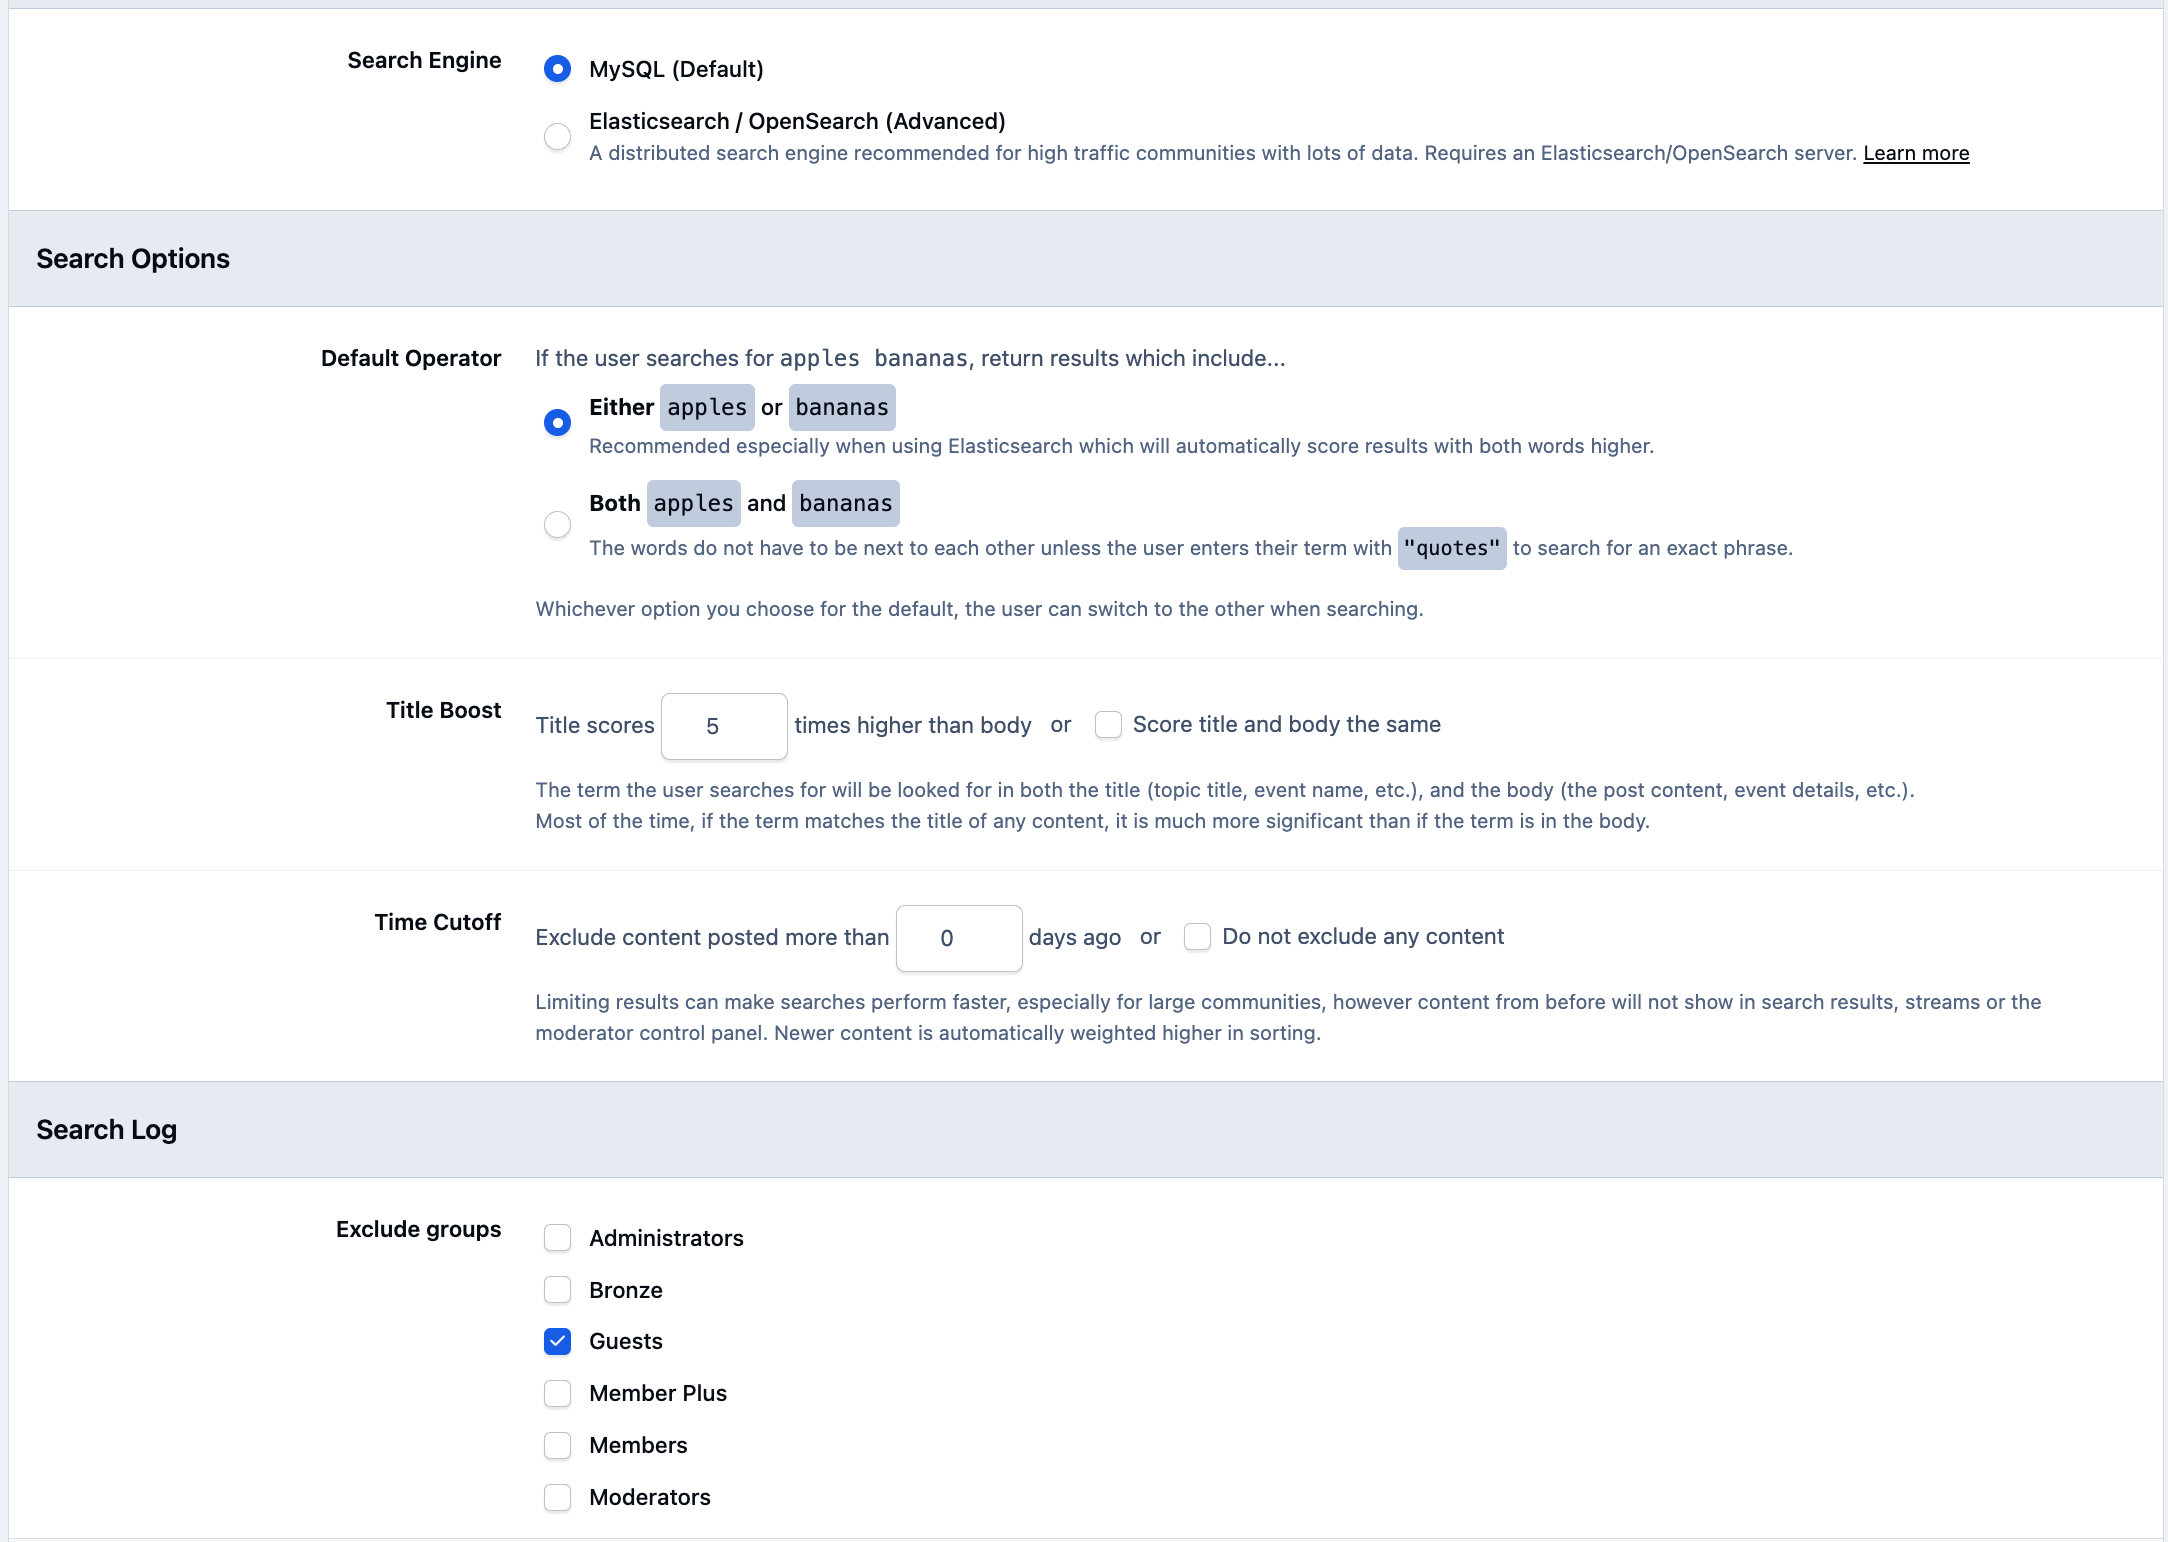
In the top-right corner of this page, you’ll also see a Rebuild Search Index button.
This can be used if you encounter issues with search results, make changes that require the index to be refreshed, or simply need to regenerate the search index for any other reason.
Elastic Search
If you choose to switch to Elasticsearch, you’ll need to enter the connection details for your Elasticsearch server.
If this has been set up by your hosting provider, you’ll need to obtain the server address and the index name being used. These details should then be entered into the corresponding fields provided in the settings area.
Elasticsearch Options - Admin CP
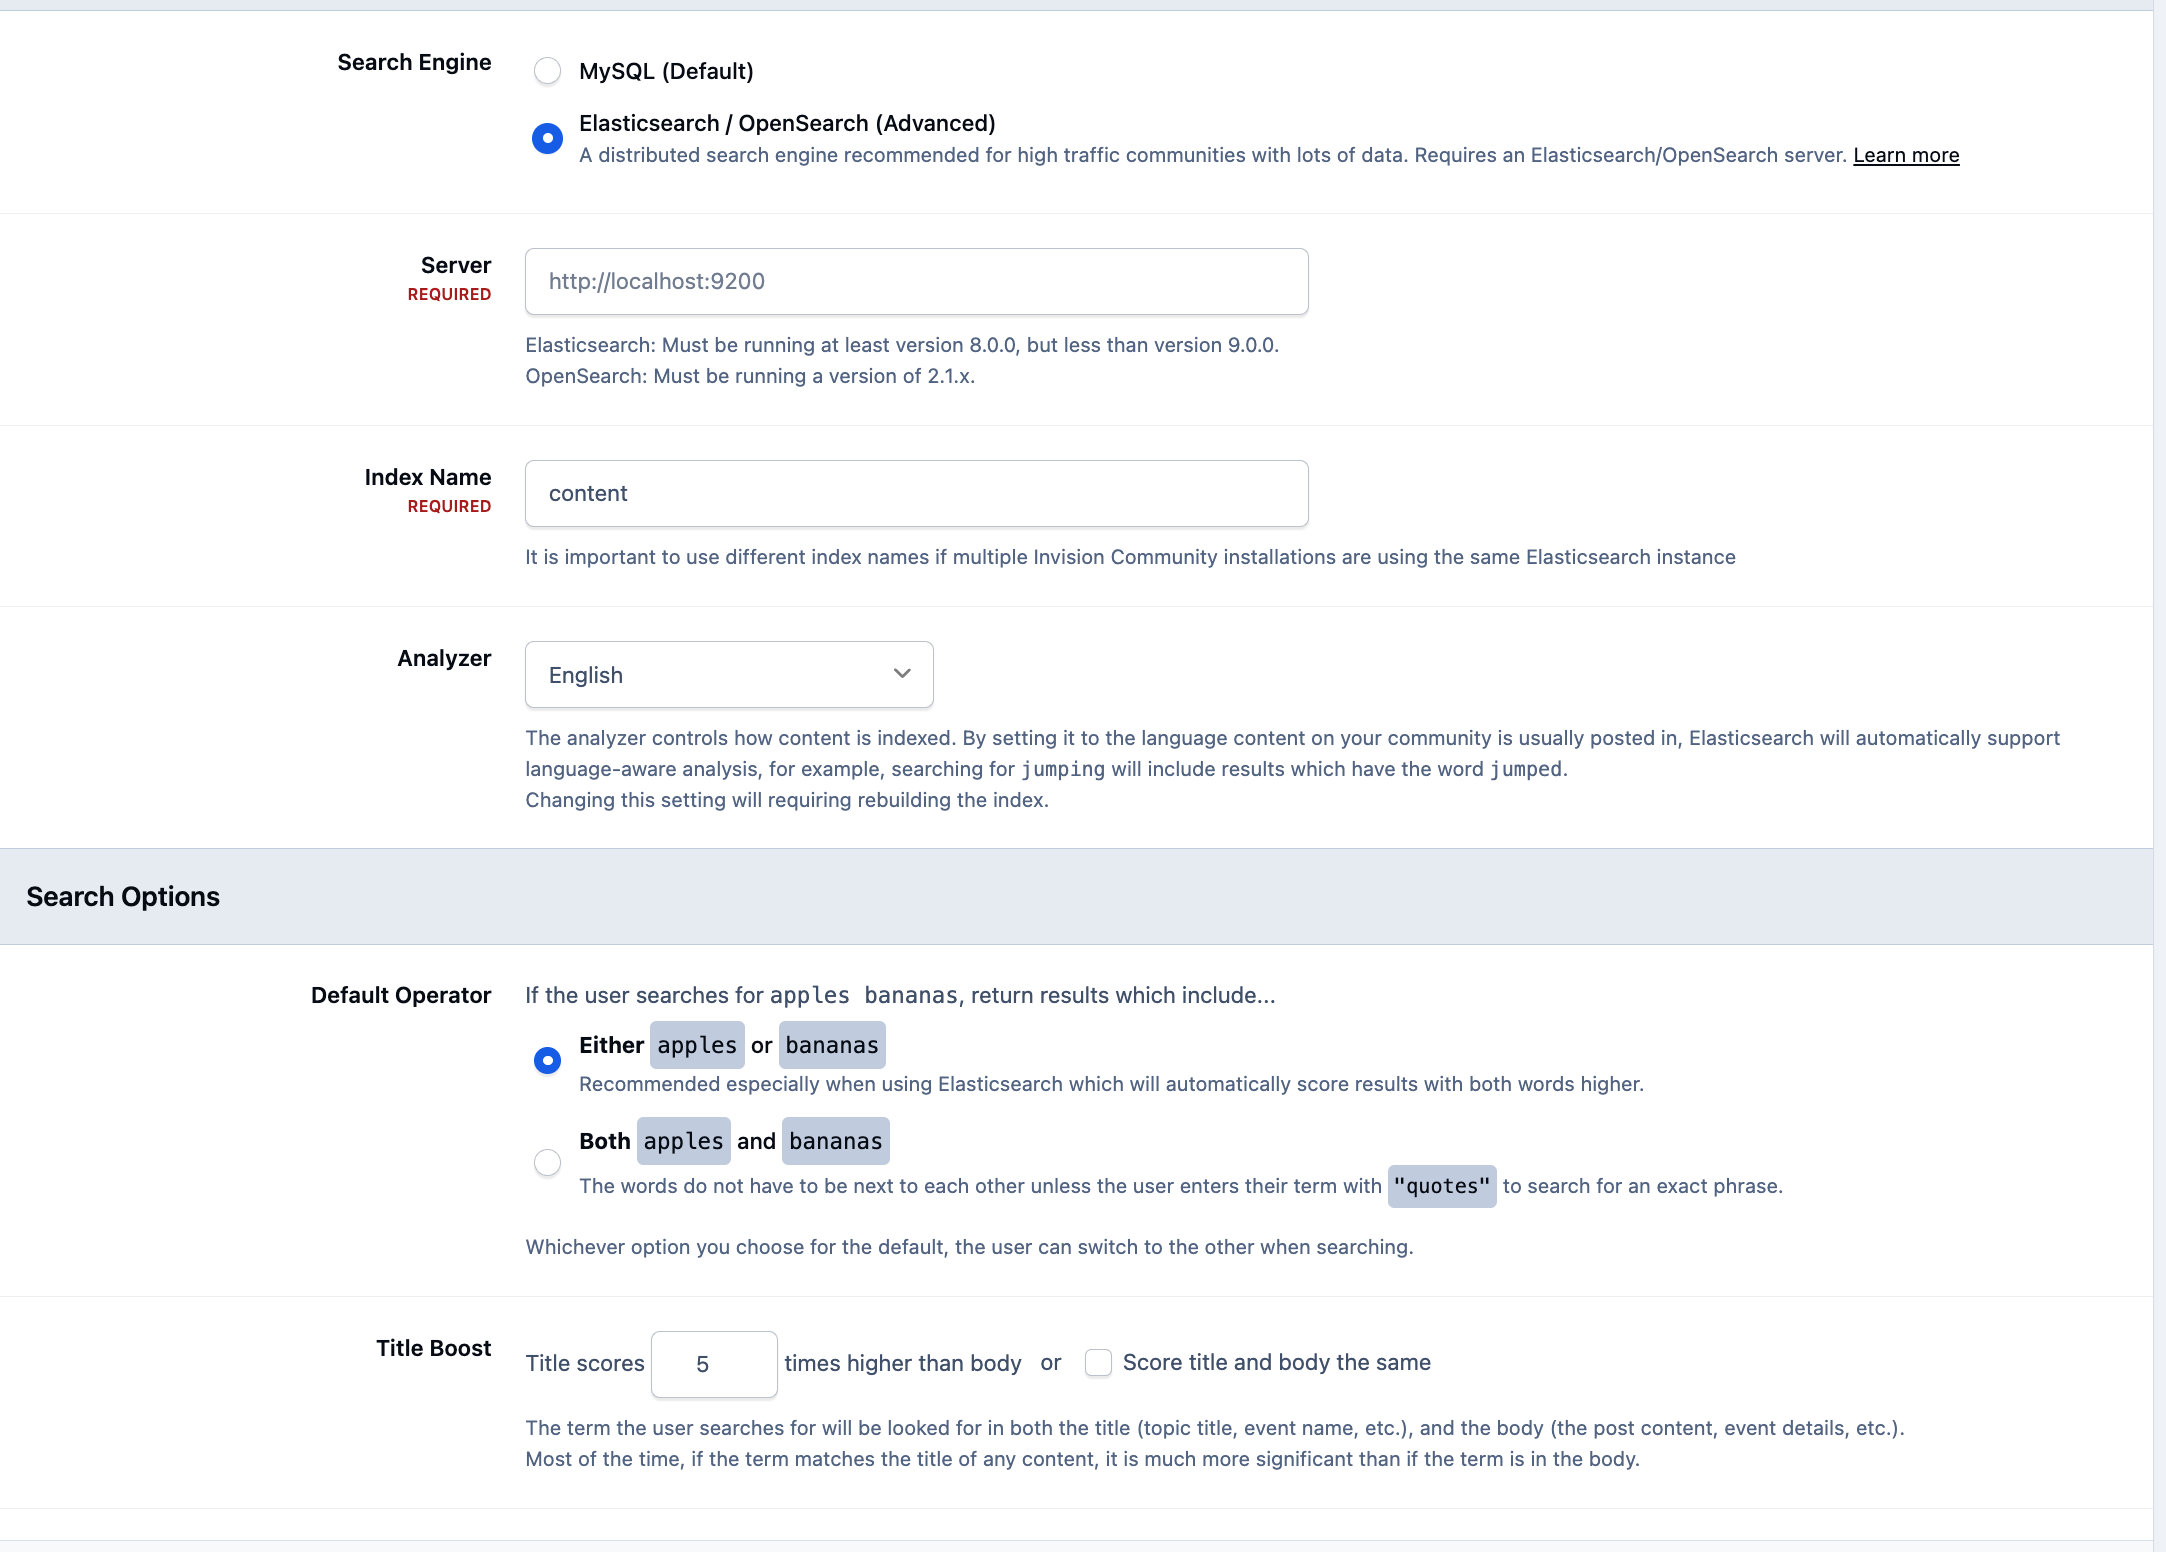
When using Elasticsearch, you’ll also have access to additional configuration options such as time decay and author boost settings.
If you’re unsure how these settings work, it’s best to leave them at their default values. Only adjust them if you fully understand their impact or have been given specific guidance by your hosting provider or Elasticsearch service administrator.
Recommended Comments