


In a world where personal information and data privacy are increasingly important, and where site policies play a growing role in everyday online interactions, it’s essential to be able to clearly present key information on your site. This is often required not only to meet legal obligations in certain countries, but also to satisfy the requirements of many third-party integrations.
The Invision Community Suite is designed to give you the tools needed to manage these requirements with ease, allowing you to handle policies, disclosures, and compliance-related information efficiently—so you can focus on the day-to-day running of your community.
Guidelines
You can add guidelines explaining how you expect members to use your site from the following location in the Admin CP
System → Settings → Terms & Privacy Policy
From here, you can enter text directly into the editor, which will automatically appear on the site’s guidelines page. Alternatively, you can choose to disable the built-in guidelines entirely or link to guidelines hosted elsewhere, such as on a separate page or external website.
Adding Site Guidelines
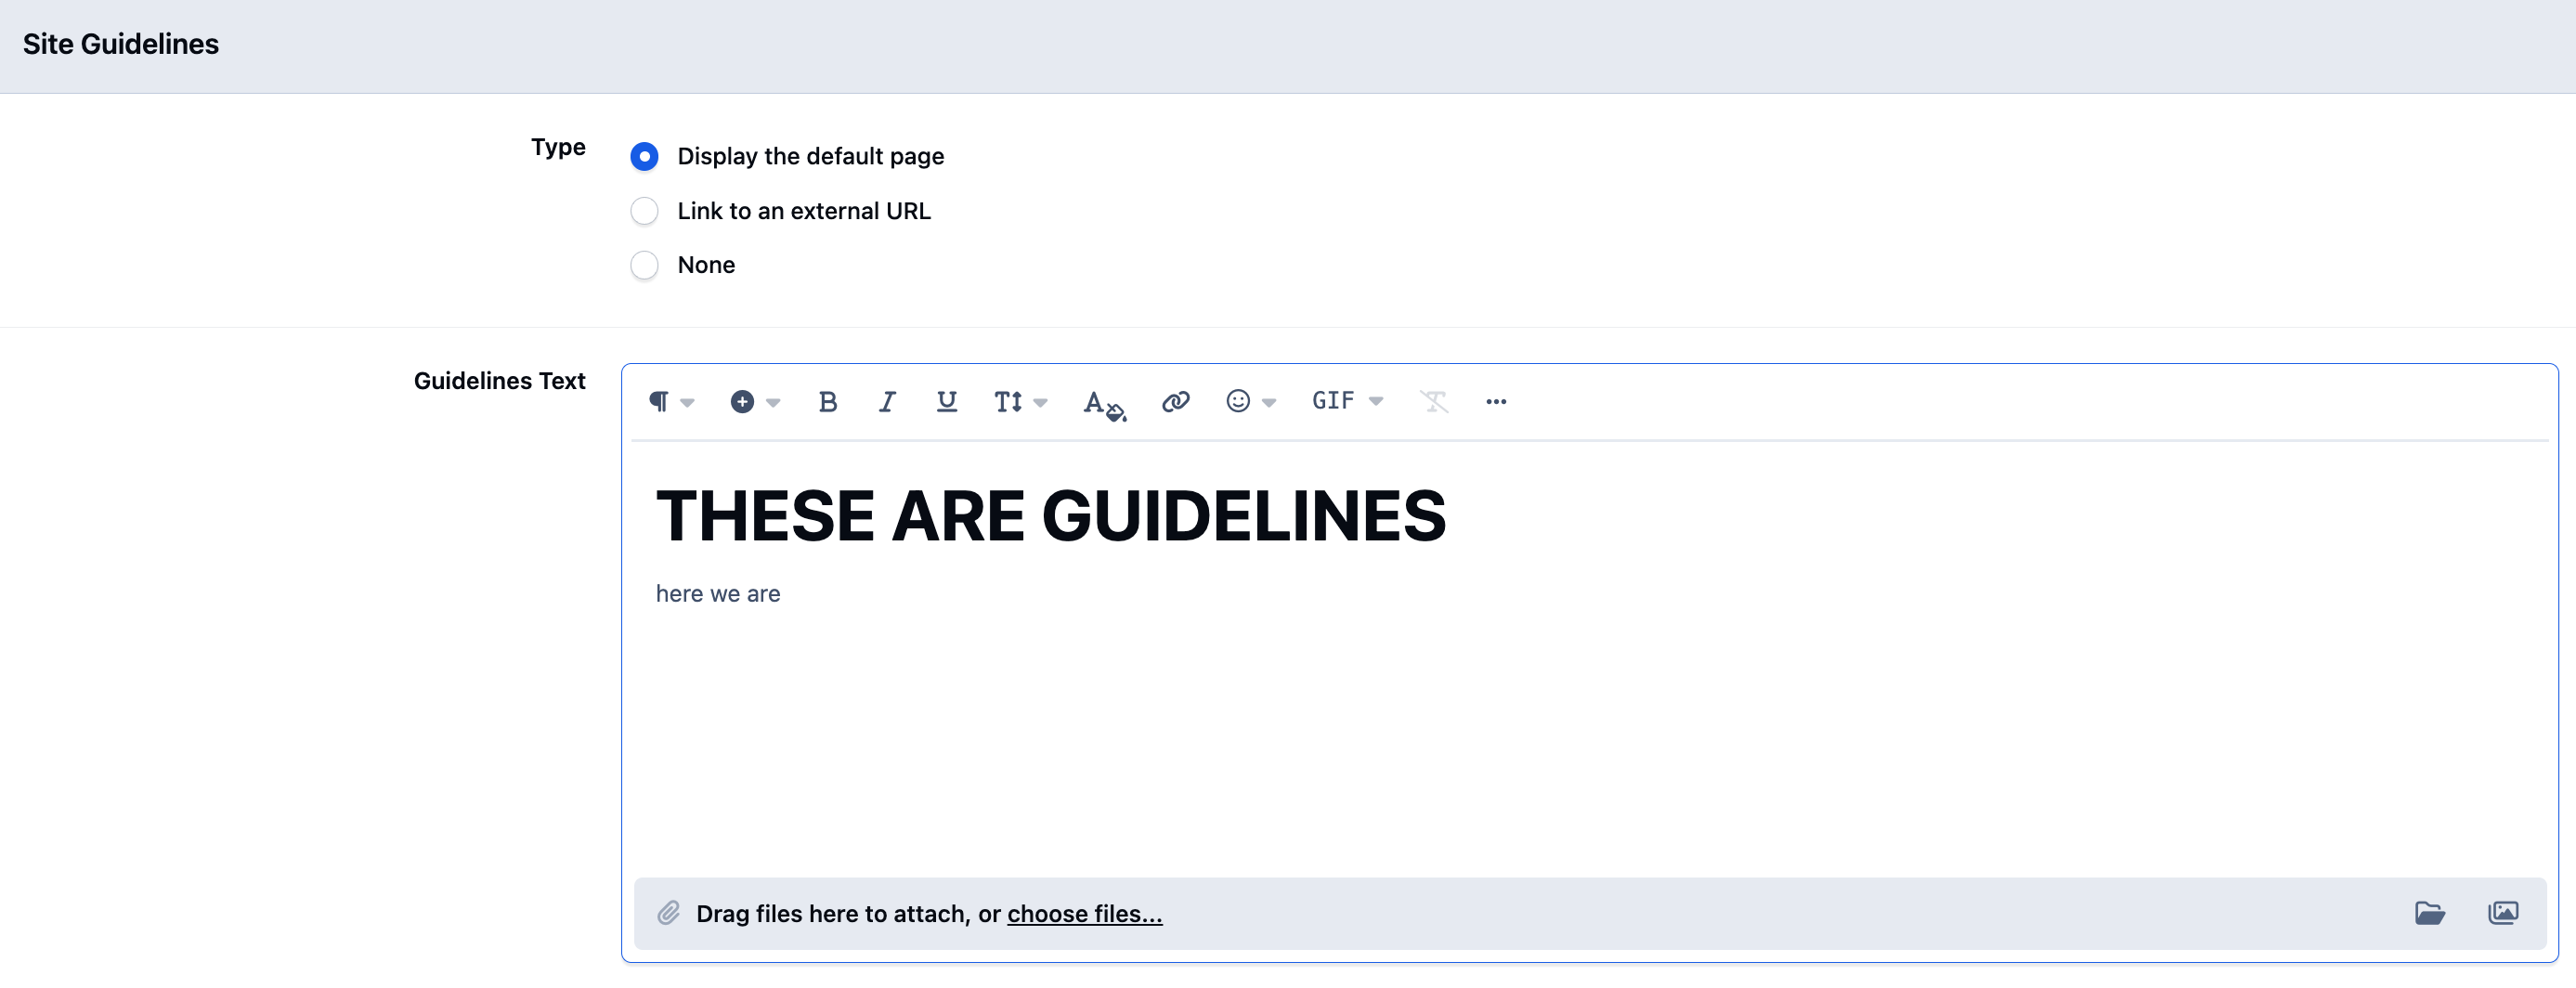
Once you’ve added your guidelines, you can make them easily accessible by adding a link through the built-in Guidelines option in the Menu Manager. This allows members to quickly find and review your community rules from your site navigation.
Privacy Policy
Having a clear and well-defined privacy policy on your site is not only important to your members, but is also a requirement for many third-party integrations. For example, services such as Facebook and Twitter login require you to provide a valid link to your privacy policy before they can be enabled.
To set up or manage your site’s privacy policy, visit the following location in the Admin CP
Adding a Privacy Policy
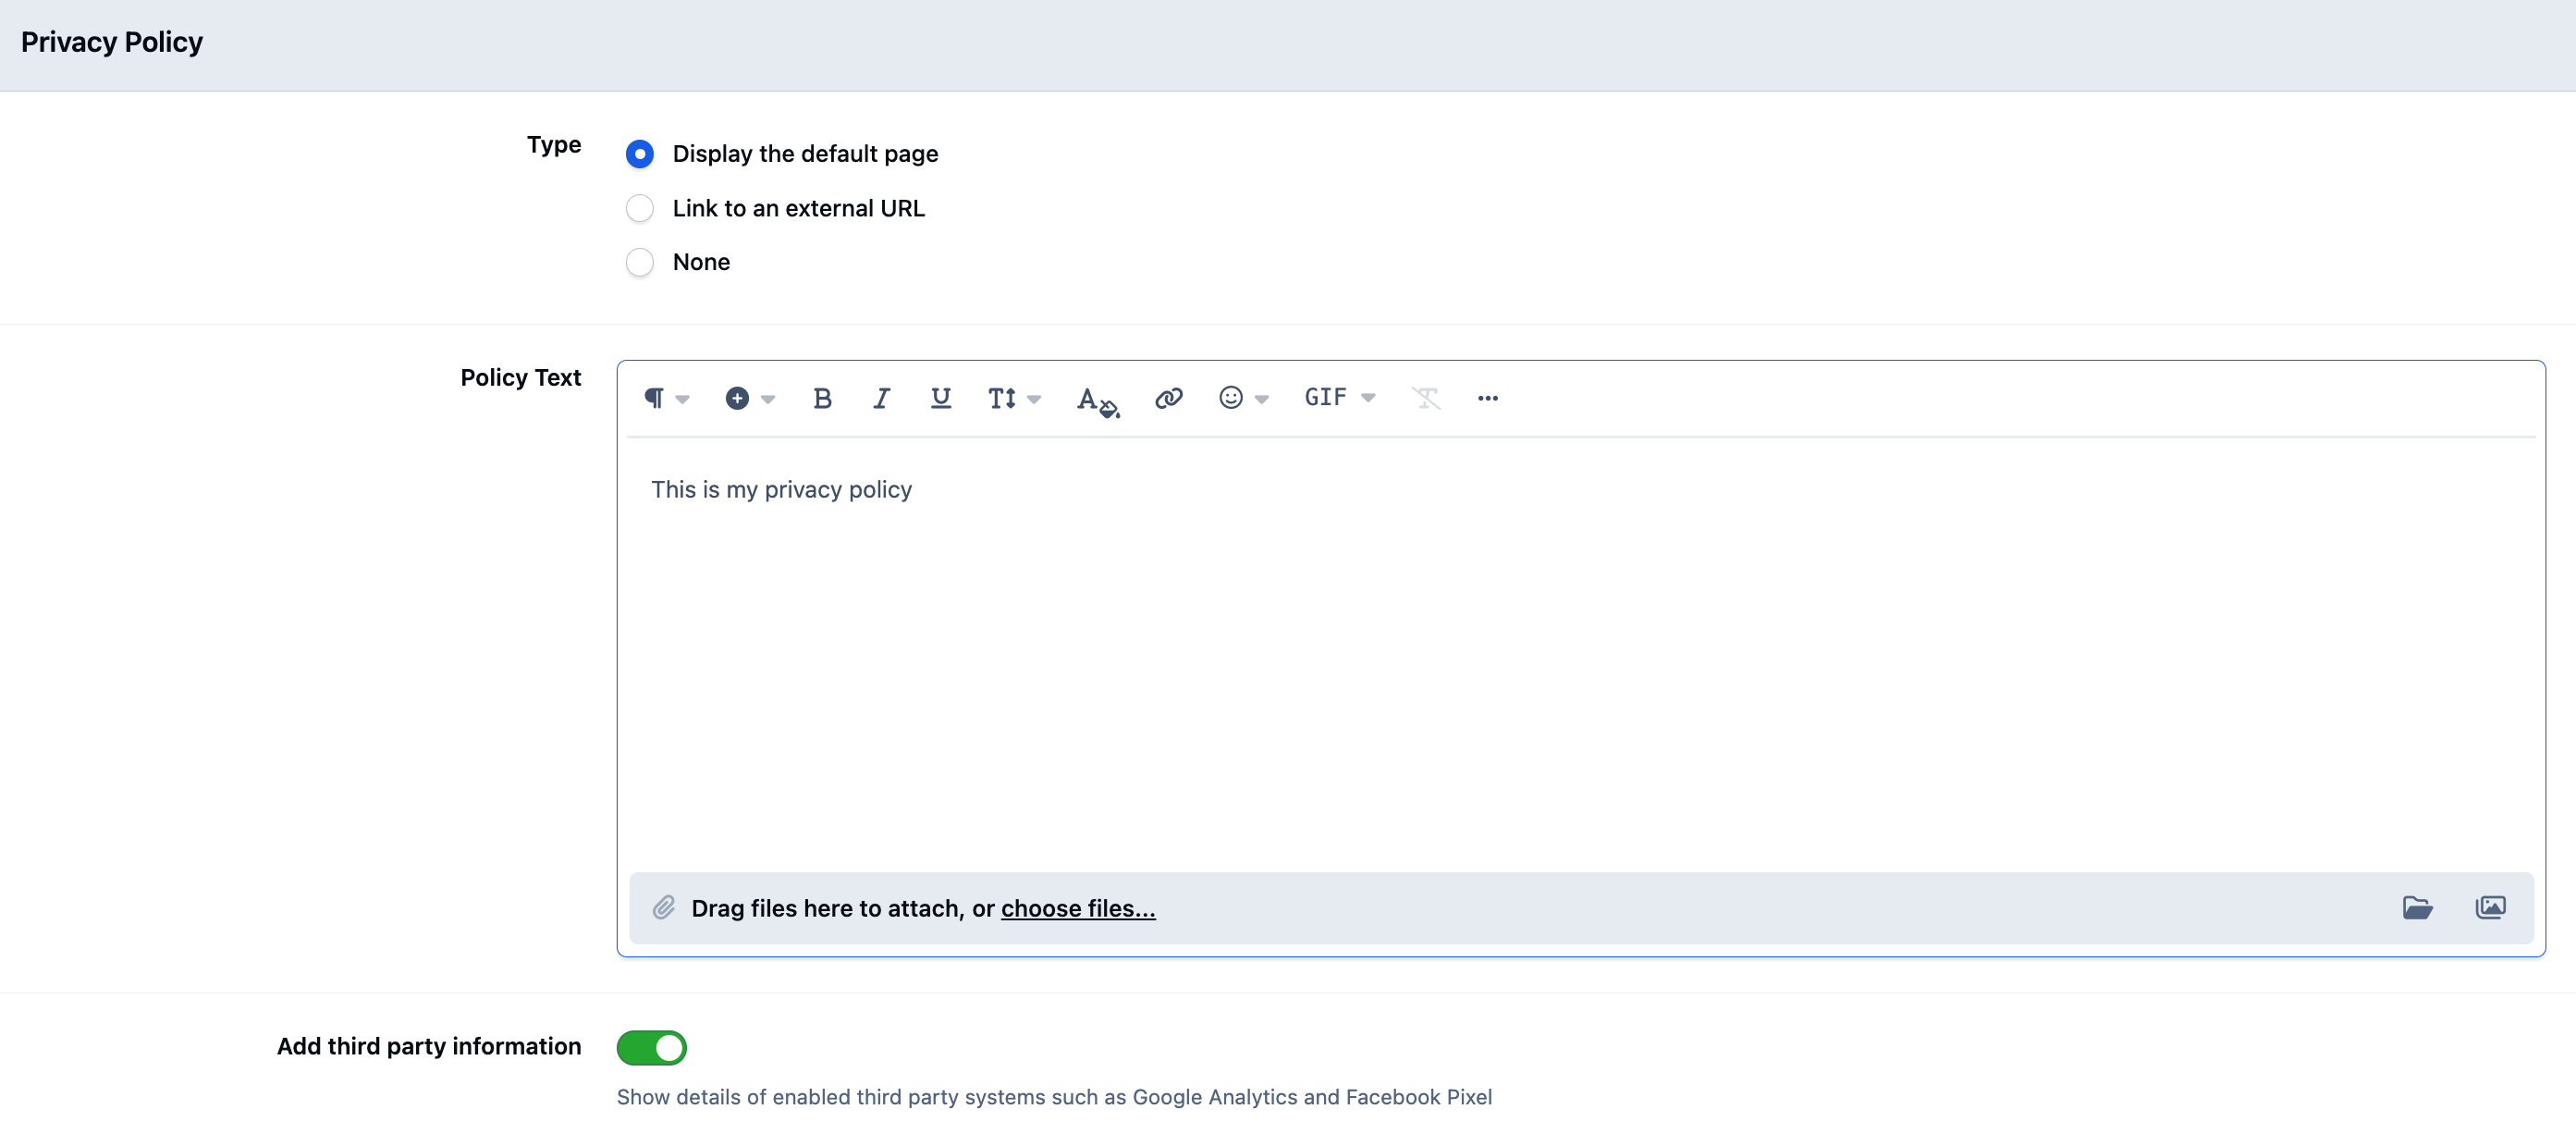
From this section, you can enter your full privacy policy directly, or provide a link to an externally hosted policy, in much the same way as the terms section discussed earlier. You’ll also notice an option to include third-party information, which is covered in the next section.
Once configured, a link to your privacy policy will appear in the footer of your site, and members will be required to accept it during registration.
If you later make changes to your privacy policy or registration terms, you’ll be prompted to decide whether existing members should be required to accept the updated version. This helps ensure that all members remain informed and up to date with your policies.
Force Acceptance of New Privacy Policy

Third Party Information
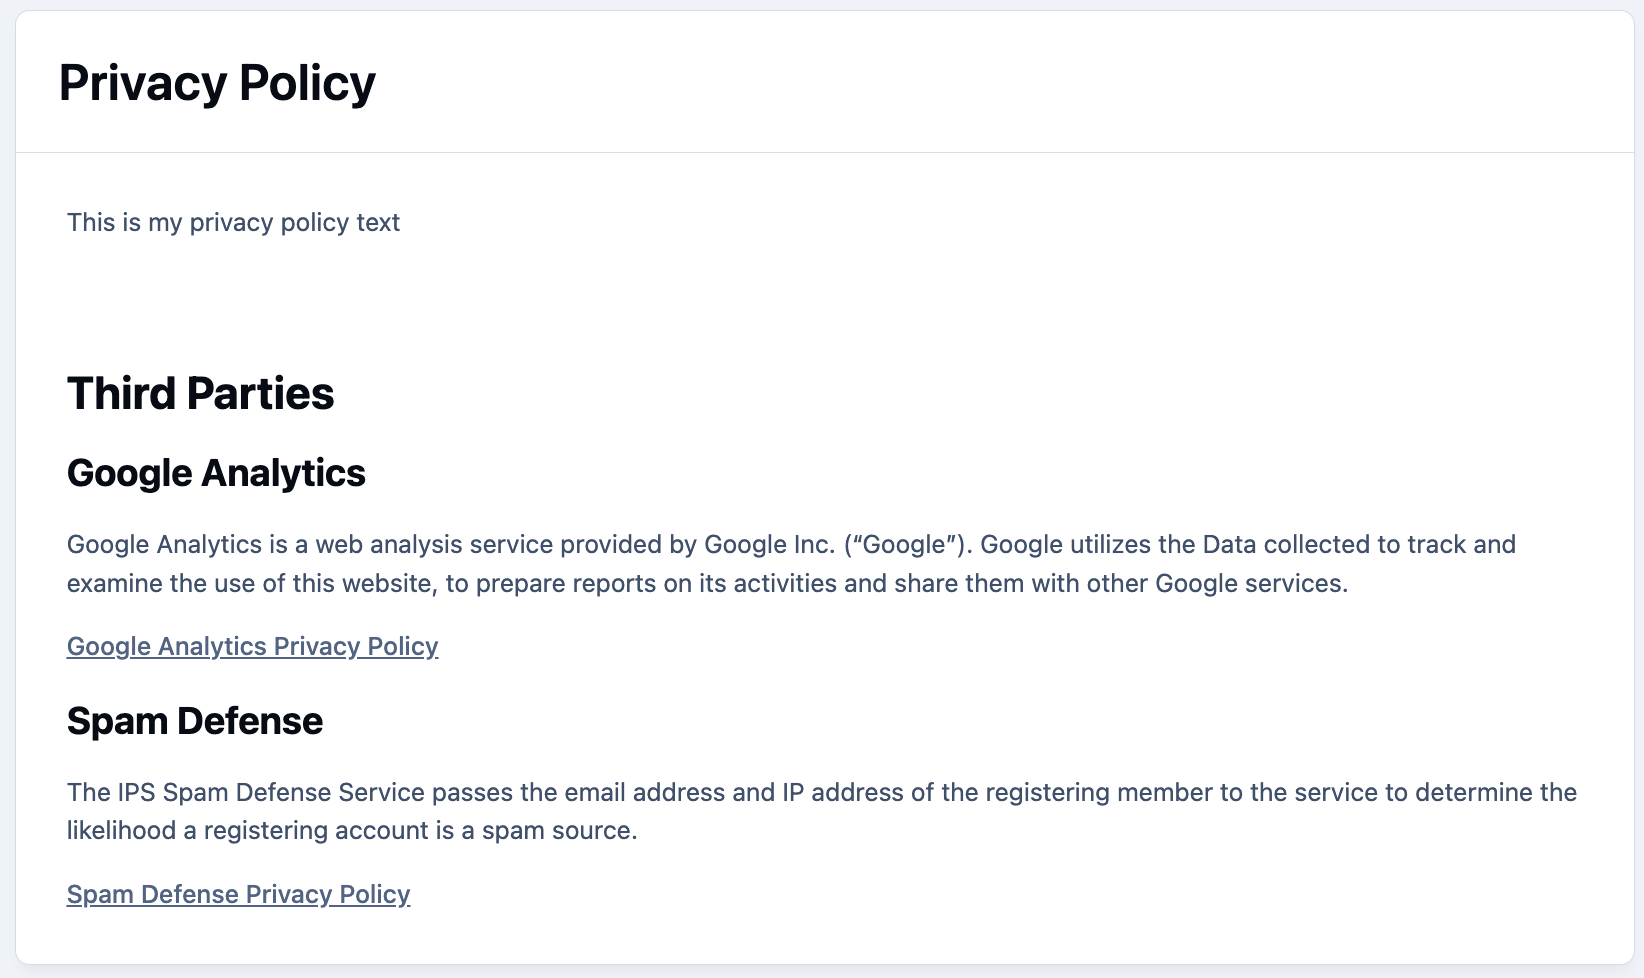
Your site may make use of a number of third-party services, such as reCAPTCHA, spam defense tools, Google Maps, and others. These services may process data including email addresses, IP addresses, and cookies, making it important that this information is clearly documented within your privacy policy.
By enabling the Add third-party information option within the privacy policy settings, the system will automatically include relevant details for the third-party services you have enabled on your site. An example of how this information is displayed can be seen in the image below.
Showing Addition of Third Party Information
Registration Terms & Rules
You can define guidelines outlining how you expect members to use your site from the following location in the Admin CP:
System → Settings → Terms & Privacy Policy
These guidelines are presented to users during registration and must be accepted before an account can be created. As with other policy-related settings, the content can be entered directly, linked to an external page, or disabled entirely if you prefer.
Guest Options
Within the Guest Options section, you can configure a terms of service confirmation bar that is displayed to visitors who are browsing your site as guests. This works in a similar way to the cookie consent banners commonly seen on many websites.
You can access this feature from the following location in the Admin CP:
System → Settings → Terms & Privacy Policy → Guest Options
From here, you can control the content shown in the guest bar and customize the message as needed. You’ll also see a list of available placeholders, such as {cookies} and {terms}, which automatically insert relevant text and links related to cookies and your terms of service.
Guest Options Settings - Admin CP
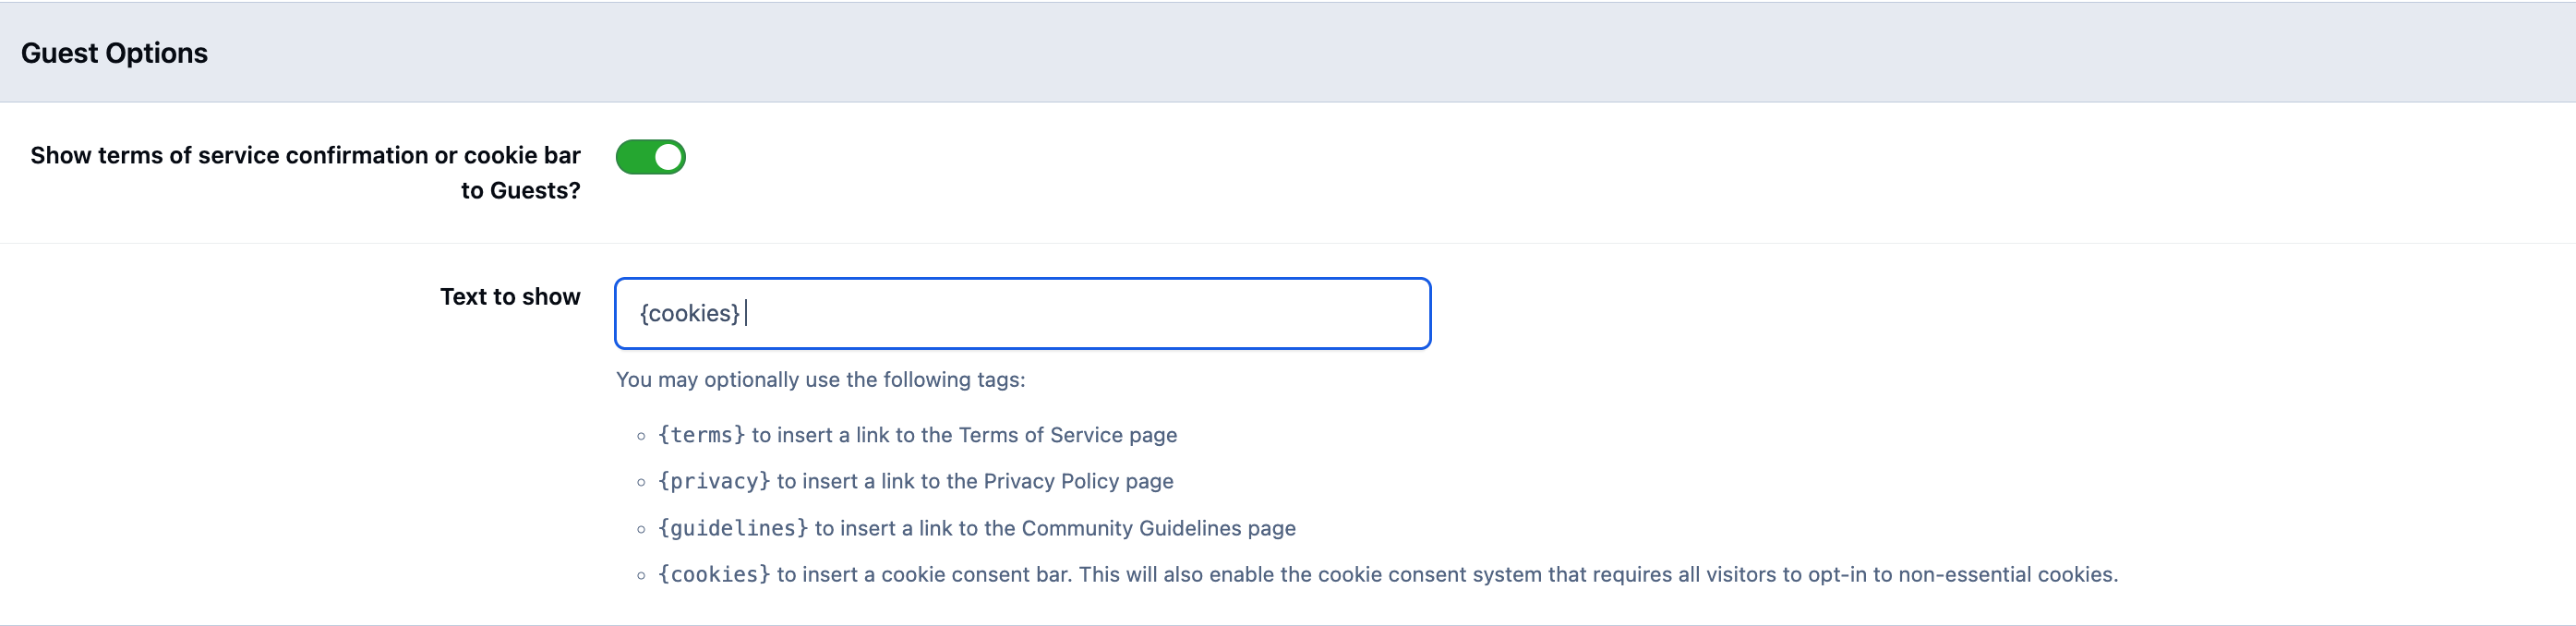
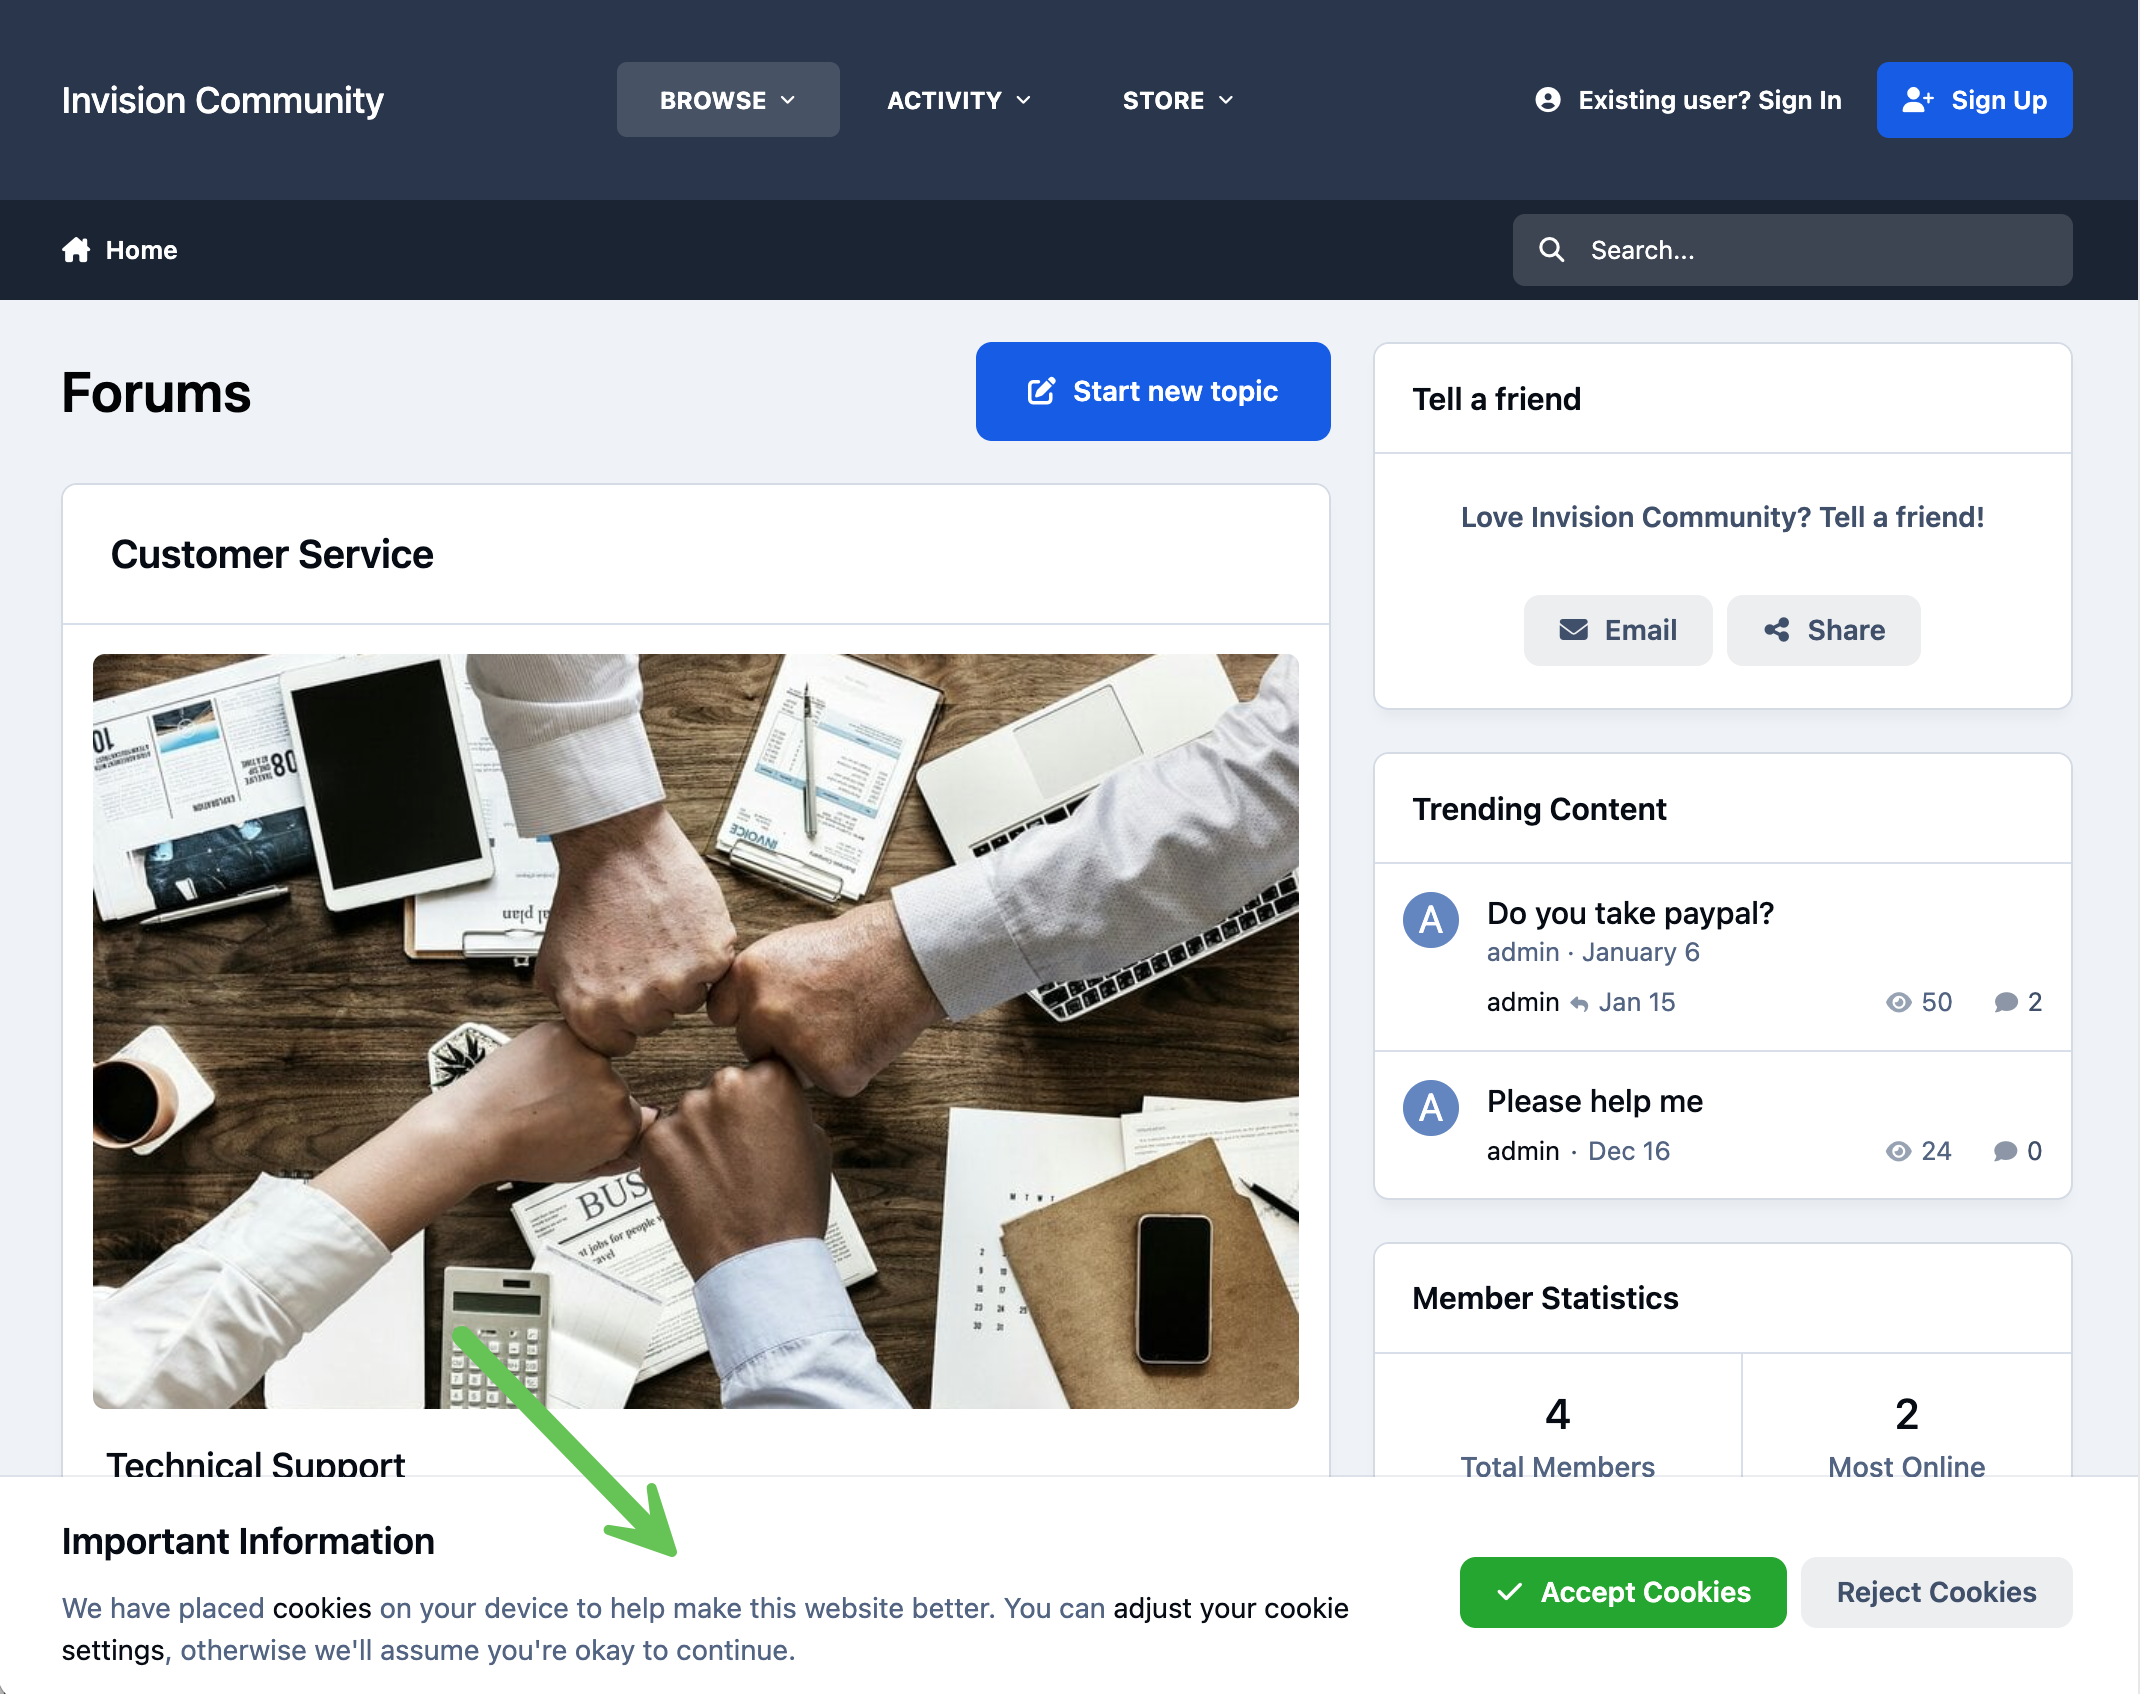
In the example above, the {cookies} placeholder has been added. This automatically displays information to guests about the site’s use of cookies, along with the relevant links for further details.
You can see how this appears to visitors in the image below.
Guest Bar Showing
Other Options
Bulk Mail Opt In
In some regions, most notably the EU, it’s important that members actively opt in to receive emails, rather than being automatically subscribed with a pre-selected checkbox.
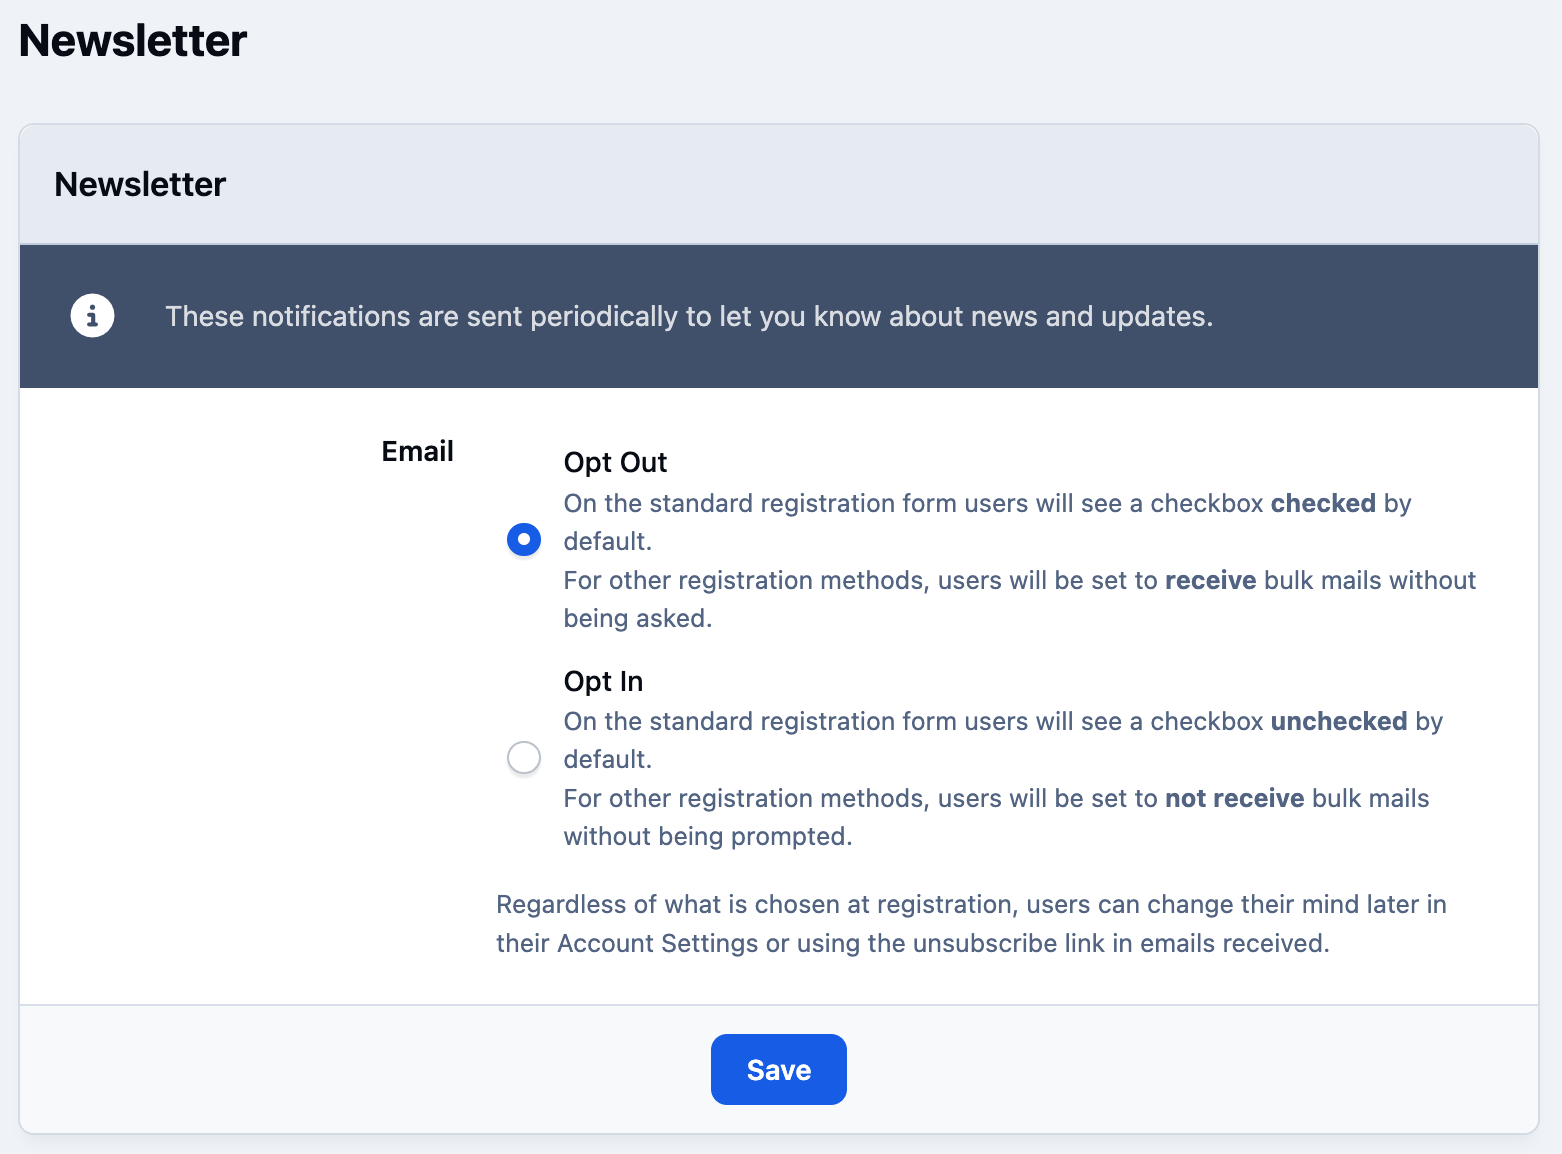
You can control whether newsletter subscriptions are opt-in or opt-out from the following location in the Admin CP
Members → Member Settings → Notifications → Newsletter
Setting Up Newsletter Defaults
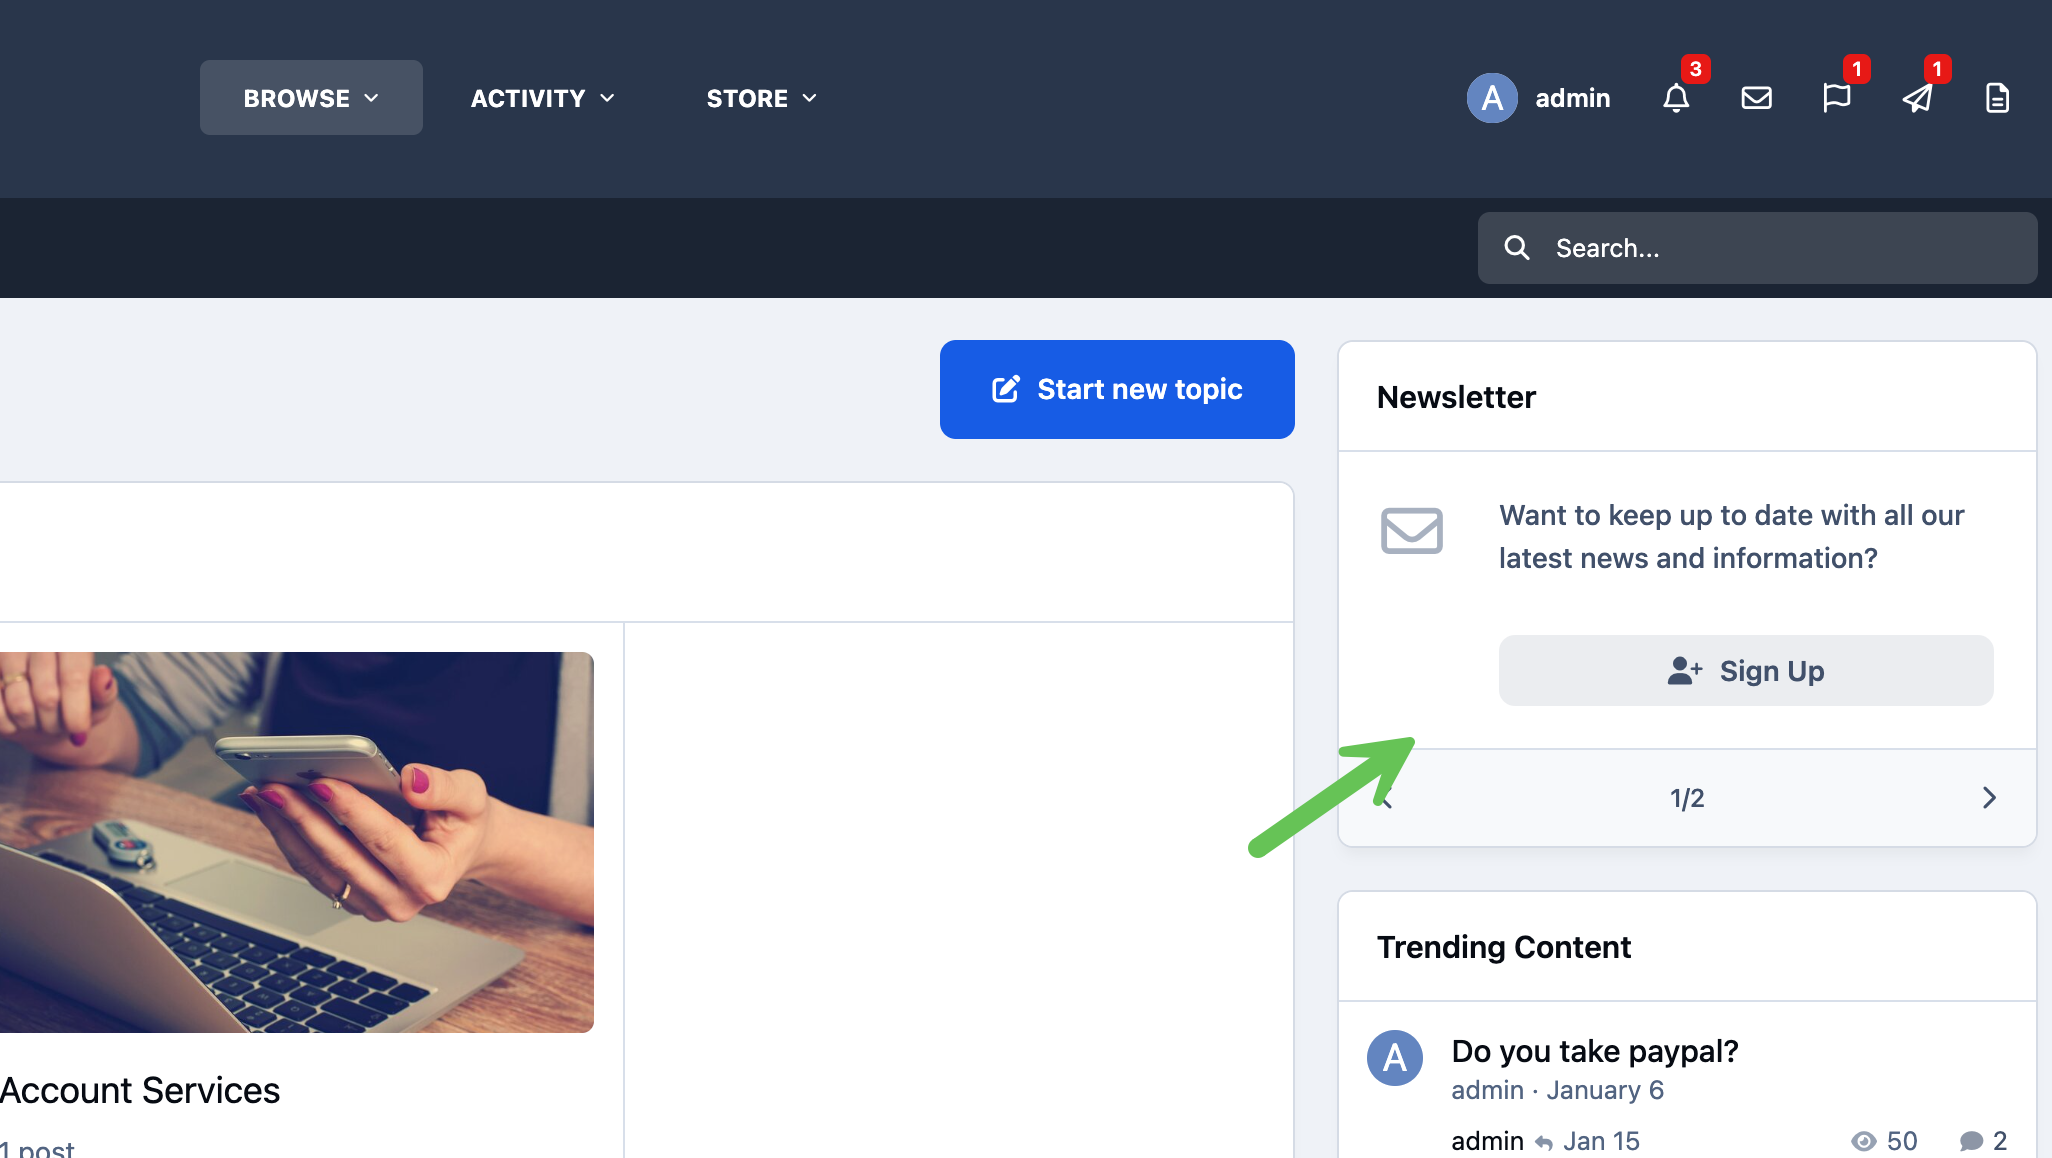
In addition to this, members are given an easy way to sign up for newsletters at a later time if they choose not to opt in during registration. This is handled by adding the Newsletter Signup widget from the System section of the page editor menu
Using this block allows members to subscribe at their own convenience, helping ensure compliance with opt-in requirements while still giving you opportunities to grow your mailing list over time.
Newsletter Signup Widget
Removing IP Addresses
IP addresses play an important role in how the internet functions and are recorded alongside content each time a member posts on your site. By default, these IP addresses are stored indefinitely.
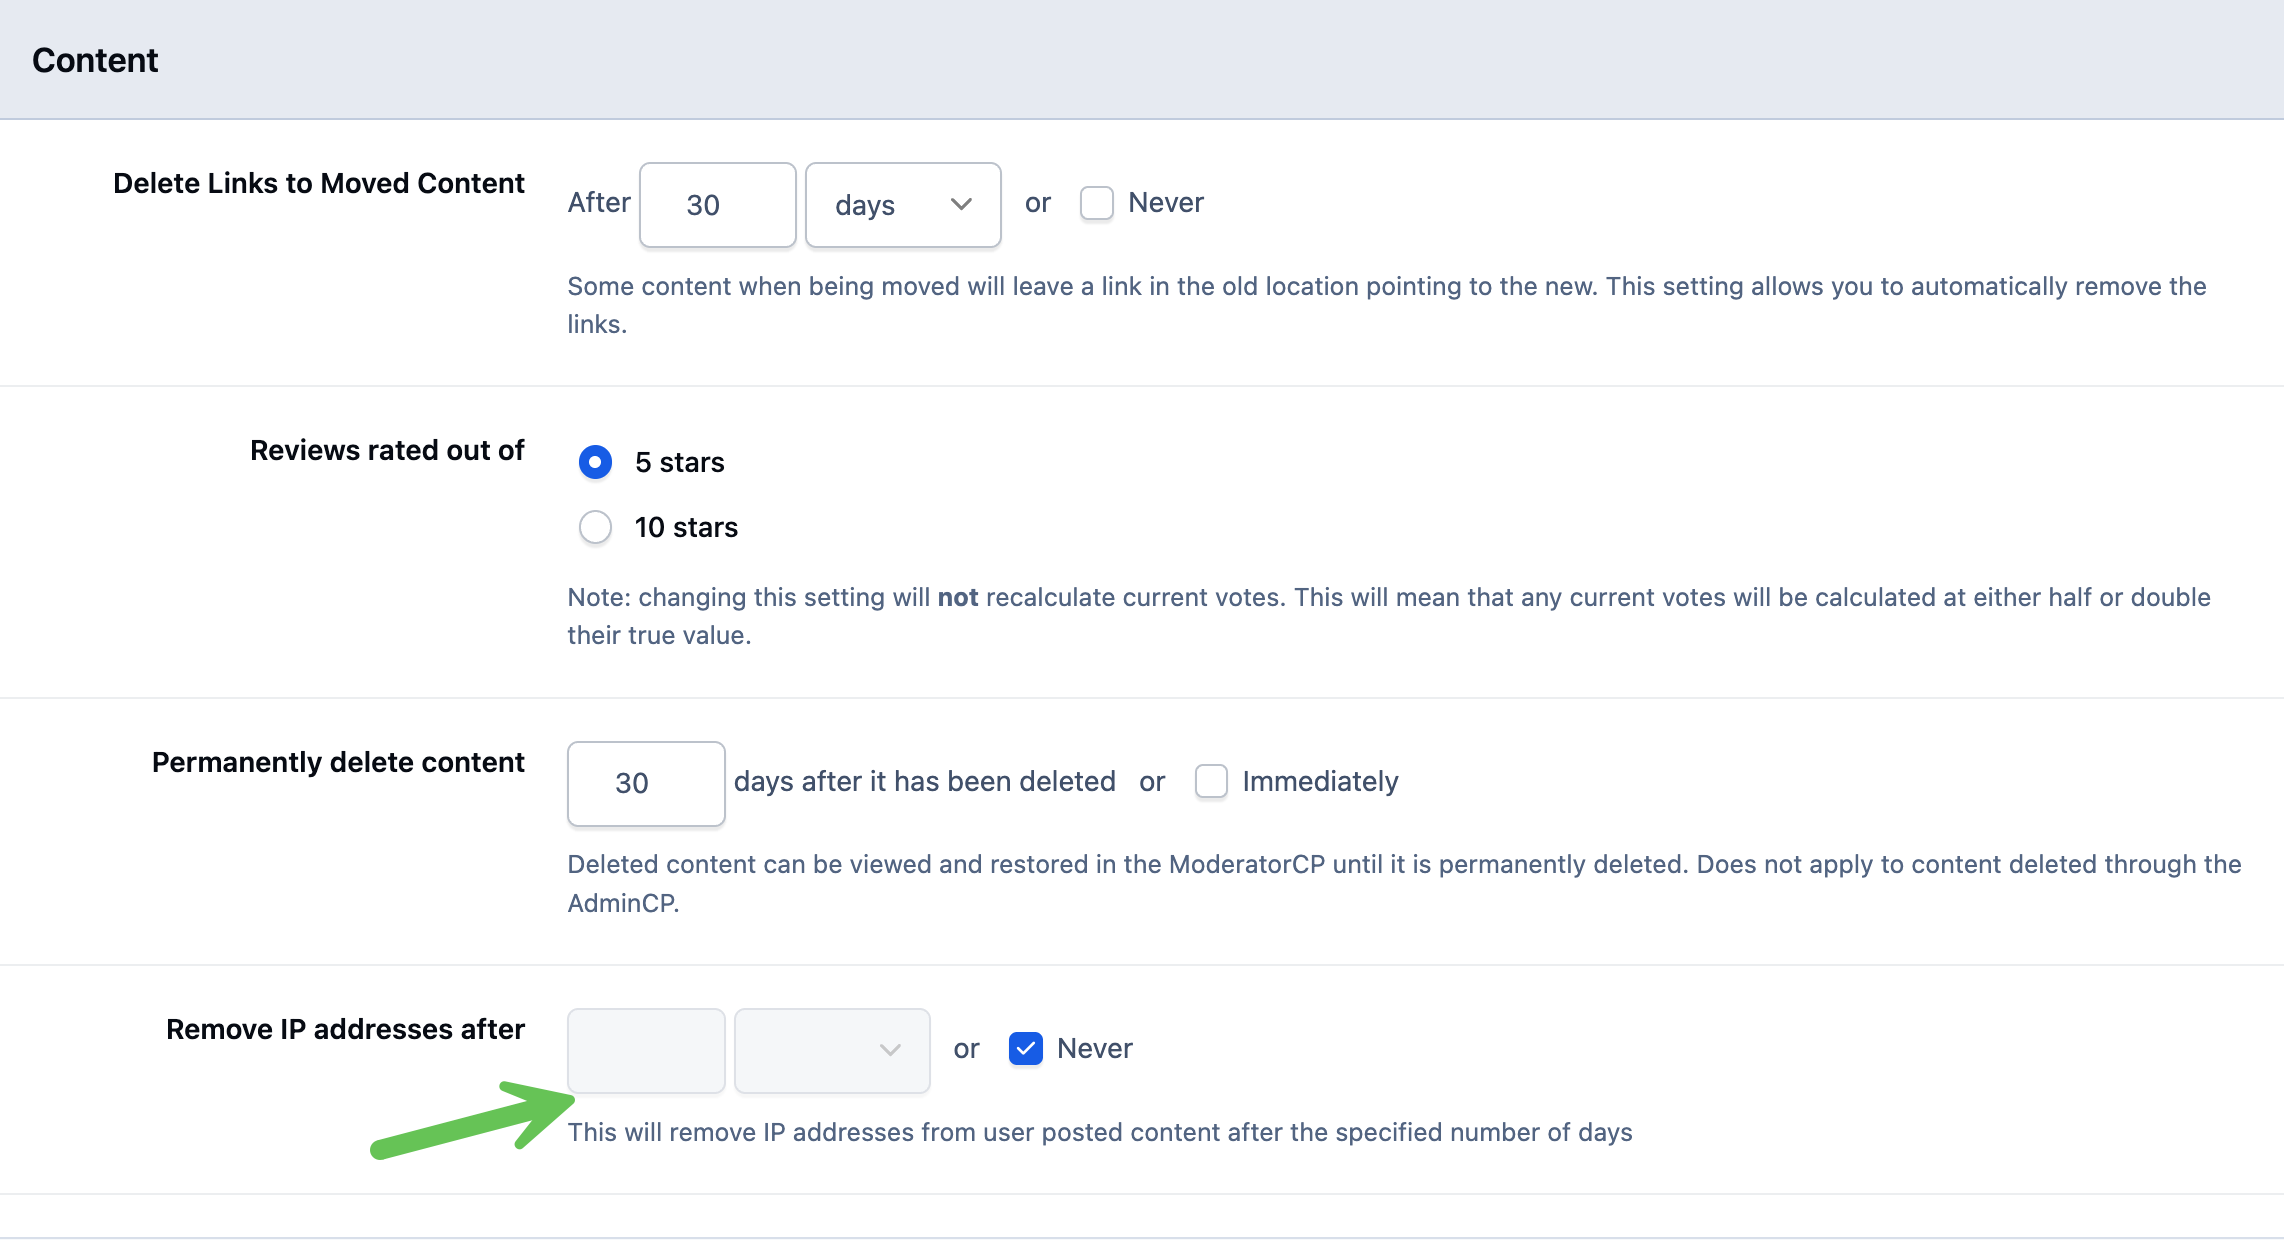
If you would prefer to periodically remove stored IP address information—for example, to better align with privacy policies or data retention requirements—you can configure this behavior from the following location in the Admin CP
System → Settings → Posting & Editor→ Content
Removing IP Addresses On Schedule
Personal Information Requests
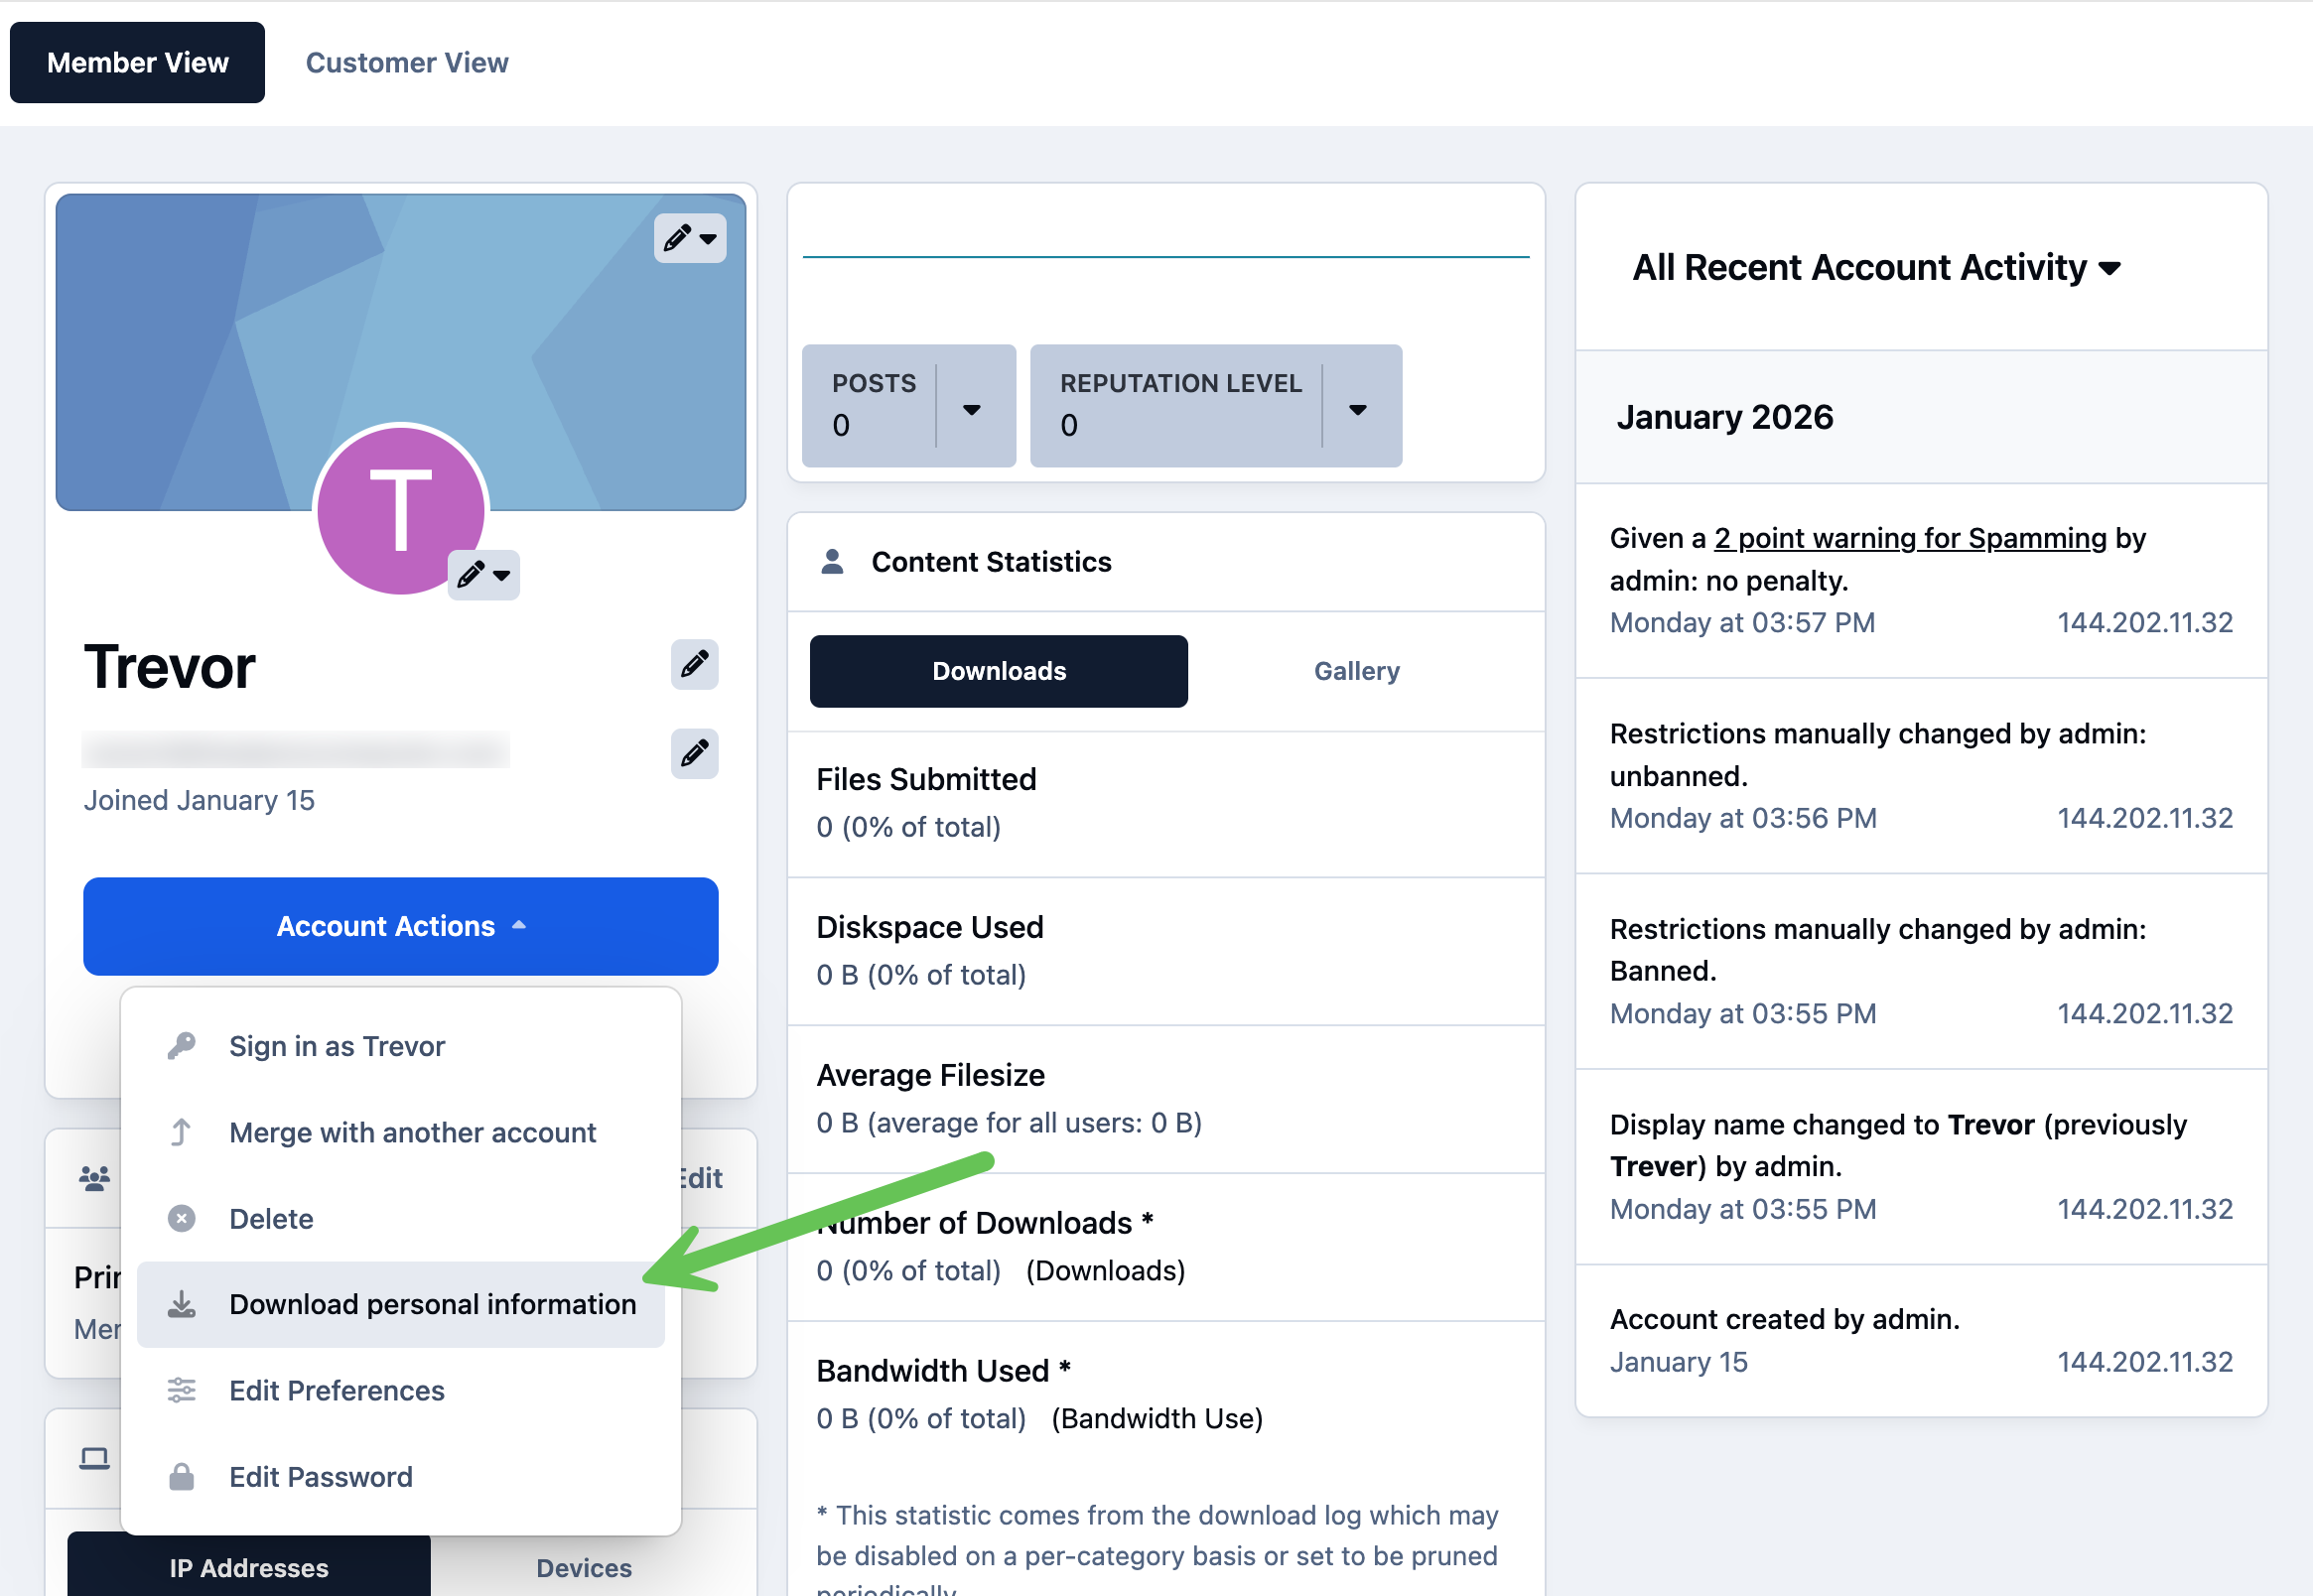
From time to time, members may request a copy of the personally identifiable information (PII) stored on their account. This can be easily provided directly from the member’s account within the Admin CP
To do this, navigate to:
Members → Members → {Member Name}
From the member’s account page, select Account Functions, then choose Download Personal Information to generate and provide the requested data.
Downloading PI
Members can also request a copy of their personal information themselves from their account settings, under the Security and Privacy section.
Recommended Comments