


Spam is an unavoidable challenge for any online community. From automated sign-ups to accounts created solely to post unwanted or malicious content, managing spam can quickly become a drain on time and resources.
The Invision Community Suite includes a comprehensive set of spam management tools designed to help you prevent, detect, and respond to spam effectively. By combining automated defenses with moderator controls, these tools allow you to protect your community while minimizing disruption to genuine members.
Invision Spam Services
Spam Defense service
The spam defence service can be found in the following area of the Admin CP
Members → Content Moderation → Spam Prevention→ Spam Defense
From here, you can configure what actions are automatically taken when a registering user is identified by the system as a potential spammer.
Spam Defense Service
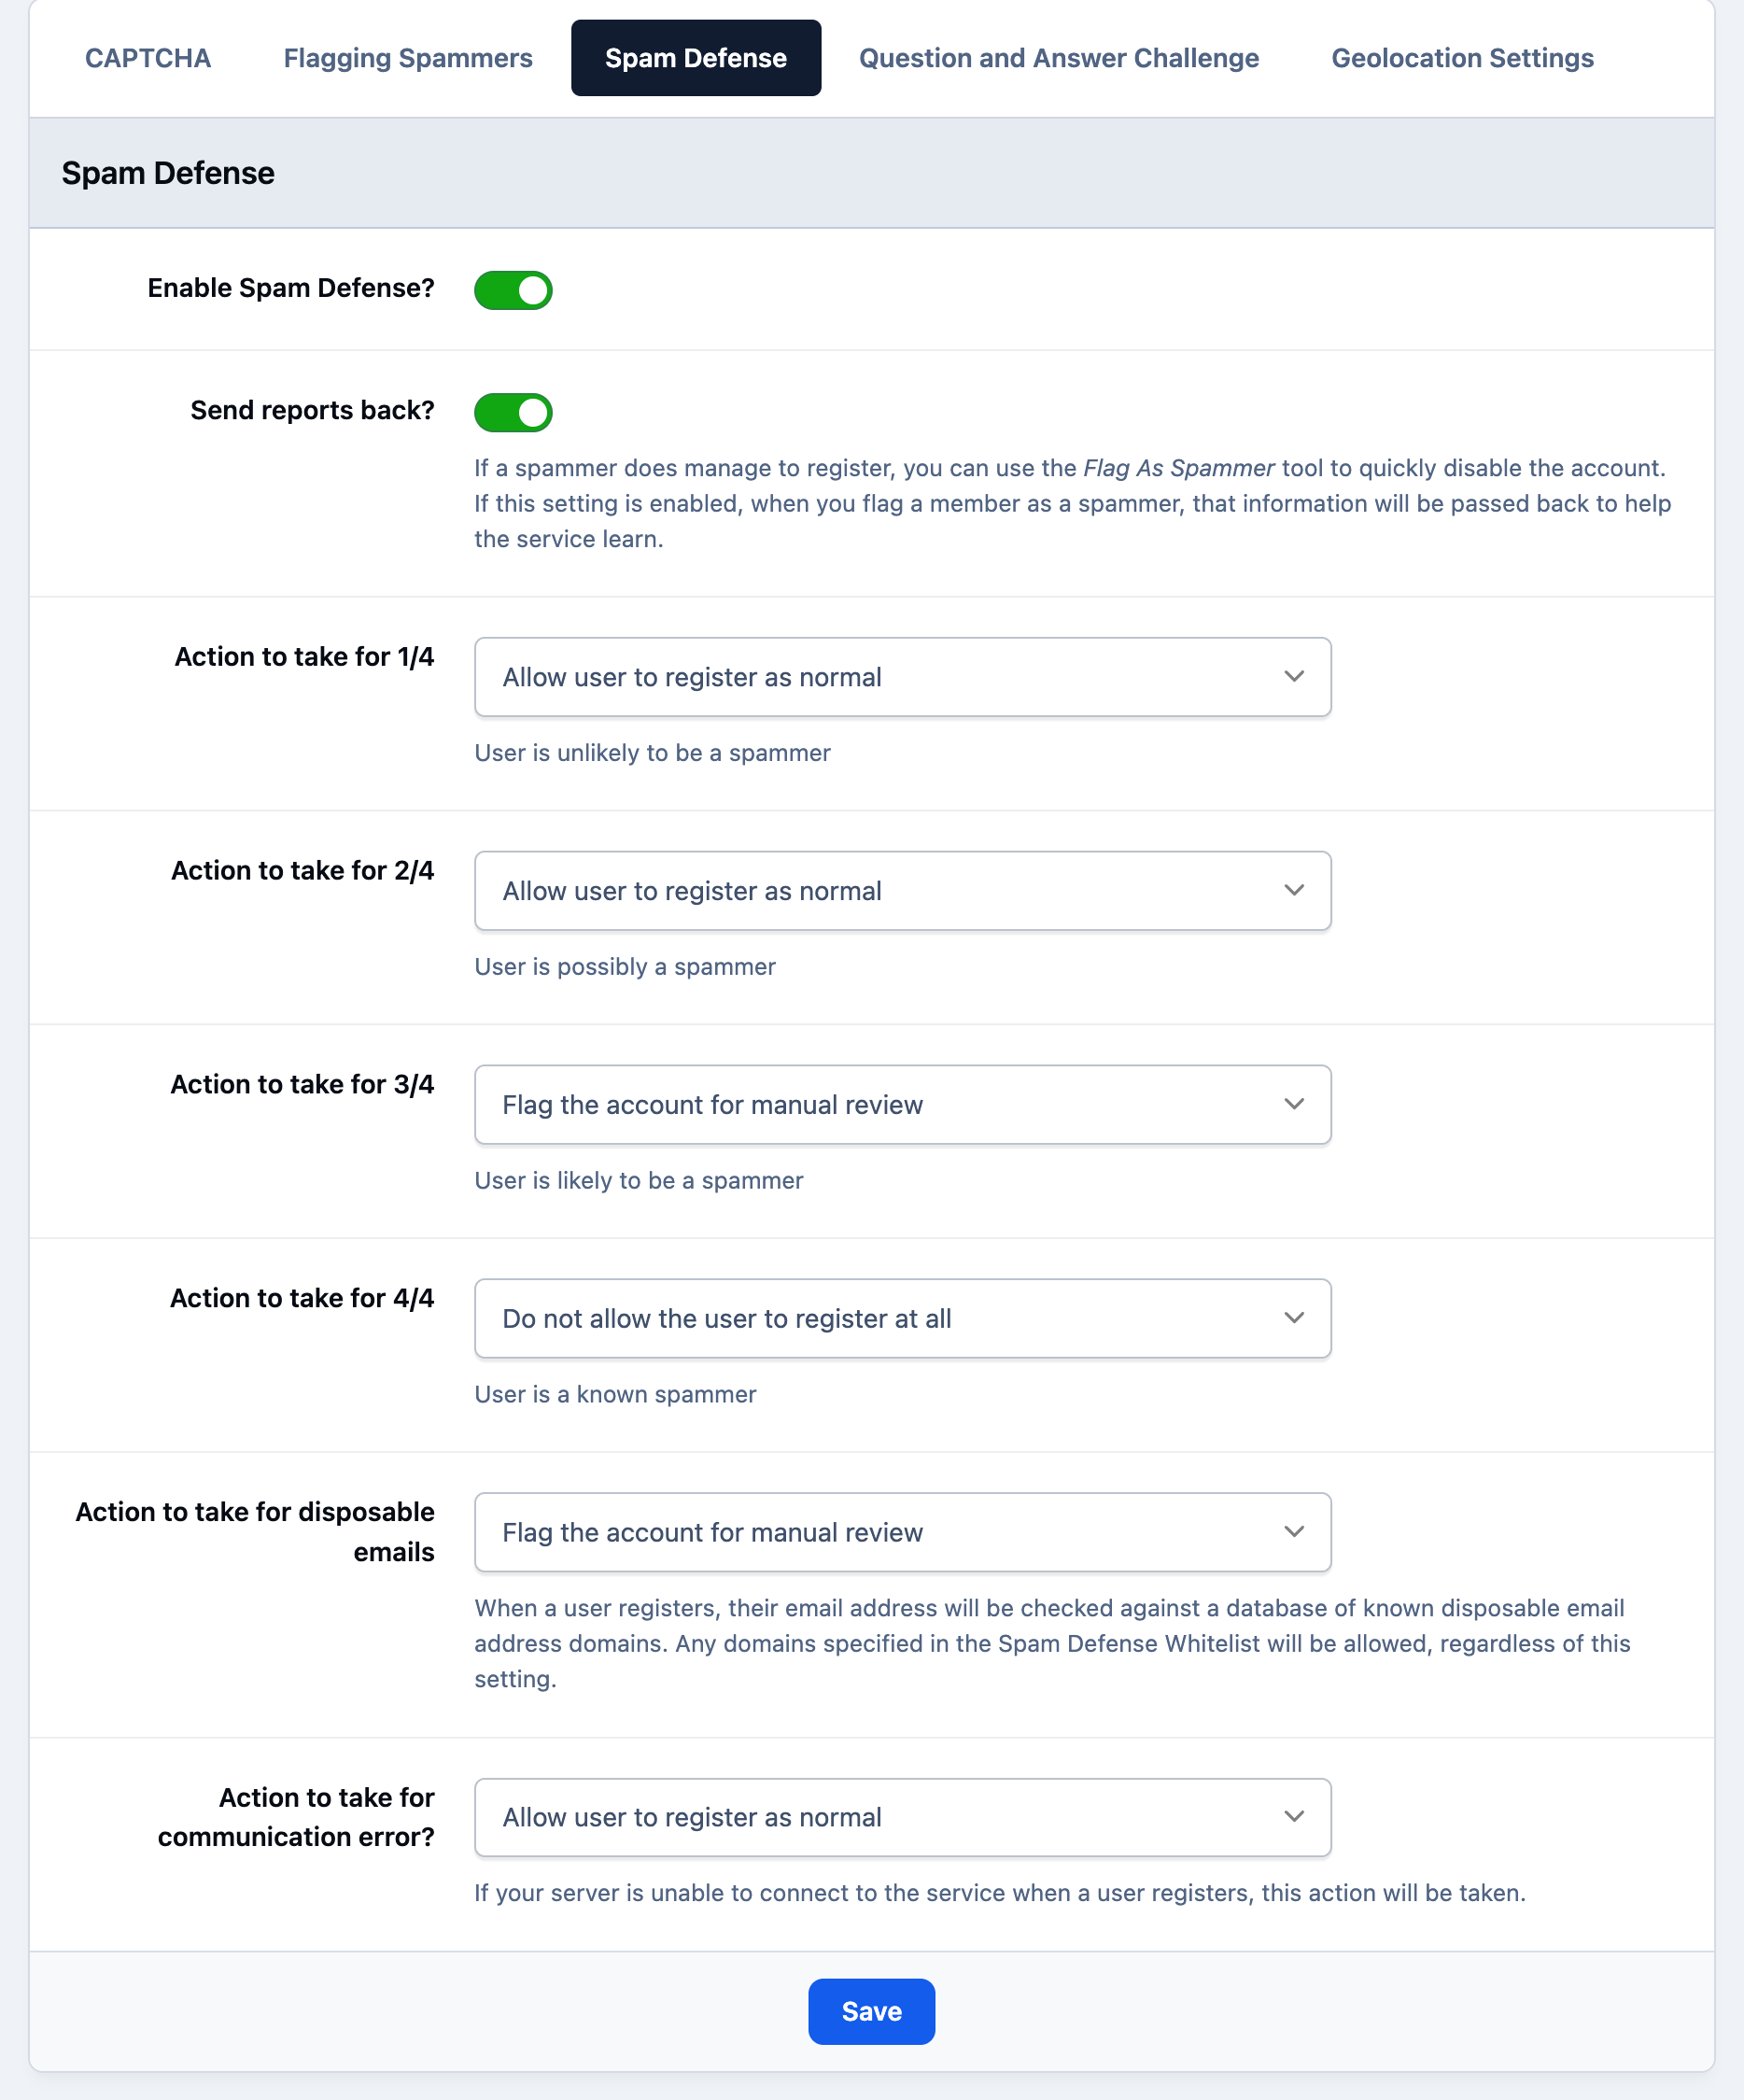
When a user registers, the spam defense service assigns a score indicating how likely the account is to be spam. Scores range from 1 to 5, where 1 represents the lowest likelihood of spam and 5 represents the highest.
You can then define how the system should respond to registrations at each score level, allowing you to automatically apply different actions based on the assessed risk.
You can change the default settings to any of the following items
Allow user to register as normal
Allow registration, but require approval of all posts
Flag the account for manual review
Register the account, but immediately ban it
Do not allow the user to register at all
In addition, you can also choose what you would like to happen when a users registers with a disposable email address, with the same options as above.
Logging
There may be occasions where you need to review the spam score that was assigned to a registering member. To support this, the system keeps a log of every registration that is checked by the spam defense service.
These logs are particularly useful if a potential member reports that they are unable to complete registration, as they allow you to see exactly how the system classified the account.
You can access these records by selecting Spam Defense Logs from the top-right corner of the Spam Prevention section, or by navigating to:
Members → Content Moderation → Spam Prevention → Spam Defense Logs
Logs from the Spam Defense Service
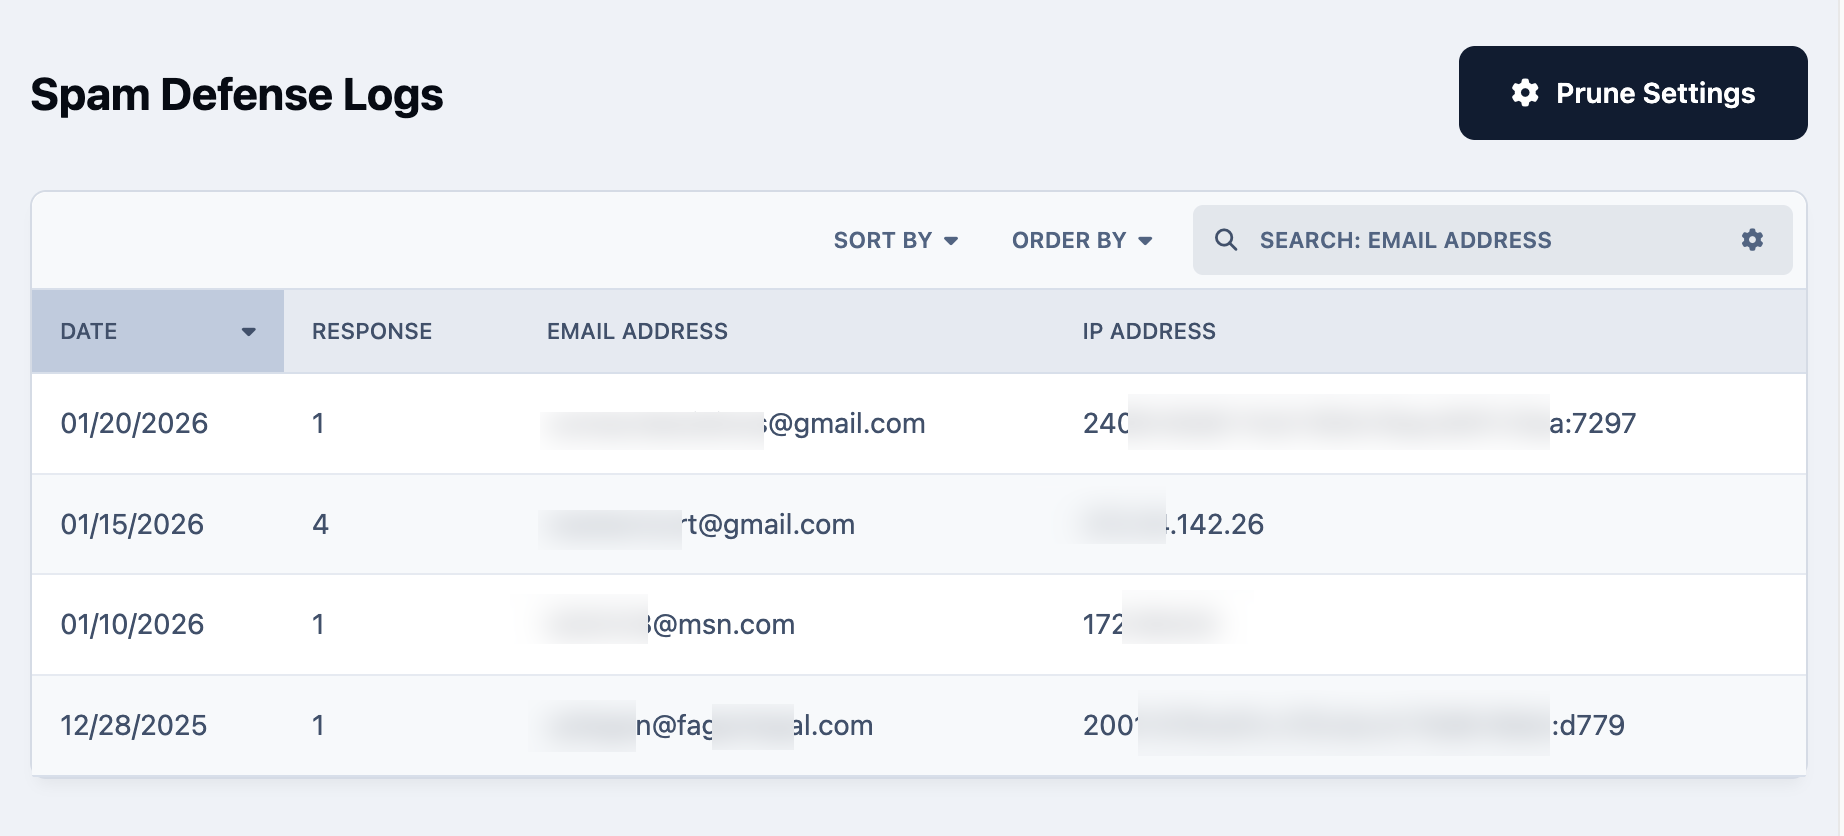
From here, you can view the user’s registration details along with the spam score that was assigned. When combined with your configured spam defense settings, this information shows exactly what action was taken for that registration.
White Listing
There may be occasions where a legitimate user is assigned a higher spam score than expected. A common example of this is during testing, where repeatedly registering accounts can cause your own IP address to be flagged as a higher-risk spam source. At higher levels, this can result in registration being blocked entirely.
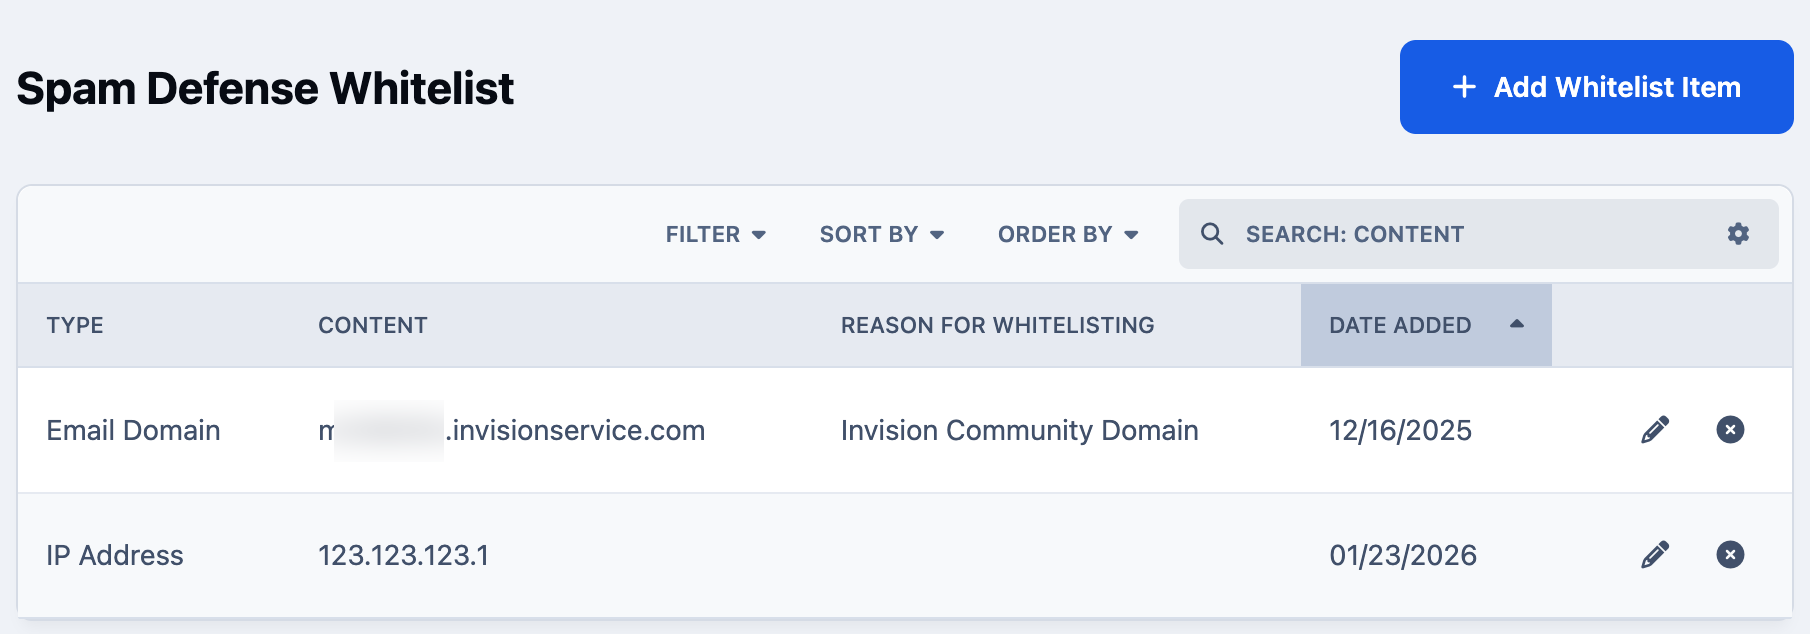
In situations like this, you can whitelist trusted sources within the spam defense system so they are excluded from future checks. This is particularly useful for administrators, developers, or internal testing environments.
To do this, visit the Spam Defense Whitelist, where you can add specific IP addresses or email domains that should be ignored by the spam detection service going forward.
An email and IP Added to Whitelist
Geolocation Spam Filtering
In many cases, spam activity originates from bots or servers located in specific regions. By leveraging our existing geolocation service, Invision Community now provides additional filters that allow administrators to take action based on a user’s geographic location. You can set up location specific moderation in the following area of the admin CP
Members → Content Moderation → Geolocation Settings
Adding Locations to Geolocation Filtering
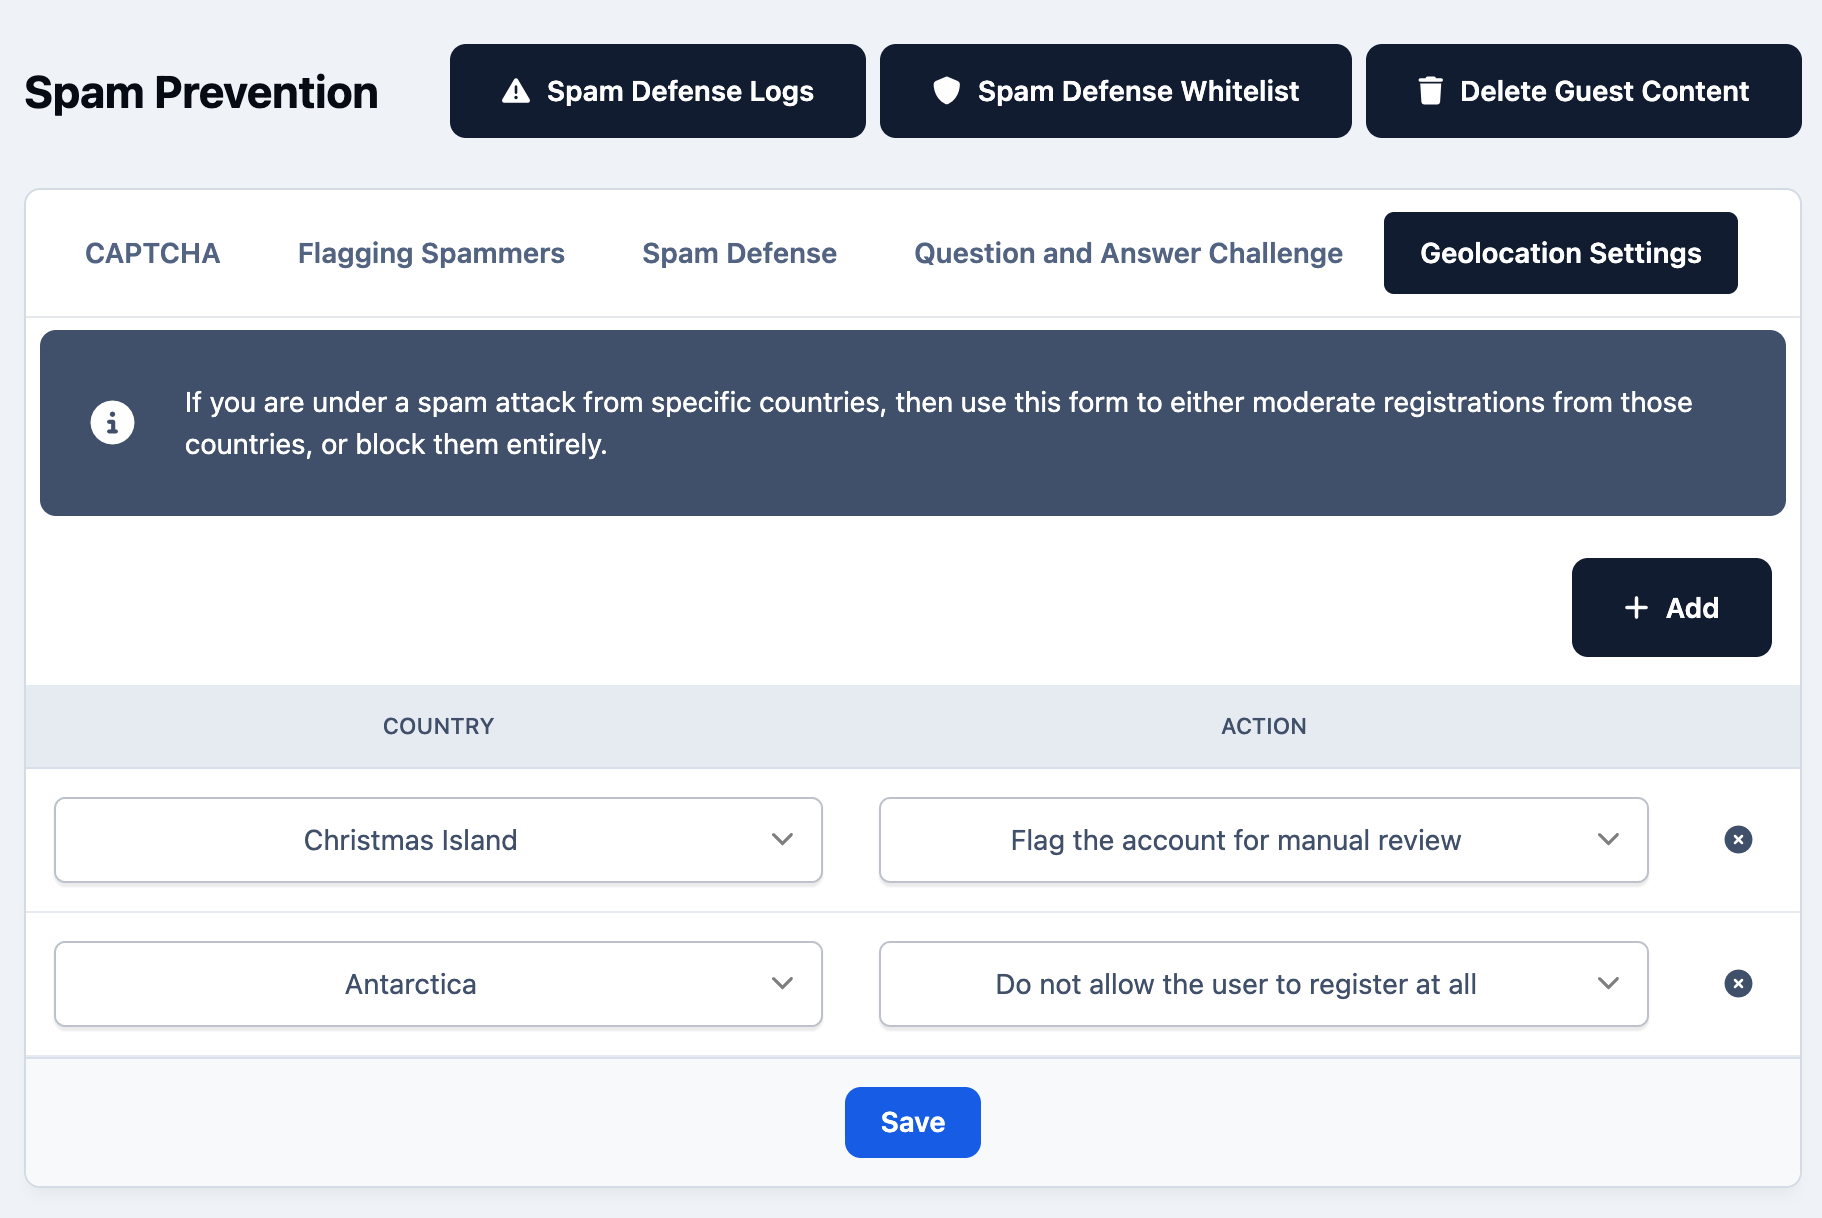
Using these filters, you can choose to automatically hold registrations from selected regions for administrator review, or deny those registrations entirely. This gives you another effective layer of control, helping to reduce spam while still allowing legitimate registrations to be reviewed when appropriate.
Cloud Content Analysis
Available in our teams package or above, we have also added an additional layer of spam prevention after registration. This can be found in the following location within your Admin CP
Members → Content Moderation → Spam Analysis
After a member registers, or if an existing account has been inactive for a period of time, their first few content submissions are analyzed using a custom-built spam detection algorithm within the Invision Community platform.
This algorithm evaluates multiple aspects of the submitted content and assigns it a score from 1 to 5. In a similar manner to the spam defence service, 1 represents the lowest likelihood of spam and 5 represents the highest.
Similar Settings to Spam Defense, but for Spam Analysis
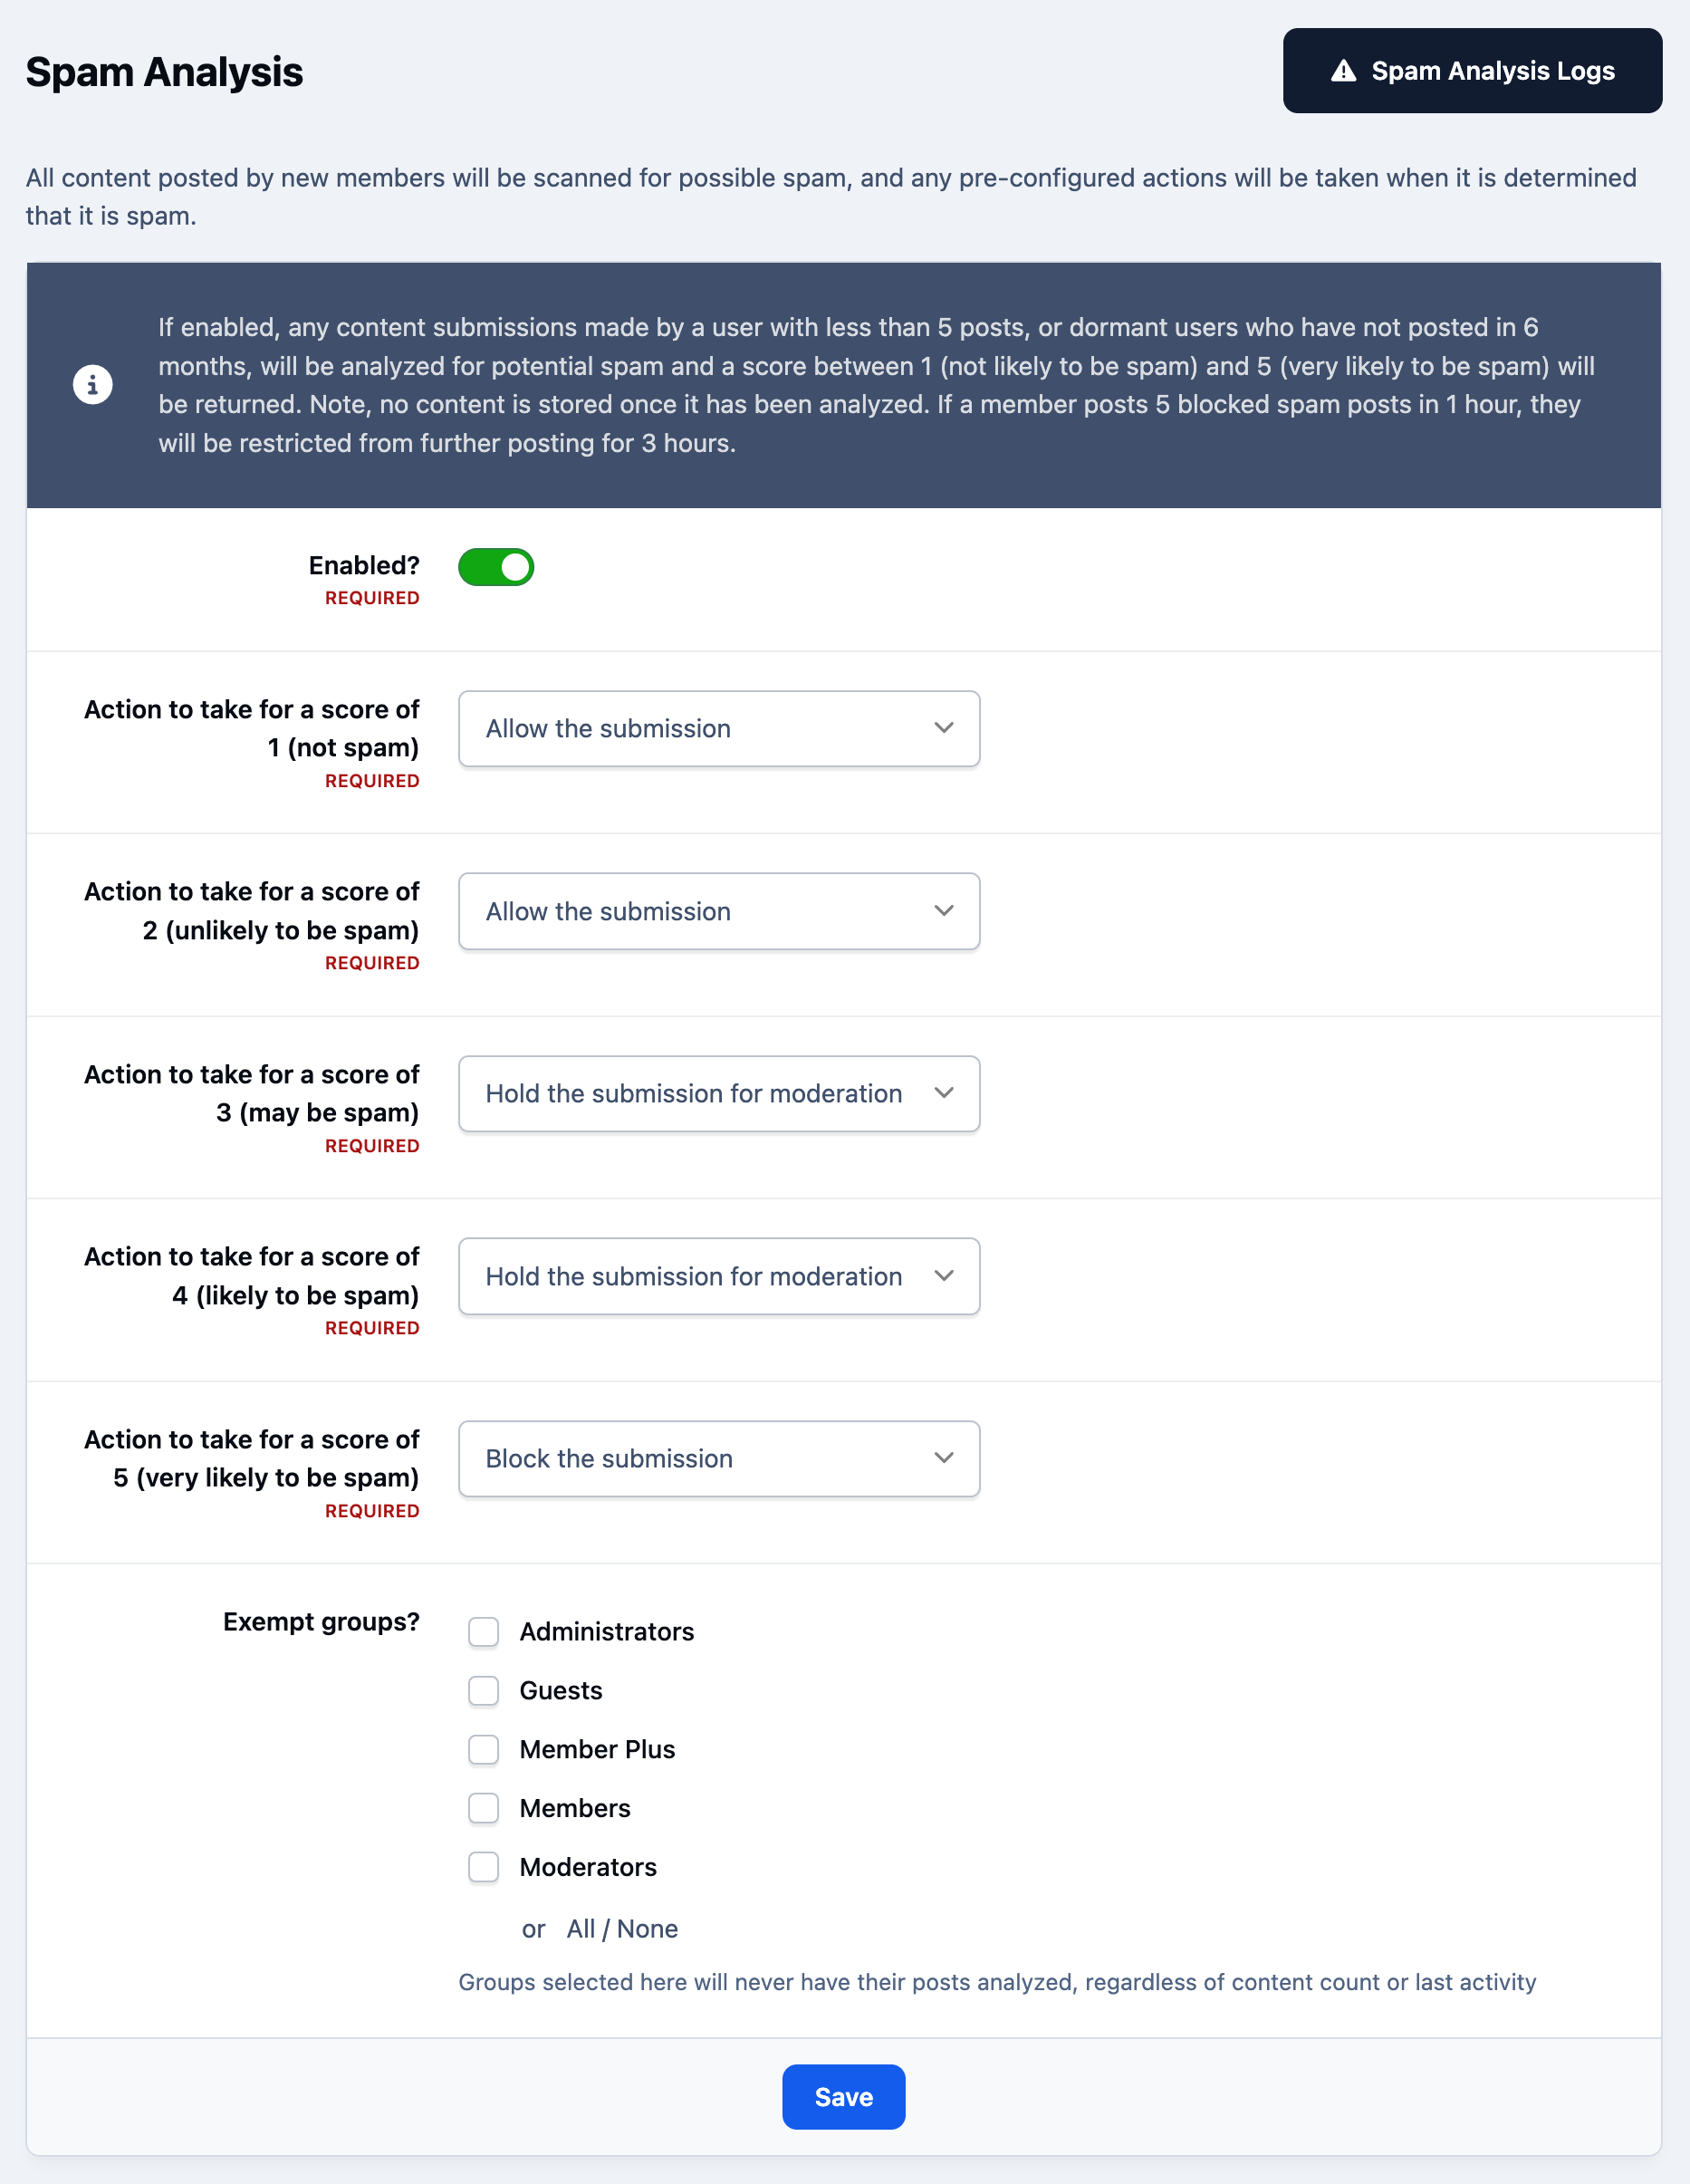
The system is continuously refined and improved based on emerging spam trends. These improvements happen automatically, without any action required from administrators and without the need to install software updates or upgrade to new versions of Invision Community.
Based on the score assigned, administrators can define how the system should respond. Possible actions include:
Allowing the submission to be posted immediately
Holding the submission for moderator review
Denying the submission entirely
Specific member groups can also be excluded from post-submission spam checks. This is particularly useful for communities with subscription-based registrations, where you may want trusted or paid members to bypass spam filtering, while still monitoring content from new or non-subscribed users.
Spam can quickly become a major challenge for community managers, and these additional post-registration tools help stop unwanted content at the source. Post-submission spam checking adds another powerful layer of protection, further reducing the number of spam topics and posts that reach public view.
Captcha
CAPTCHA is an external service used to help determine whether a visitor is a real person or an automated bot. Bots are commonly used to register accounts automatically in order to post spam, advertisements, or malicious content. Enabling a CAPTCHA method is one effective way to reduce this type of automated abuse.
You can configure CAPTCHA for your site from the CAPTCHA tab within following area of the Admin CP
Members → Content Moderation → Spam Prevention → CAPTCHA
From here, you can choose one of the following options:
Cloudflare Turnstile - The user clicks a "I'm not a robot" checkbox.
Invisible reCAPTCHA - Runs silently in the background and intelligently determines whether the user is human, without requiring any interaction.
reCAPTCHA v2 - Presents users with the familiar “I’m not a robot” checkbox.
hCaptcha - Prompts users to click a checkbox and, in some cases, select specific images from a grid.
Each of these services requires a (free) API key in order to function. Direct links to obtain the required keys are provided within the settings area for each CAPTCHA option.
Flagging Spammers
The Flagging Spammers section allows you to define what happens when a member on your community is identified as a spammer. From here, you can configure automatic actions such as banning the account, removing any submitted content, and sending notifications to selected staff members if required. This can be found in the Admin CP at
Members → Content Moderation → Spam Prevention → Flagging Spammers
Flagging Settings
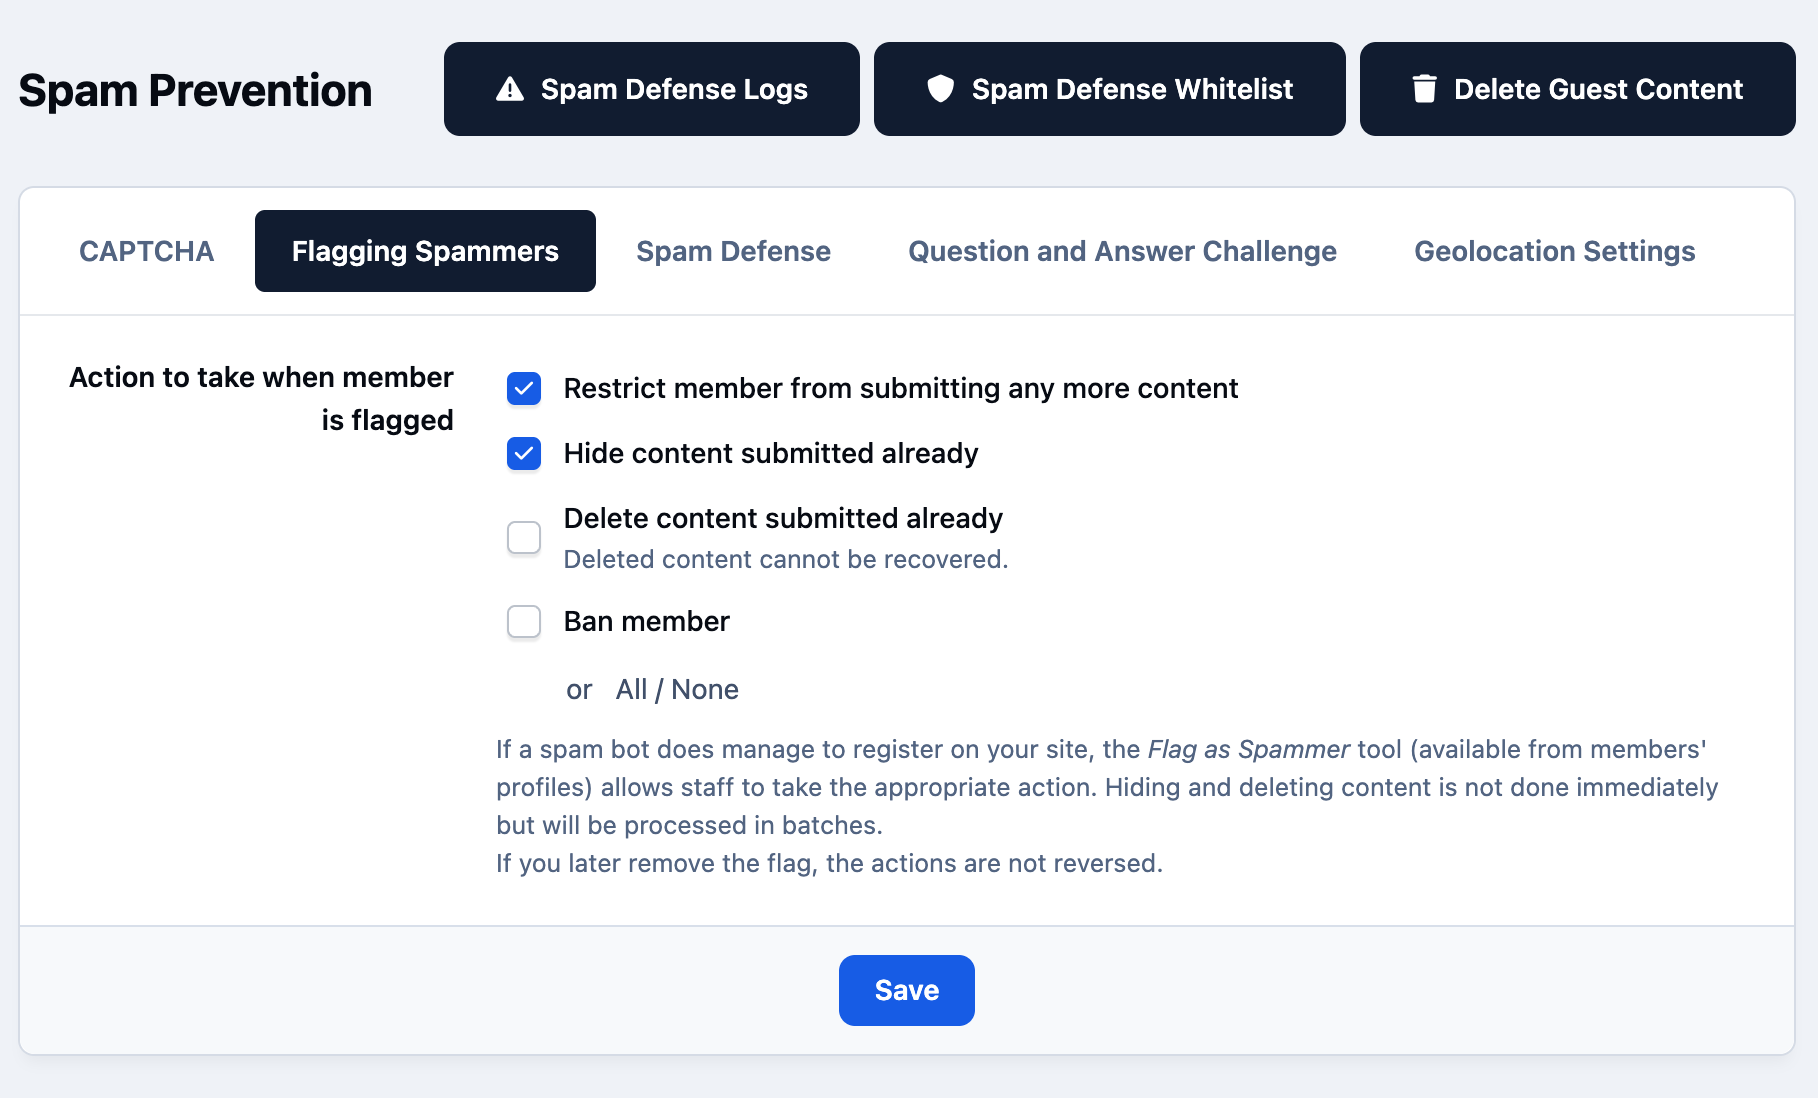
A member can be flagged as a spammer from several areas across the site. Administrators and moderators will find this option:
Next to each member in the member list within the Admin CP
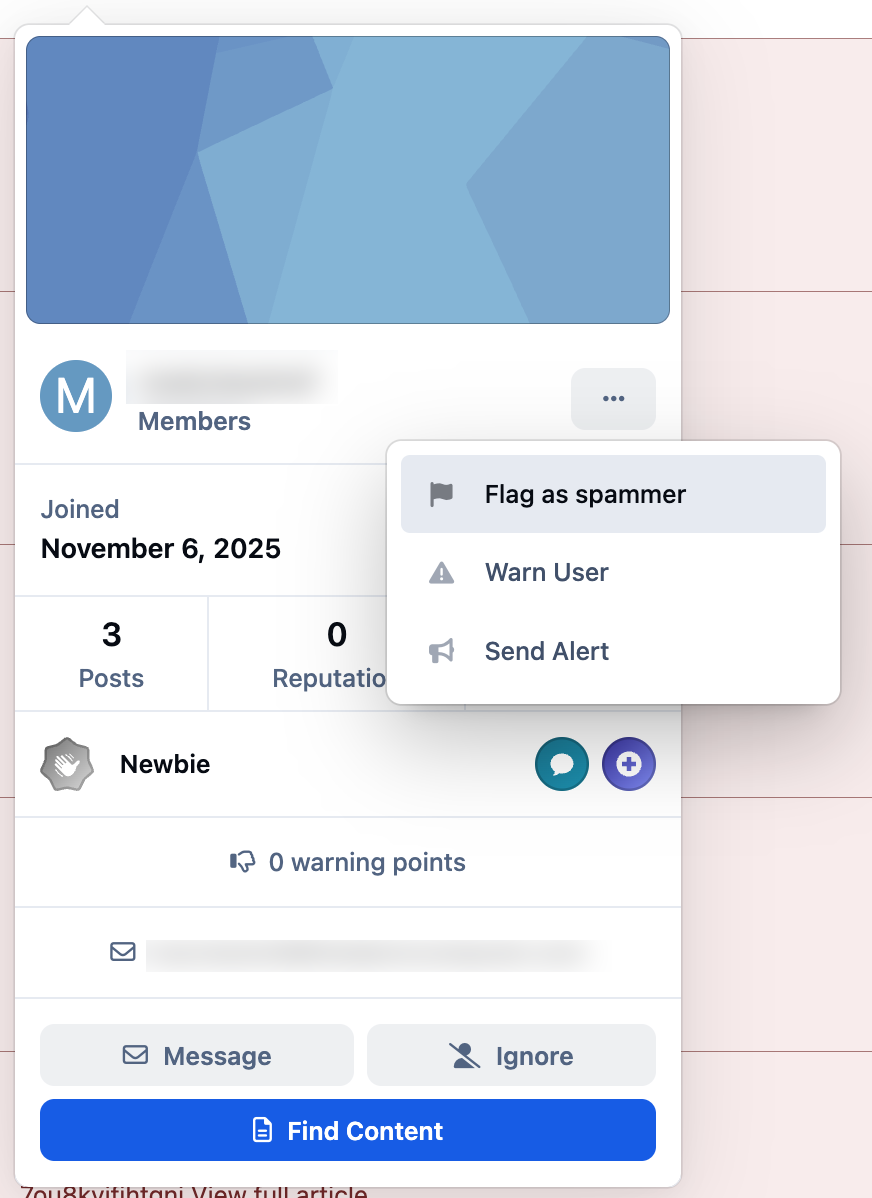
On the member’s profile on the front end of the site
Under the More Options menu within a member card
Each of these options provides a quick way to identify and act on spam accounts wherever they are encountered.
Flagging a Member as a Spammer
Question and Answer Challenge
The Question and Answer Challenge provides an additional, customizable way to verify that a registering user is human and not an automated spam bot. You can create your own questions and define one or more acceptable answers for each, giving you full control over how this challenge works.
When setting up these questions, it’s best to use prompts that require a bit of reasoning rather than simple math or color-based questions, as bots can often bypass those with ease. Adding multiple questions is also recommended, as this helps ensure the same answer isn’t presented for every registration—something that could otherwise be exploited if a human feeds the answer into a bot.
Example questions:
Question: What is the third letter of the fifth word in this sentence?
Answer: tQuestion: What is the third word, in this sentence after the comma?
Answer: sentence
Thoughtfully designed questions like these add an extra layer of protection while remaining simple and fair for genuine users.
Recommended Comments