


Permissions are a powerful way to control who can see and interact with different areas of your site. By using permissions effectively, you can tailor the experience for different types of users across your community.
For example, you may want to create a private staff area that only moderators can access, or a premium section that is available only to paying members. Permissions give you the flexibility to do all of this, and more.
Permissions Overview
Within the Invision Community platform, there are several ways to control what users can access, both from a staff management perspective and from a regular member’s point of view.
In this section, we’ll focus primarily on member-facing permissions, which are managed through member groups and modules, while also providing a brief overview of other permission-related controls you may encounter throughout the suite.
Group Permissions
Most member access permissions within the platform are controlled using Member Groups. If you’re not already familiar with how groups work, we recommend reviewing the Member Groups guide before continuing.
Permissions can be accessed in two main ways:
From the list of member groups, using the lock icon, to manage all node permissions for a specific group
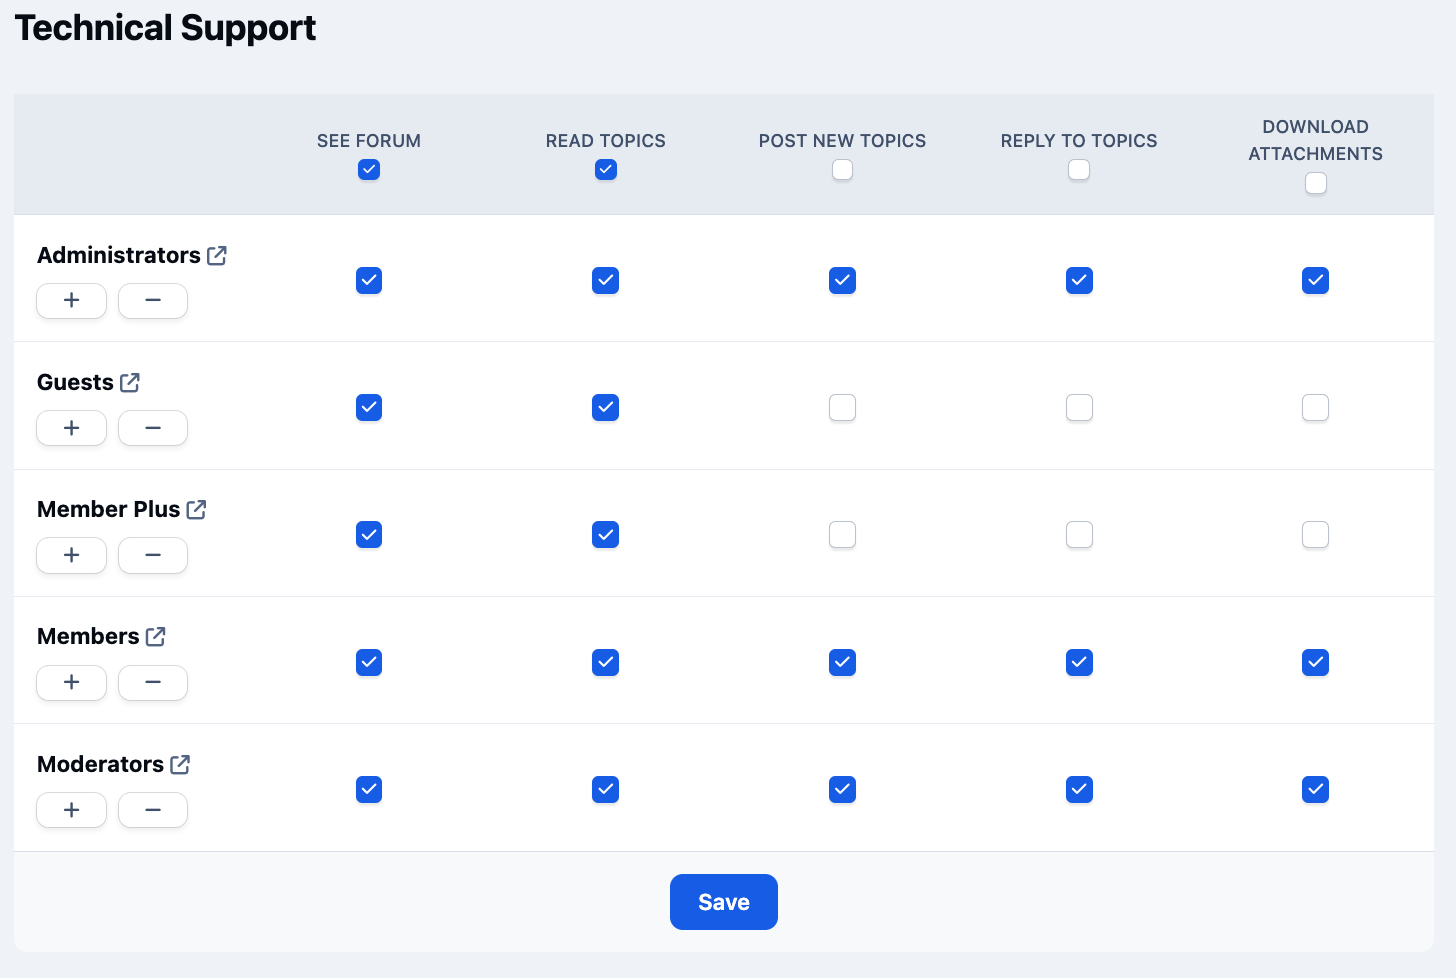
From the node (forum for example), using the lock icon, to manage all member group permissions for a specific node
Which method you use will depend on what you’re trying to achieve.
If you want to configure all permissions for a specific group, navigate to:
Members → Groups
From here, select the lock icon next to the group you want to edit.
(In some areas, this option may appear in a dropdown menu on the right.)
This view allows you to define everything that members of this group can see and do across the site.
Node Permissions By Member Group
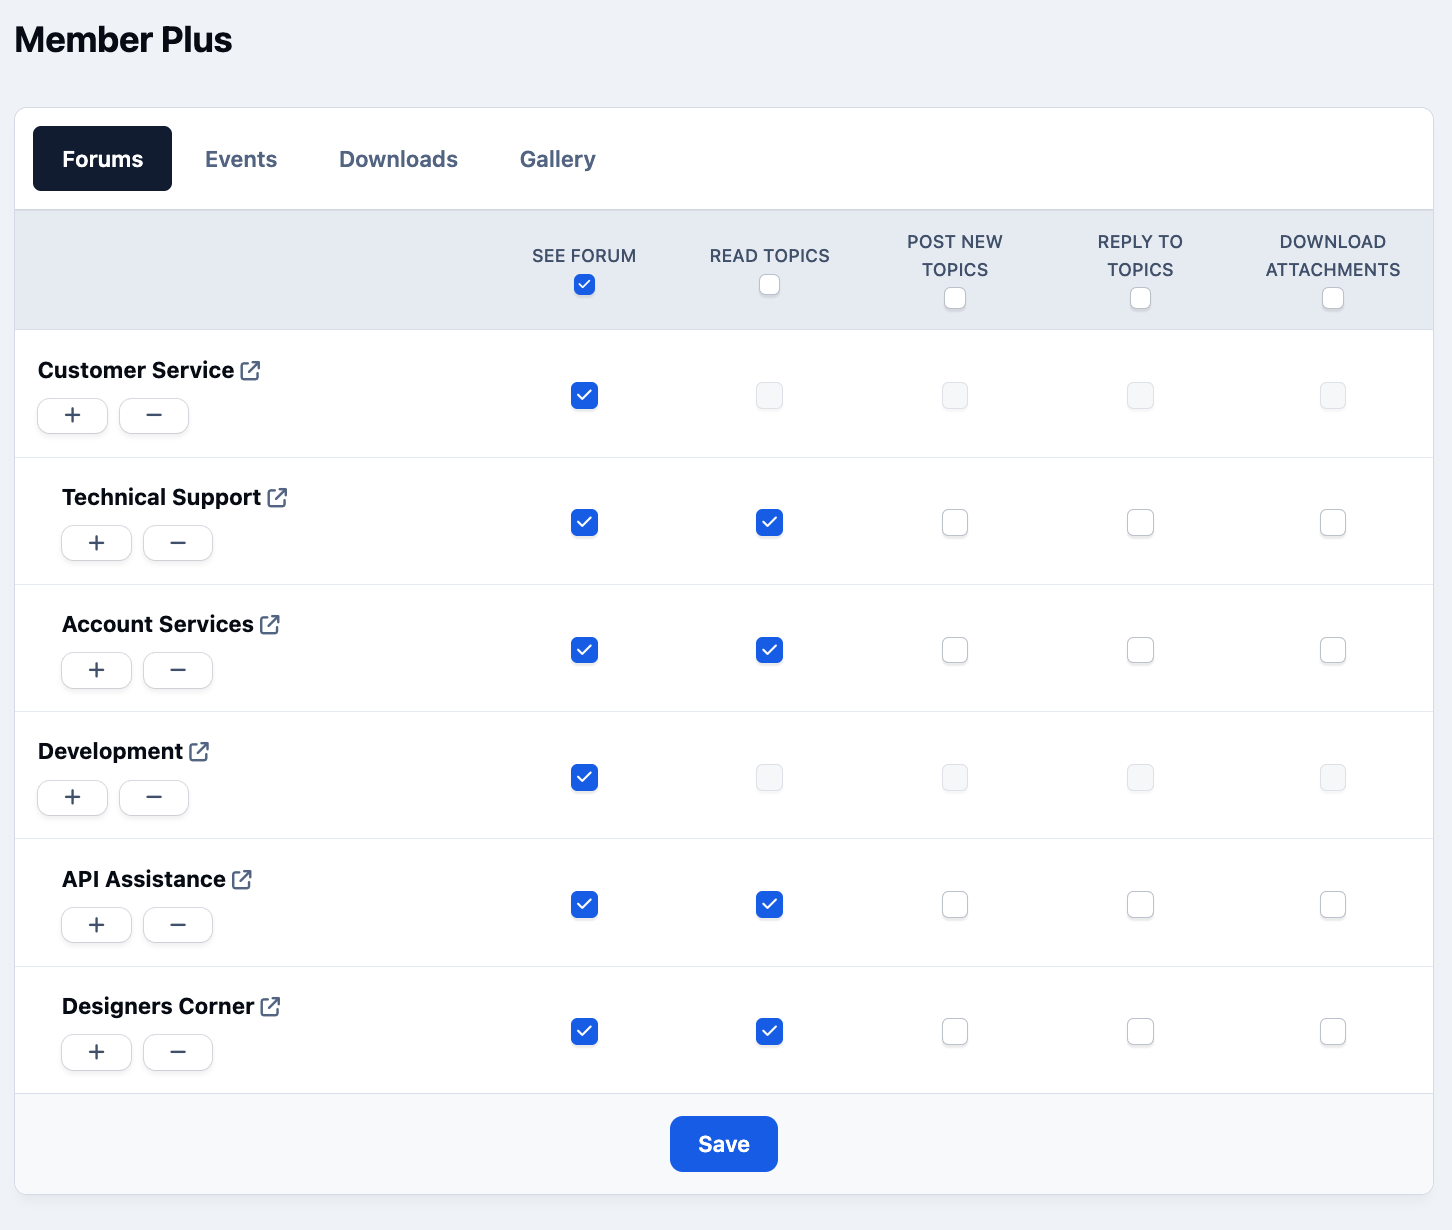
Alternatively, you can manage permissions directly from within an applications nodes, such as:
Community → Forums
Gallery
Downloads
Selecting the lock icon next to a forum, category, or section will display a permissions grid showing all member groups and their access to that specific area.
This approach is especially useful when:
Creating a new forum or category
Quickly setting access rules for multiple groups at once
Member Group Permissions By Node
Permission Fundamentals
It’s important to note that permissions are additive.
If a member belongs to multiple groups, they will receive any permission that is granted by any one of those groups. For example, if one group allows access to a forum and another does not, the member will have access.
Module Permissions
There may be times when you want to restrict access to an entire application, or even a specific module within an application, rather than controlling access at the content level.
Examples include:
Completely removing private messaging for a group
Removing the contact form
Preventing guests from using search
In these cases, module permissions are the appropriate tool.
To manage module-level permissions, go to:
System → Site Features → Applications
Expanding any application will show the list of modules it contains.
Application Modules
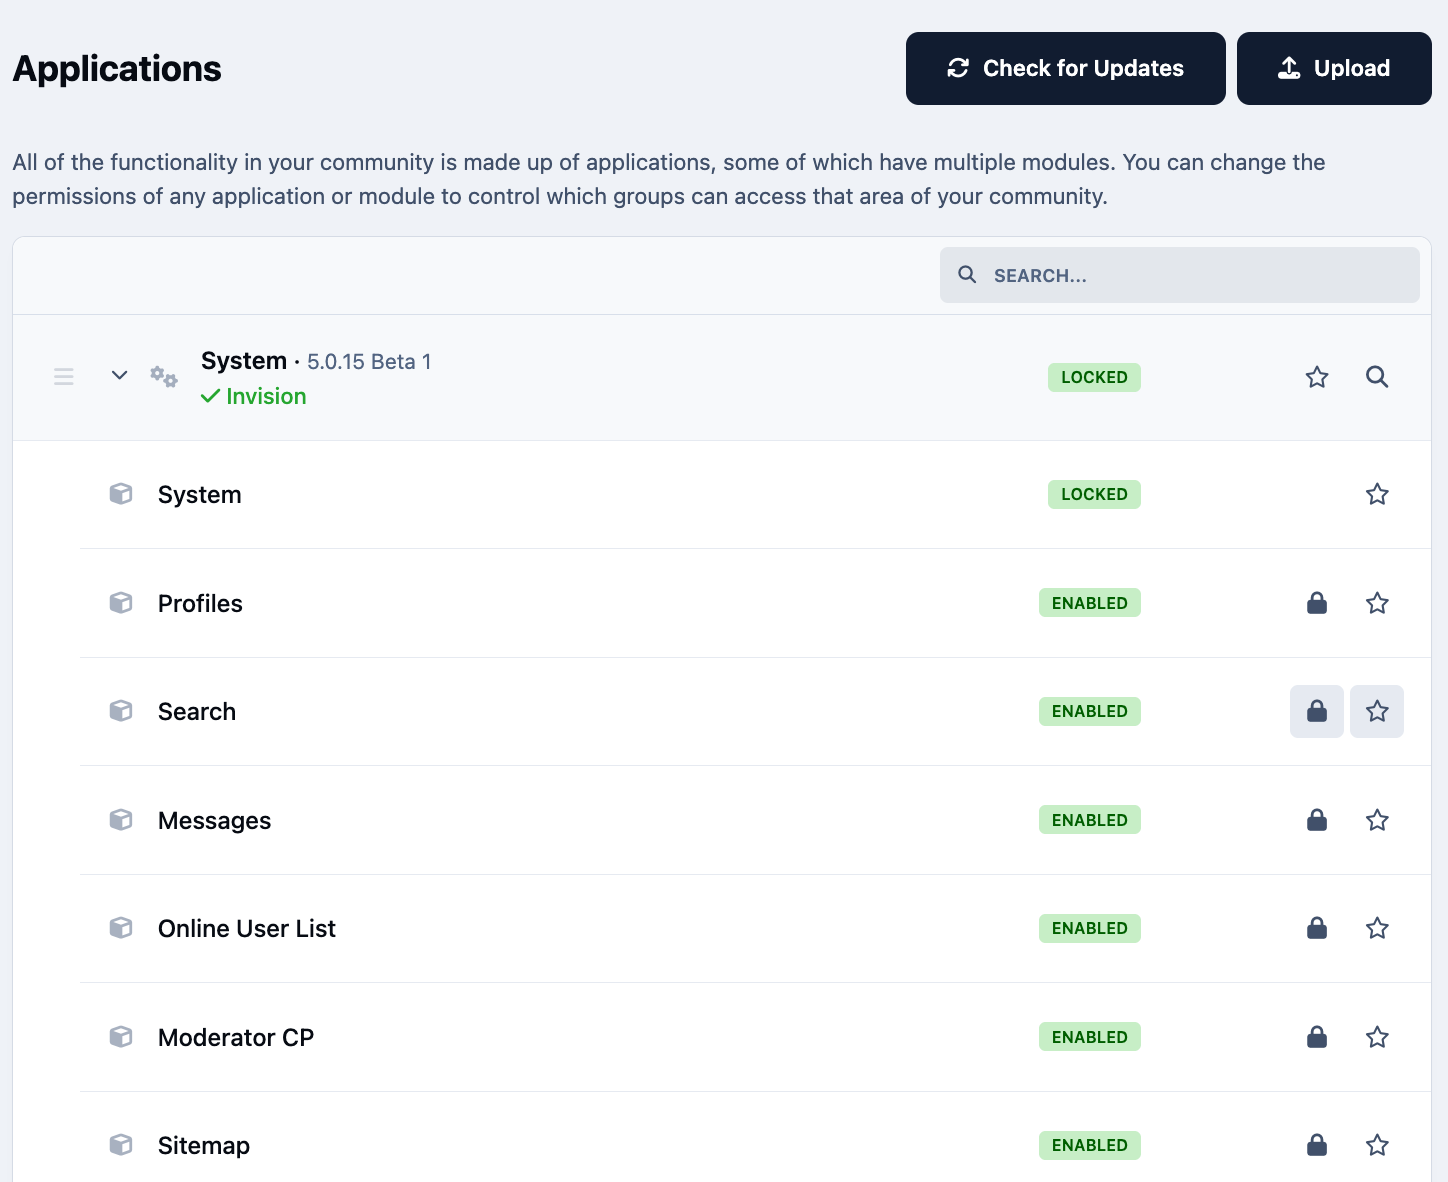
Unlike standard permissions, module permissions can completely remove functionality, making it appear as though the feature does not exist for the affected users.
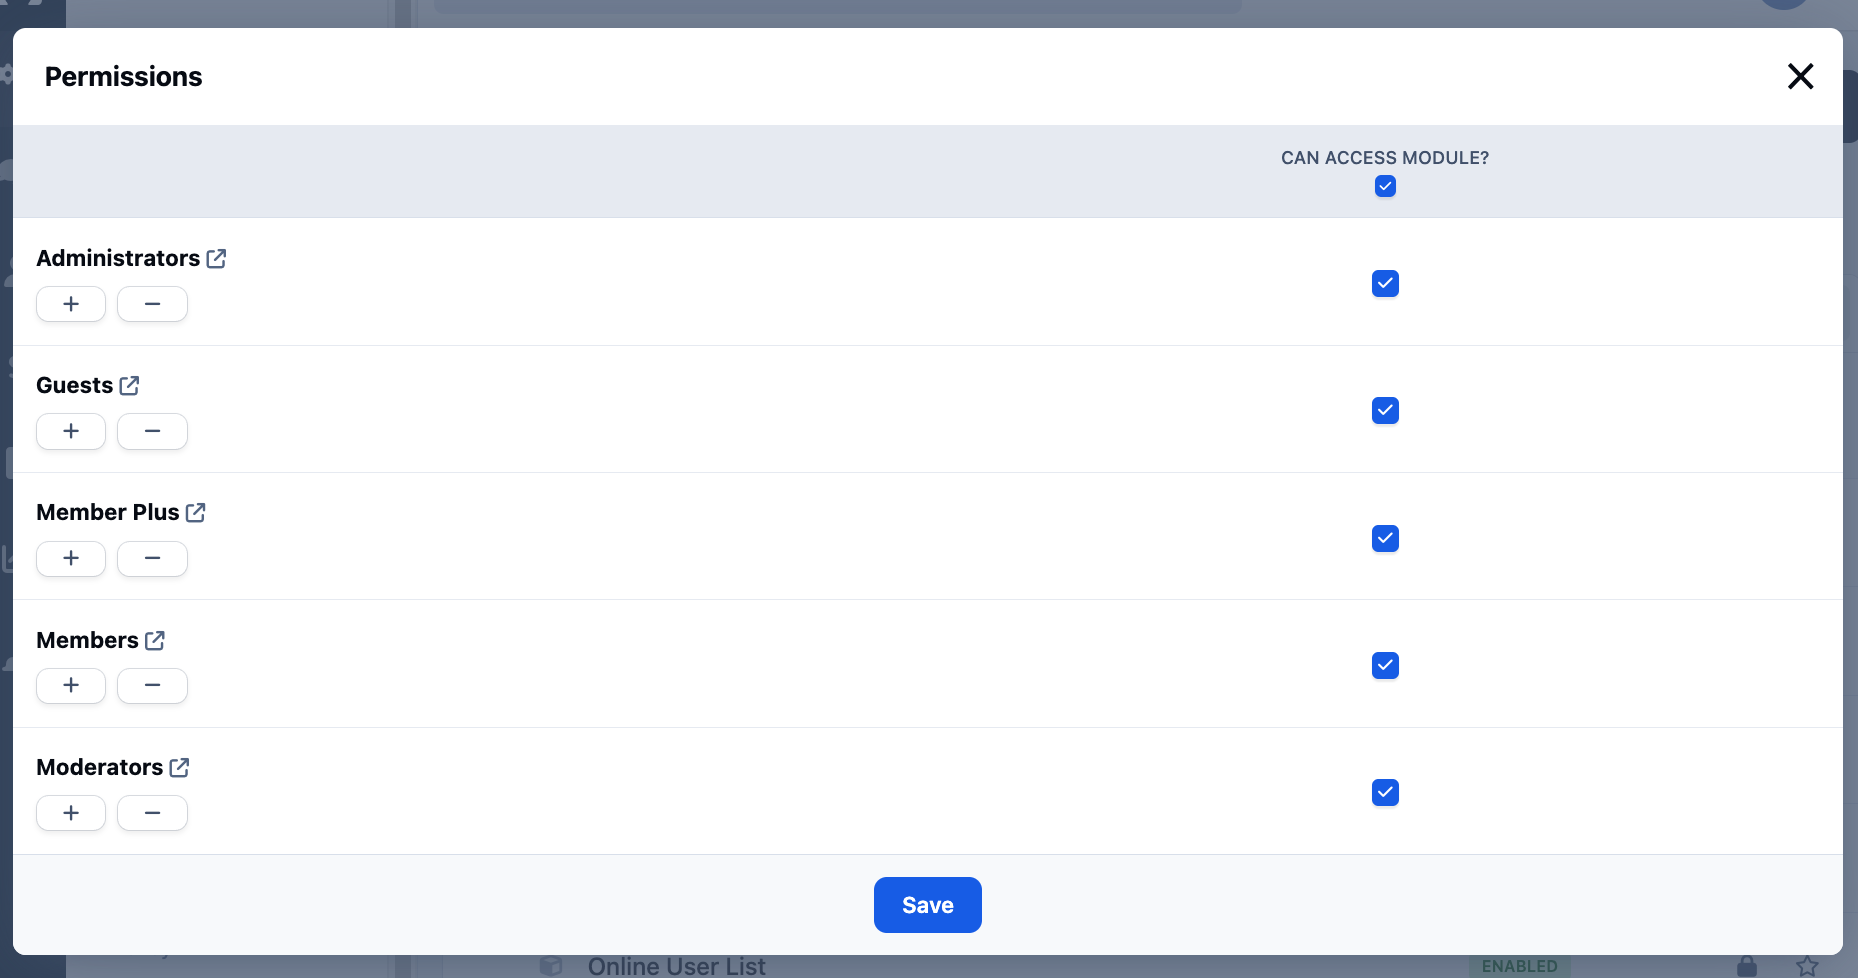
Selecting the lock icon next to a module allows you to choose which member groups are allowed access.
For example, if you remove access to the Search module for guests, search functionality will be entirely unavailable to users who are not logged in.
Module Access Permissions
Other Permission Controls
In various areas of the Admin CP, you’ll also find additional permission-related options, including:
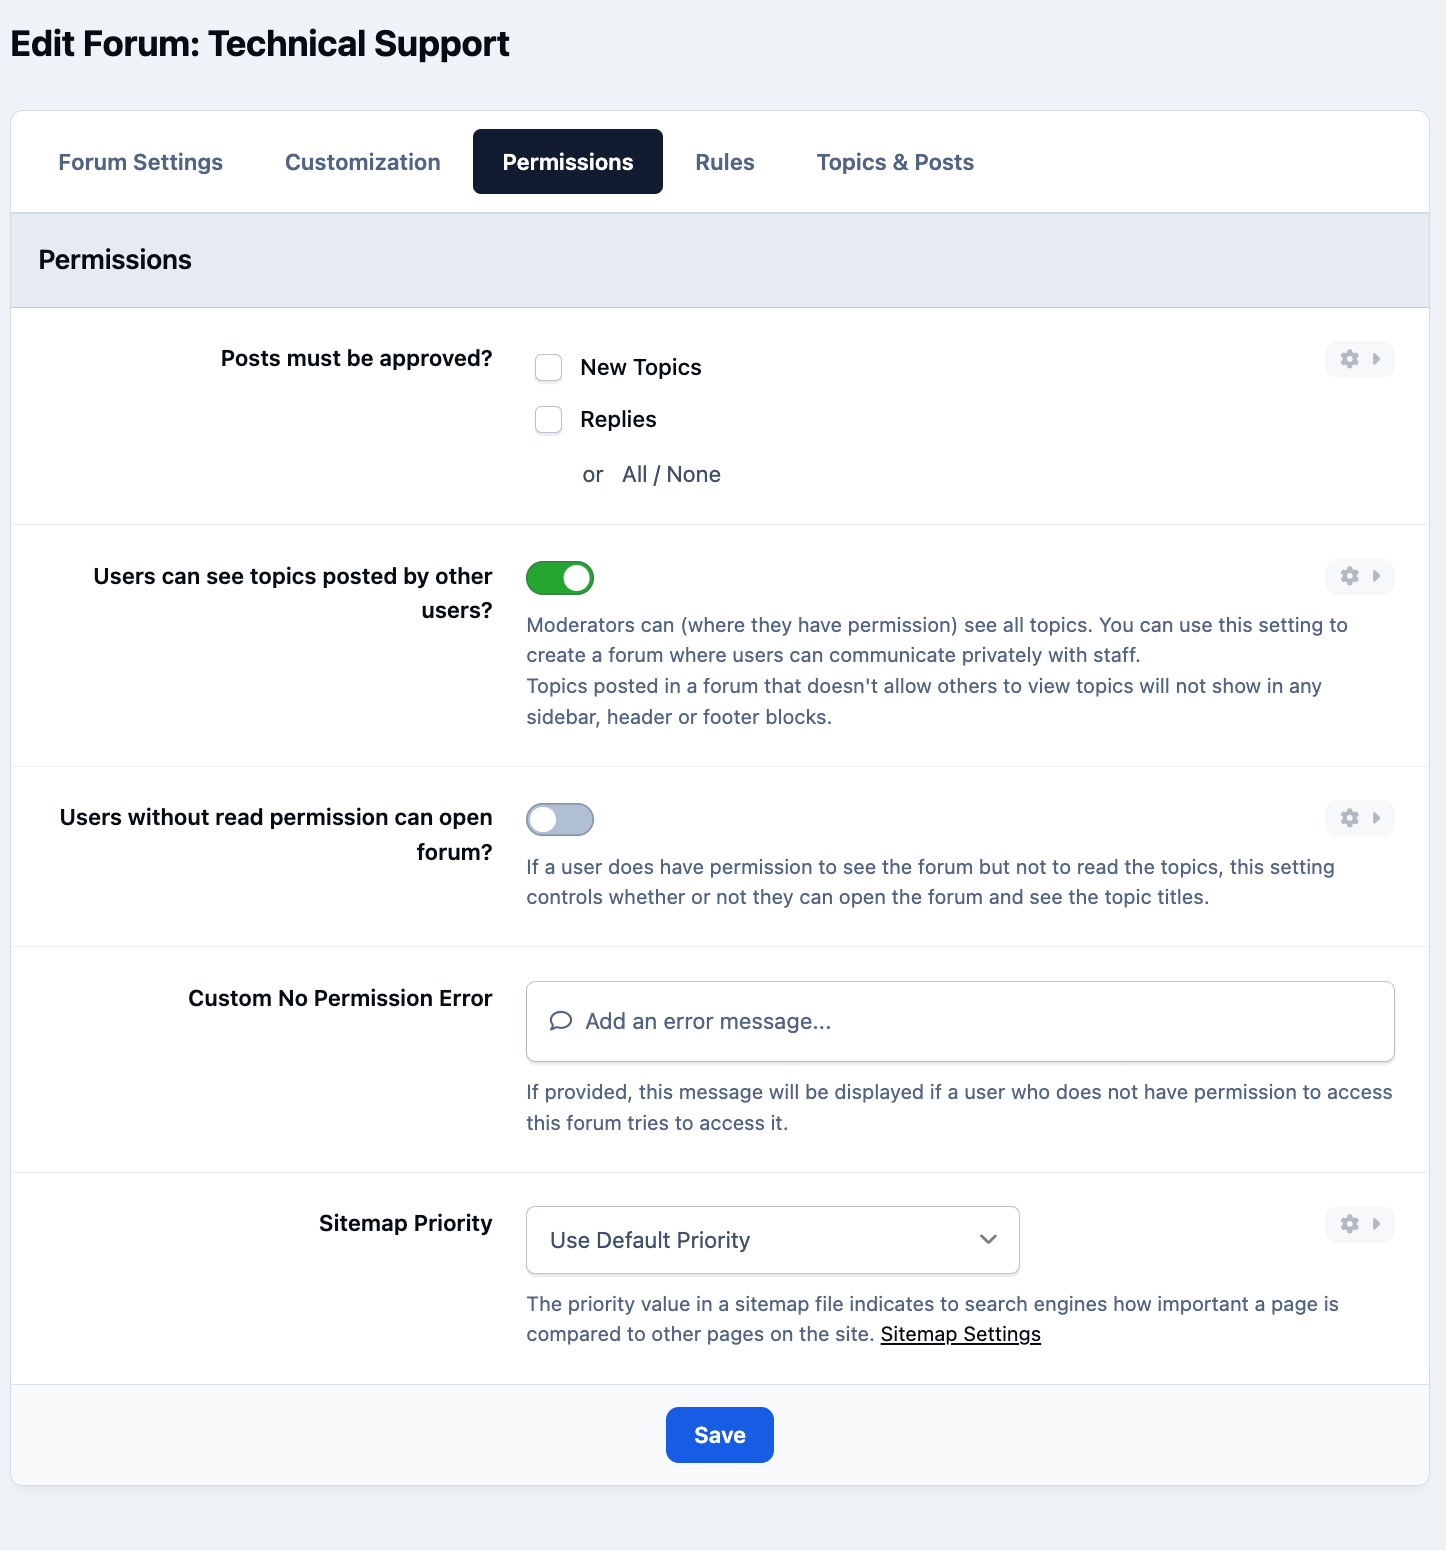
Custom permission error messages - useful if you want to guide users toward an action (such as subscribing or registering) when they try to access restricted content
Global limits - such as upload sizes or posting restrictions
Other area-specific controls - apply regardless of group membership
These options allow you to fine-tune how access is handled and how restrictions are communicated to your members.
Other Specific Permissions
Recommended Comments