
MaxMind minFraud analyses transactions to help identify potentially fraudulent activity. Within Invision Community, this information can be used alongside Fraud Rules to automatically hold transactions for manual approval or refuse them where necessary.
This guide will walk you through setting up and configuring MaxMind, so you can make use of these checks as part of your fraud prevention measures.
Setting up
To set up maxmind, you will first of all need a maxmind account. Once created you need to obtain your account ID and license key.
https://www.maxmind.com/en/home
Important
While Invision Community provides guidance on integrating with MaxMind, you should refer to the MaxMind documentation for full details on setting up your account and obtaining the required credentials for use within the platform.
For the best experience, we recommend using version 1.3 or above of the MaxMind minFraud service.
Once you have completed the setup within MaxMind, you can enable the integration from your Admin CP by visiting the following location:
System → Site Features → Integrations
From here, select Enable on the MaxMind minFraud option to activate the service within your community.
Setup Page
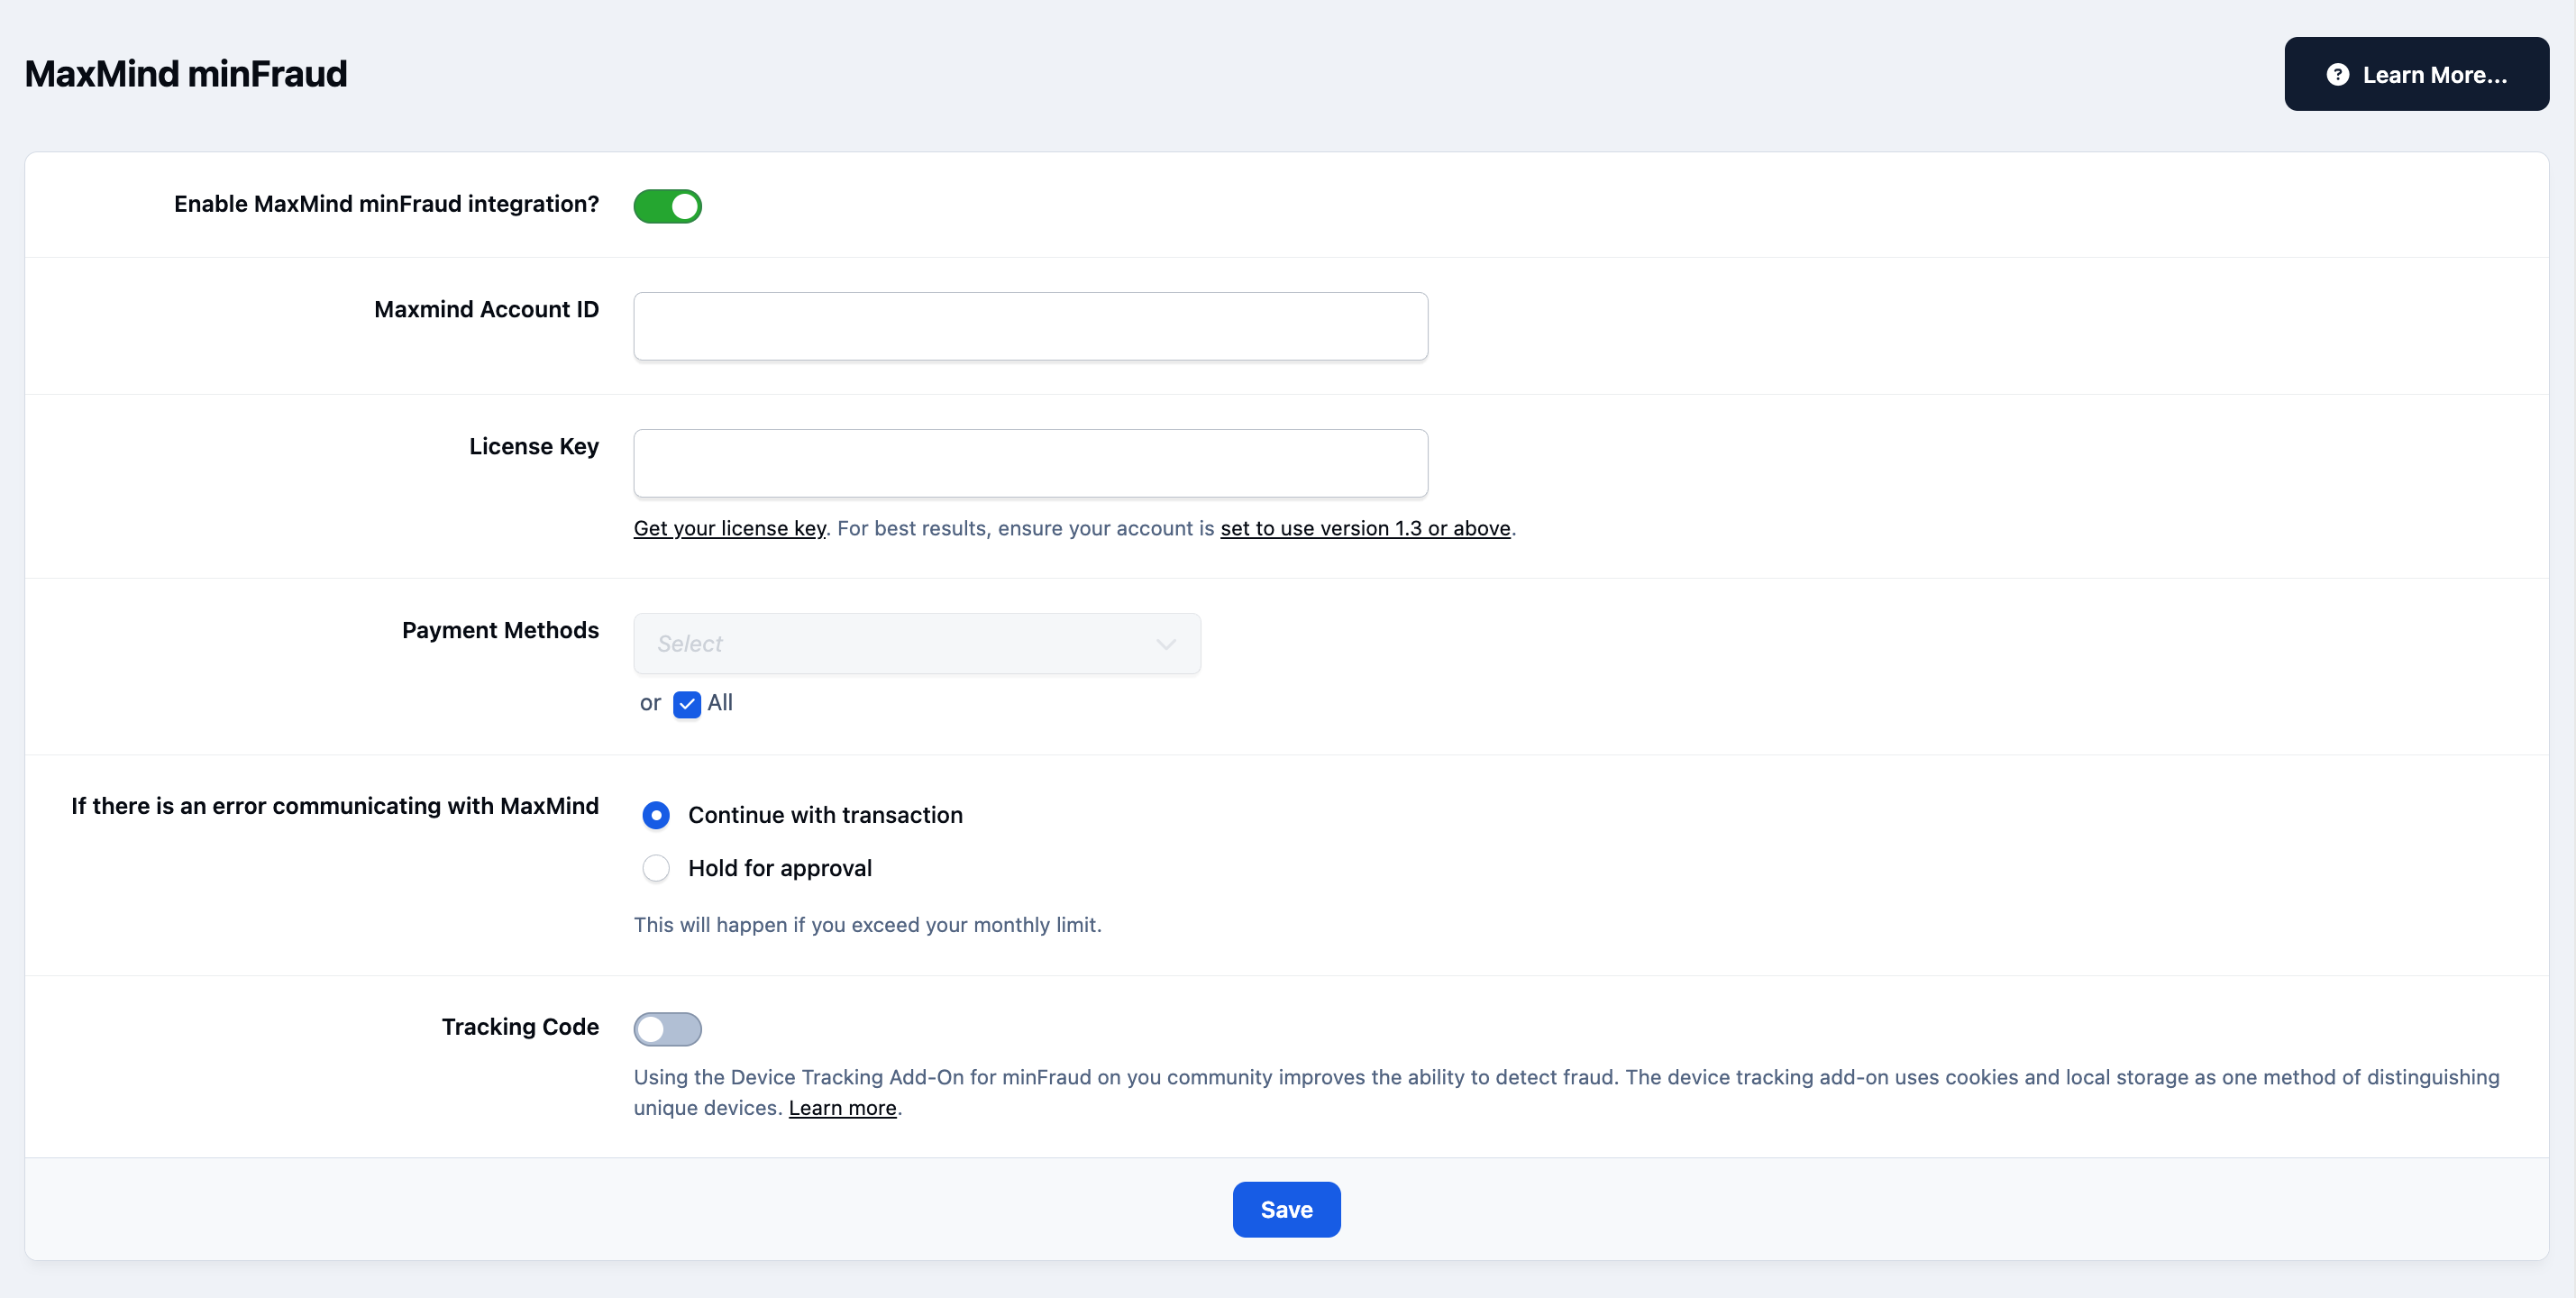
You will also see options to limit MaxMind usage to specific payment methods, review what to check if communication with the service is not working, and choose whether to enable the optional device tracking code for enhanced fraud detection.
Usage
Within the following area, you can then configure your fraud rules, allowing you to apply checks based on criteria such as order value, customer details, and more. This includes rules based on MaxMind risk scores.
Commerce → Payments → Settings
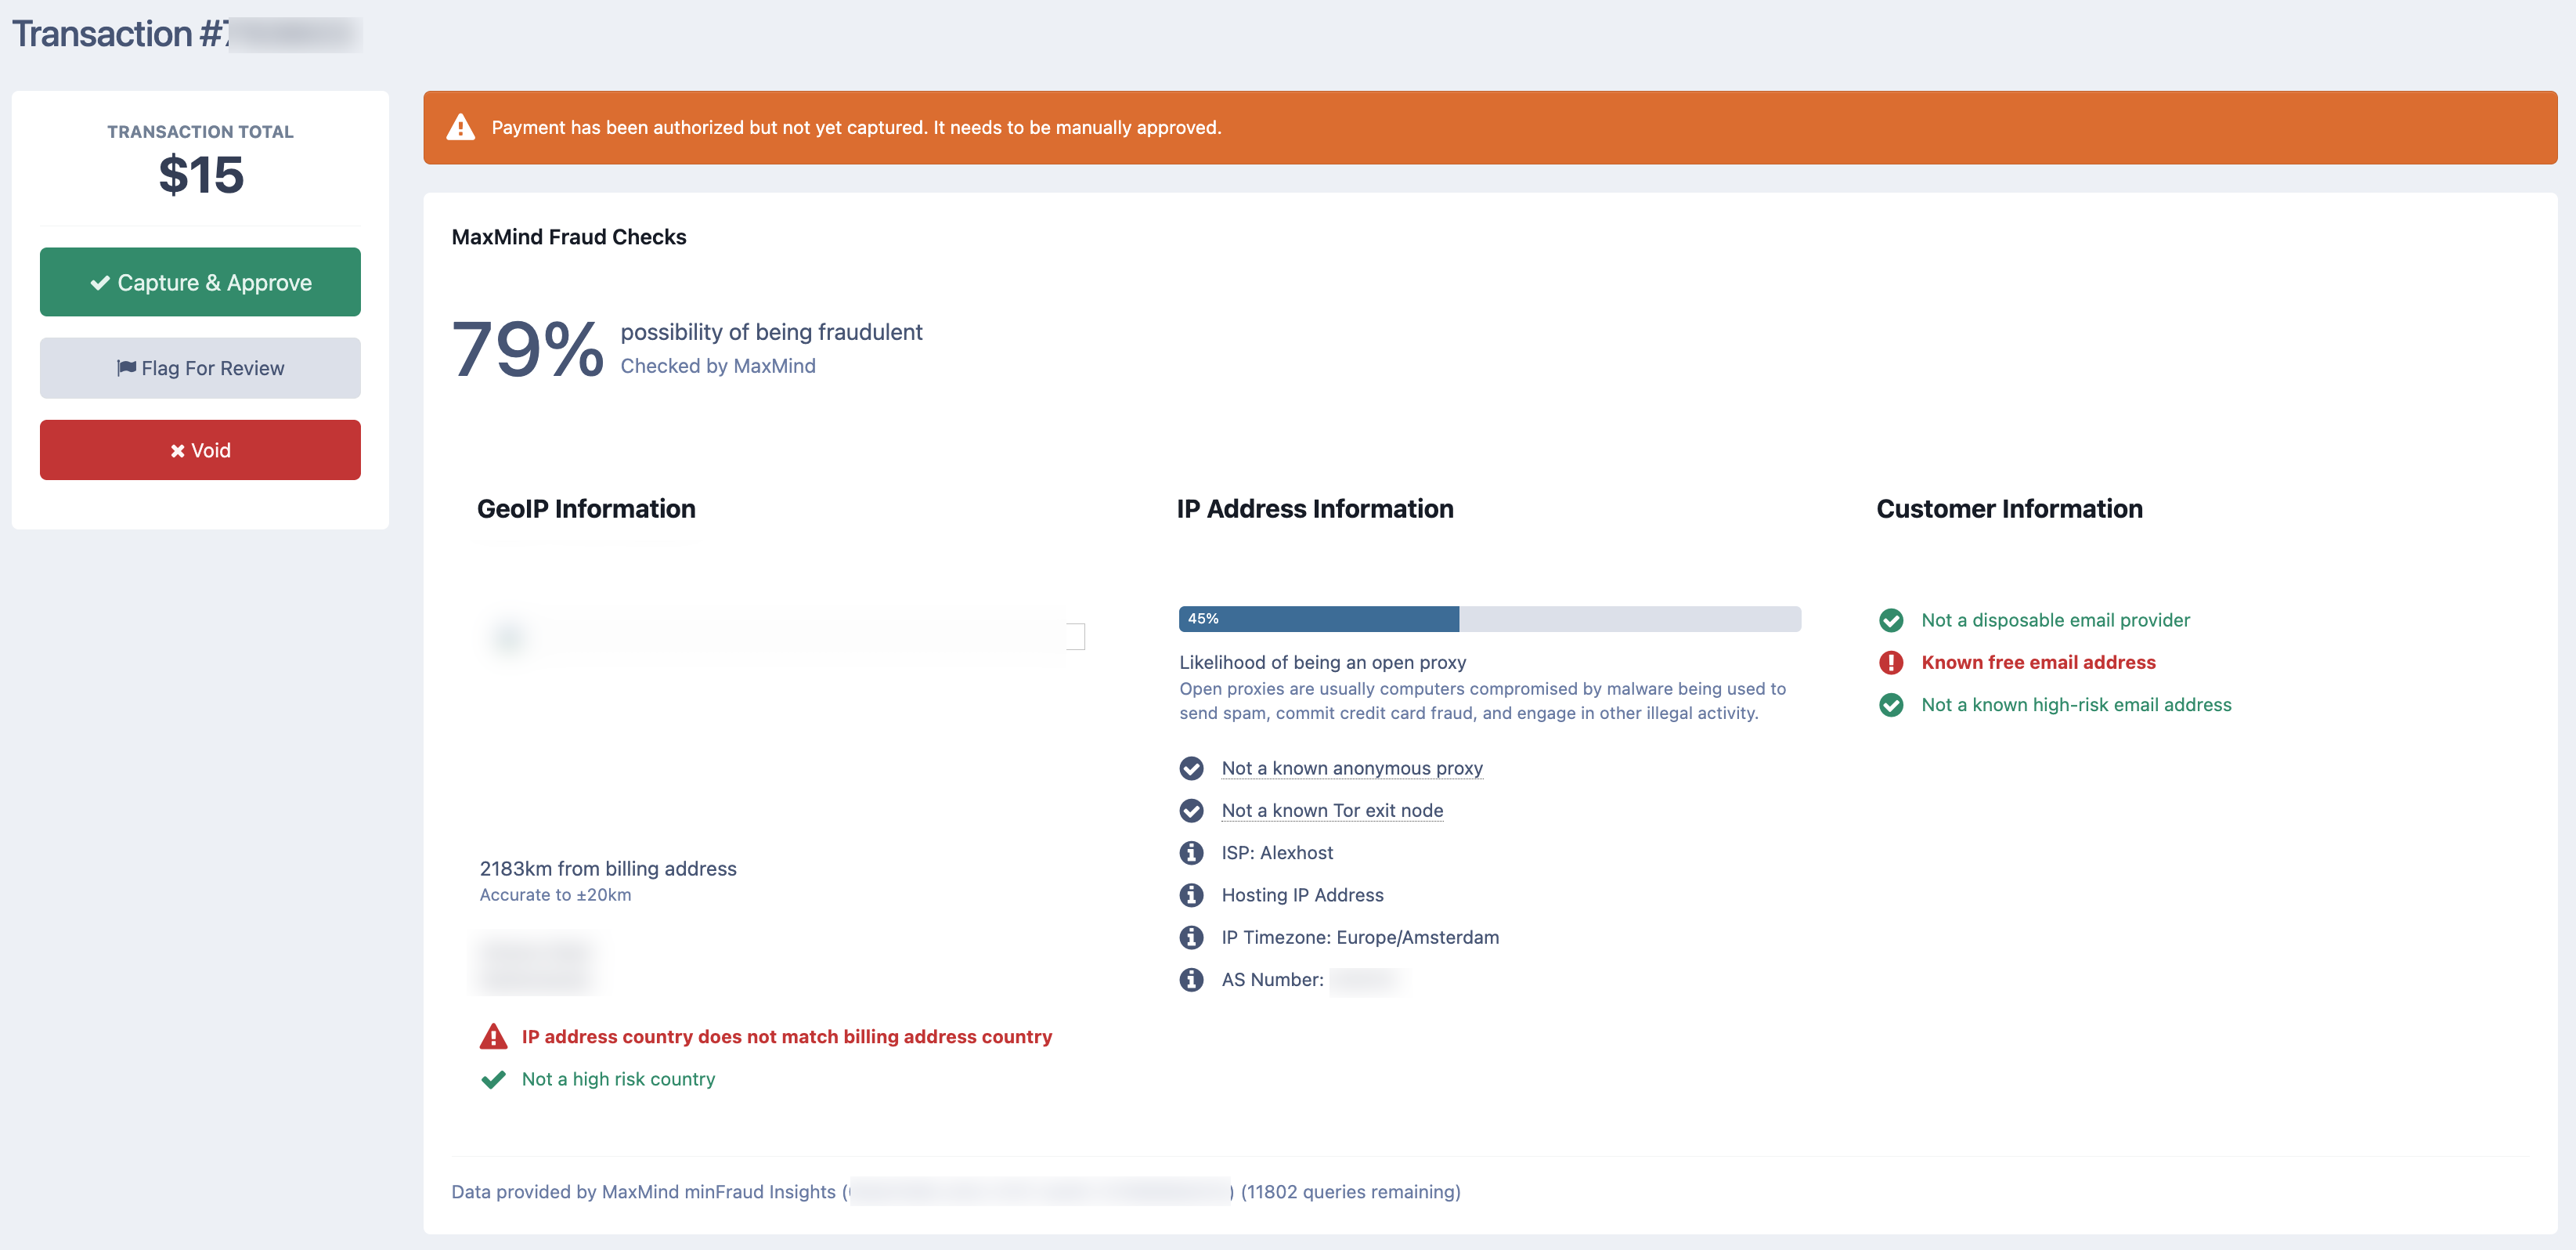
Once you have a rule set up, these will show within all transactions, and hold/reject items where needed. Below shows an example of the information that is returned from maxmind
Example Transaction
Recommended Comments